Tabla de contenido
Publicidad
Idiomas disponibles
Idiomas disponibles
Enlaces rápidos
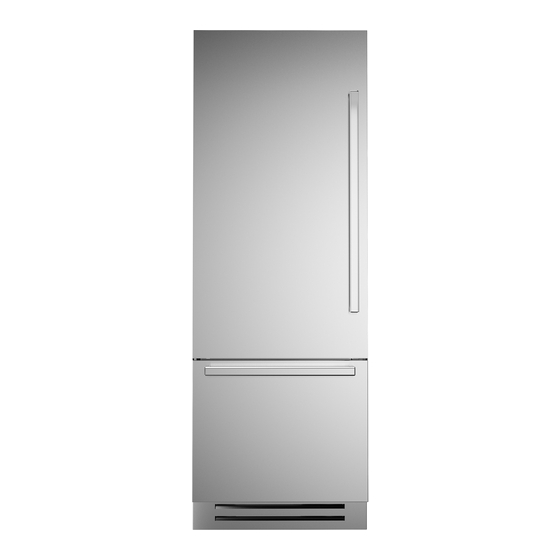
REF75PIXL
REF75PIXR
REF75PRL
REF75PRR
REF90PIXL
REF90PIXR
REF90PRL
REF90PRR
Frigorifero Guida all'Installazione
Refrigerator Installation Guide
Réfrigérateur Guide d'installation
Frigorífico Guía de instalación
Koelkast Installatiehandleiding
Kylskåp Installationsguide
Køleskab Installationsvejledning
IT
EN
FR
ES
NL
SW
DK
Publicidad
Capítulos
Tabla de contenido

Manuales relacionados para Bertazzoni REF75PIXL


Resumen de contenidos para Bertazzoni REF75PIXL
- Página 1 REF75PIXL REF75PIXR REF75PRL REF75PRR REF90PIXL REF90PIXR REF90PRL REF90PRR Frigorifero Guida all’Installazione Refrigerator Installation Guide Réfrigérateur Guide d’installation Frigorífico Guía de instalación Koelkast Installatiehandleiding Kylskåp Installationsguide Køleskab Installationsvejledning...
- Página 2 IMPORTANTE Le dimensioni tra parentesi sono espresse in pollici: mm (in). I pesi tra parentesi sono espressi in libbre: kg (lb). Le temperature tra parentesi sono espresse in gradi Fahrenheit: °C (°F) www.universal.bertazzoni.com...
-
Página 3: Tabla De Contenido
Installazione a incasso di un singolo frigorifero....................Installazione a incasso di due o più frigoriferi....................COMPLETAMENTO DELL'INSTALLAZIONE Montaggio delle squadrette di sicurezza antiribaltamento................Montaggio delle maniglie sulla parte frontale in acciaio inox ..............Circolazione dell’aria..............................Verifiche a fine installazione........................... Messa in funzione............................... www.universal.bertazzoni.com... -
Página 4: Istruzioni Importanti
TENUTO IMBALLO - PACKING CONTENTS UTO IMBALLO - PACKING CONTENTS ENUTO IMBALLO - PACKING CONTENTS StandPlus/ StandPlus/ Integrated Classic www.universal.bertazzoni.com StandPlus/ Integrated Classic X-pro Integrated Classic X-pro X-pro... -
Página 5: Requisiti Tecnici
Bussola da 13 mm (1/2") rotelle posteriori Nota Non tutti i modelli sono dotati di dispositivo automatico per la produzione di cubetti di ghiaccio (IceMaker). Per sapere se è necessario l'allacciamento idrico, verificare se il modello è dotato di IceMaker. www.universal.bertazzoni.com... - Página 6 75: 750 (29 ⅝”) 75: 750 (29 ⅝”) 90: 899 (35 3/8”) 610 (24”) 75: 749 (29 1/2”) 90: 899 (35 3/8”) ) ” 2 610 (24”) 75: 749 (29 1/2”) ) ” 2 500 (19 ¾” 500 (19 ¾” www.universal.bertazzoni.com...
-
Página 7: Requisiti Del Vano Di Installazione Del Frigorifero: Serie Integrated In Acciaio Inox
90: 900 (35 ½”) 75: 750 (29 ⅝”) 75: 750 (29 ⅝”) 90: 899 (35 ⅜”) 635 (25”) 75: 749 (29 ½”) 560 (22”) 90: 899 (35 ⅜”) 635 (25”) 75: 749 (29 ½”) 560 (22”) 693 (27 ¼”) 693 (27 ¼”) www.universal.bertazzoni.com... -
Página 8: Operazioni Preliminari All'installazione
1/4" in rame o polietilene. danneggiare i pavimenti. I pavimenti delicati devono Lunghezza del cavo elettrico: 2500 mm (98 3/8") essere protetti con pannelli di compensato, cartone Lunghezza del tubo dell'acqua: 2500 mm (98 3/8") o materiali simili. www.universal.bertazzoni.com... -
Página 9: Livellamento
1/4" nel connettore a gomito e avvitare l'adattatore a gomito all'elettrovalvola sul retro del frigorifero. Stringere saldamente a mano - per un serraggio corretto, non occorrono attrezzi/chiavi speciali. Aprire l'alimentazione dell'acqua e verificare l'assenza di perdite dai raccordi prima di spingere il frigorifero all'interno del vano. www.universal.bertazzoni.com... -
Página 10: Montaggio Dei Pannelli
[ 8 ] (v. Fig. 4 e 8). > Partendo dal bordo inferiore del pannello, segnare la posizione delle staffe > Seguendo la tabella corrispondente, segnare prima il foro esterno e poi quello interno www.universal.bertazzoni.com... -
Página 11: Disposizione Delle Staffe Di Montaggio Dei Pannelli Di Rivestimento
1,5 mm (1/16"). 34 (1 SERIE LARGHEZZA PORTA/CASSETTONE LARGHEZZA VANO ½” 13 ( ½” 13 ( 897 (35 1/4") 900 (35 1/2") Staffa di regolazione verticale del cassettone 747 (29 3/8") 750 (29 5/8") inferiore. Prendere nota dell'orientamento. www.universal.bertazzoni.com... -
Página 12: Montaggio Delle Maniglie Sui Frigoriferi Integrated
-450 mm (-17 3/4") e uno a +450 mm (+17 3/4") > Posizionare la maniglia in corrispondenza dei fori e inserire le viti attraverso il pannello e il distanziale della maniglia www.universal.bertazzoni.com... -
Página 13: Montaggio Dei Pannelli Sulla Porta E Sul Cassettone Dei Frigoriferi Integrated
Una volta sistemato il pannello frontale, riposizionare correttamente la guarnizione, in modo da permettere la corretta chiusura della porta o del cassettone ed evitare malfunzionamenti del frigorifero. www.universal.bertazzoni.com... - Página 14 [ 10 ] per poi bloccarlo utilizzando i fori [ 11 Una volta sistemato il pannello frontale, riposizionare correttamente la guarnizione, in modo da permettere la corretta chiusura della porta o del cassettone ed evitare malfunzionamenti del frigorifero. www.universal.bertazzoni.com...
-
Página 15: Installazione
5 mm in corrispondenza della parte superiore/ posteriore del mobile per la fuoriuscita dell'aria calda. MONTAGGIO DEI PROFILI LATERALI 6,5 (¼”) 6,5 (¼”) Parete Parete Frigorifero mobile mobile 22 ( ⁄ ”) 22 ( ⁄ ”) A Elemento di B Telaio in alluminio collegamento www.universal.bertazzoni.com... -
Página 16: Installazione A Incasso Di Due O Più Frigoriferi
Sul retro dei frigoriferi, montare le staffe di collegamento: fissare le staffe superiore e inferiore prima a un frigorifero e poi all’altro > Una volta installati i frigoriferi, applicare il copriprofilo centrale sul profilo di collegamento e premerlo a fondo fino a quando scatta in posizione www.universal.bertazzoni.com... - Página 17 6,5 (¼”) 6,5 (¼”) Parete Parete 13 (½”) Frigorifero Frigorifero mobile mobile 44,4 (1 ¾”) 22 ( ⁄ ”) 22 ( ⁄ ”) A Elemento di collegamento D Elemento di collegamento B Telaio in alluminio E Telaio in alluminio www.universal.bertazzoni.com...
-
Página 18: Completamento Dell'installazione
6. COMPLETAMENTO DELL'INSTALLAZIONE 6.1 Installazione del kit antiribaltamento www.universal.bertazzoni.com... -
Página 19: Montaggio Delle Maniglie Sulla Parte Frontale In Acciaio Inox
Se la griglia è parzialmente coperta dallo zoccolo l'attrezzo il pannello in acciaio inox. della cucina, è consigliabile rimuoverla per migliorare il flusso d'aria. SERIE 90 SERIE 75 860 (33 7/8") 740 (29 1/8") > 100 (4") 10 (3/8") www.universal.bertazzoni.com... -
Página 20: Messa In Funzione
602 -95 li bianco EB 61 - 62 li Nomen forato solo per le parti retro illuminate come da disegno “C” Testo e gra ca www.universal.bertazzoni.com Nomenclature: Grigio Whirlpool Testo e gra ca Nomenclature bianco EB 61 - 62 li... - Página 21 In questo caso, tacitare gli eventuali segnali acustici premendo il tasto Alarm (Allarme), richiudere la porta e attendere che venga raggiunta la temperatura impostata. È necessario che il frigorifero raggiunga la temperatura corretta prima di potervi introdurre gli alimenti. www.universal.bertazzoni.com...
- Página 22 IMPORTANT Dimensions in parentheses are in inches: mm (in). Weights in parentheses are in pounds: kg (lb). Temperatures in parentheses are in Fahrenheit degrees: °C(°F) www.universal.bertazzoni.com...
- Página 23 Mounting panels to the door and the drawer of Integrated units..............INSTALLATION Built-in installation of single appliance......................... Built-in installation of two or more appliances....................COMPLETING THE INSTALLATION Anti-tipping safety assembly............................Mounting handles on stainless front........................Air circulation.................................. Post installation checklist............................. Start Up....................................www.universal.bertazzoni.com...
-
Página 24: Important Instructions
TENUTO IMBALLO - PACKING CONTENTS UTO IMBALLO - PACKING CONTENTS ENUTO IMBALLO - PACKING CONTENTS StandPlus/ StandPlus/ Integrated Classic www.universal.bertazzoni.com StandPlus/ Integrated Classic X-pro Integrated Classic X-pro X-pro... -
Página 25: Technical Requirements
17 mm (3/4”) wrench Adjusting height of the rear 13 mm (1/2”) socket rollers Note Not all models come with an automatic ice maker. Verify if your model is equipped with an ice maker to determine if you require water supply. www.universal.bertazzoni.com... -
Página 26: Installation Niche Features: Integrated Series
75: 750 (29 ⅝”) 75: 750 (29 ⅝”) 90: 899 (35 3/8”) 610 (24”) 75: 749 (29 1/2”) 90: 899 (35 3/8”) ) ” 2 610 (24”) 75: 749 (29 1/2”) ) ” 2 500 (19 ¾” 500 (19 ¾” www.universal.bertazzoni.com... -
Página 27: Installation Niche Requirements: Stainless Integrated Series
90: 900 (35 ½”) 75: 750 (29 ⅝”) 75: 750 (29 ⅝”) 90: 899 (35 ⅜”) 635 (25”) 75: 749 (29 ½”) 560 (22”) 90: 899 (35 ⅜”) 635 (25”) 75: 749 (29 ½”) 560 (22”) 693 (27 ¼”) 693 (27 ¼”) www.universal.bertazzoni.com... -
Página 28: Preparing The Installation
Be very careful to avoid any damage to floors. Delicate floors should be protected with plywood, hard cardbo- Electrical cord length: 2500 mm (98 3/8”) Water connection line length: 2500 mm (98 3/8”) ard or similar material panels. www.universal.bertazzoni.com... -
Página 29: Levelling
Firmly tighten with fingers - a tool /wrench should not be needed to make a proper seal. Turn on the water and ensure all connections are not leaking prior to pushing the unit into the niche. www.universal.bertazzoni.com... -
Página 30: Panels Mounting
]. The support bracket faces the opposite [ 8 ] (note imgs 4 and 8). > Starting from the bottom edge of the panel, mark the positioning of the brackets > Following the corresponding table, mark the out- side and then the inside hole[ 3 www.universal.bertazzoni.com... -
Página 31: Overlay Panels Mounting Brackets Layout
1.5mm (1/16”). 34 (1 34 (1 SERIES DOOR/DRAWER WIDTH NICHE WIDTH ½” 13 ( ½” 13 ( 897 (35 1/4”) 900 (35 1/2”) Vertical adjustment bracket for lower 747 (29 3/8”) 750 (29 5/8”) drawer. Note orientation. www.universal.bertazzoni.com... -
Página 32: Mounting The Handles On Integrated Units
-450 mm (-17 3/4”) and one at +450 mm (+17 3/4”) > Place the handle on top of the holes and insert the screws through the panel and into the handle support www.universal.bertazzoni.com... -
Página 33: Mounting Panels To The Door And The Drawer Of Integrated Units
Once the front panel has been ad-justed, check that the gasket has been repositio- ned correctly to as-sure the door/drawer are closing correctly and avoid operational er-rors of the unit. www.universal.bertazzoni.com... - Página 34 [ 11 in position using the holes Once the front panel has been ad-justed, check that the gasket has been repositio- ned correctly to as-sure the door/drawer are closing correctly and avoid operational er-rors of the unit. www.universal.bertazzoni.com...
-
Página 35: Installation
5mm gap must be provided at the top / back of the ca- binetry to allow warm air to escape. SIDE PROFILES MOUNTING 6,5 (¼”) 6,5 (¼”) Wall Wall Appliance furniture furniture 22 ( ⁄ ”) 22 ( ⁄ ”) A Connecting element B Alluminium frame www.universal.bertazzoni.com... -
Página 36: Built-In Installation Of Two Or More Appliances
> Once units are fully installed snap the central cover frame onto the central connection pro les by firmly pressing toward the front of the appliance until it clicks www.universal.bertazzoni.com... - Página 37 6,5 (¼”) 6,5 (¼”) 6,5 (¼”) 6,5 (¼”) Wall Wall 13 (½”) Appliance Appliance furniture furniture 44,4 (1 ¾”) 22 ( ⁄ ”) 22 ( ⁄ ”) A Connecting element D Connecting element B Alluminium frame E Alluminium frame www.universal.bertazzoni.com...
-
Página 38: Completing The Installation
6. COMPLETING THE INSTALLATION 6.1 Anti tipping kit installation www.universal.bertazzoni.com... -
Página 39: Mounting Handles On Stainless Front
90 SERIES 75 SERIES 860 (33 7/8”) 740 (29 1/8”) > 100 (4”) 10 (3/8”) www.universal.bertazzoni.com... -
Página 40: Post Installation Checklist
602 -95 li bianco EB 61 - 62 li Nomen forato solo per le parti retro illuminate come da disegno “C” Testo e gra ca www.universal.bertazzoni.com Nomenclature: Grigio Whirlpool Testo e gra ca Nomenclature bianco EB 61 - 62 li... - Página 41 If this is the case, deactivate any possible acoustic signals by pressing the Alarm button, close the door and wait until the set tempera- ture is reached. It is necessary to let the unit reach the correct temperature before foods are stored inside. www.universal.bertazzoni.com...
- Página 42 IMPORTANT Les dimensions entre parenthèses sont exprimées en pouces : mm (in). Les poids entre parenthèses sont exprimés en livres : kg (lb). Les températures entre parenthèses sont exprimées en degrés Fahrenheit : °C (°F) www.universal.bertazzoni.com...
- Página 43 Installation encastrée d’un seul réfrigérateur......................Installation encastrée de deux réfrigérateurs ou plus..................OPÉRATIONS FINALES DE L’INSTALLATION Montage des équerres de sécurité anti-basculement..................Montage des poignées sur la partie frontale en acier inox ................Circulation de l’air................................Contrôles en fin d’installation............................Mise en marche................................www.universal.bertazzoni.com...
-
Página 44: Instructions Importantes
à l’aide des deux équerres fournies à cet effet. TENUTO IMBALLO - PACKING CONTENTS UTO IMBALLO - PACKING CONTENTS ENUTO IMBALLO - PACKING CONTENTS StandPlus/ StandPlus/ Integrated Classic www.universal.bertazzoni.com StandPlus/ Integrated Classic X-pro Integrated Classic X-pro X-pro... -
Página 45: Exigences Techniques
Douille de 13 mm (1/2") roues postérieures Remarque Les modèles ne sont pas tous dotés de dispositif automatique production de glaçons (Ice Maker). Pour savoir si le raccordement à l’alimentation d’eau est nécessaire, s’assurer que le modèle est doté de distributeur de glace. www.universal.bertazzoni.com... -
Página 46: Caractéristiques Du Logement D'installation Du Réfrigérateur : Série Integrated
75: 750 (29 ⅝”) 75: 750 (29 ⅝”) 90: 899 (35 3/8”) 610 (24”) 75: 749 (29 1/2”) 90: 899 (35 3/8”) ) ” 2 610 (24”) 75: 749 (29 1/2”) ) ” 2 500 (19 ¾” 500 (19 ¾” www.universal.bertazzoni.com... -
Página 47: Caractéristiques Du Logement D'installation Du Réfrigérateur : Série Integrated En Acier Inox
90: 900 (35 ½”) 75: 750 (29 ⅝”) 75: 750 (29 ⅝”) 90: 899 (35 ⅜”) 635 (25”) 75: 749 (29 ½”) 560 (22”) 90: 899 (35 ⅜”) 635 (25”) 75: 749 (29 ½”) 560 (22”) 693 (27 ¼”) 693 (27 ¼”) www.universal.bertazzoni.com... -
Página 48: Opérations À Effectuer Avant L'installation
1/4" en cuivre ou en polyéthylène. ne pas endommager le sol. Les sols délicats doivent Longueur du câble électrique : 2 500 mm (98 3/8") être protégés à l’aide de panneaux de contreplaqué, Longueur du tuyau d’eau : 2 500 mm (98 3/8") de carton ou autres matériaux semblables. www.universal.bertazzoni.com... -
Página 49: Nivellement
Serrer à fond à la main (pour obtenir un bon serrage, aucun outil ni aucune clé spéciale n’est nécessaire). Ouvrir l’alimentation d’eau et s’assurer de l’absence de fuites au niveau des raccords avant de pousser le réfrigérateur dans son logement. www.universal.bertazzoni.com... -
Página 50: Montage Des Panneaux
être orientée vers le côté opposé [ 8 ] (voir fig. 4 et 8). > En partant du bord inférieur du panneau, marquer la position des brides > En faisant référence au tableau correspondant, marquer tout d’abord le trou externe puis le trou interne www.universal.bertazzoni.com... -
Página 51: Disposition Des Brides De Montage Des Panneaux De Revêtement
être inférieur à 1,5 mm (1/16"). 34 (1 SÉRIE LARGEUR PORTE/TIROIR LARGEUR LOGEMENT ½” 13 ( ½” 13 ( 897 (35 1/4") 900 (35 1/2") Bride de réglage vertical du tiroir inférieur. 747 (29 3/8") 750 (29 5/8") Prendre note de l'orientation. www.universal.bertazzoni.com... -
Página 52: Montage Des Poignées Sur Les Réfrigérateurs Integrated
à -450 mm (-17 3/4") et un autre à +450 mm (+17 3/4") > Positionner la poignée à hauteur des trous et introduire les vis à travers le panneau et l’entretoise de la poignée www.universal.bertazzoni.com... -
Página 53: Montage Des Panneaux Sur La Porte Et Sur Le Tiroir Des Réfrigérateurs Integrated
éloigné de la surface de la porte ou du tiroir. Une fois le panneau frontal positionné, remettre correctement en place le joint, de façon à garantir la bonne fermeture de la porte ou du tiroir et à éviter tout mauvais fonctionnement du réfrigérateur. www.universal.bertazzoni.com... - Página 54 [ 11 Une fois le panneau frontal positionné, remettre correctement en place le joint, de façon à garantir la bonne fermeture de la porte ou du tiroir et à éviter tout mauvais fonctionnement du réfrigérateur. www.universal.bertazzoni.com...
-
Página 55: Installation
MONTAGE DES PROFILS LATÉRAUX 6,5 (¼”) 6,5 (¼”) Mur ou Mur ou Réfrigérateur meuble meuble 22 ( ⁄ ”) 22 ( ⁄ ”) A Élément de B Cadre en aluminium raccordement www.universal.bertazzoni.com... -
Página 56: Installation Encastrée De Deux Réfrigérateurs Ou Plus
: fixer la bride supérieure et la bride inférieure à un des deux réfrigérateurs puis à l’autre > Une fois les réfrigérateurs installés, appliquer le couvre-profil central sur le profil de raccordement et exercer dessus une pression jusqu’au déclic de positionnement www.universal.bertazzoni.com... - Página 57 6,5 (¼”) Mur ou Mur ou 13 (½”) Réfrigérateur Réfrigérateur meuble meuble 44,4 (1 ¾”) 22 ( ⁄ ”) 22 ( ⁄ ”) A Élément de raccordement D Élément de raccordement B Cadre en aluminium E Cadre en aluminium www.universal.bertazzoni.com...
-
Página 58: Opérations Finales De L'installation
6. OPÉRATIONS FINALES DE L’INSTALLATION 6.1 Installation du kit anti-basculement www.universal.bertazzoni.com... -
Página 59: Montage Des Poignées Sur La Partie Frontale En Acier Inox
à ne pas rayer le panneau en recommandé de la retirer pour améliorer le flux acier inox avec l’outil. d’air. SÉRIE 90 SÉRIE 75 860 (33 7/8") 740 (29 1/8") > 100 (4") 10 (3/8") 50 % www.universal.bertazzoni.com... -
Página 60: Mise En Marche
Nomenclature: Grigio Whirlpool bianco EB 61 - 62 li passaggio di nero coprente 602 -95 li www.universal.bertazzoni.com bianco EB 61 - 62 li Nomen forato solo per le parti retro illuminate come da disegno “C”... - Página 61 Dans ce cas, désactiver les éventuels signaux sonores en appuyant sur la touche Alarm (Alarme), refermer la porte et attendre que la température programmée soit atteinte. Avant d’introduire des aliments, il est nécessaire que le réfrigérateur atteigne la bonne température. www.universal.bertazzoni.com...
- Página 62 IMPORTANTE Las medidas entre paréntesis están expresadas en pulgadas: mm (in). Los pesos entre paréntesis están expresados en libras: kg (lb). Las temperaturas entre paréntesis están expresadas en grados Fahrenheit: °C (°F) www.universal.bertazzoni.com...
- Página 63 Instalación empotrada de dos o más frigoríficos....................COMPLETAR LA INSTALACIÓN Montaje de las escuadras de seguridad antivuelco....................Montaje de los tiradores en la parte frontal de acero inoxidable..............Circulación del aire................................. Control final de la instalación............................Puesta en funcionamiento............................www.universal.bertazzoni.com...
-
Página 64: Instrucciones Importantes
TENUTO IMBALLO - PACKING CONTENTS UTO IMBALLO - PACKING CONTENTS ENUTO IMBALLO - PACKING CONTENTS StandPlus/ StandPlus/ Integrated Classic www.universal.bertazzoni.com StandPlus/ Integrated Classic X-pro Integrated Classic X-pro X-pro... -
Página 65: Requisitos Técnicos
No todos los modelos están provistos de dispositivo automático para producir cubitos de hielo (Ice Maker). Para saber si es necesario realizar la conexión a la red de suministro de agua, compruebe si el modelo dispone de Ice Maker. www.universal.bertazzoni.com... -
Página 66: Características Del Hueco De Instalación Del Frigorífico: Serie Integrated
75: 750 (29 ⅝”) 75: 750 (29 ⅝”) 90: 899 (35 3/8”) 610 (24”) 75: 749 (29 1/2”) 90: 899 (35 3/8”) ) ” 2 610 (24”) 75: 749 (29 1/2”) ) ” 2 500 (19 ¾” 500 (19 ¾” www.universal.bertazzoni.com... -
Página 67: Requisitos Del Hueco De Instalación Del Frigorífico: Serie Integrated
90: 900 (35 ½”) 75: 750 (29 ⅝”) 75: 750 (29 ⅝”) 90: 899 (35 ⅜”) 635 (25”) 75: 749 (29 ½”) 560 (22”) 90: 899 (35 ⅜”) 635 (25”) 75: 749 (29 ½”) 560 (22”) 693 (27 ¼”) 693 (27 ¼”) www.universal.bertazzoni.com... -
Página 68: Operaciones Previas A La Instalación
Los pavimentos delicados se deben proteger con suministrado (de 1/4’’ y de empalme rápido), que paneles de madera contrachapada, cartón u otro se deberá conectar a un tubo de 1/4’’ de cobre o material similar. www.universal.bertazzoni.com... -
Página 69: Nivelación
Apriete fuertemente a mano; para un apriete correcto no se necesitan herramientas ni llaves especiales. Abra la llave de paso del agua y, antes de empujar el frigorífico dentro del hueco, compruebe que no haya fugas en los racores. www.universal.bertazzoni.com... -
Página 70: Montaje De Los Paneles
[ 8 ] (ver las fig. 4 y 8). > Empezando por el borde inferior del panel, marque la posición de los estribos > Siguiendo la tabla correspondiente, marque antes el orificio exterior y después el interior www.universal.bertazzoni.com... -
Página 71: Disposición De Los Estribos De Montaje De Los Paneles De Revestimiento
1,5 mm (1/16"). 34 (1 ANCHURA DEL SERIE ANCHURA PUERTA/CAJÓN ½” 13 ( HUECO ½” 13 ( 897 (35 1/4") 900 (35 1/2") Estribo de ajuste vertical del cajón inferior. Tome nota de la orientación. 747 (29 3/8") 750 (29 5/8") www.universal.bertazzoni.com... -
Página 72: Montaje De Los Tiradores En Los Frigoríficos Integrated
-450 mm (-17 3/4") y otro orificio a +450 mm (+17 3/4") > Coloque el tirador en correspondencia con los orificios e inserte los tornillos a través del panel y del distanciador del tirador www.universal.bertazzoni.com... -
Página 73: Montaje De Los Paneles En La Puerta Y En El Cajón De Los Frigoríficos Integrated
Una vez ajustado el panel frontal, vuelva a colocar correctamente el sello para permitir el cierre correcto de la puerta o del cajón y evitar un mal funcionamiento del frigorífico. www.universal.bertazzoni.com... - Página 74 [ 10 ] para luego bloquearlo utilizando los orificios [ 11 Una vez ajustado el panel frontal, vuelva a colocar correctamente el sello para permitir el cierre correcto de la puerta o del cajón y evitar un mal funcionamiento del frigorífico. www.universal.bertazzoni.com...
-
Página 75: Instalación
5 mm en correspondencia con MONTAJE DE LOS PERFILES LATERALES 6,5 (¼”) 6,5 (¼”) Pared o Pared o Frigorífico mueble mueble 22 ( ⁄ ”) 22 ( ⁄ ”) A Elemento de conexión B Bastidor de aluminio www.universal.bertazzoni.com... -
Página 76: Instalación Empotrada De Dos O Más Frigoríficos
> Una vez instalados los frigoríficos, coloque el embellecedor central en el perfil de conexión y empújelo hasta el fondo hasta oír un clic www.universal.bertazzoni.com... - Página 77 6,5 (¼”) Pared o Pared o 13 (½”) Frigorífico Frigorífico mueble mueble 44,4 (1 ¾”) 22 ( ⁄ ”) 22 ( ⁄ ”) A Elemento de conexión D Elemento de conexión B Bastidor de aluminio E Bastidor de aluminio www.universal.bertazzoni.com...
-
Página 78: Completar La Instalación
6. COMPLETAR LA INSTALACIÓN 6.1 Instalación del kit antivuelco www.universal.bertazzoni.com... -
Página 79: Montaje De Los Tiradores En La Parte Frontal De Acero Inoxidable
SERIE 90 SERIE 75 860 (33 7/8") 740 (29 1/8") > 100 (4") 10 (3/8") 50 % www.universal.bertazzoni.com... -
Página 80: Control Final De La Instalación
602 -95 li bianco EB 61 - 62 li Nomen forato solo per le parti retro illuminate come da disegno “C” Testo e gra ca www.universal.bertazzoni.com Nomenclature: Grigio Whirlpool Testo e gra ca Nomenclature bianco EB 61 - 62 li... - Página 81 En este caso, silencie las señales acústicas pulsando la tecla Alarm (Alarma), cierre la puerta y espere a que se alcance la temperatura configurada. Antes de introducir los alimentos, el frigorífico debe alcanzar la temperatura correcta. www.universal.bertazzoni.com...
- Página 82 BELANGRIJK De afmetingen tussen haakjes zijn uitgedrukt in inches: mm (in). De gewichten tussen haakjes zijn uitgedrukt in pond: kg (lb). De temperaturen tussen haakjes zijn uitgedrukt in graden Fahrenheit: °C (°F) www.universal.bertazzoni.com...
- Página 83 Inbouw van een enkele koelkast..........................Inbouw van twee of meer koelkasten........................HET VOLTOOIEN VAN DE INSTALLATIE Montage van de anti-kantel hoekbeugels......................... Het monteren van de roestvrijstalen handgrepen aan de voorzijde .............. Luchtcirculatie................................. Controles aan het einde van installatie........................Inbedrijfstelling................................www.universal.bertazzoni.com...
-
Página 84: Belangrijke Instructies
TENUTO IMBALLO - PACKING CONTENTS UTO IMBALLO - PACKING CONTENTS ENUTO IMBALLO - PACKING CONTENTS StandPlus/ StandPlus/ Integrated Classic www.universal.bertazzoni.com StandPlus/ Integrated Classic X-pro Integrated Classic X-pro X-pro... -
Página 85: Technische Voorschriften
Dopsleutel 13 mm (1/2") achterwielen Opmerking Niet alle modellen zijn uitgerust met een automaat voor de productie van ijsblokjes (IceMaker). Als u wilt weten of een wateraansluiting nodig is, controleer dan of het model is uitgerust met een IceMaker. www.universal.bertazzoni.com... - Página 86 75: 750 (29 ⅝”) 75: 750 (29 ⅝”) 90: 899 (35 3/8”) 610 (24”) 75: 749 (29 1/2”) 90: 899 (35 3/8”) ) ” 2 610 (24”) 75: 749 (29 1/2”) ) ” 2 500 (19 ¾” 500 (19 ¾” www.universal.bertazzoni.com...
-
Página 87: Eigenschappen Van De Nis Waar De Koelkast Komt: Inbouwmodellen
90: 900 (35 ½”) 75: 750 (29 ⅝”) 75: 750 (29 ⅝”) 90: 899 (35 ⅜”) 635 (25”) 75: 749 (29 ½”) 560 (22”) 90: 899 (35 ⅜”) 635 (25”) 75: 749 (29 ½”) 560 (22”) 693 (27 ¼”) 693 (27 ¼”) www.universal.bertazzoni.com... -
Página 88: Werkzaamheden Voorafgaand Aan De Installatie
Ga uiterst voorzichtig te werk, om beschadiging van of polyethyleen buis aangesloten moet worden. de vloer te voorkomen. Kwetsbare vloeren moeten Lengte van de stroomkabel: 2500 mm (98 3/8") worden beschermd met multiplex platen, karton of Lengte van de waterleiding: 2500 mm (98 3/8") soortgelijke materialen. www.universal.bertazzoni.com... -
Página 89: Nivellering
Draai stevig vast met de hand - er is geen speciaal gereedschap of moersleutel nodig voor een correcte bevestiging. Open de watertoevoer en controleer de fittingen op lekkage, voordat u de koelkast in de nis schuift. www.universal.bertazzoni.com... -
Página 90: Montage Van De Panelen
[ 8 ] (zie Afb. 4 e 8). > Teken vanaf de onderkant van het paneel de positie van de beugels af > Teken overeenkomstig de tabel eerst het buitenste gat af en vervolgens het binnenste gat www.universal.bertazzoni.com... -
Página 91: Het Plaatsen Van De Bevestigingsbeugels Voor De Bekledingspanelen
1,5 mm (1/16"). 34 (1 34 (1 SERIE BREEDTE VAN DE DEUR/LADE NISBREEDTE ½” 13 ( 897 (35 1/4") 900 (35 1/2") ½” 13 ( Verticale stelbeugel van de onderste lade. 747 (29 3/8") 750 (29 5/8") Let op de richting. www.universal.bertazzoni.com... - Página 92 één gat op -450 mm (-17 3/4") en één op +450 mm (+17 3/4") > Plaats de handgreep op de plaats van de gaten en steek de schroeven door het paneel en de afstandhouder van de handgreep www.universal.bertazzoni.com...
- Página 93 Nadat voorpaneel geplaatst, verplaatst u de pakking correct, zodat de deur of lade goed sluit en storingen aan de koelkast voorkomt. www.universal.bertazzoni.com...
- Página 94 [ 10 ], en kunt u het vervolgens vastzetten met behulp van de gaten [ 11 Nadat voorpaneel geplaatst, verplaatst u de pakking correct, zodat de deur of lade goed sluit en storingen aan de koelkast voorkomt. www.universal.bertazzoni.com...
-
Página 95: Installatie
5 mm in HET MONTEREN VAN ZIJPROFIELEN 6,5 (¼”) 6,5 (¼”) Muur of Muur of Koelkast kast kast 22 ( ⁄ ”) 22 ( ⁄ ”) A Verbindingselement B Aluminium frame www.universal.bertazzoni.com... -
Página 96: Inbouw Van Twee Of Meer Koelkasten
één koelkast en vervolgens aan de andere > Nadat de koelkasten zijn geïnstalleerd, brengt u het middelste afdekprofiel op het verbindingsprofiel aan en drukt u deze naar beneden totdat deze in zijn positie vastklikt www.universal.bertazzoni.com... - Página 97 6,5 (¼”) 6,5 (¼”) 6,5 (¼”) 6,5 (¼”) Muur of Muur of 13 (½”) Koelkast Koelkast kast kast 44,4 (1 ¾”) 22 ( ⁄ ”) 22 ( ⁄ ”) A Verbindingselement D Verbindingselement B Aluminium frame E Aluminium frame www.universal.bertazzoni.com...
-
Página 98: Het Voltooien Van De Installatie
6. HET VOLTOOIEN VAN DE INSTALLATIE 6.1 Installatie van de anti-kantelset www.universal.bertazzoni.com... -
Página 99: Luchtcirculatie
Als het rooster voor een deel wordt afgedekt door beschadigt of bekrast met het gereedschap. de keukenplint, is het raadzaam om het rooster te verwijderen, waardoor er een betere luchtstroom SERIE 90 SERIE 75 860 (33 7/8") 740 (29 1/8") > 100 (4") 10 (3/8") www.universal.bertazzoni.com... -
Página 100: Inbedrijfstelling
602 -95 li bianco EB 61 - 62 li Nomen forato solo per le parti retro illuminate come da disegno “C” Testo e gra ca www.universal.bertazzoni.com Nomenclature: Grigio Whirlpool Testo e gra ca Nomenclature bianco EB 61 - 62 li... - Página 101 Bevestig in dat geval eventuele akoestische signalen door op de knop Alarm (Alarm) te drukken, sluit de deur en wacht tot de ingestelde temperatuur is bereikt. Het is noodzakelijk dat de koelkast de juiste temperatuur bereikt voordat er etenswaren in kunnen worden geplaatst. www.universal.bertazzoni.com...
- Página 102 VIKTIGT Måtten inom parentes är uttryckta i tum: mm (in). Vikterna inom parentes är uttryckta i pund: kg (lb). Temperaturerna inom parentes är uttryckta i grader Fahrenheit: °C (°F) www.universal.bertazzoni.com...
- Página 103 Montering av paneler på dörr och låda i Integrated-kylskåp................INSTALLATION Inbyggnad av ett fristående kylskåp........................... Inbyggnad av två eller flera kylskåp........................... SLUTFÖRANDE AV INSTALLATIONEN Montering av tippskydd..............................Montering av handtag på framdelen i rostfritt stål....................Luftcirkulation.................................. Kontroller efter installationen............................. Idrifttagning..................................www.universal.bertazzoni.com...
-
Página 104: Viktiga Instruktioner
Fäst kylskåpets övre del i väggen med de två vinkeljärn som levereras med kylskåpet. TENUTO IMBALLO - PACKING CONTENTS UTO IMBALLO - PACKING CONTENTS ENUTO IMBALLO - PACKING CONTENTS StandPlus/ StandPlus/ Integrated Classic www.universal.bertazzoni.com StandPlus/ Integrated Classic X-pro Integrated Classic X-pro X-pro... -
Página 105: Tekniska Krav
Skruvnyckel 17 mm (3/4”) Höjdjustering av de bakre Insexnyckel 13 mm (1/2”) hjulen Anmärkning Alla modeller är inte utrustade med den automatiska maskinen för tillverkning av iskuber (IceMaker). För att veta om vattenanslutning är nödvändig, kontrollera om modellen är utrustad med IceMaker. www.universal.bertazzoni.com... - Página 106 75: 750 (29 ⅝”) 75: 750 (29 ⅝”) 90: 899 (35 3/8”) 610 (24”) 75: 749 (29 1/2”) 90: 899 (35 3/8”) ) ” 2 610 (24”) 75: 749 (29 1/2”) ) ” 2 500 (19 ¾” 500 (19 ¾” www.universal.bertazzoni.com...
-
Página 107: Krav För Kylskåpets Installationsutrymme: Serien Integrated I Rostfritt Stål
90: 900 (35 ½”) 75: 750 (29 ⅝”) 75: 750 (29 ⅝”) 90: 899 (35 ⅜”) 635 (25”) 75: 749 (29 ½”) 560 (22”) 90: 899 (35 ⅜”) 635 (25”) 75: 749 (29 ½”) 560 (22”) 693 (27 ¼”) 693 (27 ¼”) www.universal.bertazzoni.com... -
Página 108: Förberedande Åtgärder Inför Installationen
1/4” i koppar eller polyeten. Var väldigt försiktig, för att förhindra skador på golven. Ömtåliga golv måste skyddas med paneler Elkabelns längd: 2 500 mm (98 3/8”) Vattenslangens längd: 2 500 mm (98 3/8”) av plywood, kartong eller liknande material. www.universal.bertazzoni.com... -
Página 109: Nivellering
Dra åt ordentligt för hand – för korrekt åtdragning behövs inga särskilda verktyg/nycklar. Öppna vattenförsörjningen och kontrollera att det inte läcker från kopplingarna innan du trycker in kylskåpet i utrymmet. www.universal.bertazzoni.com... -
Página 110: Montering Av Paneler
]. Stödbeslaget måste vara vänt mot motsatt sida [ 8 ] (se fig. 4 och 8). > Utgå från panelens nedre kant och markera ut beslagens placering > Följ den motsvarande tabellen, markera först ut det yttre hålet och därefter det inre hålet www.universal.bertazzoni.com... -
Página 111: Placering Av Beklädnadspanelernas Monteringsbeslag
34 (1 1,5 mm (1/16”). 34 (1 SERIE BREDD DÖRR/LÅDA UTRYMMETS BREDD ½” 13 ( ½” 13 ( 897 (35 1/4”) 900 (35 1/2”) Vertikalt justeringsbeslag för den nedre 747 (29 3/8”) 750 (29 5/8”) lådan. Var uppmärksam på riktningen. www.universal.bertazzoni.com... - Página 112 (kod HV) på dörren, dela panelens höjd i två och gör ett hål vid -450 mm (-17 3/4”) och ett vid +450 mm (+17 3/4”) > Placera handtaget vid hålen och sätt in skruvarna genom panelen och handtagets distansbricka www.universal.bertazzoni.com...
-
Página 113: Montering Av Handtag På Integrated-Kylskåp
Placera tillbaka tätningen korrekt när frontpanelen har installerats, så att man kan stänga dörren eller lådan korrekt och förhindra funktionsfel hos kylskåpet. www.universal.bertazzoni.com... - Página 114 [ 10 ] insida för att sedan blockera panelen med [ 11 hjälp av hålen Placera tillbaka tätningen korrekt när frontpanelen har installerats, så att man kan stänga dörren eller lådan korrekt och förhindra funktionsfel hos kylskåpet. www.universal.bertazzoni.com...
-
Página 115: Installation
5 mm vid möbelns övre/bakre del för att släppa ut varm luft. MONTERING AV SIDOLISTER 6,5 (¼”) 6,5 (¼”) Vägg eller Vägg eller Kylskåp möbel möbel 22 ( ⁄ ”) 22 ( ⁄ ”) A Anslutningselement B Aluminiumprofil www.universal.bertazzoni.com... -
Página 116: Inbyggnad Av Två Eller Flera Kylskåp
övre och nedre beslagen på det ena kylskåpet och sedan på det andra kylskåpet > När kylskåpen har installerats, sätt fast listskyddet i mitten på anslutningslisten och tryck fast den helt tills den klickar fast på plats www.universal.bertazzoni.com... - Página 117 MONTERING AV SIDOLISTER OCH MITTLISTER 6,5 (¼”) 6,5 (¼”) 6,5 (¼”) 6,5 (¼”) 13 (½”) Kylskåp Kylskåp Vägg eller Vägg eller möbel möbel 44,4 (1 ¾”) 22 ( ⁄ ”) 22 ( ⁄ ”) A Anslutningselement D Anslutningselement B Aluminiumprofil E Aluminiumprofil www.universal.bertazzoni.com...
-
Página 118: Slutförande Av Installationen
6. SLUTFÖRANDE AV INSTALLATIONEN 6.1 Installation av kit med tippskydd www.universal.bertazzoni.com... -
Página 119: Montering Av Handtag På Framdelen I Rostfritt Stål
2,5 mm (1/8”). Var försiktig så att ta bort det, för att förbättra luftflödet. panelen i rostfritt stål inte skadas eller repas med verktyget. SERIE 90 SERIE 75 860 (33 7/8”) 740 (29 1/8”) > 100 (4”) 10 (3/8”) 50 % www.universal.bertazzoni.com... -
Página 120: Idrifttagning
Nomenclature: Grigio Whirlpool bianco EB 61 - 62 li passaggio di nero coprente 602 -95 li www.universal.bertazzoni.com bianco EB 61 - 62 li Nomen forato solo per le parti retro illuminate come da disegno “C”... - Página 121 I detta fall kan du tysta ner eventuella ljudsignaler genom att trycka på knappen Alarm, stänga dörren och vänta tills den inställda temperaturen har uppnåtts. Kylskåpet måste uppnå korrekt temperatur innan några matvaror kan läggas in. www.universal.bertazzoni.com...
- Página 122 VIGTIGT Målene i parentes er i tommer: mm (in). Vægten i parentes er i pund: kg (lb). Temperaturerne i parentes er i grader Fahrenheit: °C (°F) www.universal.bertazzoni.com...
- Página 123 Indbygget installation af et enkelt køleskab......................Indbygget installation af to eller flere køleskabe....................AFSLUTNING AF INSTALLATIONEN Montering af vinkelbeslag til sikring mod at vælte....................Montering af håndtagene på forsiden i rustfrit stål .................... Luftcirkulation.................................. Kontroller efter endt installation..........................Ibrugtagning..................................www.universal.bertazzoni.com...
-
Página 124: Vigtige Anvisninger
Fastgør køleskabet til muren for oven med de to medleverede vinkelbeslag. TENUTO IMBALLO - PACKING CONTENTS UTO IMBALLO - PACKING CONTENTS ENUTO IMBALLO - PACKING CONTENTS StandPlus/ StandPlus/ Integrated Classic www.universal.bertazzoni.com StandPlus/ Integrated Classic X-pro Integrated Classic X-pro X-pro... -
Página 125: Tekniske Krav
Højdeindstilling af de bagerste Topnøgle på 13 mm (1/2") hjul Bemærk Ikke alle modellerne er udstyret med den automatiske enhed til fremstilling af isterninger (IceMaker). For at se om apparatet kræver vandtilslutning skal du kontrollere, om det er udstyret med IceMaker. www.universal.bertazzoni.com... -
Página 126: Egenskaberne For Rummet Hvor Køleskabet Skal Installeres: Integrated-Serien
75: 750 (29 ⅝”) 75: 750 (29 ⅝”) 90: 899 (35 3/8”) 610 (24”) 75: 749 (29 1/2”) 90: 899 (35 3/8”) ) ” 2 610 (24”) 75: 749 (29 1/2”) ) ” 2 500 (19 ¾” 500 (19 ¾” www.universal.bertazzoni.com... - Página 127 90: 900 (35 ½”) 75: 750 (29 ⅝”) 75: 750 (29 ⅝”) 90: 899 (35 ⅜”) 635 (25”) 75: 749 (29 ½”) 560 (22”) 90: 899 (35 ⅜”) 635 (25”) 75: 749 (29 ½”) 560 (22”) 693 (27 ¼”) 693 (27 ¼”) www.universal.bertazzoni.com...
-
Página 128: Indledende Handlinger Før Installationen
1/4" kobber- eller polyethylenrør. Vær så opmærksom som mulig på ikke at beskadige gulvet. Gulvene skal beskyttes med en spånplade, El-ledningens længde: 2500 mm (98 3/8") Vandslangens længde: 2500 mm (98 3/8") et stykke pap eller lignende materiale. www.universal.bertazzoni.com... -
Página 129: Nivellering
Spænd fast med hånden - ingen specialværktøj/ skruenøgler er nødvendige for korrekt spænding. Åbn vandforsyningen og kontroller for lækager fra samlingerne, inden du skubber køleskabet ind på plads i rummet. www.universal.bertazzoni.com... -
Página 130: Montering Af Panelerne
]. Støttebeslaget skal være vendt mod den modsatte side [ 8 ] (se fig. 4 og 8). > Start fra panelets underkant og markér beslagenes placering > Følg den tilsvarende tabel og markér først det udvendige hul og derefter det indvendige www.universal.bertazzoni.com... -
Página 131: Placering Af Beslagene Til Montering Af Beklædningspanelerne
34 (1 SERIE DØRENS/SKUFFENS BREDDE BREDDE PÅ RUM ½” 13 ( ½” 13 ( 897 (35 1/4") 900 (35 1/2") Beslag til lodret regulering af den nederste 747 (29 3/8") 750 (29 5/8") skuffe. Læg mærke til hvordan det vender. www.universal.bertazzoni.com... -
Página 132: Montering Af Håndtagene På Integrated-Køleskabene
(kode HV) på døren skal man dele panelets højde i to og lave et hul i -450 mm (-17 3/4") og et i +450 mm (+17 3/4") > Placer håndtaget ud for hullerne og indsæt skruerne gennem panelet håndtagets afstandsstykke www.universal.bertazzoni.com... -
Página 133: Montering Af Panelerne På Døren Og På Skuffen På Integrated-Køleskaberne
Når frontpanelet er placeret, skal man sætte pakningen korrekt på plads, så døren eller skuffen kan lukke korrekt og dermed forhindre, at køleskabet ikke fungerer korrekt. www.universal.bertazzoni.com... - Página 134 [ 10 ] for derefter at fastgøre det via hullerne [ 11 Når frontpanelet er placeret, skal man sætte pakningen korrekt på plads, så døren eller skuffen kan lukke korrekt og dermed forhindre, at køleskabet ikke fungerer korrekt. www.universal.bertazzoni.com...
-
Página 135: Installation
5 mm ekstra plads ved den øverste/bageste del af køleskabet, for at varm luft kan undslippe. MONTERING AF SIDEPROFILERNE 6,5 (¼”) 6,5 (¼”) Væg eller Væg eller Køleskab møbel møbel 22 ( ⁄ ”) 22 ( ⁄ ”) A Forbindelseselement B Aluminiumsstel www.universal.bertazzoni.com... -
Página 136: Indbygget Installation Af To Eller Flere Køleskabe
øverste og nederste beslag først på det ene køleskab og derefter på det andet > Når køleskabene er installeret, skal man sætte den midterste profilafdækning på forbindelsesprofilen og trykke den ind, indtil den klikker på plads www.universal.bertazzoni.com... - Página 137 MONTERING AF SIDE- OG MIDTERPROFILERNE 6,5 (¼”) 6,5 (¼”) 6,5 (¼”) 6,5 (¼”) Væg eller Væg eller 13 (½”) Køleskab Køleskab møbel møbel 44,4 (1 ¾”) 22 ( ⁄ ”) 22 ( ⁄ ”) A Forbindelseselement D Tilslutningselement B Aluminiumsstel E Aluminiumsstel www.universal.bertazzoni.com...
-
Página 138: Afslutning Af Installationen
6. AFSLUTNING AF INSTALLATIONEN 6.1 Sæt til at forhindre at køleskabet vælter www.universal.bertazzoni.com... -
Página 139: Montering Af Håndtagene På Forsiden I Rustfrit Stål
Pas på ikke at beskadige det for at forbedre luftstrømningen. eller ridse panelet i rustfrit stål med værktøjet. SERIE 90 SERIE 75 860 (33 7/8") 740 (29 1/8") > 100 (4") 10 (3/8") www.universal.bertazzoni.com... -
Página 140: Ibrugtagning
602 -95 li bianco EB 61 - 62 li Nomen forato solo per le parti retro illuminate come da disegno “C” Testo e gra ca www.universal.bertazzoni.com Nomenclature: Grigio Whirlpool Testo e gra ca Nomenclature bianco EB 61 - 62 li... - Página 141 I dette tilfælde skal man slå lyden fra lydsignalerne ved at trykke på Alarmtasten, lukke døren og vente på, at den indstillede temperatur er nået. Det er nødvendigt, at køleskabet når den rigtige temperatur, før der kommes fødevarer i det. www.universal.bertazzoni.com...
- Página 144 800 927 987...