Publicidad
Idiomas disponibles
Idiomas disponibles
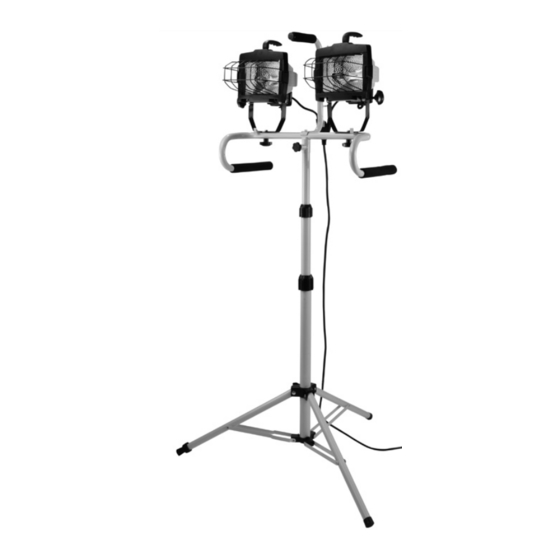
TQS1000QD
ENGLISH
ITEMS REQUIRED
(Purchase separately)
• Phillips screwdriver
• Adjustable wrench
• Pliers
WARNINGS AND CAUTIONS
INSTRUCTIONS PERTAINING TO A RISK OF FIRE, ELECTRIC SHOCK, EXPOSURE TO
EXCESSIVE UV RADIATION, OR INJURY TO PERSONS.
IMPORTANT SAFETY INSTRUCTIONS
Lighted lamp is HOT!
WARNING: When using outdoor use portable luminaires, basic safety precautions
should always be followed to reduce the risk of fire, electric shock, and personal injury.
WARNING: To reduce the risk of fire, electric shock, exposure to excessive UV radiation
or injury to persons:
• IMPORTANT: READ ALL SAFETY INSTRUCTIONS.
• Turn off/unplug and allow to cool before replacing bulb.
• Bulb gets HOT quickly! Only contact switch/plug when turning on.
• Do not touch hot lens, guard, or enclosure.
• Do not remain in light if skin feels warm.
• Do not look directly at lighted lamp.
• Keep away from materials that may burn.
• Use only with a 500 watt or smaller quartz halogen bulb.
• Do not touch the bulb at any time. Use a soft cloth. Oil from skin may damage bulb.
• Do not operate the portable luminaire with a missing or damaged guard, lamp containment
barrier, or UV filter.
• If lens is replaced, use only a diffused tempered safety glass of equal thickness.
• Use of bulb(s) of higher wattage rating than what is listed in the safety instructions will void
the warranty.
• For indoor and outdoor use.
• cULus LISTED.
• Connect fixture to a 120 volt, 60 Hz power source. Any other connection voids the warranty.
• Use with only three-wire outdoor extension cords that have three-prong grounding plugs
and grounding receptacles that accept the appliance's plug.
• Ground Fault Circuit Interruption (GFCI) protection is to be provided on the circuit(s) or
outlet(s) to be used for the wet location portable luminaire. Receptacles are available having
built-in GFCI protection and are able to be used for this measure of safety.
• Use only with an extension cord for outdoor use, such as an extension cord of cord type
SW, SW-A, SOW, SOW-A, STW, STW-A, STOW, STOW-A, SJW, SJW-A, SJOW, SJOW-A, SJTW,
SJTW-A, SJTOW, SJTOW-A.
Questions? / ¿Preguntas ? 1-800-334-6871 ConsumerProducts@cooperlighting.com
PACKAGING CONTENTS / CONTENIDO DEL PAQUETE
A. (2) Light heads
(2) Cabezas de la
lámparas
B. Safety guard
Protección de
seguridad
C. Sled crossbar
Barra transversal
tipo trineo
D. Quick-release knob
Perilla de liberación
rápida
E. Center handle
Manija central
F. (2) Light handles
(2) Manijas de la lámpara
G. (3) 500 watt quartz halogen bulbs
(One located in each fixture plus
spare bulb stored in center handle)
(2) Bombillas de halógeno de
cuarzo de 500 vatios
(un ubicada en cada lámpara
más una bombilla adicional
almacenada en la manija central)
H. Tripod stand
Soporte del trípode
• The worklight should be located no further than 6 feet from the nearest outlet.
• Disassembling your fixture will void the warranty.
• SAVE THESE INSTRUCTIONS.
ASSEMBLING YOUR FIXTURE
WARNING: Deviation from the assembly instructions
may result in a risk of fire or electric shock.
1. Using the light mounting knob with short bolt
(J) provided, attach center handle (E) to the sled
crossbar (C) (Fig. 1).
2. To mount light fixture (A) to the sled crossbar (C),
place a hex bolt (M) through a lock washer (L) and
then through tthe hole on the sled crossbar (C).
Secure fixture by positioning a light mounting
spacer (K) and a light mounting knob (I) onto the
bolt (M) and tightening to secure. Repeat for the
other light head (Fig. 2).
3. Using a Phillips screwdriver, mount the "Y" cord
to the back of the center handle (E). A threaded hole
is provided (Fig. 3).
1
Instruction Manual/ Instrucciones
I. (2) Light mounting knobs
(2) Perillas de montaje de
la lámpara
J. Light mounting knob with
short bolt
Perillas de montaje de
la lámpara con perno corto
K. (2) Light mounting spacer
(2) Espaciador de montaje de
la lámpara
L. (2) Lock washers
(2) Arandelas de seguridad
M. (2) Hex bolts
(2) Pernos hexagonales
Fig. 1
E
J
Fig. 2
C
I
Fig. 3
C
A
M
L
K
"Y" cord
Publicidad
Tabla de contenido

Manuales relacionados para Cooper Lighting TQS1000QD


Resumen de contenidos para Cooper Lighting TQS1000QD
- Página 1 (2) Arandelas de seguridad H. Tripod stand Soporte del trípode M. (2) Hex bolts TQS1000QD (2) Pernos hexagonales • The worklight should be located no further than 6 feet from the nearest outlet. ENGLISH • Disassembling your fixture will void the warranty.
-
Página 2: Replacing The Bulb
AIMING THE FIXTURE 4. To install the safety guard (B), insert one side of Fig. 4 the guard between the frame and lens. Squeeze WARNING: Risk of burn. Disconnect power and the guard (B) until the other side can be placed allow fixture to cool before changing bulb or between the opposite side of the frame and handling fixture. -
Página 3: Para Ensemblar Su Accesorio
Cooper Lighting, LLC (“Cooper Lighting”) warrants to customers that, for a period of two years luminaria portátil para lugares húmedos. Existen receptáculos con protección GFCI two years from the date of purchase, Cooper Lighting’s products will be free from defects in incorporada que se pueden utilizar para cumplir con esta medida de seguridad. - Página 4 Lighting no presentarán defectos en los materiales y en la fabricación durante un período de la lámpara. dos años desde la fecha de compra. La obligación de Cooper Lighting según esta garantía se Fig. 9 limita expresamente al suministro de los productos de reemplazo. Esta garantía se extiende NOTA: Para obtener la máxima vida útil de la bombilla,...
- Página 5 La reproducción de este documento sin la aprobación previa por escrito de Cooper Lighting, LLC está estrictamente prohibida. Para solicitar ayuda, llame al 1-800-334-6871 o envíe un correo electrónico a ConsumerProducts@cooperlighting.com...