Capítulos
Tabla de contenido
Solución de problemas

Manuales relacionados para Bissell PROHEAT 2X REVOLUTION 1548 Serie


Resumen de contenidos para Bissell PROHEAT 2X REVOLUTION 1548 Serie
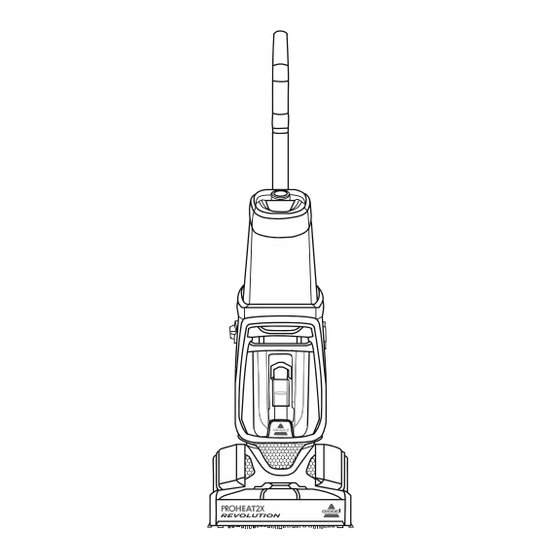
- Página 1 PROHEAT 2X ® REVOLUTION ™ Deep Cleaner _______________ USER GUIDE 1548, 1550, 1551 SERIES More of a video person? Look for this icon and go online for an instructional how-to video at www.BISSELL.com...
-
Página 2: Important Safety Instructions
See » Do not handle plug or ashes. grounding instructions. Do not appliance with wet hands. » Use only BISSELL® cleaning modify the 3-prong grounded » Do not put any object into products intended for use plug. -
Página 3: Tabla De Contenido
We love to clean and we’re excited to share one of our innovative products with you. We want your BISSELL ProHeat 2X Revolution to work like new for the years to come, so this guide has tips on how to use, maintain and, if there’s a problem, troubleshoot. - Página 4 Belt/Brush Access Plate (1 Gallon Capacity) EdgeSweep® Brushes Power Switch Carry Handle Float Stack Rubber Tab Dirty Water Tank (on Dirty Water Tank) Belt Access Door Quick Release™ Cord Wrap Foot Recline Pedal Spray Trigger 10 In-Use Cord Clip www.BISSELL.com...
-
Página 5: Assembly
Wrap the cord around Clean Water Tank with Carry Handle and the Upper the Carry Handle and the grooves and slide Handle with the screw that’s Quick Release™ Cord the tank into place. taped to the Upper Handle. Wrap. www.BISSELL.com... -
Página 6: Cleaning Formulas
Cleaning Formulas WARNING To reduce the risk of fire and electric shock due to internal component damage, use only BISSELL® cleaning formulas intended for use with the deep cleaner. Keep plenty of genuine BISSELL 2X®* Always use genuine BISSELL deep formula on hand so you can clean and cleaning formulas. - Página 7 Add BISSELL Boost Prevent for enhanced performance. Always use genuine BISSELL deep cleaning formulas. Non-BISSELL cleaning formulas may harm the machine and may void the warranty. Certain trademarks used under license from The Procter & Gamble Company or its affiliates.
- Página 8 Customize Your Clean & Maximize Your Results Always use genuine BISSELL® deep cleaning formulas. Non-BISSELL cleaning formulas may harm the machine and may void the warranty. Pretreat Choose BOOST Your Pesky Stains Your Formula Deep Clean Pretreat stains for Prepare your deep...
- Página 9 Clean Water Tank with the recommended amount of water and formula to achieve antibacterial benefits. NOTICE BISSELL Deep Clean + Antibacterial formula is only for BISSELL machines with EasyFill System. ATTENTION Do not overwet carpet. Be careful not to run over loose objects or edges of area rugs. Stalling the brush may result in premature belt failure.
- Página 10 NOTE: Fill with hot (140°F/60°C MAX) tap water and add the appropriate BISSELL formula. DO NOT USE BOILING WATER. DO NOT HEAT WATER OR TANK IN MICROWAVE. Do not substitute BISSELL 2X Formula with other household cleaning products.
- Página 11 » To prevent damage to Berber carpets, avoid repeated strokes in the same area. » For best cleaning performance, clean with your machine in Deep Clean Mode. » Choose Deep Clean Mode and use BISSELL Deep Clean + Antibacterial to deliver antibacterial benefits.
-
Página 12: Important
Power Switch to turn machine ON. NOTE: If using the Mini Deep Reach Tool, be sure the needles of the tool are pressed down into the carpet so the spray gets into the carpet fibers. www.BISSELL.com... - Página 13 12 inches per second WARNING To reduce the risk of fire and electric shock when cleaning a hard floor, the BISSELL® Bare Floor Tool (1606611) must be used and is only to be used with BISSELL Hard Floor Formulas intended for use with this appliance.
-
Página 14: Emptying The Dirty Water Tank
Float Stack Did You Know? should lock into place. The Float Stack is Return the ring and what prevents twist to lock. Water your Dirty may leak if the ring is Water Tank from not fully tightened. overflowing. www.BISSELL.com... -
Página 15: Cleaning The Nozzle
Clean Out Tool into the thin slot at the front of the nozzle where it touches the Rotate the nozzle up and click into place. floor. Clean until free of pet hair or debris. Close the Accessory Hose Door. www.BISSELL.com... - Página 16 Step 5. the Brush Cover and Cogged Large Pump Belt. Remove the Brush Cover by lifting straight up. Remove the Cogged Large Pump Belt. The Brush Rolls can be replaced or cleaned at this time, if needed. www.BISSELL.com...
- Página 17 Make sure that the Access Plate to the end of Access Door back into brushes are aligned and the Brush Rolls by securing place. You should hear the cover is secure. with the 3 screws. it “click” into place. www.BISSELL.com...
-
Página 18: Troubleshooting
2. With the cap twisted on tightly, Leaking tank handle. hold your tank at an angle, over a sink or drain, so any extra water can pour out of the space. 3. Wipe the tank dry with a cloth. www.BISSELL.com... -
Página 19: Warranty
Care by E-mail or telephone as described it was sold. below. BISSELL is not liable for incidental or It may be necessary to obtain some of your consequential damages of any nature personal information, such as a mailing associated with the use of this product. -
Página 20: Parts & Supplies
NOTE: Please keep your original sales receipt. It provides proof of purchase date in the event of a warranty claim. See Warranty page for details. Parts & Supplies For Parts and Supplies, go to www.BISSELL.com and enter your model number in the search field. Love your product? BISSELL®... - Página 21 LIMPIADORA PROFUNDA PROHEAT 2X ® REVOLUTION ™ _______________ GUÍA DEL USUARIO SERIES 1548, 1550, 1551 ¿Prefiere ver videos? Busque este ícono y conéctese para ver un video instructivo en www.BISSELL.com...
-
Página 22: Instrucciones Importantes De Seguridad
» No coloque ningún objeto en las » Utilice solo los productos de limpieza » No deje el electrodoméstico aberturas. No use el electrodoméstico BISSELL formulados para usarse con enchufado. Desenchúfelo del si hay aberturas bloqueadas; este electrodoméstico, con el fin de tomacorriente cuando no esté... -
Página 23: Contenido Del Paquete
La ProHeat 2X® Revolution™ de BISSELL necesita un pequeño ensamble antes de ponerla en funcionamiento, por lo tanto, vaya a la sección “Ensamblaje” y empiece ahora mismo. -
Página 24: Conozca Su Limpiadora Profunda
Tanque de agua sucia 16 Lengüeta de goma (en Puerta de acceso a el tanque de agua sucia) la correa 17 Abrazadera para cable Quick Patas Release™ Gatillo del rociador 18 Pedal para reclinar 10 Sujetador para cable durante el uso www.BISSELL.com... -
Página 25: Ensamblaje
Enrolle el cable alrededor de las ranuras y deslice el el tornillo que está fijado a la la manija de transporte y el tanque en su lugar. manija superior. gancho Quick Release™. www.BISSELL.com... -
Página 26: Fórmulas De Limpieza
» Utilice una aspiradora en seco sobre el área que va a limpiar con su limpiadora profunda. » Trate previamente las manchas con el tratamiento previo para manchas BISSELL para mejorar el rendimiento sobre manchas de café y suciedad arraigada. -
Página 27: Personalice Su Limpieza Y Maximice Los Resultados
Utilice siempre las fórmulas de limpieza profunda genuinas de BISSELL. Las fórmulas de limpieza que no sean de BISSELL pueden dañar la máquina y anular la garantía. Certain trademarks used under license from The Procter & Gamble Company or its affiliates. - Página 28 Personalice su limpieza y maximice los resultados Utilice siempre las fórmulas de limpieza profunda genuinas de BISSELL. Las fór- mulas de limpieza que no sean de BISSELL pueden dañar la máquina y anular la garantía. Dé un tratamiento Elija la fórmula...
- Página 29 Algunas consideraciones sobre el llenado del tanque de agua limpia: » Llénelo con agua caliente de grifo (140 °F/60 °C, como máximo) y agregue la fórmula BISSELL adecuada. NO UTILICE AGUA HIRVIENDO. NO CALIENTE EL AGUA NI EL TANQUE EN EL MICROONDAS.
- Página 30 » Llene el tanque con agua y fórmula 2X® (paso 3 anterior). » Agregue 59,14 ml de cualquier Boost de BISSELL por cada 3,78 litros de agua. » La ProHeat 2X® Revolution™ cuenta con un tanque de agua limpia de 3,78 litros.
-
Página 31: Limpieza De La Alfombra
» Para evitar daños en las alfombras Beréber, evite pasar repetidamente sobre la misma área. » Para un mejor rendimiento de limpieza, limpie con la máquina en modo de limpieza profunda. » Elija el modo de limpieza profunda y use Deep Clean + Antibacterial de BISSELL para obtener beneficios antibacte- rianos. -
Página 32: Limpieza De Tapetes De Interiores
NOTA: si utiliza el accesorio Deep Reach Mini, asegúrese de que las agujas del accesorio se presionen hacia abajo en la alfombra para que el rociado penetre en las fibras de la alfombra. www.BISSELL.com... - Página 33 ADVERTENCIA Para reducir el riesgo de incendio y descarga eléctrica al limpiar un piso duro, el accesorio para pisos descubiertos de BISSELL (1606611) se debe usar solo con las fórmulas Hard Floor de BISSELL destinadas para usar con este electrodoméstico.
-
Página 34: Vaciado Del Tanque De Agua Sucia
El cañón flotante es lo que evita que Vuelva a colocar el anillo y el tanque de gire para bloquear. Podría agua sucia filtrarse agua si el anillo no se rebalse. está bien ajustado. www.BISSELL.com... -
Página 35: Limpieza De La Máquina Después De Utilizar
Gire la boquilla hacia arriba hasta que encaje Limpie hasta que quede libre de pelos de mas- en su lugar. Cierre la puerta de la manguera. cotas o desechos. www.BISSELL.com... -
Página 36: Limpieza De Los Cepillos Giratorios
5. de la bomba. Retire la cubierta del cepillo levantándola hacia arriba. Retire la correa grande dentada de la bomba. Los cepillos giratorios se pueden reemplazar o limpiar en ese momen- to, si es necesario. www.BISSELL.com... - Página 37 Asegúrese de que el extremo de los cepillos rea en su lugar. Deberá los cepillos estén alineados y giratorios y fíjela con los 3 escuchar un “clic”. la cubierta esté asegurada. tornillos. www.BISSELL.com...
-
Página 38: Solución De Problemas
2. Con la tapa puesta firmemente, sostenga el Puede haber quedado agua en el espacio tanque tanque en un ángulo, sobre un fregadero o entre el tanque y la manija del tanque. desagüe, para eliminar toda el agua adicional. 3. Seque el tanque con un paño. www.BISSELL.com... -
Página 39: Garantía
Cualquier garantía implícita que BISSELL, sin costo a partir de la fecha de compra del pueda surgir por una operación legal, que incluya las comprador original y durante tres años, cualquier garantías implícitas de comerciabilidad e idoneidad... -
Página 40: Piezas Y Suministros
Visite www.BISSELL.com/registration. Visite el sitio web de BISSELL: www.BISSELL.com Cuando se ponga en contacto con BISSELL, tenga a mano el número de modelo de la limpiadora. Registre su número de modelo: ___________________ Registre su fecha de compra: ___________________ NOTA: conserve el recibo de venta original.