Tabla de contenido
Publicidad
Idiomas disponibles
Idiomas disponibles
Enlaces rápidos
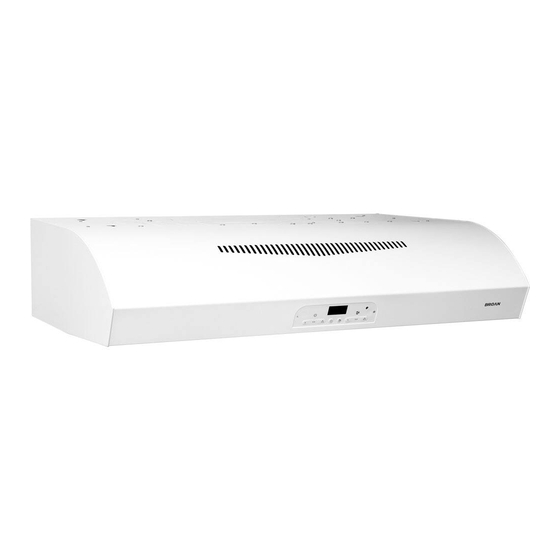
EVOLUTION
QP3 Series Range Hoods
READ AND SAVE THESE INSTRUCTIONS
WARNING
TO REDUCE THE RISK OF FIRE, ELECTRIC SHOCK, OR IN-
JURY TO PERSONS, OBSERVE THE FOLLOWING:
1. Use this unit only in the manner intended by the manufacturer.
If you have questions, contact the manufacturer at the ad-
dress or telephone number listed in the warranty.
2. Before servicing or cleaning unit, switch power off at service
panel and lock the service disconnecting means to prevent
power from being switched on accidentally. When the service
disconnecting means cannot be locked, securely fasten a
prominent warning device, such as a tag, to the service panel.
3. Installation work and electrical wiring must be done by a qual-
ified person(s) in accordance with all applicable codes and
standards, including fire-rated construction.
4. Sufficient air is needed for proper combustion and exhaust-
ing of gases through the flue (chimney) of fuel burning equip-
ment to prevent backdrafting. Follow the heating equipment
manufacturer's guideline and safety standards such as those
published by the National Fire Protection Association (NFPA),
and the American Society of Heating, Refrigeration and Air
Conditioning Engineers (ASHRAE), and the local code au-
thorities.
5. This product may have sharp edges. Be careful to avoid cuts
and abrasions during installation and cleaning.
6. When cutting or drilling into wall or ceiling, do not damage
electrical wiring and other hidden utilities.
7. Ducted fans must always be vented to the outdoors.
8. Use only metal ductwork.
9. Do not use this fan with any solid-state speed control device.
10. As an alternative, this product may be installed with the UL-
approved cord kit designated for the product, following in-
structions packed with the cord kit.
11. This unit must be grounded.
TO REDUCE THE RISK OF A RANGE TOP GREASE FIRE:
1. Never leave surface units unattended at high settings.
Boilovers cause smoking and greasy spillovers that may ig-
nite. Heat oils slowly on low or medium settings.
2. Always turn hood ON when cooking at high heat or when
flambéing food (i.e. Crepes Suzette, Cherries Jubilee, Pep-
percorn Beef Flambé).
3. Clean ventilating fans frequently. Grease should not be al-
lowed to accumulate on fan or filter.
4. Use proper pan size. Always use cookware appropriate for the
size of the surface element.
TO REDUCE THE RISK OF INJURY TO PERSONS IN THE
EVENT OF A RANGE TOP GREASE FIRE, OBSERVE THE
FOLLOWING:*
1. SMOTHER FLAMES with a close-fitting lid, cookie sheet, or
metal tray, then turn off the burner. BE CAREFUL TO PRE-
VENT BURNS. If the flames do not go out immediately,
EVACUATE AND CALL THE FIRE DEPARTMENT.
3
TM
FOR DOMESTIC COOKING ONLY
MODELS QP330BL • QP330SS • QP330WW
QP336BL • QP336SS • QP336WW
QP342BL • QP342SS • QP342WW
WARNING
2. NEVER PICK UP A FLAMING PAN — You may be burned or
spread the fire.
3. DO NOT USE WATER, including wet dishcloths or towels - a
violent steam explosion will result.
4. Use an extinguisher ONLY if:
A. You know you have a Class ABC extinguisher, and you
already know how to operate it.
B. The fire is small and contained in the area where it started.
C. The fire department is being called.
D. You can fight the fire with your back to an exit.
* Based on "Kitchen Firesafety Tips" published by NFPA.
CAUTION
1. For indoor use only.
2. For general ventilating use only. Do not use to exhaust haz-
ardous or explosive materials and vapors.
3. To avoid motor bearing damage and noisy and/or unbal-
anced impeller, keep drywall spray, construction dust, etc.,
off power unit.
4. Do not use over cooking equipment greater than 60,000
BTU/hr. as the blower motor will shut down intermittantly.
5. Your hood motor has a thermal overload which will automati-
cally shut off the motor if it becomes overheated. The motor
will restart when it cools down. If the motor continues to shut
off and restart, have the hood serviced.
6. The top of the hood MUST NOT BE LESS than 24" and at a
maximum of 30" above cooktop for best capture of cooking
impurities.
7. This hood is not intended to be used as a shelf.
8. Please read specification label on product for further infor-
mation and requirements.
NOTE If hood is to be installed non-ducted:
Purchase a set of (2) non-ducted filters for 30" wide
hoods (Model BPPF30) & 36" wide hoods (Model
BPPF36) or a set of (3) non-ducted filters for 42" wide
hoods (Model BPPF42) from your local distributor or
retailer and attach them to the aluminum mesh filters.
Register your product online at: www.broan.com
Installer: Leave this manual
with the homeowner.
Homeowner: Cleaning, Maintenance and
Operating instructions on page 2.
Page 1
Publicidad
Tabla de contenido

Manuales relacionados para Broan EVOLUTION 3 QP3 Serie


Resumen de contenidos para Broan EVOLUTION 3 QP3 Serie
- Página 1 3. Clean ventilating fans frequently. Grease should not be al- hoods (Model BPPF42) from your local distributor or lowed to accumulate on fan or filter. retailer and attach them to the aluminum mesh filters. 4. Use proper pan size. Always use cookware appropriate for the size of the surface element. Register your product online at: www.broan.com TO REDUCE THE RISK OF INJURY TO PERSONS IN THE Installer: Leave this manual EVENT OF A RANGE TOP GREASE FIRE, OBSERVE THE FOLLOWING:* with the homeowner.
-
Página 2: Cleaning & Maintenance
MODELS QP330BL • QP330SS • QP330WW QP336BL • QP336SS • QP336WW QP342BL • QP342SS • QP342WW Page 2 CONTENTS OPERATION Always turn the hood ON before cooking in order to establish an INCLUDED WITH THE HOOD: air flow in the kitchen. After turning off the range, let the hood run for a few minutes to clear the air. (1) 3¼” X 10” Operate the hood as follows: DAMPER / DUCT CONNECTOR GREASE FILTERS (2 - FOR 30” & 36” HOODS) 3 - FOR 42” HOODS) (1) 7” ROUND DUCT NOTE HALOGEN... -
Página 3: Clock Setting
MODELS QP330BL • QP330SS • QP330WW QP336BL • QP336SS • QP336WW QP342BL • QP342SS • QP342WW Page 3 CLOCK SETTING 10-MINUTE DELAY OFF Press the button once, the “hours” will begin blinking in the When your hood fan is on (any speed) press the button to LED screen. Use the and buttons to set the appropriate activate the delay off feature. When activated, the hood fan will hours for the clock. A small indicator will illuminate in the left automatically turn off after 10-minutes has elapsed. The delay corner of the LED screen to designate “pm” . After the hours are feature is active when the following appear on the LED screen: set, press the button to advance the menu to the minute se- A green indicator illuminated above the delay button, a nu- lection. The minutes will begin blinking in the LED screen. Use meric countdown “10-0” , and a clockwise rotating LED. The delay the and buttons to set the minutes. Press the button... -
Página 4: Remote Control
LOW-VOLTAGE Note: Canadian version does not have this function. WIRES FUSES DAMPER MOTOR RANGE HOOD CONTROL BOARD MAIN LIGHT FUSE FUSE REMOTE CONTROL The hood is compatible with Broan RF Remote Control Model BCR1 (optional). Purchase separately. PREPARE HOOD LOCATION ROOF CAP 3¼" X 10" or 7" ROUND DUCT (For vertical discharge) The Range Hood Control Board contains a Main Fuse and a Light Fuse to protect the controls from power surges. If a fuse has opened (blown), the green fan setting or light setting indicators will not operate properly when the fan or light buttons are pressed, and the fan and lights will not turn on. -
Página 5: Prepare The Hood
MODELS QP330BL • QP330SS • QP330WW QP336BL • QP336SS • QP336WW QP342BL • QP342SS • QP342WW Page 5 PREPARE THE HOOD Use the proper diagram below, for placement of ductwork and electrical cutout in cabinet or wall. For a non-ducted installation, DO NOT cut a duct access hole. Remove parts bag from inside the hardware box included with the hood. 3¼” X 10” VERTICAL DUCTING Remove all protective polyfilm from the hood (stainless HOOD MOUNTING SCREWS (5) steel hoods only). " (30" hood) " (30" hood) " (36" hood) " (36" hood) " (42" hood) " (42" hood) CABINET FRONT CABINET BOTTOM "... - Página 6 MODELS QP330BL • QP330SS • QP330WW QP336BL • QP336SS • QP336WW QP342BL • QP342SS • QP342WW Page 6 11 NON-DUCTED INSTALLATION ONLY: Purchase a set of (2) non-ducted filters for 30” wide hoods (Model BPPF30) & 36” wide hoods (Model BPPF36) or a set of (3) non-ducted filters for 42” wide hoods (Model BPPF42) from your local distributor or retailer. Attach the non-ducted filters to the aluminum mesh filters following NON-DUCT instructions packed with the non-ducted filters. DIVERTER FOR NON-DUCTED INSTALLATIONS - Skip to “INSTALL THE HOOD” . 7” ROUND KNOCKOUT NON-DUCTED INSTALLATION ONLY: PLATE (also From parts bag: Attach Non-Duct Diverter to Air Box remove 3¼” x 10” with 2 Screws and 2 Washers. vertical plate) SCREWS 3¼” X 10” VERTICAL KNOCKOUT 3¼” X 10” PLATE HORIZONTAL KNOCKOUT PLATE 12 DUCTED INSTALLATION ONLY: NON-DUCT Remove 3¼” x 10 vertical, 3¼” x 10” horizontal, or 7-inch PLATE round knockout plate(s) as appropriate for your ducting...
-
Página 7: Install The Hood
MODELS QP330BL • QP330SS • QP330WW QP336BL • QP336SS • QP336WW QP342BL • QP342SS • QP342WW Page 7 INSTALL THE HOOD CONNECT THE WIRING WARNING To reduce the risk of electrical shock, switch power off at service panel. Lock or tag service panel to prevent power from being switched on accidentally. GROUND SCREW ELECTRICAL WIRING BOX COVER HOUSE POWER CABLE Connect House Power Cable to range hood wiring - BLACK to BLACK, WHITE to WHITE, and GREEN or BARE WIRE to Ground Screw. Replace electrical wiring ELECTRICAL box cover. POWER CABLE Re-attach Bottom Pan with 6 Screws removed in Step 6. KNOCKOUT INSTALL LIGHT BULBS Remove Electrical Wiring Box Cover from inside of hood and appropriate Electrical Power Cable Knockout from top or back of hood. SUCTION CUP TOOL HALOGEN PUSH IN BULB HOUSE POWER CABLE ROTATE CLOCKWISE LIGHT PANEL SCREWS... -
Página 8: Service Parts
This warranty supersedes all prior 99010354 Non-Duct Filter Kit for 36” (2 charcoal filters and 8 filter clips) warranties. 99010360 Non-Duct Filter Kit for 42” (3 charcoal filters and 12 filter clips) To qualify for warranty service, you must (a) notify Broan-NuTone at the address or 99526707 Suction Cup Tool Not Shown telephone number below, (b) give the model number and part identification and (c) -
Página 9: Hottes De Cuisine De Série Qp3
à la dimension de la surface votre détaillant et les fixer aux filtres en aluminium. chauffante. OBSERVEZ LES CONSIGNES SUIVANTES DE MANIÈRE À Enregistrez votre produit en ligne à : www.broan.com RÉDUIRE LES RISQUES DE BLESSURES CORPORELLES EN Installateur : Veuillez remettre ce manuel CAS D’INCENDIE CAUSÉ PAR DE LA GRAISSE SUR LE PLAN DE CUISSON :* au propriétaire. -
Página 10: Nettoyage Et Entretien
MODÈLES QP330BL • QP330SS • QP330WW QP336BL • QP336SS • QP336WW QP342BL • QP342SS • QP342WW Page 10 CONTENU FONCTIONNEMENT Mettez toujours la hotte en MARCHE avant de cuisiner afin d’établir une INCLUS AVEC LA HOTTE : circulation d’air dans la cuisine. Laissez la hotte fonctionner quelques minutes après l’arrêt de la cuisinière afin de nettoyer l’air. (1) CLAPET / RACCORD Pour utiliser la hotte, faites comme suit : DE CONDUIT FILTRES À DE 8,3 X 25,4 CM GRAISSES (3-¼... -
Página 11: Arrêt Différé De 10 Minutes
MODÈLES QP330BL • QP330SS • QP330WW QP336BL • QP336SS • QP336WW QP342BL • QP342SS • QP342WW Page 11 RÉGLAGE DE L’HEURE ARRÊT DIFFÉRÉ DE 10 MINUTES Appuyez une fois sur le bouton , les « heures » commencent à La hotte étant en marche (à n’importe quelle vitesse), appuyez sur clignoter sur l’écran DEL. Utilisez les boutons et pour régler le bouton pour activer la fonction d’arrêt différé. Le ventilateur... -
Página 12: Arrière De La Hotte
MODÈLES QP330BL • QP330SS • QP330WW QP336BL • QP336SS • QP336WW QP342BL • QP342SS • QP342WW Page 12 SYSTÈME DE DÉTECTEUR DE CHALEUR CLAPET D’AIR DE COMPENSATION La hotte est compatible avec le Clapet d’air de compensation Broan Cette hotte comporte un système perfectionné de détecteur de modèle MD6T ou modèle MD8T (en option). Vendu séparément. chaleur capable de déceler une température excessive et de régler automatiquement le ventilateur au régime adéquat. Connectez le clapet d’air de compensation avec des fils de basse tension, tel qu’illustré. Pour de plus amples informations, consultez les directives... -
Página 13: Préparation De La Hotte
MODÈLES QP330BL • QP330SS • QP330WW QP336BL • QP336SS • QP336WW QP342BL • QP342SS • QP342WW Page 13 PRÉPARATION DE LA HOTTE À l’aide des diagrammes ci-dessous, déterminez l’emplacement exact des coupes à effectuer pour le conduit et le fil d’alimentation électrique dans l’armoire ou le mur. Pour une installation sans conduit, NE PAS découper de trou pour le conduit. Retirez le sac de pièces de l’intérieur de la boîte de matériel inclus avec le hotte. CONDUIT VERTICAL VIS DE MONTAGE DE 8,3 X 25,4 CM (3-¼ X 10 PO) Enlevez toutes les pellicules protectrices de la hotte (hottes en LA HOTTE (5) acier inoxydable seulement). 29,5 cm (hotte de 30 po / 76 cm) 29,5 cm (hotte de 30 po / 76 cm) 37,1 cm (hotte de 36 po / 91,4 cm) 37,1 cm (hotte de 36 po / 91,4 cm) 44,8 cm (hotte de 42 po / 107 cm) - Página 14 MODÈLES QP330BL • QP330SS • QP330WW QP336BL • QP336SS • QP336WW QP342BL • QP342SS • QP342WW Page 14 11 INSTALLATION SANS CONDUIT SEULEMENT : Veuillez vous procurer un ensemble de (2) filtres pour hottes sans conduit de 76 cm (30 po) de largeur (Modèle BPPF30) ou 91,4 cm (36 po) de largeur (Modèle BPPF36) ou un ensemble de (3) filtres pour hottes sans conduit de 107 cm (42 po) de largeur (Modèle BPPF42) chez votre distributeur local ou votre détaillant. Fixez les filtres pour hotte sans conduit aux filtres d’aluminium selon les DÉFLECTEUR instructions accompagnant les filtres pour hotte sans conduit. NON CANALISÉ INSTALLATIONS SANS CONDUIT - Passez à « INSTALLATION DE LA HOTTE ». OUVERTURE RONDE PRÉAMORCÉE DE INSTALLATION SANS CONDUIT SEULEMENT : 17,8 cm (7 po) (enlevez Du sac de pièces : Fixez le déflecteur non canalisé à la également la plaque boîte à air à l’aide de 2 vis et 2 rondelles. pour conduit vertical de 8,3 x 25,4 cm [3-¼ x 10 po]) OUVERTURE PRÉAMORCÉE OUVERTURE POUR PRÉAMORCÉE CONDUIT POUR CONDUIT VERTICAL DE HORIZONTAL DE 8,3 X 8,3 X 25,4 CM 25,4 CM (3-¼ X 10 PO) (3-¼ X 10 PO) 12 INSTALLATION AVEC CONDUITS SEULEMENT :...
- Página 15 MODÈLES QP330BL • QP330SS • QP330WW QP336BL • QP336SS • QP336WW QP342BL • QP342SS • QP342WW Page 15 INSTALLATION DE LA HOTTE RACCORD DU CÂBLAGE AVERTISSEMENT Pour réduire les risques de choc électrique, coupez le courant du panneau électrique. Verrouillez ou posez un sceau sur le panneau afin d’éviter que le courant ne soit VIS DE MISE rétabli accidentellement. À LA TERRE COUVERCLE DU BOÎTIER DE CONNEXION ÉLECTRIQUE CÂBLE ÉLECTRIQE DE LA MAISON Connectez le câble électrique de la maison avec les fils de la hotte - le NOIR avec le NOIR, le BLANC avec le BLANC, et le VERT ou FIL NU avec la vis de mise à la terre. Replacez le OUVERTURE couvercle du boîtier de connexion électrique. PRÉAMORCÉE DU CÂBLE Reposez le panneau inférieur avec les 6 vis enlevées à D’ A LIMENTATION l’étape 6. ÉLECTRIQUE INSTALLATION DES A MPOULES Enlevez le couvercle du boîtier de connexion électrique à l’intérieur de la hotte et l’ouverture préamorcée de câble d’alimentation électrique appropriée sur le dessus ou à l’arrière de la hotte.
-
Página 16: Pièces De Rechange
P laque pour conduit rond de 17,8 cm (7 po) (comprend la quincaillerie conduit - achetés et assemblés à l’étape 11. de montage) 97018256 E nsemble d’interface utilisateur blanche (comprend interface, plaque GARANTIE indicatrice, quincaillerie de montage) 97018257 E nsemble d’interface utilisateur noire (comprend interface, plaque indicatrice, quincaillerie de montage) 99528258 Plaque indicatrice, blanche 99528259 Plaque indicatrice, noire Garantie limitée d’un an 97018251 Ensemble de condensateur (comprend écrous à fil, vis de montage) Broan-NuTone garantit au consommateur et acheteur initial de ses produits que ceux-ci 97018225 P anneau d’éclairage blanc DROIT (comprend la quincaillerie de montage) sont exempts de tout vice de matériau ou de fabrication pour une période d’un (1) an 97018226 P anneau d’éclairage noir DROIT (comprend la quincaillerie de montage) à compter de la date d’achat originale. CETTE GARANTIE NE COMPORTE AUCUNE 97018227 P anneau d’éclairage inox DROIT (comprend la quincaillerie de montage) AUTRE GARANTIE, EXPRESSE OU TACITE, Y COMPRIS, MAIS SANS S’Y LIMITER, 97018205 Ensemble de filtres pour hotte de 76 cm (30 po) (2 par sac) LES GARANTIES TACITES DE VALEUR MARCHANDE OU D’ADAPTATION À UN USAGE 97018206 Ensemble de filtres pour hotte de 91,4 cm (36 po) (2 par sac) PARTICULIER. 97018207 Ensemble de filtres pour hotte de 107 cm (42 po) (2 par sac) Durant cette période d’un an, Broan-NuTone réparera ou remplacera gratuitement, à sa... - Página 17 (107 cm) (Modelo BPPF42) con su distribuidor o minorista 4. Use una cacerola del tamaño adecuado. Siempre use utensilios local, y acóplelos a los filtros de malla de aluminio. de cocina que sean apropiados para el tamaño del elemento de Registre su producto en Internet en: www.broan.com la superficie. PARA REDUCIR EL RIESGO DE LESIONES A LAS PERSONAS Aviso al instalador: Deje este manual EN CASO DE UN INCENDIO PRODUCIDO POR GRASA EN UNA con el dueño de la casa.
- Página 18 MODELOS QP330BL • QP330SS • QP330WW QP336BL • QP336SS • QP336WW QP342BL • QP342SS • QP342WW Página 18 CONTENIDO FUNCIONAMIENTO ENCIENDA siempre la campana antes de comenzar a cocinar, a fin de SE INCLUYE CON LA CAMPANA: establecer un flujo de aire en la cocina. Después de apagar la estufa, deje que la campana funcione durante unos cuantos minutos para despejar el aire. CONECTOR PARA Para hacer funcionar la campana, haga lo siguiente: REGULADOR/ CONDUCTO DE 3¼ X 10 PULG. FILTROS PARA (8.3 X 25.4 CM) GRASA (2 PARA LAS CAMPANAS DE 30 Y 36 PULG. (76 Y 91.4 CM) Y 3 PARA LAS CAMPANAS DE 42 PULG.
-
Página 19: Apagado Con Retardo De 10 Minutos
MODELOS QP330BL • QP330SS • QP330WW QP336BL • QP336SS • QP336WW QP342BL • QP342SS • QP342WW Página 19 AJUSTES DEL RELOJ APAGADO CON RETARDO DE 10 MINUTOS Presione una vez el botón ; las “horas” comenzarán a destellar en la Cuando el ventilador de la campana esté encendido (en cualquier pantalla de LED. Use los botones y para ajustar el horario adecuado velocidad), presione el botón para activar la función de apagado en el reloj. Un pequeño indicador se iluminará en la esquina izquierda de con retardo. Cuando se activa, el ventilador de la campana se apagará la pantalla de LED para designar “pm” . Después de configurar las horas, automáticamente después de que transcurran 10 minutos. Esta función presione el botón para hacer avanzar al menú a la selección de se activa cuando aparece lo siguiente en la pantalla de diodos LED: Un minutos. Los minutos comenzarán a destellar en la pantalla de LED. Use indicador verde iluminado arriba del botón de retardo... -
Página 20: Posterior De La Campana
MODELOS QP330BL • QP330SS • QP330WW QP336BL • QP336SS • QP336WW QP342BL • QP342SS • QP342WW Página 20 REGULADOR DE AIRE DE REPUESTO SISTEMA HEAT SENTRY La campana es compatible con el regulador de aire de repuesto Broan, Esta campana está equipada con un sistema Heat Sentry de avanzada Modelo MD6T o Modelo MD8T (opcional). Se compra por separado. que vigila el exceso de temperatura y ajusta automáticamente al Realice la conexión del regulador de aire de repuesto con cableado ventilador en la velocidad adecuada. de bajo voltaje, como se ilustra. Consulte información adicional en las 1) Si el ventilador está encendido, el sistema Heat Sentry aumentará instrucciones del regulador de aire de repuesto. la velocidad del ventilador cuando la temperatura está elevada. Si la temperatura sigue subiendo, el sistema Heat Sentry seguirá aumentando... -
Página 21: Prepare La Campana
MODELOS QP330BL • QP330SS • QP330WW QP336BL • QP336SS • QP336WW QP342BL • QP342SS • QP342WW Página 21 Guíese por el diagrama correspondiente (a continuación) para PREPARE LA CAMPANA colocar los conductos y hacer el corte exacto para la conexión eléctrica en el gabinete o en la pared. Para instalaciones en sistemas sin conductos, NO haga ningún orificio de acceso para conducto. Quite la bolsa de piezas del interior del cuadro de hardware incluido con la campana. CONDUCTO VERTICAL DE 3¼ X 10 PULG. TORNILLOS DE MONTAJE (8.3 X 25.4 CM) Quite todo el forro de plástico protector de la campana DE LA CAMPANA (5) (únicamente campanas de acero inoxidable). 11 5/8 pulg. (29.5 cm) 11 5/8 pulg. (29.5 cm) (campana de 30 pulg./76 cm) (campana de 30 pulg./76 cm) 14 5/8 pulg. -
Página 22: Placa De Sistema Sin Conducto
MODELOS QP330BL • QP330SS • QP330WW QP336BL • QP336SS • QP336WW QP342BL • QP342SS • QP342WW Página 22 11 ÚNICAMENTE EN INSTALACIONES SIN CONDUCTOS: Compre un juego de dos (2) filtros para sistemas sin conductos para las campanas de 30 pulg. (76 cm) (Modelo BPPF30) y para las campanas de 36 pulg. (91.4 cm) (Modelo BPPF36) o un juego de tres (3) filtros para sistemas sin conductos para las campanas de 42 pulg. (107 cm) (Modelo BPPF42) con su distribuidor o DESVIADOR minorista local. Siguiendo las instrucciones que acompañan a los PARA SISTEMAS filtros para sistemas sin conductos, acople éstos a los filtros de SIN CONDUCTOS malla de aluminio. P ARA INSTALACIONES SIN CONDUCTOS: pase directamente al paso “INSTALE LA CAMPANA” . PLACA REDONDA ÚNICAMENTE EN INSTALACIONES SIN CONDUCTOS: DE AGUJERO CIEGO De la lista de piezas: Fije el desviador para sistemas sin DE 7 pulg. (17.8 cm) conductos a la caja de aire con 2 tornillos y 2 arandelas. (también desmonte la placa vertical de 3¼ x 10 pulg. [8.3 x 25.4 cm]) TORNILLOS PLACA HORIZONTAL DE 3¼ X PLACA VERTICAL 10 PULG. DE AGUJERO CIEGO (8.3 X 25.4 CM) DE 3¼ X 10 PULG. -
Página 23: Instale La Campana
MODELOS QP330BL • QP330SS • QP330WW QP336BL • QP336SS • QP336WW QP342BL • QP342SS • QP342WW Página 23 INSTALE LA CAMPANA CONECTE EL CABLEADO ADVERTENCIA Para reducir el riesgo de una descarga eléctrica, desconecte el suministro eléctrico al panel de servicio. Bloquee el panel de servicio o póngale una etiqueta de seguridad para evitar TORNILLO que alguien conecte accidentalmente la energía eléctrica. DE TIERRA CUBIERTA DE LA CAJA DE CABLEADO CABLE ELÉCTRICO ELÉCTRICO DE LA CASA Conecte el cable eléctrico de la casa al cableado de la campana: cable NEGRO con NEGRO, BLANCO con BLANCO y VERDE o SIN FORRO al tornillo de tierra. Vuelva a colocar la ORIFICIO cubierta de la caja de cableado eléctrico. CIEGO DEL CABLE Vuelva a fijar el recipiente inferior con los 6 tornillos que quitó ELÉCTRICO en el paso 6. INSTALE LAS BOMBILLAS Quite la cubierta de la caja de cableado eléctrico del interior de la campana y el correspondiente agujero ciego del cableado eléctrico desde la parte superior o trasera de la campana. HERRAMIENTA DE VENTOSA (1) EMPUJAR HACIA BOMBILLA ADENTRO... -
Página 24: Piezas De Servicio
97018256 M ontaje de interfaz del usuario, color blanco (incluye interfaz, placa de identificación, piezas de montaje) 97018257 M ontaje de interfaz del usuario, color negro (incluye interfaz, placa de GARANTÍA identificación, piezas de montaje) 99528258 Placa de identificación, blanca 99528259 Placa de identificación, negra 97018251 Juego de capacitor (incluye tuercas de alambre, tornillo de montaje) 97018225 Panel de luces DERECHO color blanco (incluye piezas de montaje) Garantía limitada por un año 97018226 Panel de luces DERECHO color negro (incluye piezas de montaje) Broan-NuTone garantiza al consumidor comprador original de sus productos que 97018227 Panel de luces DERECHO de acero inoxidable (incluye piezas de montaje) tales productos estarán libres de defectos en materiales o mano de obra durante un 97018205 Juego de filtros de 30 pulg. (76 cm) (2 por bolsa) período de un (1) año a partir de la fecha de la compra original. NO EXISTEN OTRAS 97018206 Juego de filtros de 36 pulg. (91.4 cm) (2 por bolsa) GARANTÍAS, EXPLÍCITAS O IMPLÍCITAS, INCLUYENDO, ENTRE OTRAS, GARANTÍAS 97018207 Juego de filtros de 42 pulg. (107 cm) (3 por bolsa) IMPLÍCITAS DE COMERCIALIZACIÓN O APTITUD PARA UN PROPÓSITO PARTICULAR. 97018220 Rueda de ventilador (incluye tuerca de montaje) Durante este período de un año, Broan-NuTone, a su criterio, reparará o reemplazará 97018223 Juego de motor (incluye motor, aislantes, piezas de montaje)