Publicidad
Idiomas disponibles
Idiomas disponibles
Información de seguridad .............. 5
Instrucciones de operación
Quemadores superiores .............. 6,7
Utensilios ............................................ 8
Horno ........................................... 9, 11
Horneado y rostizado por tiempo
............................................................ 9
Termostato ..................................... 11
Cuidado y Limpieza ................ 12, 15
Instrucciones de instalación .. 17, 24
Solución de problemas ........... 25, 27
Accesorios ..................................... 30
Servicios al consumidor
Serviplus .......................................... 57
Garantía ......................................... 58
Anote aquí los números de modelo
y serie:
Modelo #
Serie #
Puede localizarlos en una etiqueta, por
detrás del cajón de almacenamiento,
en el marco del horno.
Manual de uso y cuidado e
instrucciones de instalación
Modelos de quemadores eléctricos
superiores radiantes:
Modelos equipados con limpieza
estándar
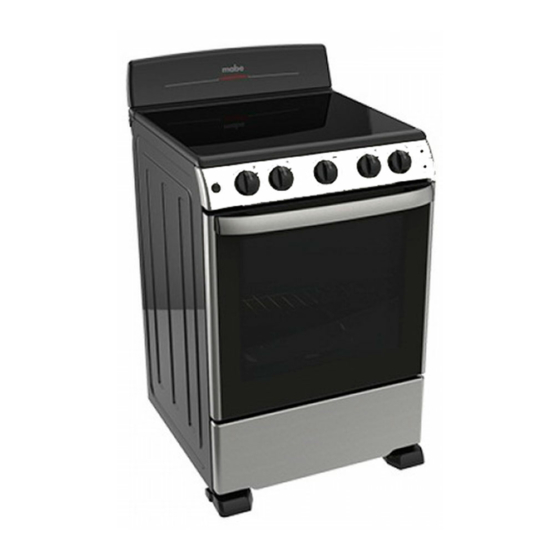
EME6063
For the English version,
go to page 31.
295D3817P007
Publicidad
Capítulos

Manuales relacionados para mabe EME6063


Resumen de contenidos para mabe EME6063
-
Página 1: Tabla De Contenido
Utensilios ..........8 Modelos equipados con limpieza Horno ........... 9, 11 estándar Horneado y rostizado por tiempo EME6063 ............9 Termostato ........11 Cuidado y Limpieza ....12, 15 Instrucciones de instalación .. 17, 24 Solución de problemas ... 25, 27 Accesorios ........ - Página 2 INSTRUCCIONES IMPORTANTES DE SEGURIDAD. LEA TODAS LAS INSTRUCCIONES ANTES DE USAR. ADVERTENCIA: LEA TODAS LAS INSTRUCCIONES DE SEGURIDAD ANTES DE UTILIZAR ESTE PRODUCTO. NO SEGUIR ESTAS INSTRUCCIONES PUEDE GENERAR UN INCENDIO, UNA DESCARGA ELÉCTRICA, LESIONES CORPORALES O LA MUERTE. DISPOSITIVO ANTIVOLCADURAS ADVERTENCIA Riesgo de Volcaduras Un niño o un adulto pueden hacer volcar la estufa y morir.
-
Página 3: Precauciones De Seguridad
COCINE COMPLETAMENTE LA CARNE ROJA Y LAS AVES... Cocine completamente la carne roja y las aves: la carne roja hasta una temperatura INTERNA de 160 ºF (72 ºC) por lo menos y las aves hasta una temperatura INTERNA de 180 ºF (83 ºC) por lo menos. -
Página 4: Información De Seguridad
INFORMACIÓN IMPORTANTE DE SEGURIDAD LEA TODAS LAS INSTRUCCIONES ANTES DE USAR SU ESTUFA HORNO • Aléjese de la estufa cuando abra la puerta del • El jalar las parrillas hasta el tope de bloqueo horno. El aire caliente o vapor que escapa, es muy cómodo cuando necesita levantar ali- puede causar quemaduras en manos, cara y/ mentos pesados. -
Página 5: Quemadores Eléctricos Radiantes
INFORMACIÓN IMPORTANTE DE SEGURIDAD LEA TODAS LAS INSTRUCCIONES ANTES DE USAR SU ESTUFA ADVERTENCIA QUEMADORES ELÉCTRICOS RADIANTES Tenga cuidado al tocar la cubierta. La superficie de vidrio de la cubierta retendrá calor después de que los controles han sido apagados. Evite rayar la cubierta de cristal. -
Página 6: Usando Los Quemadores De La Cubierta
Usando los quemadores de la cubierta A lo largo de este manual, las características y apariencia pueden variar con respecto a las de su modelo. Controles de los quemadores de la cubierta Los quemadores de la cubierta y sus En una cocina silenciosa, usted podría controles están diseñados para proporciona- escuchar unos ligeros clics durante la rle una variedad de posiciones de calor para... -
Página 7: Usando Los Quemadores Eléctricos Radiantes
Usando los quemadores de la cubierta A lo largo de este manual, las características y apariencia pueden variar con respecto a las de su modelo. Luces indicadoras (solamente modelos de quemadores radiantes con cubierta de cristal). La luz indicadora HOT (CALIENTE) se ilumina al encender cualquier quemador eléctrico radiante, y permanece encendido hasta que la superficie se enfría lo suficiente... -
Página 8: Seleccionando El Tipo De Utensilios Para Cocinar
Seleccionando el tipo de utensilios para cocinar Esta información le ayudará a seleccionar utensilios para cocinar que proporcionan un buen desempeño sobre cubiertas de cristal Acero Inoxidable: Vitrocerámica: Recomendado. Se puede usar, aunque no es recomendable. Bajo desempeño. Puede rayar la superficie. Aluminio: Barro: Se recomienda el pesado. - Página 9 Cocinando en una sartén Wok Recomendamos usar woks de fondo plano El colocar el anillo sobe el quemador gener- solamente. Están disponibles en su tienda de ará una acumulación de calor que dañará venta al menudeo local. la cubierta de porcelana. No trate de usar No utilice sartenes wok que tienen anillos de dichos sartenes wok sin el anillo.
- Página 10 Usando el horno. Precalentando y colocación de charolas Precaliente el horno si la receta lo requiere. Los resultados de horneo serán mejorss si las Para precalentar programe el horno a la charolas para hornear están centradas en el temperatura correcta. El precalentado es horno lo más posible.
-
Página 11: Ajuste Usted Mismo El Termostato Del Horno
Ajuste usted mismo el termostato del horno Quizá su horno nuevo cocine diferente que el que reemplazó. Use su horno nuevo durante unas pocas semanas para familiarizarse con él. Si usted piensa que su horno nuevo trabaja demasiado caliente o demasiado frío, entonces usted mismo puede ajustar el termostato. -
Página 12: Cuidado Y Limpieza
Cuidado y limpieza de la estufa Asegúrese de que el horno no esté conectado y de que las superficies se encuentren a temperatura ambiente antes de limpiar cualquier parte de la estufa. ADVERTENCIA Riesgo de Volcaduras Un niño o un adulto pueden hacer volcar la estufa y morir. Verifique que el soporte antivolcaduras se haya instalado y ajustado correctamente. - Página 13 Brazo bisagra Puerta removible Para reinstalar la puerta La puerta del horno es removible, pero pesada. Quizá necesite ayuda para retirarla y para reins- 1. Sujete firmemente ambos lados de la puerta, talarla. por la parte superior. Para remover la puerta 2.
- Página 14 Parrillas del horno Limpie las parrillas del horno con un limpiador a- Para facilitar el deslizamiento de las parrillas, brasivo o con una fibra para tallar. Después de aplique una pequeña cantidad de aceite vegetal limpiar, enjuague las parrillas con agua limpia y o aceite para cocinar a una toalla de papel y lim- seque con un trapo limpio.
-
Página 15: Limpiando La Cubierta De Cristal
Limpiando la cubierta de cristal Limpieza normal de uso diario Use ÚNICAMENTE un limpiador para cubiertas 4. Utilice una toalla de papel especial para cu- cerámicas para la cubierta de cristal. Otro tipo de biertas cerámicas, para limpiar toda la super- limpiadores pueden no ser tan efectivos. -
Página 16: Superficie De Cristal - Riesgo De Daños Permanentes
Marcas metálicas y rayones 1. Tenga cuidado de no arrastrar cacerolas y 2. Si se deja que las cacerolas que tienen un re- sartenes sobre la cubierta de cristal. Esto de- cubrimiento delgado de aluminio o cobre jará marcas metálicas sobre la superficie de hiervan hasta que el líquido se consuma, en- la cubierta de cristal. -
Página 17: Instrucciones De Instalación
Instrucciones Estufas eléctricas MABE de 60 cm de instalación ANTES DE QUE USTED COMIENCE POR SU SEGURIDAD: Lea estas instrucciones completa y cuidadosamente. Debe cumplirse con todas las dimensiones de trazos y espacios IMPORTANTE: • Guarde estas instrucciones para ser usa- para obtener un uso seguro de la estufa. - Página 18 RETIRE EL MATERIAL DE EMBARQUE Retire el material de empaque. El no remover todo el material Modelo de empaque podría resultar en daños al aparato. EME6063 106 cm (41¾") 60 cm (23¾") 5.08 cm (2") 112.7 cm (44⅜") Su estufa, como muchos otros aparatos electrodomésticos, es...
-
Página 19: Conexiones Eléctricas
Instrucciones de instalación CONEXIONES ELÉCTRICAS REQUISITOS ELÉCTRICOS REQUERIMIENTOS ELÉCTRICOS ADVERTENCIA: POR SU PROPIA SEGURIDAD, NO PRECAUCIÓN: POR SEGURIDAD PERSONAL, NO USE UNA EXTENSIÓN ELÉCTRICA CON ESTE USE UN CORDÓN ELÉCTRICO DE EXTENSIÓN APARATO. RETIRE EL FUSIBLE DE SU CASA O CON ESTE APARATO. -
Página 20: Instalación Del Cordón Eléctrico Ydispositivo Reductor De Tensión
Instrucciones de instalación INSTALACIÓN DEL CORDÓN ELÉCTRICO Y Use exclusivamente un cordón eléctrico para estufa, enlistado DISPOSITIVO REDUCTOR DE TENSIÓN por UL de 3 hilos ó 4 hilos conductores. Estos cordones pueden incluir terminales tipo anillo y un dispositivo para reducir la ten- sión. -
Página 21: Instalación De Un Cordón Eléctrico De 3 Conductores
Instrucciones de instalación REQUISITOS ELÉCTRICOS (CONT.) INSTALACIÓN DE UN CORDÓN ELÉCTRICO Solamente para instalaciones con cordón eléctrico (con- DE 3 CONDUCTORES sulte el siguiente paso si usa conducto portacables), en- samble el dispositivo reductor de tensión en el agujero. In- troduzca el cordón eléctrico a través del dispositivo reduc- ADVERTENCIA: EL CABLE NEUTRAL O DE CO- tor de tensión y apriete. -
Página 22: Conductores
Instrucciones de instalación REQUISITOS ELÉCTRICOS (CONT.) INSTALACIÓN DE UN CORDÓN ELÉCTRICO INSTALACIÓN DE CONDUCTO DE 4 CONDUCTORES PORTACABLES (CONDUIT) DE 3 CONDUCTORES ADVERTENCIA: EL CABLE NEUTRAL DEL CIRCUI- Afloje los tres tornillos inferiores del bloque de terminales. TO DE ALIMENTACIÓN DEBE CONECTARSE A LA Inserte la punta del cable pelado (Blanco/Neutro) a través TERMINAL NEUTRAL UBICADA AL CENTRO DEL del orificio de la terminal central del bloque de terminales. -
Página 23: Instale La Estufa
Instrucciones de instalación REQUISITOS ELÉCTRICOS (CONT.) INSTALE LA ESTUFA INSTALACIÓN DE CONDUCTO INSTALACIÓN DEL DISPOSITIVO PORTACABLES (CONDUIT) DE 4 ANTIVOLCADURAS CONDUCTORES ADVERTENCIA Afloje los tres tornillos inferiores del bloque de terminales. Retire el tornillo y placa de conexión a tierra y apártelos. Corte y deshágase de la cinta de conexión a tierra. -
Página 24: Nivele La Estufa
Instrucciones de instalación NIVELE LA ESTUFA LISTA DE VERIFICACIÓN DE LA OPERACIÓN Instale las parrillas en el horno y acomode la estufa en el • Encienda un quemador de la cubierta para observar que la lugar donde quedará instalada. resistencia brilla dentro de un periodo de 60 segundos. Apa- gue el quemador cuando detecte el brillo. - Página 25 Antes de que llame para solicitar servicio... Consejos para solucionar problemas Ahorre tiempo y dinero. Revise primero los cuadros en las siguientes páginas y quizá no necesite llamar para pedir un servicio. Problema é Quemadores eléctricos radiantes Los quemadores eléctri- Se están usando utensilios inapropia- •...
- Página 26 Antes de que llame para solicitar servicio... é Horno: Todos los modelos La luz del horno no traba- El foco está flojo o defectuoso.• Apriete o reemplace el foco. El interruptor que opera la iluminación • Llame para solicitar servicio. está...
- Página 27 Antes de que llame para solicitar servicio... é Los alimentos no se asan El horno no está programado en la • En modelos que vienen con una perilla de temperatura, asegú- posición para ASAR . apropiadamente rese de que usted giró la perilla hasta la posición BROIL (ASAR). En modelos con botón BROIL (ASAR), asegúrese de que esté...
-
Página 28: Accesorios
Accesorios ¿Está buscando algo más? Para comprar partes o accesorios para su aparato, contacte al centro autorizado de servicio. Parrillas para horno Charola de asador Resistencias para horno Perillas Limpiador Focos Almohadillas limpiadoras Raspador... - Página 29 Owner’s Manual and Safety information ......30 Installation Instructions Operating Instructions Model Surface Units ......34, 35 EME6063 Cookware ........36 Oven ..........37 Time Baking and roasting ....37 Thermostat ........38 Care and Cleaning ....39, 43 Installation Instructions ..... 44, 51 Troubleshooting Tips ....
-
Página 30: Safety Information
IMPORTANT SAFETY INFORMATION. READ ALL INSTRUCTIONS BEFORE USING. WARNING! READ ALL SAFETY INSTRUCTIONS BEFORE USING THE PRODUCT. FAILURE TO FOLLOW THESE INSTRUCTIONS MAY RESULT IN FIRE, ELECTRIC SHOCK SERIOUS INJURY OR DEATH. ANTI-TIP DEVICE WARNING Tip-Over Hazard A child or adult can tip the range and be killed. Verify the anti-tip bracket has been properly installed and engaged. -
Página 31: Safety Precautions
COOK MEAT AND POULTRY THOROUGHLY... Cook meat and poultry thoroughly—meat to at least an INTERNAL temperature of 160° F and poultry to at least an INTERNAL temperature of 180°F. Cooking to these temperatures usually protects against foodborne illness. WARNING SAFETY PRECAUTIONS •... -
Página 32: Surface Units
IMPORTANT SAFETY INFORMATION. READ ALL INSTRUCTIONS BEFORE USING. WARNING OVEN • Stand away from the range when opening • When using cooking or roasting bags in the the oven door. Hot air or steam which es- oven, follow the manufacturer’s directions. capes can cause burns to hands, face •... - Página 33 IMPORTANT SAFETY INFORMATION. READ ALL INSTRUCTIONS BEFORE USING. WARNING! RADIANT SURFACE UNITS (on some models) Use care when touching the cooktop. The glass surface of the cooktop will retain heat after the con- trols have been turned off. • Avoid scratching the glass cooktop. The cook- •...
- Página 34 Using the surface units. Throughout this manual, features and appearance may vary from your model. Surface Cooking Controls Your surface units and controls are de- In a quiet kitchen, you may hear slight signed to give you a variety of heat set- clicking sounds during cooking, indicating tings for surface unit cooking.
-
Página 35: Temperature Limiter
Using the surface units. Throughout this manual, features and appearance may vary from your model. Indicator Lights (on radiant glass models only). A Hot indicator light will glow when any radiant el- ement is turned on, and will remain on until the surface is cool enough to touch. - Página 36 Selecting types of cookware. The following information will help you choose cookware that will give good performance on glass cooktops. Stainless Steel: Glass-ceramic: recommended usable, but not recommended Poor performance. May scratch the sur- Aluminum: face. heavy weight recommended. Stoneware: Good conductivity.
-
Página 37: Preheating And Pan Placement
Oven Temperature Knob Turn this knob to the setting you want. The oven cycling light glows until the oven reaches your selected temperature, then goes off and on with the oven element(s) during cooking. Before you begin... To remove a shelf, pull it toward you, tilt To avoid possible burns, place the shelves the front end up and pull it out. - Página 38 Adjust the oven thermostat – Easy to do yourself! You may find that your new oven cooks differently that the one it replaced. Use your new oven for a few weeks to be- come more familiar with it. If you still think your new oven is too hot or too cold, you can adjust the thermostat yourself. Do not use thermometers, such as those found in grocery stores, to check the temperature setting of your oven.
-
Página 39: Care And Cleaning
Care and cleaning of the range. Be sure electrical power is off and all surfaces are cool before cleaning any part of the range. WARNING Tip-Over Hazard A child or adult can tip the range and be killed. Verify the anti- tip bracket has been properly installed and engaged. -
Página 40: Broiler Pan And Grid
Hinger arm Lift-Off Oven Door The oven door is removable, but it is To replace the door: heavy. You may need help removing and 1. Firmly grasp both sides of the door at the replacing the door. top. To remove the door: 2. -
Página 41: Oven Vent
Oven Shelves Clean the oven shelves with an abrasive To make the shelves slide more easily, ap- cleanser or scouring pad. After cleaning, ply a small amount of vegetable oil or rinse the shelves with clean water and dry cooking oil to a paper towel and wipe the with a clean cloth. - Página 42 Cleaning the glass cooktop. Normal Daily Use Cleaning ONLY use Ceramic Cooktop Cleaner on 4. Use a paper towel for Ceramic Cook- the glass cooktop. Other types of cleaners tops to clean the entire cooktop sur- may not be as effective. face.
- Página 43 Cleaning the glass cooktop. Metal Marks and Scratches 1. Be careful not to slide pots and pans 2. If pots with a thin overlay of aluminum across your cooktop. It will leave metal or copper are allowed to boil dry the markings on the cooktop surface.
-
Página 44: Installation Instructions
Installation 60 cm mabe Electric Ranges Instructions BEFORE YOU BEGIN FOR YOUR SAFETY: Read these instructions completely and carefully. All rough-in and spacing dimensions must be met for safe use of your range. Electricity to the range can be IMPORTANT •... -
Página 45: Prepare The Opening
Phillips Screwdriver Flat-blade Screwdriver 23¾±¼” PARTS INCLUDED 36”¾ ± ¼” Anti-Tip Bracket Kit Model REMOVE SHIPPING MATERIAL EME6063 41¾" 23¾" 2" 44⅜" Remove packaging materials. Failure to remove packaging materials could result in damage to the Flooring under the range appliance. -
Página 46: Electrical Requirements
Installation Instructions ELECTRICAL CONNECTIONS ELECTRICAL REQUIREMENTS ELECTRICAL REQUIREMENTS CAUTION: For personal safety, do not WARNING: For personal safety, do not use an extension cord with this appli- use an extension cord with this appli- ance. Remove house fuse or open cir- ance. -
Página 47: Electrical Connections
Installation Instructions ELECTRICAL CONNECTIONS POWER CORD AND STRAIN RELIEF Use only a 3-conductor or a 4-conductor UL-listed range cord. These cords may be provided with ring ter- INSTALLATION minals on wire and a strain relief device. A range cord rated at 40 amps with 125/250 minimum Remove the wire cover (on the back of the range) by volt range is required. - Página 48 Installation Instructions ELECTRICAL CONNECTIONS (CONT.) 3-WIRE POWER CORD INSTALLATION For power cord installations only (see the next step if using conduit), assemble the strain relief in the hole. WARNING: The neutral or ground wire of Insert the power cord through the strain relief and tighten.
- Página 49 Installation Instructions ELECTRICAL CONNECTIONS (CONT.) 3-WIRE CONDUIT INSTALLATION 4-WIRE POWER CORD INSTALLATION WARNING: The neutral wire of the supply Loosen the 3 lower terminal screws from the termi- nal block. Insert the center bare wire (white/ neu- circuit must be connected to the neu- tral) tip through the bottom center terminal block tral terminal located in the center of the opening.
-
Página 50: Anti-Tip Device Installation
Installation Instructions ELECTRICAL CONNECTIONS (CONT.) 4-WIRE CONDUIT INSTALLATION ANTI-TIP DEVICE INSTALLATION Loosen the three lower terminal screws from the WARNING terminal block. Remove the ground screw and ground plate and retain them. Cut and discard the ground strap. DO NOT DISCARD ANY SCREWS. Insert the ground bare wire tip between the range frame and the ground plate (removed earlier) and secure it in place with the ground screw (removed... -
Página 51: Install The Range
Installation Instructions INSTALL THE RANGE LEVEL THE RANGE OPERATION CHECKLIST Install the oven racks in the oven and position the • Turn on one of the surface units to observe that range where it is to be installed. the element glows within 60 seconds. Turn the unit off when glow is detected. -
Página 52: Troubleshooting Tips
Before you call for service... Troubleshooting Tips Save time and money! Review the charts on the following pages first and your may not need to call for ser- vice. Problem Possible Causes What To Do Radiant Cooktops Surface units will not Improper cookware being used. - Página 53 Before you call for service... Problem Possible Causes What To Do Oven-All Models Oven light does not Light bulb is loose or defective. • Tighten or replace the bulb. work Switch operating light is broken • Call for service. Oven will not work Plug on range is not completely •...
- Página 54 Before you call for service... Problem Possible Causes What To Do Food does not broil Oven is not set to BROIL. • On models with a temperature knob, make sure you properly turn it all the way to the BROIL position. On models with a BROIL pad, make sure it is turned on.
-
Página 55: Accesories
Accessories Looking For Something More? To inquire about purchasing a part or an accessory for your appliance, contact the authorized service cen- ter. Oven Elements Oven Racks Knobs Light Bulbs Cleaner Cleaning Pads Scraper... - Página 56 Notes...
-
Página 57: Centros De Servicio
El especialista en servicio de línea blanca Antes de solicitar un servicio de garantía: 1. Asegúrese de haber seguido las indicaciones de instalación, uso y cuidados que menciona el instructivo. 2. Localice y tenga a la mano su garantía debidamente sellada o bien la factura, nota o comprobante de compra. -
Página 58: Póliza De Garantía
Póliza de garantía Leiser S. de R.L. de C.V. garantiza este producto por 1 año a partir de la fecha de compra, contra cualquier defecto atribuible a la calidad de sus materiales o mano de obra durante su fabricación, bajo las siguientes condiciones: 1.