Klarstein 10011485 Instrucciones De Uso
Ocultar thumbs
Ver también para 10011485:
- Manual del usuario (52 páginas) ,
- Manual de instrucciones (96 páginas)

Manuales relacionados para Klarstein 10011485


Resumen de contenidos para Klarstein 10011485
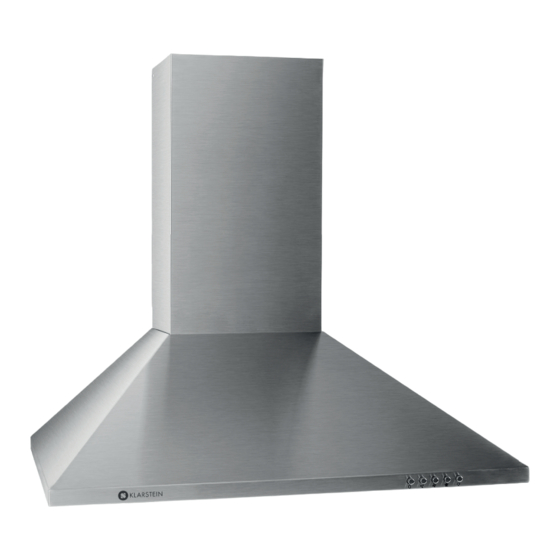
- Página 1 Zitruspresse orange Dunstabzugshaube 10011485 10011489 10026366 10011486 10011490 10026367 10008166 10008167 10008168 10011487 10022115 10026368 10011488 10022116 10028132 10028133...
-
Página 2: Sicherheitshinweise
Sehr geehrter Kunde, zunächst möchten wir Ihnen zum Erwerb Ihres Gerätes gratulieren. Bitte lesen Sie die folgenden Anschluss- und Anwendungshinweise sorgfältig durch und befolgen Sie die- se um möglichen technischen Schäden vorzubeugen. SICHERHEITSHINWEISE Installation • Das Gerät muss durch einen qualifizierten Techniker installiert werden. •... -
Página 3: Für Den Installateur
• Stellen Sie sicher, dass Leitungen nicht mit den sich bewegenden Teilen in Kontakt kommen und nicht gequetscht werden. • Das Gerät muss mit der Schutzerde verbunden sein. Installation (10011485/10011486/10011487) Die Distanz zwischen der Kochfläche und der untersten Kante der Dunstabzugshaube muss mindestens 65 cm betragen (siehe Bild 1) Ist die Höhe definiert, bringen Sie die Verankerung an der entsprechenden Stelle an. - Página 4 Klammer für die Kaminverblendung Bild 1 Verankerung Bild 2 Innenseite der Kaminverblendung Rohverbindung Außenliegende Kaminklammer Außenseite der Kaminverblendung Bild 3 Sicherheits- schrauben Bild 4 Bild 5...
- Página 5 Installation (10011488/10011489/10011490) (10026366/10026367/10026368) Die Distanz zwischen der Kochfläche und der untersten Kante der Dunstabzugshaube muss mindestens 65 cm betragen (siehe Bild 1) Ist die Höhe definiert, bringen Sie die Verankerung an der entsprechenden Stelle an. Dazu müssen Sie zuerst Bohrungen setzen (Sie benötigen eine Bohrmaschine, passende Bohrer, Dübel und Schrauben) und anschließend die Verankerung mit den Schrauben an der Wand befestigen.
- Página 6 Innenseite der Kaminverblendung außenliegende Kaminklammer Sicherheits- schrauben Außenseite der Bild 7 Kaminverblendung...
- Página 8 Richtig Falsch Bedienung Bevor Sie das Gerät zu Erstenmal nach der richtigen Installation in Betrieb nehmen, schließen Sie bitte die Haube an das Stromnetz an (beachten Sie bitte dabei die allgemeingültigen Sicherheitsbestimmungen). Knöpfe Stop: Der Motor ist „AUS“. Low: Der Motor läuft auf der niedrigsten Stufe. Mid: Der Motor läuft auf der mittleren Stufe.
- Página 9 Tasten und Anzeige Uhrzeit einstellen • Drücken und halten Sie die Timer-Taste bis die LED-Anzeige anfängt zu blinken. • Mit der Geschwindigkeitstaste erhöhen Sie die Zahl und mit der Licht-Taste verringern Sie diese. • Um Minuten einstellen zu können drücken und halten Sie die Timer-Taste erneut bis die Minuten anfangen zu blinken.
-
Página 10: Fehlerbehebung
Fehlerbehebung Problem Das Gerät funktioniert nicht Grund Keine elektrische Versorgung vorhanden Lösung Überprüfen Sie, ob der Stecker eingesteckt ist Überprüfen Sie, ob der Hauptschalter eingeschaltet ist. Problem Geringer Luftfluss Grund Aluminium Fettfilter ist verstopft Lösung Reinigen Sie den Filter und setzen Sie ihn wieder ein, wenn er getrocknet ist. Problem Geringer Luftfluss Grund... -
Página 11: Konformitätserklärung
Hinweise zur Entsorgung Befi ndet sich die linke Abbildung (durchgestrichene Mülltonne auf Rädern) auf dem Produkt, gilt die Europäische Richtlinie 2002/96/EG. Diese Produkte dürfen nicht mit dem normalen Hausmüll entsorgt werden. Informieren Sie sich über die örtlichen Regelungen zur getrennten Sammlung elektrischer und elektronischer Gerätschaf- ten. -
Página 12: Safety Instructions
Safety Instructions 1. Notice Carefully read the following important information regarding installation, safety and maintenance. Keep this information booklet accessible for further consultations. The appliance has been designed as a exhausting version (external exhaust ) or as a filter version (internal air recycle) cooker hood. - Página 13 3. With the isolated low voltage circuit board control, 12vAC input, the lights are therefore safer. 4. Special wind tunnel construction and oil collector design, free dirt will be absorbed in a second. Installation (10011485/10011486/10011487) 1. The cooker hood should be placed at a distance of 65-75cm (26-30inch) from the cooking surface for the best effect.
- Página 14 Inside chimney Extensible tube Outside chimney bracket Outside chimney Pic 3 Safety screw Pic 4 Pic 5 Installation (10011488/10011489/10011490) The cooker hood should be placed at a distance of 65-75cm (26-30inch) from the cooking surface for the best effect. See Pic 1. Install the hook on a suitable place once the installation height is fixed, and keep it in line.
- Página 17 Notice of installation 1. Before installation, please ensure the area is clean to avoid suction of the remaining bits of broken wood and dust. 2. It cannot share the same air ventilation tube with other appliance such as gas tube, warmer tube, and hot wind tube.
- Página 18 Push button • Connect the plug into the power. • Press the button “Stop”, the motor is stopped then • Press the button “Low”, the motor is running at low speed. Press the button “Mid”, the motor is running at medium speed. Press the button “High”, the motor is running at high speed. •...
- Página 19 • If “23” appears on the LED display, the speed selection will no longer operate and if “00” appears on the LED display, the light ON/OFF button will no longer operate. • When the correct hour digits appear on the LED display, press and hold the timer button until the minute digits of the LED display flash.
- Página 20 Maintenance The cleaning of the carbon grease filter mesh The filter mesh is made of high-density stainless steel. Please do not use the corrosive detergent on it. Keeping this filter clean will keep the appliance running correctly. Please strictly follow the guide- lines below. Method 1: Put the mesh into 40-50 c clean water, pour on detergent, and soak for 2-3 mins. Wear gloves and clean with a soft brush.
- Página 21 The carbon filters should be replaced every 3 - 6 months or if they show signs of damage. Abnormity and Solution Fault Cause Solution The leaf blocked Get rid of the blocking The capacitor damaged Replace capacitor Light on, but motor does not The motor jammed bearing da- Replace motor work...
-
Página 22: Hints On Disposal
Hints on Disposal According to the European waste regulation 2002/96/EG this symbol on the product or on its packaging indicates that this product may not be treated as household was- te. Instead it should be taken to the appropriate collection point for the recycling of electrical and electronic equipment. -
Página 23: Instructions De Securité
Très cher client, Nous vous félicitons avant toute chose pour l‘achat de cet appareil. Veuillez suivre attentivement les instructions de branchement et d‘utilisation qui suivent afin de ne pas provoquer d‘accidents techniques. INSTRUCTIONS DE SECURITÉ Installation • L‘appareil doit être installé par du personnel qualifié. •... -
Página 24: Pour L'installateur
• Assurez-vous que les différents conduits ne soient pas tordus. • L‘appareil doit être branché sur une prise de terre. Installation (10011485/10011486/10011487) 1.1 La distance entre votre four ou vos plaques de cuisson et la hotte doit être au moins de 65cm (illustration 1). - Página 25 Fixation pour le revêtement de la hotte Illustration 1 Crochet Illustration 2 Intérieur du revêtement de la hotte Tube extensible Support de cheminée extérieure Cheminée extérieure Illustration 3 Verrou de sécurité Illustration 4 Illustration 5...
- Página 26 Installation (10011488/10011489/10011490) (10026366/10026367/10026368) 1.1 La distance entre votre four ou vos plaques de cuisson et la hotte doit être au moins de 65cm (illus- tration 1). 1.2 Une fois la hauteur définie, installez le support contre le mur à l‘endroit indiqué en utilisant une per- ceuse et des vis et chevilles adéquates.
- Página 27 Intérieur du revêtement de la hotte Support de cheminée Verrou sécurité Cheminée extérieure Illustration 7...
- Página 29 droite faux Utilisation Branchez la hotte sur le courant en respectant les consignes concernant le branchement électrique avant de l‘utiliser. Notice of installation Boutons Stop: Le moteur est éteint. Low: Le moteur fonctionne à bas régime. Mid: Le moteur fonctionne à régime moyen. High: Le moteur fonctionne à...
- Página 30 Touches et affichage Réglage de l‘heure • Maintenez la touche Timer appuyée jusqu‘à ce que l‘affichage LED clignote. • Faites défiler les chiffres en avant avec la touche vitesse et en arrière avec la touche lumière. • Pour régler les minutes, ré-appuyez sur la touche Timer jusqu‘à ce que les minutes clignotent. •...
- Página 31 Résolution des erreurs Problème L‘appareil ne fonctionne pas. Raison Pas de courant électrique Solution Vérifiez que l‘appareil soit branché. Vérifiez que l‘appareil soit sur ON. Problème Faible aération Raison Le filtre à air est bloqué Solution Nettoyez le filtre et réinstallez-le une fois sec. Problème Faible aération Raison...
-
Página 32: Informations Sur Le Recyclage
Informations sur le recyclage Vous trouverez sur le produit l’image ci-contre (une poubelle sur roues, barrée d‘une croix), ce qui indique que le produit se trouve soumis à la directive euro- péenne 2002/96/CE. Renseignez-vous sur les dispositions en vigueur dans votre région concernant la collecte séparée des appareils électriques et électroniques. -
Página 33: Indicaciones De Seguridad
Estimado cliente: Le felicitamos por la adquisición de este producto. Lea atentamente el siguiente manual y siga cui- dadosamente las instrucciones de uso con el fin de evitar posibles daños técnicos. Indicaciones de seguridad Instalación • El aparato debe ser instalado por un técnico cualificado. •... - Página 34 • El aparato debe estar conectado a tierra. Instalación (10011485/10011486/10011487) 1.1 La distancia mínima entre la superficie de cocción y el extremo inferior de la campana debe ser de al menos 65 cm. (ver imagen 1) 1.2 Cuando haya marcado la altura, coloque el elemento de sujeción.
- Página 35 Ganchos para el armazón de la chimenea Imag. 1 Elemento de sujeción Imag. 2 Interior del armazón de la chimenea Unión de tubos Ganchos de la chimenea exteriores Exterior del armazón de la chimenea Imag. 3 Tornillos de seguridad Imag. 4 Imag.
- Página 36 Instalación (10011488/10011489/10011490) (10026366/10026367/10026368) 1.1 La distancia mínima entre la superficie de cocción y el extremo inferior de la campana debe ser de al menos 65 cm (ver imagen 1). 1.2 Cuando haya marcado la altura, coloque el elemento de sujeción. Necesitará para ello hacer los agujeros en la pared (deberá...
- Página 37 Interior del armazón de la chimenea Ganchos de la chimenea exteriores Tornillos de seguridad Exterior del armazón Imag. 7 La campana...
-
Página 39: Puesta En Funcionamiento
Correcto Incorrecto Puesta en funcionamiento Antes de que utilice el aparato por primera vez, conecte la campana a la toma de corriente (para ello cumpla con las indicaciones generales de seguridad). Notice of installation Botones Stop: El motor está apagado. Low: El motor funciona a velocidad más baja. -
Página 40: Configurar El Temporizador
Botones e indicaciones Configurar la hora • Mantenga pulsado el botón Timer hasta que la pantalla LED parpadee. • Pulse el botón de velocidad para aumentar la hora y el botón de luz, para reducirla. • Para configurar los minutos, mantenga pulsado el botón Timer hasta que parpadeen los minutos. Configure los minutos. - Página 41 Reparación de anomalías Anomalía El aparato no se pone en marcha Razón No hay corriente eléctrica Solución Compruebe que el enchufe esté conectado. Compruebe que el interruptor principal esté encendido Anomalía Escaso flujo de aire Razón El filtro de aluminio está obstruido Solución Limpie el filtro y vuelva a colocarlo cuando se haya secado Anomalía...
-
Página 42: Retirada Del Aparato
Retirada del aparato Si el aparato lleva adherida la ilustración de la izquierda (el contenedor de basura tachado) entonces rige la normativa europea, directiva 2002/96/CE. Este producto no debe arrojarse a un contenedor de basura común. Infórmese sobre las leyes territoriales que regulan la recogida separada de aparatos eléctricos y electrónicos.