Tabla de contenido
Publicidad
Idiomas disponibles
Idiomas disponibles
Enlaces rápidos
Item #1003-145-153
Model #024-0375H
USE AND CARE GUIDE
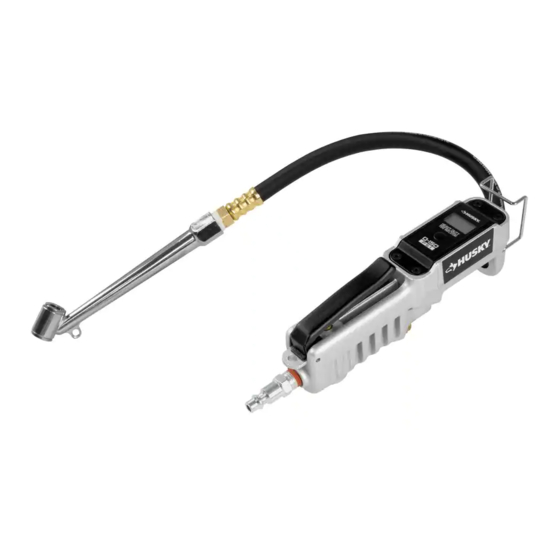
HEAVY DUTY DIGITAL TIRE INFLATION TOOL
Questions, problems, missing parts?
Before returning to the store, call
Husky Customer Service
8 a.m. - 7 p.m., EST, Monday - Friday
9 a.m. - 6 p.m., EST, Saturday
1-888-HD-HUSKY
HUSKYTOOLS.COM
200-3128-E_11/21/18
THANK YOU
We appreciate the trust and confidence you have placed in Husky through the purchase of this air compressor
accessory. We strive to continually create quality products designed to enhance your home. Visit us online to see our
full line of products available for your home improvement needs. Thank you for choosing Husky!
Publicidad
Capítulos
Tabla de contenido
Solución de problemas

Resumen de contenidos para Husky 024-0375H
- Página 1 200-3128-E_11/21/18 THANK YOU We appreciate the trust and confidence you have placed in Husky through the purchase of this air compressor accessory. We strive to continually create quality products designed to enhance your home. Visit us online to see our...
-
Página 2: Tabla De Contenido
Table of Contents Safety Information ........2 Installation ..........5 Work Area Safety ........2 Connecting to the Air Compressor ..5 Personal Safety ........2 Setting up the Inflator ......6 Warranty ...........3 Operation...........6 Pre-Installation .........4 Operating the tire inflator ......6 Maintenance ..........7 Specifications ........4 Package Contents ........4 Replacing the battery ......7 Planning Installation ......5... -
Página 3: Warranty
This warranty gives you specific legal rights, and you may also have other rights which vary from state to state. Contact the Customer Service Team at 1-888-HD-HUSKY or visit www.huskytools.com. HUSKYTOOLS.com... -
Página 4: Pre-Installation
200-3128-A_1-31-18 THANK YOU We appreciate the trust and confidence you have placed in Husky through the purchase of this air compressor accessory. We strive to continually create quality products designed to enhance your home. Visit us online to see our full line of products available for your home improvement needs. -
Página 5: Planning Installation
(N) to a compressor that has a quick connect coupler (O) on the end. Compressor Figure 1 Typical Installation Part Description Part Description Air Hose (not included) Male Connector (included) Quick Connect Coupler (not included) Inflator (included) HUSKYTOOLS.com Please contact 1-888-HD-HUSKY for further assistance. -
Página 6: Setting Up The Inflator
Installation Setting up the Inflator □ To turn on the LCD display (H) backlight, press the On/Unit/Light button (I) and release. WARNING: Do not modify the digitial tire inflator. NOTE: The LCD display (H) on the inflator will Unauthorized modifications may impair the function and/or automatically turn off after 60 seconds of not being used. -
Página 7: Battery Replacement
Check batteries LCD display is blank Change batteries, replace with (2) 1.5 VDC, AAA Wait approximately 15 to 20 seconds for LCD to warm up before Display hard to see in cold weather HUSKYTOOLS.com Please contact 1-888-HD-HUSKY for further assistance. - Página 8 Questions, problems, missing parts? Before returning to the store, call Husky Customer Service 8 a.m. - 7 p.m., EST, Monday - Friday 9 a.m. - 6 p.m., EST, Saturday 1-888-HD-HUSKY HUSKYTOOLS.COM Retain this manual for future use. Document Number: 200-3128-E_11/21/18...
-
Página 9: Herramienta Digital De Alto Rendimiento Para Inflar Neumáticos
200-3128-E_11/21/18 GRACIAS Agradecemos la confianza que ha depositado en Husky a través de la compra de este accesorio para compresor de aire. Siempre buscamos crear productos de calidad diseñados para mejorar su hogar. Visítenos en línea para ver nuestra línea completa de productos disponibles para sus necesidades de mejoras del hogar. ¡Gracias por elegir... -
Página 10: Información De Seguridad
Índice Información de seguridad ......2 Instalación ..........5 Seguridad en el área de trabajo .....2 Conexión al compresor de aire ....5 Seguridad personal .......2 Configuración del inflador ......6 Garantía.............3 Funcionamiento ........6 Antes de la instalación ......4 Uso del inflador de neumáticos .....6 Mantenimiento ..........7 Especificaciones ........4 Contenido del paquete ......4... -
Página 11: Garantía
Esta garantía le brinda derechos legales específicos y quizás usted tenga otros derechos que varían según el estado. Póngase en contacto con el Equipo de Atención al Cliente al 1-888-HD-HUSKY o visite www.huskytools.com. HUSKYTOOLS.com... -
Página 12: Antes De La Instalación
200-3128-A_1-31-18 THANK YOU We appreciate the trust and confidence you have placed in Husky through the purchase of this air compressor accessory. We strive to continually create quality products designed to enhance your home. Visit us online to see our full line of products available for your home improvement needs. -
Página 13: Planificación De La Instalación
® su lugar. las roscas macho. compresor Figura 1 Instalación típica Pieza Descripción Pieza Descripción Manguera de aire (no incluida) Conector macho (incluido) Acoplador de conexión rápida (no incluido) Inflador (incluido) HUSKYTOOLS.com Comuníquese al 1-888-HD-HUSKY para obtener más información. -
Página 14: Configuración Del Inflador
Instalación Configuración del inflador □ Para encender la retroiluminación de la pantalla LCD (H), presione y suelte el botón de Encendido/Unidad/Luz (I). ADVERTENCIA: No modifique el inflador de neumáticos digital. Las modificaciones no autorizadas pueden afectar NOTA: La pantalla LCD (H) del inflador se apagará el funcionamiento o la seguridad del equipo. -
Página 15: Reemplazo De La Pila
Reemplace las pilas con (2) AAA de 1.5 V CC Espere aproximadamente 15 o 20 segundos para que se caliente Se dificulta ver la pantalla en clima frío la pantalla LCD antes de usarlo HUSKYTOOLS.com Comuníquese al 1-888-HD-HUSKY para obtener más información. - Página 16 ¿Preguntas, problemas, piezas que faltan? Antes de regresar a la tienda, llame al Servicio de Atención al Cliente de Husky Lunes a viernes, de 8:00 a 19:00 hs (hora del Este) Sábados de 9:00 a 18:00 hs (hora del Este) 1-888-HD-HUSKY HUSKYTOOLS.COM...


