
Manuales relacionados para Klarstein Beef Baron


Resumen de contenidos para Klarstein Beef Baron
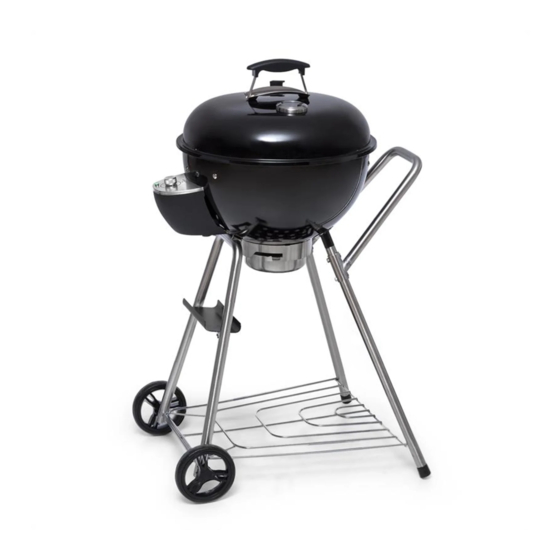
- Página 1 Beef Baron Kugelgrill Ball grill Parrilla redonda Barbecue boule Barbecue Rotondo 10034735...
-
Página 3: Tabla De Contenido
Sehr geehrter Kunde, wir gratulieren Ihnen zum Erwerb Ihres Gerätes. Lesen Sie die folgenden Hinweise sorgfältig durch und befolgen Sie diese, um möglichen Schäden vorzubeugen. Für Schäden, die durch Missachtung der Hinweise und unsachgemäßen Gebrauch entstehen, übernehmen wir keine Haftung. Scannen Sie den folgenden QR-Code, um Zugriff auf die aktuellste Bedienungsanleitung und weitere Informationen rund um das Produkt zu erhalten. -
Página 4: Sicherheitshinweise
SICHERHEITSHINWEISE WARNUNG Erstickungsgefahr! Die Feuerstelle ist nur zur Nutzung im Freien bestimmt. Sie darf nicht in Gebäuden, Garagen oder anderen geschlossenen Bereichen verwendet werden. Es können sich giftige Dämpfe bilden, die zum Ersticken führen. • Halten Sie Kinder und Haustiere stets in einem sicheren Abstand zum Grill. •... - Página 5 VORSICHT! VERWENDEN SIE KEIN ALKOHOL ODER BENZIN ZUM ENTZÜNDEN ODER WIEDERENTZÜNDEN!
-
Página 6: Geräteübersicht
GERÄTEÜBERSICHT Nummern der Einzelteile... - Página 7 Nummer und Anzahl der Einzelteile...
- Página 8 Nummer und Anzahl der Einzelteile Nummer und Anzahl der Kleinteile...
-
Página 9: Zusammenbau
ZUSAMMENBAU Schritt 1... - Página 10 Schritt 2...
- Página 11 Schritt 3...
- Página 12 Schritt 4...
- Página 13 Schritt 5...
- Página 14 Schritt 6...
- Página 15 Schritt 7...
- Página 16 Schritt 8...
- Página 17 Schritt 9...
- Página 18 Schritt 10...
- Página 19 Schritt 11 Wenn Sie den Grill als Holzkohlegrill benutzen, entfernen Sie das Ölfangblech!
- Página 20 Schritt 12 Verwendung als Holzkohlegrill: Nehmen Sie das Ölfangblech heraus und drehen Sie den Sensor zur Seite. Nun können Sie den Kamado Grill wie einen normalen Holzkohlegrill verwenden. Stellen Sie die Temperatur auf die höchste Stufe ein. Der Ventilator beschleunigt die Verbrennung und die Holzkohle wird in kurzer Zeit durchgeglüht.
- Página 21 Schritt 13...
-
Página 22: Bedienung
BEDIENUNG Batterien in den Ventilator einsetzen VORSICHT Verbrennungsgefahr! Falls die Batterien während des Betriebs ersetzt werden müssen, lassen Sie den Grill erst komplett abkühlen, bevor Sie die Batterien austauschen. 1. Schalten Sie den Ventilator aus. 2. Drehen Sie mit der linken Hand die Verriegelung unter dem Thermostat gegen den Uhrzeigersinn. - Página 23 Bedienung des Thermostats VORSICHT Verbrennungsgefahr! Der Thermostat und alle umliegend Elemente und Oberflächen werden während des Betriebs sehr heiß. Tragen sie Schutzhandschuhe, damit Sie sich nicht verbrennen. Das Gerät ist mit einem Sensor und einem automatischem Lüftersystem ausgestattet. Wenn sie am Thermostat eine bestimmte Temperatur einstellen, wird der Sensor aktiviert und steuert automatisch die Temperatur.
-
Página 24: Reinigung Und Pflege
Grillen mit Holzkohle 1. Nehmen Sie zuerst das Ölfangblech heraus und drehen Sie den Sensor zur Seite (siehe: Zusammenbau - Schritt 12). 2. Stapeln Sie die Holzkohle in Pyramidenform in die Kohleschale. Die Kohleschale fasst etwa 1,5 kg Holzkohle. 3. Verteilen Sie festen Grillanzünder gleichmäßig um die Pyramide. 4. -
Página 25: Gartemperaturen Und Garzeiten
GARTEMPERATUREN UND GARZEITEN Langsames Garen / Räuchern (125-150 °C) Rind, Lamm oder Schweinefleisch 1 Stunde/kg Hühnerflügel 15 Minuten/kg Rippen 30 Minuten/kg Braten 30 Minuten/kg Braten / Backen / Grillen (160-250 °C) Huhn (Stücke) 30-45 Minuten Huhn (ganz) 60-80 Minuten Schweinefleisch (Filet) 20-30 Minuten Meeresfrüchte 5-10 Minuten Truthahn... -
Página 26: Hinweise Zur Entsorgung
HINWEISE ZUR ENTSORGUNG Befindet sich die linke Abbildung (durchgestrichene Mülltonne auf Rädern) auf dem Produkt, gilt die Europäische Richtlinie 2012/19/EU. Diese Produkte dürfen nicht mit dem normalen Hausmüll entsorgt werden. Informieren Sie sich über die örtlichen Regelungen zur getrennten Sammlung elektrischer und elektronischer Gerätschaften. - Página 27 Dear Customer, Congratulations on purchasing this device. Please read the following instructions carefully and follow them to prevent possible damages. We assume no liability for damage caused by disregard of the instructions and improper use. Scan the QR code to get access to the latest user manual and more product information.
-
Página 28: Safety Instructions
SAFETY INSTRUCTIONS WARNING Danger of suffocation! The fireplace is only intended for use in the Free determined. It must not be used in buildings, garages or other enclosed areas. Toxic fumes may form, causing suffocation. • Always keep children and pets at a safe distance from the grill. •... - Página 29 CAUTION! DO NOT USE SPIRIT OR PETROL FOR LIGHTING OR RE-LIGHTING!
-
Página 30: Product Overview
PRODUCT OVERVIEW Numbers of the individual parts... - Página 31 Number and quantity of individual parts...
- Página 32 Number and quantity of individual parts Number and quantity of small parts...
-
Página 33: Assembly
ASSEMBLY Step 1... - Página 34 Step 2...
- Página 35 Step 3...
- Página 36 Step 4...
- Página 37 Step 5...
- Página 38 Step 6...
- Página 39 Step 7...
- Página 40 Step 8...
- Página 41 Step 9...
- Página 42 Step 10...
- Página 43 Step 11 If you use the grill for barbecue, remove the oil trap plate!
- Página 44 Step 12 Use as charcoal grill: Remove the oil trap plate and turn the sensor to the side. Now you can use the Kamado Grill like a normal charcoal grill. Set the temperature to the highest level. The fan accelerates combustion and the charcoal will glow through in a short time.
- Página 45 Step 13...
-
Página 46: Operation
OPERATION Inserting the batteries into the fan. CAUTION Risk of burns! If the batteries have to be replaced during operation, allow the grill to cool down completely before replacing the batteries. 1. Switch off the fan. 2. Turn the lock under the thermostat counterclockwise with your left hand. Carefully remove the housing with your right hand. - Página 47 Operating the thermostat CAUTION Risk of burns! The thermostat and all surrounding elements and surfaces become very hot during operation. Wear protective gloves so that you do not burn yourself. The device is equipped with a sensor and an automatic fan system. When you set a specific temperature on the thermostat, the sensor is activated and automatically controls the temperature.
-
Página 48: After Grilling
Grilling with charcoal 1. First remove the oil trap plate and turn the sensor to the side (see: Assembling - Step 12). 2. Stack the pyramid-shaped charcoal in the charcoal bowl. The charcoal bowl holds about 1.5 kg of charcoal. 3. -
Página 49: Cooking Temperatures And Cooking Times
COOKING TEMPERATURES AND COOKING TIMES Slow Cook / Smoke (125-150 °C) Beef, lamb or pork 1 hour/kg Chicken wings 15 minutes/kg Ribs 30 minutes/kg Roast 30 minutes/kg Roast / Bake / Grill (160-250 °C) Chicken (pieces) 30-45 minutes Chicken (whole) 60-80 minutes Pork meat (fillet) 20-30 minutes Seafood... -
Página 50: Hints On Disposal
HINTS ON DISPOSAL According to the European waste regulation 2012/19/EU this symbol on the product or on its packaging indicates that this product may not be treated as household waste. Instead it should be taken to the appropriate collection point for the recycling of electrical and electronic equipment. -
Página 51: Datos Técnicos
Estimado cliente: Le felicitamos por la adquisición de este producto. Lea atentamente el siguiente manual y siga cuidadosamente las instrucciones de uso con el fin de evitar posibles daños. La empresa no se responsabiliza de los daños ocasionados por un uso indebido del producto o por haber desatendido las indicaciones de seguridad. -
Página 52: Indicaciones De Seguridad
INDICACIONES DE SEGURIDAD ADVERTENCIA Riesgo de asfixia. La parrilla solo está indicada para su uso al aire libre. No debe emplearse en edificios, garajes u otras estancias cerradas. Pueden formarse gases nocivos que provocarían la asfixia. • Mantenga a niños y mascotas a una distancia prudencial de la parrilla. •... - Página 53 ATENCIÓN! ¡NO UTILICE ALCOHOL O GASOLINA PARA ENCEDER LA CHIMENEA!
-
Página 54: Descripción Del Aparato
DESCRIPCIÓN DEL APARATO Números de los componentes... - Página 55 Número y cantidad de los componentes...
- Página 56 Número y cantidad de los componentes Número y cantidad de las piezas pequeñas...
-
Página 57: Montaje
MONTAJE Paso 1... - Página 58 Paso 2...
- Página 59 Paso 3...
- Página 60 Paso 4...
- Página 61 Paso 5...
- Página 62 Paso 6...
- Página 63 Paso 7...
- Página 64 Paso 8...
- Página 65 Paso 9...
- Página 66 Paso 10...
- Página 67 Paso 11 Cuando utilice el producto como parrilla de carbón, retire la bandeja colectora de grasa.
- Página 68 Paso 12 Uso como parrilla de carbón: Extraiga la bandeja colectora de grasa y aparte el sensor a un lado. Ahora puede utilizar el horno redondo como una parrilla de carbón normal. Seleccione el nivel más elevado de temperatura. El ventilador acelera la combustión y el carbón vegetal arderá...
- Página 69 Paso 13...
-
Página 70: Manejo
MANEJO Colocar pilas en el ventilador ATENCIÓN Riesgo de quemaduras. Si es necesario sustituir las pilas durante el funcionamiento, deje que el aparato se enfríe por completo antes de realizar la operación. 1. Apague el ventilador. 2. Con la mano izquierda, gire el cierre situado bajo el termostato en sentido antihorario. - Página 71 Utilización del termostato ATENCIÓN Riesgo de quemaduras. El termostato y el resto de elementos y superficies alcanzan temperaturas muy elevadas durante su funcionamiento. Utilice guantes de protección para no quemarse. El aparato está equipado con un sensor y un sistema de ventilación automática. Si en el termostato regula una temperatura determinada, el sensor se activa y controla automáticamente la temperatura.
-
Página 72: Limpieza Y Cuidado
Barbacoa con carbón 1. Extraiga primero la bandeja colectora de grasa y aparte el sensor a un lado (consulte el Paso 12 de montaje). 2. Apile el carbón en forma de pirámide en la bandeja para carbón. La bandeja soporta aprox. 1,5 kg de carbón vegetal. 3. -
Página 73: Temperaturas Y Tiempos De Cocción
TEMPERATURAS Y TIEMPOS DE COCCIÓN Cocción a fuego lento / ahumado (125-150 °C) Ternera, cordero o cerdo 1 hora/kg Alitas de pollo 15 minutos/kg Costillas 30 minutos/kg Asado 30 minutos/kg Asar / Hornear / Preparar a la parrilla (160-250 °C) Pollo (pedazos) 30-45 minutos Pollo (entero) -
Página 74: Retirada Del Aparato
RETIRADA DEL APARATO Si el aparato lleva adherida la ilustración de la izquierda (el contenedor de basura tachado) entonces rige la normativa europea, directiva 2012/19/UE. Este producto no debe arrojarse a un contenedor de basura común. Infórmese sobre las leyes territoriales que regulan la recogida separada de aparatos eléctricos y electrónicos. -
Página 75: Fiche Technique
Chère cliente, cher client, Toutes nos félicitations pour l’acquisition de ce nouvel appareil. Veuillez lire attentivement et respecter les instructions de ce mode d’emploi afin d’éviter d’éventuels dommages. Le fabricant ne saurait être tenu pour responsable des dommages dus au non- respect des consignes de sécurité... -
Página 76: Consignes De Sécurité
CONSIGNES DE SÉCURITÉ MISE EN GARDE Risque d‘étouffement ! Le barbecue est destiné à un usage en extérieur uniquement. Il ne doit pas être utilisé dans un bâtiment, un garage ou tout autre espace clos. Il peut se former des vapeurs toxiques qui provoquent la suffocation. - Página 77 ATTENTION ! NE PAS UTILISER D‘ALCOOL OU D‘ESSENCE POUR ALLUMER OU RALLUMER !
-
Página 78: Aperçu De L'appareil
APERÇU DE L‘APPAREIL Numéros des pièces détachées... - Página 79 Numéro et nombre des pièces détachées...
- Página 80 Numéro et nombre des pièces détachées Numéros et nombre des petits éléments...
-
Página 81: Assemblage
ASSEMBLAGE Étape 1... - Página 82 Étape 2...
- Página 83 Étape 3...
- Página 84 Étape 4...
- Página 85 Étape 5...
- Página 86 Étape 6...
- Página 87 Étape 7...
- Página 88 Étape 8...
- Página 89 Étape 9...
- Página 90 Étape 10...
- Página 91 Étape 11 Si vous utilisez le barbecue comme un barbecue à charbon, retirez le récupérateur d‘huile !
- Página 92 Étape 12 Utilisation comme barbecue à charbon : Retirez le récupérateur d‘huile et tournez le capteur sur le côté. Vous pouvez maintenant utiliser le barbecue boule comme un barbecue à charbon normal. Réglez la température au niveau le plus élevé. Le ventilateur accélère la combustion et le charbon de bois brûle en peu de temps.
- Página 93 Étape 13...
-
Página 94: Utilisation
UTILISATION Installation des piles dans le ventilateur ATTENTION Risque de brûlure ! Si les piles doivent être remplacées pendant le fonctionnement, laissez le barbecue refroidir complètement avant de les remplacer. 1. Éteignez le ventilateur. 2. Tournez le verrou sous le thermostat dans le sens antihoraire avec la main gauche. Retirez délicatement le boîtier avec votre main droite. - Página 95 Utilisation du thermostat ATTENTION Risque de brûlure ! Le thermostat et tous les éléments et surfaces environnants deviennent très chauds pendant le fonctionnement. Portez des gants de protection pour ne pas vous brûler. L‘appareil est équipé d‘un capteur et d‘un système de ventilation automatique. Si vous réglez une certaine température sur le thermostat, le capteur est activé...
-
Página 96: Nettoyage Et Entretien
Grillades au charbon de bois 1. Retirez d‘abord la plaque de récupération d‘huile et tournez le capteur sur le côté (voir : Assemblage - Étape 12). 2. Empilez le charbon de bois en forme de pyramide dans la cuvette de charbon. La cuvette de charbon contient environ 1,5 kg de charbon de bois. -
Página 97: Températures Et Temps De De Cuisson
TEMPÉRATURES ET TEMPS DE DE CUISSON Cuisson lente / fumage (125-150 °C) Bœuf, agneau ou porc 1 heure/kg Ailes de poulet 15 minutes /kg Côtes 30 minutes /kg Sauté 30 minutes /kg Sauter / cuisson au four / grillades (160-250 °C) Poulet (découpes) 30-45 minutes Poulet (entier) -
Página 98: Informations Sur Le Recyclage
INFORMATIONS SUR LE RECYCLAGE Vous trouverez sur le produit l’image ci-contre (une poubelle sur roues, barrée d‘une croix), ce qui indique que le produit se trouve soumis à la directive européenne 2012/19/UE. Renseignez- vous sur les dispositions en vigueur dans votre région concernant la collecte séparée des appareils électriques et électroniques. - Página 99 Gentile cliente, La ringraziamo per aver acquistato il dispositivo. La preghiamo di leggere attentamente le seguenti istruzioni per l’uso e di seguirle per evitare possibili danni tecnici. Non ci assumiamo alcuna responsabilità per danni scaturiti da una mancata osservazione delle avvertenze di sicurezza e da un uso improprio del dispositivo.
-
Página 100: Avvertenze Di Sicurezza
AVVERTENZE DI SICUREZZA AVVERTIMENTO Pericolo di soffocamento! Il dispositivo è adatto solo all’utilizzo all’aperto. Non può essere utilizzato all’interno di edifici, garage o altre aree chiuse. Possono formarsi gas tossici che causano il soffocamento. • Tenere sempre bambini e animali domestici a distanza di sicurezza dal barbecue. •... - Página 101 ATTENZIONE! NON UTILIZZARE ALCOOL O BENZINA PER ACCENDERE O RIACCENDERE IL BRACIERE!
-
Página 102: Descrizione Del Dispositivo
DESCRIZIONE DEL DISPOSITIVO Numeri dei singoli componenti... - Página 103 Numero e quantità dei singoli componenti...
- Página 104 Numero e quantità dei singoli componenti Numero e quantità dei componenti piccoli...
-
Página 105: Montaggio
MONTAGGIO 1° passaggio... - Página 106 2° passaggio...
- Página 107 3° passaggio...
- Página 108 4° passaggio...
- Página 109 5° passaggio...
- Página 110 6° passaggio...
- Página 111 7° passaggio...
- Página 112 8° passaggio...
- Página 113 9° passaggio...
- Página 114 10° passaggio...
- Página 115 11° passaggio Se si utilizza il barbecue come griglia a carbonella, rimuovere la vaschetta di raccolta dell’olio!
- Página 116 12° passaggio Utilizzo come griglia a carbonella: Rimuovere la vaschetta di raccolta dell’olio e ruotare di lato il sensore. Ora potete utilizzare il barbecue rotondo come una normale griglia a carbonella. Impostare la temperatura sul livello più alto. La ventola accelera la combustione e la carbonella diventa ardente in poco tempo.
- Página 117 13° passaggio...
-
Página 118: Utilizzo
UTILIZZO Inserire le batterie nella ventola ATTENZIONE Pericolo di ustione! Se è necessario cambiare le batterie durante l’uso, lasciare raffreddare completamente il barbecue prima di procedere alla sostituzione. 1. Spegnere la ventola. 2. Con la mano sinistra, girare in senso antiorario il blocco sotto al termostato. Facendo attenzione, rimuovere l’alloggiamento con la mano destra. - Página 119 Utilizzo del termostato ATTENZIONE Pericolo di ustione! Il termostato e tutti gli elementi e le superfici circostanti diventano estremamente caldi durante l’uso. Indossare guanti protettivi per evitare di scottarsi. Il dispositivo è dotato di un sensore e di un sistema automatico di ventilazione. Se si imposta una determinata temperatura sul termostato, il sensore si attiva e controlla automaticamente la temperatura.
-
Página 120: Pulizia E Manutenzione
Grigliare con carbonella 1. Prima di tutto, togliere la vaschetta di raccolta dell’olio e girare di lato il sensore (v. “Montaggio”, passaggi 1-12). 2. Impilare la carbonella a piramide nell’apposito vano. Il vano può contenere fino a 1,5 kg di carbonella circa. 3. -
Página 121: Temperature E Tempi Di Cottura
TEMPERATURE E TEMPI DI COTTURA Cottura lenta/Affumicatura (125-150 °C) Manzo, agnello o maiale 1 ora/kg Ali di pollo 15 minuti/kg Costolette 30 minuti/kg Arrosto 30 minuti/kg Arrostire/Cottura al forno/Grigliare (160-250 °C) Pollo (pezzi) 30-45 minuti Pollo (intero) 60-80 minuti Maiale (filetto) 20-30 minuti Frutti di mare 5-10 minuti... -
Página 122: Smaltimento
SMALTIMENTO Se sul prodotto è presente la figura a sinistra (il cassonetto mobile sbarrato), si applica la direttiva europea 2012/19/UE. Questi prodotti non possono essere smaltiti con i rifiuti normali. Informarsi sulle disposizioni vigenti sulla raccolta separata di dispositivi elettrici ed elettronici. Non smaltire i vecchi dispositivi con i rifiuti domestici.