Tabla de contenido
Publicidad
Idiomas disponibles
Idiomas disponibles
Enlaces rápidos
Publicidad
Tabla de contenido

Manuales relacionados para BH FITNESS H-916


Resumen de contenidos para BH FITNESS H-916
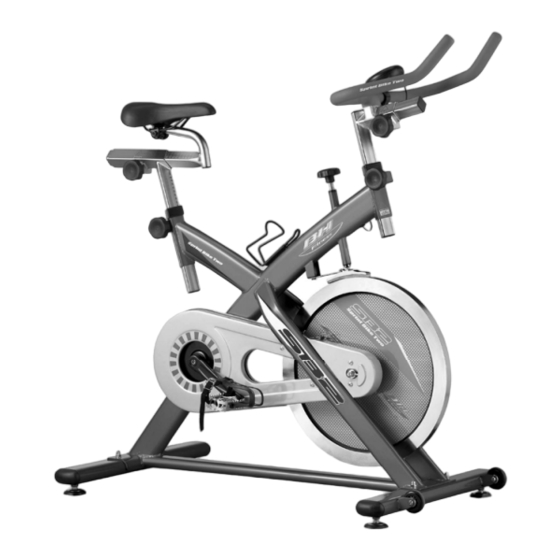
- Página 1 H-916 Instrucciones de montaje y utilización Instructions for assembly and use Instructions de montage et utilisation Montage und gebrauchsanleitung Instruções de montagem e utilização Istruzioni di montaggio e uso Montage-en gebruiksinstrukties...
- Página 2 Fig 1 10 (4) 9 (4) 8 (4) 30 (1) Fig 2 Fig 3...
- Página 3 Fig 4 Fig 5 Fig 6 Fig 7 Fig 8...
-
Página 4: Indicaciones Generales
Español AVISO IMPORTANTE DE coloque objetos cortantes alrededor de la máquina. SEGURIDAD Las personas discapacitadas no deberán utilizar la máquina sin la PRECAUCIONES asistencia de una persona cualificado Esta bicicleta ha sido diseñada y o un médico. construida de modo que proporcione Antes de utilizar este aparato, la máxima seguridad. -
Página 5: Montaje De Los Pedales
situaciones y conductas que pueden tornillos (10), coloque las arandelas resultar peligrosas. planas (9), y las tuercas ciegas (8) y Esta unidad no ha de utilizarse en apriete fuertemente. ningún caso como juguete. 2.- MONTAJE DE LOS Es responsabilidad del propietario asegurarse que todos los usuarios de PEDALES máquina... -
Página 6: Regulacion Horizontal Del Sillín
agujas del reloj Fig. 4, cuando lo 5.- COLOCACION DEL tenga a la MONITOR altura adecuada para realizar Coja el monitor (m), Fig. 6, introduzca ejercicio. el monitor en la brazadera (n) coja el Apriete fuertemente el pomo (T) en el cable intermedio y conexione el sentido de las agujas del reloj. - Página 7 flecha de la Fig 7) ,se produce una encuentran en la parte delantera de frenada mas repentina para el volante. su unidad, le facilitarán la maniobra de colocar su unidad en el emplazamiento escogido, NIVELACION levantando,ligeramente por la parte Una vez colocada la unidad en su delantera y empujando, como muestra lugar definitivo, para la realización del la figura 8.
-
Página 8: General Instructions
English IMPORTANT SAFETY ADVICE Disabled people should not use the machine without the assistance of a qualified person or a doctor. PRECAUTIONS Do warm up stretching exercises This bicycle has been designed and before using the equipment. constructed provide maximum Do not use the bicycle if it is not safety. - Página 9 The right-hand pedal, marked with the Your unit can only be used by one letter (R), screws onto the right-hand person at a time. crank, also marked with an (R), in a Use suitable clothing and footwear. clockwise direction. Tighten securely, Make sure all laces/cords are tied Fig.
-
Página 10: Fitting The Handlebar
To increase pedal resistance turn the 4.- FITTING THE HANDLEBAR tensioning control (Z) clockwise (+) Position the handlebar (B) on the until the exertion level best suits your handlebar stem (C), Fig 5, tighten the exercise requirements. knob (V) and then insert the handlebar To reduce pedal resistance turn the stem (C) into the hole on the main tensioning control (Z) anticlockwise (-). -
Página 11: Importantes Consignes De Sécurité Précautions
Français notice. NE pas utiliser d’accessoires IMPORTANTES CONSIGNES autres que ceux recommandés par le DE SÉCURITÉ fabricant. PRÉCAUTIONS Ne pas poser d’objets coupants aux Cette bicyclette a été conçue et abords de la machine. fabriquée de façon à ce qu’elle puisse Les personnes handicapées ne offrir une sécurité... -
Página 12: Montage De La Selle
Les parents ou personnes à qui des Prendre le tube support avant dans enfants ont été confiés doivent tenir lequel se trouvent les roulettes (J) en compte de leur soif de curiosité qui veillant à placer les points rouges et peut conduire à... -
Página 13: Réglage Horizontal De La Selle
hauteur confortable à l’aide RÉGLAGE VERTICAL DU GUIDON. pommeau de fixation (T) Fig 5 et Placez le guidon (B) à une distance où vissez dans le sens des aiguilles vous pourrez réaliser confortablement d’une montre. l’exercice et ce dans les limites du MAX, puis vissez très fort le pommeau (Y) comme indiqué... - Página 14 Remarque importante: l’avant de l’appareil permettant ainsi à Ce bouton de tension (Z) dispose d’un l’utilisateur conduire à système de freinage d’urgence : en l’emplacement choisi, levant appuyant très fort dessus (comme légèrement l’avant de l’appareil et en indiqué par la flèche de la Fig 7 il se poussant, comme indiqué...
-
Página 15: Allgemeine Hinweise
Deutsch Zwecke. Verwenden WICHTIGER Zubehörteile, die vom Hersteller des SICHERHEITSHINWEIS Geräts empfohlen werden. VORSICHTSMASSNAHMEN Achten Sie darauf, dass sich in der Dieses Fahrrad wurde so entwickelt Nähe des Gerätes keine scharfen und konstruiert, dass es maximale Gegenstände befinden. Sicherheit bietet. Behinderte Personen dürfen das Trotzdem müssen... - Página 16 Neugier berücksichtigen, u.U. Positionieren Sie das vordere gefährliche Situationen Ständerrohr (J) mit den Rädern so, Verhaltensweisen mit sich bringen dass die roten Punkte übereinstimmen kann. Dieses Gerät darf unter keinen und die Räder nach vorn zeigen (vgl. Umständen als Spielzeug verwendet Abb.
- Página 17 bequemen Position fest (Abb. 5). VERTIKALES EINSTELLEN DES Drehen Sie ihn dazu im Uhrzeigersinn. LENKERS Bringen Sie den Lenker (B) auf eine EINSTELLEN DER SATTELHÖHE Entfernung, die Ihnen ein bequemes Lockern Sie den Feststellknauf (T) der Trainieren ermöglicht. Überschreiten Sattelstange etwas, indem Sie ihn Sie aber die MAX-Markierungen nicht.
-
Página 18: Transport Und Lagerung
zu stellen, um ein Verhärten der Vorderseite Geräts. Durch Bremsbacken zu verhindern. leichtes Anheben und Schieben an Wichtig: der Vorderseite können Sie Ihr Gerät Dieser Spannungsregler (Z) verfügt so problemlos an den gewünschten über ein Not-Bremssystem. Betätigt transportieren (vgl. Abb.8). man dieses System durch festes Bewahren Sie das Gerät an einem Drücken (vgl. -
Página 19: Indicações Gerais
Português NÃO utilize acessórios que não sejam AVISO IMPORTANTE DE recomendados pelo fabricante. SEGURANÇA Não coloque objectos cortantes á PRECAUÇÕES volta da máquina. Esta bicicleta desenhada pessoas alguma construída de modo a proporcionar a incapacidade não deverão utilizar a máxima segurança. -
Página 20: Instruções De Montagem
comportamentos podem os anéis planos (9) e as porcas cegas perigosos. Este aparelho nunca (8) e aperte com força. deverá utilizar-se como um brinquedo. MONTAGEM DOS PEDAIS É responsabilidade do proprietário assegurarse que todos os usuários da Siga atentamente as instruções de máquina estejam adequadamente... - Página 21 relógio Fig. 4, coloque-o na altura COLOCAÇÃO DO MONITOR adequada para realizar o exercício e Pegue no monitor (m), Fig. 6 e depois aperte com força o botão mola introduza o monitor na braçadeira (n). (T) no sentido dos ponteiros do Pegue no cabo intermédio e ligue o relógio.
- Página 22 seta da Fig.7), produz uma travagem facilitar-lhe-ão manobrar mais repentina do volante . unidade até ao local escolhido para guardá-la, evantando, ligeiramente a parte da frente e empurrando, como NIVELAMENTO. mostra a figura 8. Deverá guardar a Depois de ter colocado a unidade no sua máquina num lugar seco, com as seu lugar definitivo, para a realização menores variações de temperatura...
-
Página 23: Indicazioni Generali
Italiano AVVERTIMENTO Non collochi oggetti taglienti attorno alla bicicletta. IMPORTANTE DI SICUREZZA Le persone handicappate non PRECAUZIONI dovranno usare l’ apparecchio senza l’ Questa bicicletta è stata disegnata e assistenza di una persona qualificata costruita in modo che garantisca la o un medico. -
Página 24: Istruzioni Di Montaggio
deve usare in nessun caso come un davanti, come mostra la Fig. (2), giocattolo. introduca le viti (10), collochi le rondelle piane (9), ed i dadi ciechi (8) È responsabilità del proprietario l’ e stringa con forza. assicurarsi che tutti gli utenti dell’ appareccio siano statu correttamente MONTAGGIO DEI PEDALI informati... - Página 25 REGOLAZIONE DELL' ALTEZZA punto di riferimento di MAX e stringa DEL SELLINO con forza la maniglia (Y) Allenti un poco la maniglia di fissaggio Fig 5 . (T) dell' albero in senso antiorario, Fig. 4, a continuazione collochi il sellino all' REGOLAZIONE DELLO altezza desiderata per realizzare l' SFORZO...
- Página 26 più o meno i piedi regolabili (13) come dalla parte anteriore e spingendo, mostra la figura 7. come mostra la figura 8. Conservi il suo apparecchio in un luogo secco che subisca le minori variazioni di SPOSTAMENTO ED temperatura possibili. IMMAGAZZINAGGIO L’...
-
Página 27: Algemene Aanwijzingen
Nederlands (loopschoenen of aerobic) wanneer u BELANGRIJKE VEILIGHEID het apparaat gebruikt. SVOORSCHRIFTEN Gebruik dit apparaat uitsluitend voor VOORZORGSMAATREGELEN gebruiksdoeleinden, zoals Deze hometrainer dusdanig beschreven deze handleiding. ontworpen en geconstrueerd om een Gebruik GEEN accessoires die niet maximale veiligheid te waarborgen. U worden aanbevolen door de fabrikant. -
Página 28: Montage-Instructies
De gebruiker dient niet zwaarder te schroeven (10), de platte ringen (9) en zijn dan 100 Kg. de dopmoeren (8) en draai stevig aan. Raak de bewegende onderdelen Plaats het voetstuk voor met niet aan. wieltjes (J), met de wielen naar voren gericht en zorg daarbij dat de rode Ouders en andere personen die punten... - Página 29 draai de instelknop (T) van de oefeningen zonder zadelpen kloksgewijs vast Fig 5. referentiepunt te overschrijden en draai de instelknop (Y) stevig vast Fig AFSTELLEN VAN DE HOOGTE VAN HET ZADEL Draai de instelknop (T) van de PLAATSING zadelpen een beetje los (tegen de MONITOR wijzers van de klok in) Fig.
- Página 30 Belangrijk: bevinden zich aan de voorkant van Deze weerstandsregelaar (Z) beschikt het apparaat en vergemakkelijken het over een noodrem die, wanneer men u het apparaat te verplaatsen en op hierop hard drukt (zoals door de pijl de uitgekozen plaats te plaatsen door van Fig 7 wordt aangegeven), een de voorkant iets te laten overhellen en directere remming op het wiel tot...
- Página 31 H-916 H-916...
- Página 32 Declaración de Conformidad Nós Exercycle S.L. declaramos sob nossa única Nosotros Exercycle S.L. declaramos bajo nuestra responsabilidade que o produto H-916 a que se única responsabilidad que el producto H-916 al que refere esta declaração está em conformidade com se refiere esta declaración es conforme con las...
- Página 33 BH FITNESS SPAIN EXERCYCLE,S.L. (Manufacturer) P.O.BOX 195 01080 VITORIA (SPAIN) Tel.: +34 945 29 02 58 Fax: +34 945 29 00 49 e-mail: info@bhfitness.es www. Bhfitness.com BH FITNESS PORTUGAL BH FITNESS FRANCE BH FITNESS UK MAQUINASPORT, S.A. Tel.: +33 (0)1429 61885...