Tabla de contenido
Publicidad
Enlaces rápidos
Publicidad
Tabla de contenido

Manuales relacionados para Rowenta IXEO QR10 Serie


Resumen de contenidos para Rowenta IXEO QR10 Serie
- Página 1 IXEO QR10XX www.rowenta.com 1800146783-03...
-
Página 3: Before First Use
Before first use At first uses, smoke and odor may come from the appliance. They do not affect the use of the appliance and disappear quickly. At first use, small particules may come from the iron. These are part of the production process and do not affect yourself or your garments. -
Página 4: Vor Der Ersten Anwendung
IMPORTANT N’utilisez jamais le plateau de votre appareil avec une centrale vapeur ou un fer classique. Utilisez exclusivement le fer de votre appareil. IMPORTANT La chaleur concentre les éléments contenus dans l’eau au cours de l’évaporation. Vous ne devez pas utiliser l’eau du sèche-linge, l’eau parfumée ou adoucie, l’eau de réfrigérateurs, de batteries, de climatiseurs, de l’eau de pluie, bouillie, filtrée ou de l’eau minérale. -
Página 5: Beschreibung Des Produktes
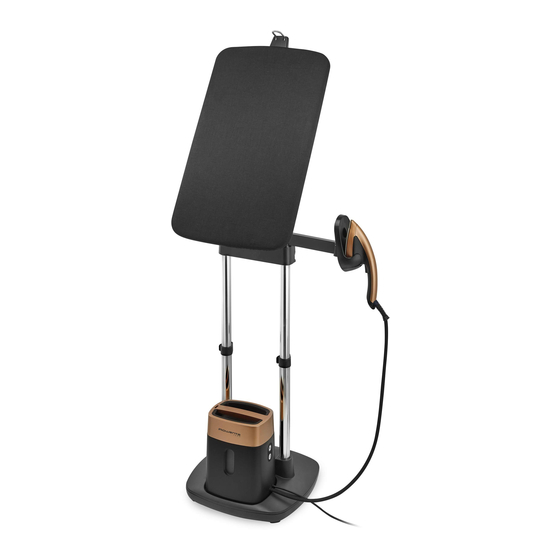
Product presentation / Présentation du produit / Beschreibung des Produktes 1. Hanger hook Product / Pupitre / Produkt 2. Tilting board 3. Iron rest 4. Iron 5. Collapsible body 6. Height lockers 7. Steam unit 8. Steam hose 1. Support cintre 2. - Página 6 Iron and steam unit / Fer et base vapeur / Bügeleisen- und Dampfeinheit 1. Iron soleplate 2. Steam trigger 3. Water tank 4. Anti calc light indicator 5. On/Off button 6. Electric cable 7. Calc cartridge 8. Cartridges compartment 1. Pointe de précision 2.
- Página 7 First use / Première utilisation / Erste Benutzung Incline the board / Incliner le plateau / Bügelbrett schrägstellen Put the hands on each side of the board, raise it vertically , and incline it to the back until inclined position. Poser les mains de part et d’autre du plateau, lever verticalement et incliner le plateau vers l’arrière jusqu’à...
- Página 8 Adjust the height / Régler la hauteur / Höhe einstellen At the horizontal position, unlock the pole lockers. Up the board until the wished position. Lock the pole lockers. En position horizontale, desserrer les verrous de réglage des pôles. Hisser le plateau jusqu’à...
- Página 9 First use of the iron / Première utilisation du fer / Erste Benutzung des Bügeleisens Make sure that the calc cartridges is set before switching one the appliance. To set the cartridges, please refer to assembly instructions. Assurez vous d’avoir placé la cartouche calcaire avant d’allumer la base. Pour placer la cartouche calcaire reportez vous à...
- Página 10 Turning on the iron / Mise en marche fer / Bügeleisen einschalten 1m30s Put the iron on the iron Plug the appliance and Press the trigger for rest. switch it on. Wait for 45 1minute30 until steam comes seconds. out. Placer le fer sur le Presser ensuite la gâchette support de fer.
- Página 11 Never iron or steam directly on a garment being worn by someone. Ne pas repasser ou défroisser une chemise portée par une personne. Bügeln oder dampfglätten niemals Kleidungsstück direkt am Körper einer Person. Trousers / Pantalon / Hose On inclided board, put the trousers to Use the board on the horizontal position iron the legs.
- Página 12 Accessories / Accessoires / Zubehör Use the hanger hook to iron a garment Use the clips to maintain a garment on placed on a hanger. the board. Utiliser le support cintre pour repasser un Utiliser les pinces pour maintenir un vêtement positionné...
- Página 13 Use the nomad steam unit / Utiliser la base en autonome / Dampfeinheit separat benutzen 45 s Position the iron and its Remove the steam unit Move around with the iron rest on the base. appliance. Plug it, switch off its base. it on, and wait 45seconds Positionner le fer et le Push the clip located on...
- Página 14 Steam boost / Shot de vapeur / Dampfstoß Press two times quickly on the steam trigger to release the steam boost. Appuyez deux fois rapidement sur x 2 la gâchette vapeur pour libérer de la vapeur. Drücken Sie zweimal kurz die Dampfstoßtaste, um den Dampfstoß...
- Página 15 Cleaning / Nettoyer / Reinigung Switch off the appliance. Clean the soleplate with Never use abrasive Wait 1 hour to allow it to a damp sponge. products or surfaces to cool down. clean the soleplate. Nettoyer la semelle avec Eteindre puis une éponge humide.
- Página 16 Tip up the board to the vertical position. Tip up the product on its back , to move it and tidy it if necessary. Basculer la planche à la verticale. Basculer le produit vers l’arrière pour le déplacer et le ranger si nécessaire. Bringen Sie das Bügelbrett in die Kippen Sie das Produkt nach hinten, senkrechte Position.
- Página 17 Switch off the appliance. Remove the water tank. Turn the steam unit over Wait 1 hour to allow it to , and open the 2 lockers. Sortir le réservoir. cool down. Retourner la base Eteindre puis vapeur et ouvrir les 2 Entnehmen Sie den débrancher l’appareil.
- Página 18 CLICK Remove the stoppers. Insert the calc cartridges Close the 2 lockers of into the steam unit. the calc cartridges. Retirer les bouchons. Insérer la cartouche Fermer les 2 verrous anti-calcaire dans la de la cartouche anti- Entfernen Sie die base vapeur.
- Página 19 45 s 1 min 30 s Put the iron and the Plug the appliance and Press the trigger for steam unit on the base. switch it on. Wait for 45 1minutes30 until steam seconds. comes out. Placer le fer et la base sur leur socle. Brancher le produit et Presser ensuite sur le mettre en marche.
-
Página 20: Voor Het Eerste Gebruik
Voor het eerste gebruik Bij de eerste keren gebruik kan er rook en geur uit het apparaat komen. Ze beïnvloeden het gebruik van uw toestel niet en ze verdwijnen snel. De eerste keer dat u uw strijkijzer gebruikt, kan het kleine deeltjes vrijgeven. Ze maken deel uit van het productieproces en hebben geen invloed op u noch op uw stoffen. -
Página 21: Antes Da Primeira Utilização
Antes da primeira utilização Aquando das primeiras utilizações, é possível que o aparelho liberte fumo e odor. Não afetam a utilização do aparelho e desaparecem rapidamente. Aquando da primeira utilização, podem soltar-se pequenas partículas do ferro. Fazem parte do processo de produção e não o afetam nem a si nem às suas roupas. Desaparecem após algumas utilizações. -
Página 22: Apresentação Do Produto
Voorstelling van het product / Apresentação do produto Product / Produto 1. Ophanghaak 2. Kantelbare strijkplank 3. Strijkijzersteun 4. Strijkijzer 5. Inschuifbare romp 6. Paalvergrendelingen 7. Stoomeenheid 8. Stoomslang 1. Suporte do cabide 2. Tábua ajustável 3. Descanso do ferro 4. -
Página 23: Strijkijzer En Stoomeenheid / Ferro E Base Do Vapor
Strijkijzer en stoomeenheid / Ferro e base do vapor 1. Strijkzool 2. Stoomhendel 3. Waterreservoir 4. “Antikalk” controlelampje 5. Aan/uit-knop 6. Elektrisch snoer 7. “Antikalk” patroon 8. Patroonvak 1. Base do ferro 2. Comando do vapor 3. Depósito da água 4. -
Página 24: De Strijkplank Kantelen / Inclinar A Tábua
Eerste gebruik / Primeira utilização De strijkplank kantelen / Inclinar a tábua Plaats uw handen aan weerskanten van de strijkplank, breng ze verticaal omhoog en kantel ze achteruit tot aan de gekantelde positie. Coloque as mãos em ambos os lados da tábua, levante-a verticalmente e incline-a para trás até... -
Página 25: De Hoogte Regelen / Regular A Altura
De hoogte regelen / Regular a altura In de horizontale positie, maak de paalvergrendelingen los. Trek de strijkplank tot aan de gewenste positie omhoog. Zet de paalvergrendelingen vast. Na posição horizontal, desbloqueie os fechos dos tubos. Puxe a tábua até à posição pretendida. - Página 26 Ingebruikname van het strijkijzer / Primeira utilização do ferro Zorg dat het “antikalk” patroon is aangebracht voordat u het apparaat inschakelt. Om het patroon aan te brengen, raadpleeg de montagehandleiding. Certifique-se de que o cartucho anticalcário está instalado antes de ligar o seu aparelho.
-
Página 27: Strijken En Stoomstrijken / Passar A Ferro E Vaporizar
Het strijkijzer inschakelen / Ligar o ferro 1m30s Plaats het strijkijzer op Steek de stekker in het Houd de stoomhendel 1 min de strijkijzersteun. stopcontact en schakel 30 ingedrukt totdat er stoom het apparaat in. Wacht wordt afgegeven. Colocar o ferro no 45 seconden. - Página 28 (Stoom)strijk nooit een kledingstuk dat door een persoon wordt gedragen. Nunca engomar nem vaporizar diretamente uma peça de roupa que esteja a ser usada por uma pessoa. Broek / Calças In de gekantelde positie, breng de broek Gebruik de strijkplank in de horizontale aan om de benen te strijken.
-
Página 29: Textielborstel / Escova Para Tecido
Accessoires / Acessórios Gebruik de ophanghaak om een Gebruik de klemmen om een kledingstuk kledingstuk te strijken dat zich op een op de strijkplank vast te zetten. kleerhanger bevindt. Utilize as molas para manter a peça de Utilize o suporte do cabide para engomar roupa na tábua. -
Página 30: De Stoomeenheid Afzonderlijk Gebruiken / Utilizar A Unidade Do Vapor De Forma Portátil
De stoomeenheid afzonderlijk gebruiken / Utilizar a unidade do vapor de forma portátil 45 s Maak het strijkijzer en Haal de stoomeenheid Verplaats de de strijkijzersteun vast stoomeenheid. Steek de van de voet af. aan de stoomeenheid. stekker in het stopcontact, Druk op de klem die schakel het apparaat in Coloque o ferro e o seu... -
Página 31: Automatische Uitschakeling / Auto-Off
Stoomstoten / Vapor Extra Druk tweemaal snel op de stoomtrekker om de stoomboost in te schakelen. Prima duas vezes rapidamente no comando do vapor para libertar vapor. x 2 Automatische uitschakeling / Auto-off 8 min De stoomeenheid gaat na een inactiviteit van 8 minuten automatisch in stand-by. Após 8 minutos de inatividade, a base de vapor entra em modo modo “stand by”. - Página 32 Reiniging / Limpeza Schakel het apparaat Reinig de strijkzool met Maak de strijkzool uit. Wacht 1 uur totdat een vochtige spons. nooit schoon met het apparaat volledig is een agressief Limpe a base com uma afgekoeld. schoonmaakmiddel. esponja húmida. Desligue o aparelho e Nunca utilize produtos retire a ficha da tomada.
- Página 33 Kantel de strijkplank naar de verticale Kantel het product naar achteren om positie. het te verplaatsen en, indien nodig, op te bergen. Coloque a tábua na posição vertical. Incline o produto para trás para o mover e arrumar, se necessário. Transportadvies: gebruik de stangen om vast te grijpen om uw apparaat te verplaatsen.
- Página 34 Schakel het apparaat Verwijder het Draai de stoomeenheid uit. Wacht 1 uur totdat waterreservoir. ondersteboven en open het apparaat volledig is de 2 vergrendelingen. Retire o depósito de afgekoeld. água. Vire a unidade do vapor Desligue o aparelho e e abra os 2 fechos. retire a ficha da tomada.
- Página 35 CLICK Verwijder de dop. Installeer het “antikalk” Sluit de 2 patroon in de vergrendelingen van het Retire as tampas. stoomeenheid. “antikalk” patroon. Insira os cartuchos Feche os 2 fechos dos anticalcário na base do cartuchos anticalcário. vapor. Zet de stoomeenheid Vul het waterreservoir.
- Página 36 45 s 1 min 30 s Installeer het strijkijzer Steek de stekker in het Houd de stoomhendel en de stoomeenheid op stopcontact en schakel 1 min 30 ingedrukt de voet. het apparaat in. Wacht totdat er stoom wordt 45 seconden. afgegeven. Coloque o ferro e a base de vapor na base.
-
Página 37: Al Primo Utilizzo
Al primo utilizzo Durante i primi utilizzi, l’apparecchio potrebbe emettere una scia di fumo e un leggero odore. Non influiscono sul funzionamento dell’apparecchio e scompariranno in breve tempo. Al primo utilizzo, dalla piastra potrebbero fuoriuscire delle piccole particelle. Sono residui del processo di fabbricazione e non sono nocivi per la salute né dannosi per i tessuti. -
Página 38: Antes Del Primer Uso
Antes del primer uso Durante los primeros usos, el aparato podría generar humo y olor. Esto no afectará al uso del aparato y desaparecerá rápidamente. En el primer uso, es posible que la plancha desprenda pequeñas partículas. Estas se han generado durante el proceso de producción y no tendrán ningún efecto sobre usted ni sus prendas. - Página 39 Descrizione del prodotto / Presentación del producto Product / Produto 1. Gancio per gruccia 2. Piano inclinabile 3. Supporto del ferro 4. Ferro 5. Struttura regolabile 6. Dispositivi di bloccaggio 7. Unità vapore 8. Cavo del vapore 1. Gancho para colgar 2.
- Página 40 Ferro e unità vapore / Plancha y dispositivo de vapor 1. Piastra del ferro 2. Pulsante del vapore 3. Serbatoio dell'acqua 4. Spia luminosa anti- calc 5. Pulsante di accensione/ spegnimento 6. Cavo di alimentazione 7. Cartuccia anticalcare 8. Scomparto della cartuccia 1.
- Página 41 Operazioni preliminari / Primera Utilización Piano in posizione inclinata / Incline la tabla Afferrare il piano da entrambi i lati, sollevarlo verticalmente e spingerlo all'indietro in posizione inclinata. Coloque una mano en cada lado de la tabla, levántela verticalmente, e inclínela hacia atrás hasta colocarla en posición inclinada.
-
Página 42: Orientamento Del Supporto Del Ferro / Orientación Del Apoyo De La Plancha
Regolazione dell’altezza / Ajuste la altura Quando il piano è in posizione orizzontale, sbloccare i dispositivi di bloccaggio. Sollevare il piano fino all'altezza desiderata e bloccare i dispositivi di bloccaggio. En posición horizontal, desbloquee los ajustes de la barra. Tire de la tabla hacia arriba hasta colocarla en la posición deseada. -
Página 43: Primo Utilizzo Del Ferro / Primera Utilización De La Plancha
Primo utilizzo del ferro / Primera utilización de la plancha Assicurarsi che la cartuccia anticalcare sia installata prima di accendere l'apparecchio. Per installare la cartuccia, fare riferimento alle istruzioni di assemblaggio. Antes de conectar un cartucho antical al aparato, asegúrese de que está ajustado. -
Página 44: Accensione Del Ferro / Encendido De La Plancha
Accensione del ferro / Encendido de la plancha 1m30s Posizionare il ferro sul Collegare l'apparecchio Tenere premuto il pulsante suo supporto. alla presa di corrente e del vapore per 1 minuto e 30 accenderlo. Attendere secondi fino all'emissione di Coloque la plancha en el 45 secondi. - Página 45 Non stirare un indumento quando è indossato. Nunca debe planchar ni aplicar vapor directamente a una prenda que se lleva puesta. Pantaloni / Pantalones Posizionare i pantaloni sul piano Usare il piano in posizione orizzontale per inclinato per stirare le gambe. stirare i dettagli.
- Página 46 Accessori / Accesorios Usare l'apposito gancio per stirare un Usare le clip per fissare un indumento al indumento su una gruccia. piano. Utilice el gancho para colgar una prenda y Utilice las pinzas para mantener la prenda poder plancharla. fija sobre la tabla. —...
- Página 47 Utilizzo separato dell’unità vapore / Utilice el dispositivo de vapor nómada 45 s Posizionare il ferro e il Rimuovere l’unità Spostare l'apparecchio. supporto del ferro sulla Collegarlo alla presa di vapore dalla base. base. corrente, accenderlo e Premere la clip situata attendere 45 secondi.
- Página 48 Getto di vapore / Salida de vapor Premere il pulsante del vapore due volte in rapida successione per emettere un getto di vapore. x 2 Pulse el gatillo de vapor dos veces rápidamente para soltar vapor. Spegnimento automatico / Auto-desconexión 8 min Dopo 8 minuti di inattività, l'unità...
- Página 49 Pulizia / Limpieza Spegnere l'apparecchio. Pulire la piastra del ferro Non usare prodotti o Attendere un'ora con una spugna umida. utensili abrasivi per affinché si raffreddi. pulire la piastra del Limpie la suela con una ferro. Apague el aparato. esponja húmeda. Espere 1 hora hasta que No utilice productos ni se haya enfriado.
- Página 50 Portare il piano in posizione verticale. Inclinare il prodotto all'indietro per spostarlo e riporlo. Levante la tabla a la posición vertical. Levante la tabla sobre su parte trasera, para moverla y guardarla si fuera necesario. Suggerimento per il trasporto: per spostare l’apparecchio, afferrare le aste regolabili. Consejo sobre transporte: para mover su aparato, utilice las barras como zona de sujeción.
- Página 51 Spegnere l'apparecchio. Rimuovere il serbatoio Capovolgere l'unità Attendere un'ora dell’acqua. vapore e aprire i due affinché si raffreddi. fermagli. Vacíe el depósito de Apague el aparato. agua. De la vuelta al Espere 1 hora hasta que dispositivo de vapor, y se haya enfriado.
- Página 52 CLICK Rimuovere i tappi. Inserire la cartuccia Chiudere i due anticalcare nell'unità fermagli della cartuccia Retire los ajustes. vapore. anticalcare. Introduzca los cartuchos Cierre los 2 ajuste de los antical en el dispositivo cartuchos antical. de vapor. Riportare l'unità vapore Riempire il serbatoio Inserire il serbatoio nella posizione originale.
- Página 53 45 s 1 min 30 s Posizionare il ferro e Collegare l'apparecchio Tenere premuto il l'unità vapore sulla base. alla presa di corrente e pulsante del vapore per accenderlo. Attendere 1 minuto e 30 secondi Coloque la plancha y 45 secondi. fino all'emissione di el dispositivo de vapor vapore.
- Página 54 45 s 1 min 30 s AR ضع المكواة ووحدة البخار على AR اوصل الجهاز بالتيار الكهربائي AR 1 اضغط على زناد البخار لمدة .وش غ ّ له. انتظر لمدة 54 ثانية القاعدة دقيقة و 03 ثانية الى أن يخرج .البخار...
- Página 55 CLICK .انزع عنها الموانع أدخل الخرطوشات في وحدة AR اقفل القفلين في خرطوشات منع .البخار التكلس ضع وحدة البخار على الوضع امأل خزان الماء أدخل خزان الماء الى مكانه الصحيح .واقفله...
- Página 56 أوقف تشغيل الجهاز. انتظر افصل خزان الماء اقلب وحدة البخار، وافتح .لمدة ساعة واحدة لكي يبرد .القفلين انزع خرطوشات منع التكلس تخلص من الخرطوشات .افتح الخرطوشات الجديدة .القديمة...
- Página 57 .اقلب اللوح الى الوضع العمودي اقلب المنتج على ظهره ، لنقله وترتيبه إذا لزم .األمر .نصائح بشأن النقل: لنقل جهازك ، استخدم العمودين كوسيلة للحمل منع التكلس ANTI عندما تقترب الخرطوشة من نهايتها ، يومض المؤشر الضوئي CALC .المضاد للترسبات...
- Página 58 التنظيف أوقف تشغيل الجهاز. انتظر نظف نعل المكواة بإسفنجة ﻻ تﺴﺘﺨﺪم أب ﺪ ًا الﻤﻨﺘﺠات أو .لمدة ساعة واحدة لكي يبرد رطبة المواد الﻜاشطة لﺘﻨﻈﻴﻒ نعل .المكواة التوضيب حوّ ل قاعدة المكواة الى الجزء أوقف تشغيل الجهاز. انتظر أفرغ خزان الماء .الخلفي...
- Página 59 التوقف األوتوماتيكي 8 min .بعد 8 دقائق من عدم التشغيل ، سوف تتحول وحدة البخار إلى وضعية اﻻستعداد 38 min . ً بعد 83 دقيقة من عدم التشغيل ، سيتم إيقاف تشغيل وحدة البخار أوتوماتيكي ا...
- Página 60 استعمال وحدة البخار لوحدها 45 s ضع المكواة و قاعدتها على AR .ارفع وحدة البخار عن قاعدتها حرك القاعدة ، وأوصل المنتج بالتيار الكهربائي وش غ ّ له وانتظر القاعدة اضغط على المشبك الموجود لمدة 54 ثانية قبل استخدام في ذراع مسند المكواة، وذلك .المكواة...
- Página 61 ال م ُلحقات استعمل خطاف العالقة لكيّ المالبس الموضوعة استعمل المشابك لتثبيت المالبس على اللوح على العالقة — فرشاة القماش ضع فرشاة البخار على نعل المكواة. هذا يساعد AR قبل فصل الفرشاة أو تركيبها ، أوقف تشغيل الجهاز .ﻻحقا على فتح ألياف المالبس لتحسين تغلغل البخار .واتركه...
- Página 62 ﻻ تكو أو توجه البخار مباشرة على المالبس التي يرتديها .شخص ما السراويل .على اللوح المائل ، ضع السروال لكي األرجل .استخدم اللوح في الوضع األفقي لكيّ التفاصيل...
- Página 63 تشغيل المكواة 1m30s ضع المكواة على قاعدتها AR اوصل الجهاز بالتيار الكهربائي AR 1 اضغط على زناد البخار لمدة .وش غ ّ له. انتظر لمدة 54 ثانية دقيقة و 03 ثانية الى أن يخرج .البخار الكي والتبخير للقمصان .على الوضع المائل ، ضع القميص على اللوحة لكيّ الظهر والصدر AR استخدم...
- Página 64 استعمال المكواة للمرة األولى تأكد من ضبط خرطوشة الترسبات قبل تشغيل الجهاز. لضبط الخرطوشات ، يرجى .الرجوع إلى تعليمات التجميع تعبئة خزان الماء افصل الجهاز عن التيار الكهربائي حرر خزان الماء وأخرجه من مكانه امأل خزان الماء .أدخل خزان الماء الى مكانه واقفله...
- Página 65 تعديل اإلرتفاع .في الوضع األفقي ، افتح قفالت األعمدة. اسحب اللوحة نحو الوضع الذي تريده. اقفل قفالت األعمدة .عند فتح قفالت األعمدة ، قد تنخفض اللوحة. امسكها أثناء التالعب توجيه قاعدة المكواة .حرك قاعدة المكواة على الجزء األمامي من الجهاز ، واضبطها حسب الوضعية األكثر مالئمة...
- Página 66 اإلستعمال للمرة األولى جعل اللوح في وضع منحدر AR .ضع يديك على كل جانب من جوانب اللوحة ، وارفعها عمود ي ًا ، واملها إلى الخلف حتى تصل إلى الوضع المائل حرك اللوحة إلى الوضع األفقي .ضع يديك على كل جانب من اللوحة ، وارفعها عمود ي ًا، وأملها إلى الخلف حتى تصبح في الوضع األفقي...
- Página 67 المكواة ووحدة البخار نعل المكواة زناد البخار خزان الماء مؤشر ضوئي ضد الترسبات زر تشغيل/إيقاف السلك الكهربائي خرطوشة ضد الترسبات ح ُ جيرة الخرطوشات...
- Página 68 وصف أجزاء المنتج المنتج خط ّ اف العالقة لوح قابل لإلمالة قاعدة المكواة المكواة الشكل قابل للطي ضوابط اإلرتفاع وحدة البخار خرطوم البخار...
- Página 69 قبل اإلستعمال للمرة األولى .عند اإلستعمال للمرة األولى، قد يصدر عن الجهاز بعض الدخان والرائحة .إنها ﻻ تؤثر على استعمال الجهاز، وسوف تختفي بسرعة عند اإلستعمال للمرة األولى، قد تخرج بعض الجسيمات الصغيرة من المكواة. انها جزء من عملية اإلنتاج وﻻ تؤثر عليك .أو...