
Manuales relacionados para EAS ELECTRIC EMCH Serie

Resumen de contenidos para EAS ELECTRIC EMCH Serie
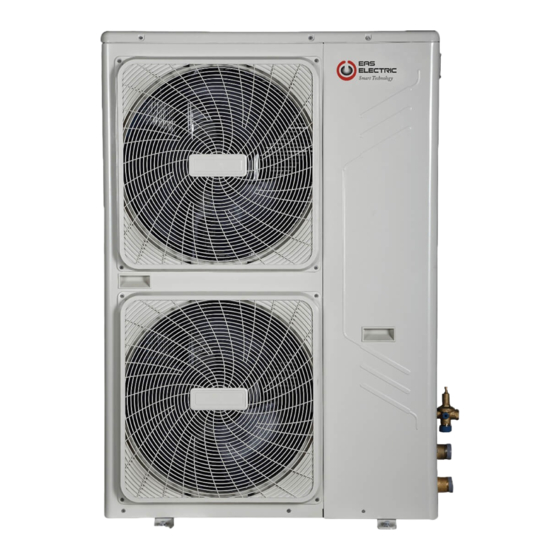
- Página 1 MINI CHILLER INVERTER MANUAL DE INSTALACIÓN Y MANUAL DE USUARIO MODELOS: EMCH-10W/1 EMCH-12W/1 EMCH-14W/3 EMCH-16W/3...
-
Página 2: Requisitos De Calidad Del Agua En El Circuito
Requisitos de calidad del agua en el circuito La calidad del agua debe cumplir los estándares de la Directiva Europea 98/83 CE y los criterios indicados en la Norma UNE 112.076 Antes de conectar la unidad exterior: En las instalaciones tanto nuevas como ya existentes, se debe de realizar una limpieza a fondo de las tuberías utilizando un producto de limpieza químico adecuado, posteriormente se lavarán las tuberías para limpiar el agente químico. -
Página 3: Tabla De Contenido
Índice 1.Alineación de unidades exteriores ....................4 3.Características ..........................5 4.Descripción de componentes principales ................... 9 5.Especificaciones .......................... 11 6.Dimensiones ..........................14 7.Diagrama de tuberías ........................15 8.Diagrama de cables ........................16 9.Características eléctricas ......................19 10.Tablas de capacidad ........................20 11.Límites de funcionamiento ...................... -
Página 4: Modelos De Unidades Exteriores
Modelos de unidades exteriores EMCH-07W/1 EMCH-10W/1 - EMCH-12W/1 - EMCH-14W/3- EMCH16W/3 Alimentación Tipo de Intercambiad Modo aire Módulo Modelo Capacidad Refrigerante (V-fases-Hz) compresor or de calor acondicionado hidráulico Bomba de EMCH-07W/1 220-240 monofásica a 50 7,0 kW Inverter CC De placas Incorporado R410A calor... -
Página 5: Características
3. Características 3.1 Compresor Inverter de CC muy eficiente El sistema de refrigeración Mini Chiller Full DC Inverter incorpora un compresor inteligente controlado por tecnología Inverter. Esta tecnología permite que el rendimiento de la unidad exterior se ajuste a las necesidades reales de calor. -
Página 6: Alta Eficiencia
3.4 Alta eficiencia 3.5 Amplio rango de temperatura El sistema mini chiller funciona de forma estable a un intervalo de temperatura extrema desde -5 ˚C a 46˚C, en calefacción de -15˚C a 27˚C. COOLING MODE 46°C -5°C HEATING MODE -15°C 27°C °C(D.B.) Outdoor temp. -
Página 7: Control Remoto De Facil Manejo
a. Armario protector metálico con pintura de poliéster inoxidable; b. Incorporado con protección contra transitorios de tensión, protección contra sobretensiones, protección anti-congelamiento, protección de flujo de agua, etc.; todo para conseguir que el sistema funcione de la forma más segura. 3.8 Control remoto de facil manejo Cambie SW4_1 (10 kW) o SW3_1 (12-16kW) en el PCB en ON para habilitar las siguientes funciones de control remoto. -
Página 8: Función De Comienzo/Detención Forzados De La Bomba De Agua
100% 3.10 Función de comienzo/detención forzados de la bomba de agua Pulse el botón de consulta "Check" durante 3 segundos para hacer que comience a funcionar la bomba de agua cuando la unidad está en modo de espera (standby). Pulse el botón de "Check" durante 3 segundos nuevamente para detener la bomba de agua. -
Página 9: Descripción De Componentes Principales
4. Descripción de los componentes principales Estructura Las paredes y la base están hechas de acero galvanizado pintado con epoxi para asegurar una resistencia total a la contaminación atmosférica y bandeja de acumulación de condensado según normativa. Serpentín del condensador Las tuberías del serpentín son de cobre compacto, de alto rendimiento y sin soldaduras y las aletas son de aluminio, con superficie ancha para garantizar una óptima capacidad de intercambio de calor. - Página 10 1 Panel de operaciones 2 Manómetro Agua 3 válvula de descarga automática 4 Ventilador axial 5 interruptor de presión diferencial 6 condensador 7 Acumulador 8 Descarga de Seguridad 9 válvula expansion eléctrica 10 Intercambiador de calor de placas 11 Cuadro eléctrico 12 interruptor de alta presión 13 válvula de 4 vías 14 Tanque de expansión...
-
Página 11: Especificaciones
Especificaciones Modelo EMCH-07W/1 Fuente de alimentación V-fases-Hz 220-240, 1, 50 Capacidad Refrigeración*(1) Entrada 2.25 Capacidad 7.88 Refrigeración*(2) Entrada 1.84 Capacidad Calefacción*(3) Entrada Capacidad 8.29 Calefacción*(4) Entrada 2.13 EER* (1) kW/ kW 3.23 EER* (2) kW/ kW 5.16 Consumo con potencia máxima Corriente con potencia máxima 15,6 Modelo... - Página 12 Modelo EMCH-10W/1 EMCH-12W/1 220-240, 1, 50 Fuente de alimentación V-fases-Hz 220-240, 1, 50 10.0(2.9~10.5) 11.2(3.1~12.0) Capacidad Refrigeración*(1) 2.95 3.38 Entrada 10.9 14.50 Capacidad Refrigeración*(2) 2.49 2.80 Entrada 11.0(3.2~12.0) 12.3(3.3~13.2) Capacidad Calefacción*(3) 3.14 3.72 Entrada 10.96 13.75 Capacidad Calefacción*(4) 2.51 2.85 Entrada 3.39 3.31...
- Página 13 Modelo EMCH-14W/3 EMCH-16W/3 Fuente de alimentación V-fases-Hz 380-415, 3, 50 380-415, 3, 50 Capacidad 12.5(3.3~14.0) 14.5(3.5~15.5) Refrigeración*(1) Entrada 4.53 Capacidad 15.17 16.70 Refrigeración*(2) Entrada 3.13 3.73 Capacidad 13.8(3.5~15.4) 16.0(3.7~17.0) Calefacción*(3) Entrada 4.25 4.85 Capacidad 15.30 16.97 Calefacción*(4) Entrada 3.15 3.86 EER* (1) kW/ kW EER* (2)
-
Página 14: Dimensiones
6. Dimensiones EMCH-07W/1 (Unidad: mm) EMCH-10W/1, EMCH-12W/1, EMCH-14W/3, EMCH-16W/3 (Unidad : mm) -
Página 15: Diagrama De Tuberías
5.� Diagrama de tuberías� EMCH-07W/1 HEAT PUMP 1 Compresor 6 Válvula expansiva electrónica 11 Acumulador 2 Conmutador de alta presión 7 Receptor de líquidos 12 Conmutador de presión baja 3 valor de 4 vías (solo BOMBA 8 Intercambiador de calor de 13 Calentador de caja del DE CALOR) placa... -
Página 16: Diagrama De Cables
6.� Diagrama de cables� EMCH-07W/1... - Página 17 EMCH-10W/1...
- Página 18 EMCH-12W/1, EMCH-14W/3, EMCH-16W/3...
-
Página 19: Características Eléctricas
7. Características eléctricas Unidad exterior Alimentación Compresor Modelo Tensión Fase Mín. Máx. TOCA EMCH-07W/1 50 Hz 220-240 V monof. 198 V 254 V 10,1 15,6 29,5 0,195 1,65 198V EMCH-10W/1 50Hz 220~240V 264V 15.1 25.0 12.1 0.20 342V EMCH-12W/1 50Hz 220~240V 456V 0.20... -
Página 20: Tablas De Capacidad
8. Tablas de capacidad Refrigeración EMCH-07 W/1 ℃ Temp. ambiente ( 21,00 25,00 30,00 35,00 40,00 46,00 Tª agua refriger ada de salida ℃ 5,00 7,84 1,98 3,95 7,38 2,04 3,61 6,96 2,11 3,31 6,58 2,17 3,03 6,17 2,28 2,70 5,67 2,39 2,37... - Página 21 EMCH-10W/1 Temp. ambiente.(ć) 21.00 25.00 30.00 35.00 40.00 46.00 Tª agua refriger ada de salida. (ć) 5.00 11.20 2.60 4.31 10.54 2.68 3.94 9.95 2.76 3.60 9.40 2.85 3.30 8.81 2.99 2.95 8.10 3.14 2.58 6.00 11.57 2.64 4.39 10.89 2.72 4.00 10.26...
- Página 22 EMCH-14W/3 Temp. ambiente ć) 21.00 25.00 30.00 35.00 40.00 46.00 Tª agua refriger ada de salida. (ć) 5.00 13.99 3.43 4.07 13.18 3.54 3.72 12.43 3.65 3.41 11.75 3.76 3.12 11.01 3.95 2.79 10.13 4.15 2.44 6.00 14.47 3.49 4.15 13.61 3.60 3.78...
-
Página 23: Calefacción
Calefacción EMCH-07W/1 Temp. ambiente (℃) Tª agua caliente salida (℃) 40,00 4,96 1,56 3,17 6,20 1,78 3,49 7,30 1,98 3,70 8,11 2,15 3,78 8,81 2,26 3,90 9,87 2,40 4,12 11,35 2,59 4,39 41,00 4,81 1,60 3,01 6,01 1,81 3,32 7,08 2,02 3,51 7,88... - Página 24 EMCH-10W/1 Temp. ambiente.(ć) Tª agua calien te de salida (ć) 40.00 6.82 1.96 3.47 8.53 2.23 3.82 10.04 2.48 4.05 11.15 2.70 4.14 12.12 2.84 4.27 13.57 3.01 4.51 15.61 3.25 4.80 41.00 6.61 2.00 3.30 8.27 2.28 3.63 9.74 2.53 3.85 10.83...
- Página 25 EMCH/14W/3 Temp. ambiente.(ć) Tª agua calien te de salida (ć) 40.00 8.56 2.66 3.22 10.70 3.02 3.54 12.59 3.36 3.75 13.99 3.65 3.83 15.20 3.84 3.96 17.03 4.07 4.18 19.58 4.40 4.45 41.00 8.29 2.71 3.05 10.37 3.08 3.36 12.22 3.43 3.57 13.59...
-
Página 26: Límites De Funcionamiento
9. Límites de funcionamiento Área de operación REFRIGERACIÓN recomendada 4 5 7 TEMPERATURA DEL AGUA DE SALIDA CALEFACCIÓN TEMPERATURA DE AGUA DE SALIDA a) Soluciones de etilenglicol El uso de soluciones de etilenglicol y agua en lugar de agua como medio refrigerador reducen el rendimiento de la unidad. -
Página 27: Factores De Suciedad Y Polvo
Nota: Durante el invierno, si no se usa la unidad, drene el agua completamente si no se ha cargado el anticongelante en la tubería o mantenga la alimentación encendida (en modo de espera o apagado) y asegúrese de que el agua no salga de la unidad. Cuando la temperatura ambiente esté... -
Página 28: Rendimiento Hidráulico
10. Rendimiento hidráulico Perdida de carga del intercambiador de calor (lado del agua) Flujo de agua Modelo l/sec 0.222 0.278 0.333 0.389 0.444 0.500 0.556 Caída de presión 7 kW... -
Página 32: Unidad Exterior
11. Nivel de ruido Unidad exterior Microphone 1.0m Modelo Nivel de ruido (dB (A)) EMCH-07W/1 EMCH-10W/1 EMCH-12W/1 EMCH-14W/1 EMCH-16W/1 Nota: ※ : Flujo de aire alto/bajo del motor de ventilador exterior. 2). Se analiza a 1 metro de la unidad en una cámara semi-anecoica (presión acústica). -
Página 33: Vista Ampliada
12. Vista ampliada EMCH-07W/1 28.4 28.6 28.5 28.7 28.3 28.2 28.1... - Página 34 Núm. Nombre Cantidad Núm. Nombre Cantidad Conjunto de sensor de temp. de descarga Piezas soldadas de placa fija Conjunto de receptor de líquido Pieza soldada de soporte 20.1 Base rodamiento Cilindro acumulador 20.2 Placa fija de tubería de entrada Regulador de presión Conjunto de tubo de drenaje de intercambiador de calor de placas Barra de soporte de válvula antirretorno...
-
Página 35: Instalación
EMCH-10W/1... - Página 36 Núm. Nombre Cant. Núm. Nombre Cant. Ensamblaje placa frontal derecha Separador Gas-liquido Partes de válvula de cuatro vias Interruptor de presión diferencial Ensamblaje válvula de cuatro vías Medidor hidraulico Interruptor de presión Ensmblaje de la caja de la pantalla Piezas soldadas de soporte Ensamblaje del conjunto de la caja electrica de control Ensamblaje de tubería aspiración...
- Página 37 EMCH-12W/1 EMCH-14W/3 EMCH-16W/3...
- Página 38 Núm. Nombre Cant. Núm. Nombre Cant. Ensamblaje placa frontal derecha Interruptor de presión diferencial Partes de válvula de cuatro vias Medidor hidraulico Ensamblaje válvula de cuatro vías Ensmblaje de la caja de la pantalla Interruptor de presión Ensamblaje del conjunto de la caja electrica de control 1 Piezas soldadas de soporte 25.1 Modulo inverter...
-
Página 39: Instalación
15. Instalación a) Información general de instalación Advertencia general Estas unidades fueron diseñadas para agua fría y agua caliente y se deben usar en aplicaciones compatibles con sus características de rendimiento. Estas unidades están diseñadas para aplicaciones residenciales o similares. Una instalación, regulación y mantenimiento incorrectos o un uso inadecuado exime al fabricante de toda responsabilidad, ya sea contractual o de otra índole, de todo daño a personas, animales u otros. -
Página 40: Instalación De La Unidad Exterior Elección Del Sitio De Instalación
Trate la unidad con sumo cuidado para evitar daños. b) Instalación de la unidad exterior Elección del sitio de instalación Antes de instalar la unidad, póngase de acuerdo con el cliente sobre el sitio donde se instalará, tomando en consideración los siguientes puntos: -verificar que los puntos de fijación sean adecuados para soportar el peso de la unidad. -
Página 41: Espacio De Servicio Unidad: Mm
Espacio de servicio Unidad: mm Dado que el centro de gravedad de la unidad no se encuentra en su centro físico, por favor tenga cuidado al levantarla . Nunca la sostenga por la entrada de aire de la unidad exterior para evitar que se deforme. No toque el ventilador con las manos u otros objetos. -
Página 42: Conexión Hidráulica
d)� Conexión hidráulica La selección e instalación de los componentes es responsabilidad del instalador, quien deberá seguir las buenas prácticas de trabajo y las leyes vigentes. Antes de conectar los tubos, asegúrese de que no contengan piedras, arena, óxido u otros elementos que puedan dañar la unidad. Se recomienda hacer un bypass para permitir que los tubos se laven sin desconectar la unidad (véase las sección de válvulas de drenaje). - Página 43 Si la instalación necesitara una altura de bombeo útil más alta que la obtenida al instalar el conjunto de bomba y tanque de almacenamiento, se recomienda instalar una bomba adicional en la unidad. Si la bomba adicional se instala dentro de la unidad, la bomba deberá conectarse cerca del intercambiador de calor de placas.
- Página 44 Evaporador Evaporador Recirculación Recirculación Caudal máximo de agua fría El caudal máximo de agua refrigerada está limitada por la caída de presión permitida en el evaporador. Se proporciona en la tabla siguiente. Si el flujo de sistema es más rapido que la velocidad de flujo máximo de la unidad, omitir el evaporador como se muestra en el diagrama para obtener una tasa de flujo inferior del evaporador.
-
Página 45: Recargar La Instalación
h) Control de calidad del agua Cuando se utiliza agua industrial como agua refrigerada, poco furring puede ocurrir; sin embargo, agua de pozo o agua de río, que se utiliza como agua refrigerada, puede causar mucho sedimento, como el enrasado, arena, y así sucesivamente. Por lo tanto, el agua de pozo o agua de los ríos deben ser filtrados y se suavizaron en equipos para ablandar el agua antes de desembocar en el sistema de agua enfriada. - Página 46 Tamaño y posición de las conexiones Entrada de agua Orificio de reposición automática de agua Descarga de seguridad Salida de agua Salida de agua del intercambiador de calor de placas Reabastecimiento Entrada/salida Descarga de Modelo automático de (mm) (mm) (mm) (mm) (mm) (mm)
-
Página 47: Conexión Eléctrica
e) Conexión eléctrica Los sistemas de refrigeración Mini Chiller vienen de fábrica ya cableados pero necesitan la instalación de un interruptor térmico de corte omnipolar, un interruptor de red con llave para la conexión al suministro de alimentación y la conexión del interruptor de flujo a los terminales correspondientes. Todas estas operaciones las debe realizar personal cualificado de conformidad con las leyes vigentes. -
Página 48: Conexionado Alimentación Eléctrica
f)� Conexionado alimentación eléctrica� EMCH-07/W1 Para la conexión funcional de la unidad, lleve el cable de suministro al panel eléctrico d dentro de la unidad y conéctelo a los terminales L-N y a la fase (L), (N) neutra y tierra en el caso de unidades de 220-240 V a 50 Hz. - Página 49 1) Conexión auxiliar EMCH-07W/1 1. Los terminales de cableado “PUMP2” suministra las señales de ENCENDIDO/APAGADO. La bomba de agua en espera (standby) se debe controlar mediante el contactor CA. 2. El terminal de cableado de ENCENDIDO/APAGADO suministra un voltaje de 220 V. La unidad se debe apagar cuando accionando el interruptor del mando, el circuito quede cerrado.
-
Página 50: Apagado Remoto
b. Alarma remota El terminal de alarma remota solo proporciona una señal de conmutación pasiva. La corriente que pasa a través de la interfaz del terminal debe ser inferior a 1,5 A, de lo contrario, utilice el contactor de CA para controlar la carga indirectamente. c. -
Página 51: Especificaciones De Alimentación
● El control por cable es opcional. ● Utilice un cable blindado de 3 hilos para conectar el control por cable y la capa de protección debe estar conectada a tierra ● Al conectar el control por cable, el panel de control de la unidad exterior se usa principalmente para la visualización para verificar los parámetros, no se puede usar para configurar el modo y la temperatura. -
Página 52: Comprobaciones Y Puesta En Marcha La Unidad
13. Comprobaciones y puesta en marcha la unidad Preparación para la puesta en marcha Reinicie si la unidad ha estado apagada durante largos períodos. La enfriadora la debe poner en marcha por primera vez el Servicio Técnico. Antes de poner en marcha las enfriadoras, asegúrese de: - que se respetan todas las condiciones de seguridad. - Página 53 Para acceder el panel de control abrir la tapa: -retirar el tornillo 1 y tornillo 2; -subir el panel 3.
-
Página 54: Funcionamiento Y Mantenimiento
14. Funcionamiento y mantenimiento a) Características de funcionamiento Punto de ajuste en modo refrigeración (Ajustado en fábrica) = 12 °C, Histéresis = 3 °C. El compresor arranca con temperaturas de agua superiores a 12 °C. El compresor se apaga con temperaturas de agua inferiores a 9 °C. Punto de ajuste en modo de calefacción (Ajustado en fábrica) = 40 °C, Histéresis = 4 °C. -
Página 55: Mantenimiento Rutinario
b) Mantenimiento rutinario Nunca realice ninguna tarea de limpieza sin haber desconectado la unidad de la fuente de alimentación principal. Si se daña el cable de alimentación, debe sustituirlo el fabricante o su agente de servicio técnico o un fabricante o agente de servicio técnico igualmente calificado. Un mantenimiento regular es fundamental para mantener la eficacia de la unidad en términos de rendimiento y de consumo energético. -
Página 56: Prohibición
Importante En el caso de fugas parciales, el circuito debe vaciarse por completo antes de volver a llenarse El refrigerante R410a debe llenarse únicamente en estado líquido. Las condiciones de funcionamiento diferentes a las nominales pueden producir valores considerablemente diferentes. La prueba de estanqueidad o identificación de fugas debe llevarse a cabo únicamente usando gas refrigerante R410a, y comprobando con un detector de fugas adecuado. -
Página 57: Controlador
18. Mando 18.1 Mando estándar Se incorpora a la enfriadora de fábrica. El panel frontal del dispositivo funciona como interfaz del usuario y se usa para realizar todas las tareas relativas al dispositivo. ① ② ③ ④ ⑤ ⑥ ⑧ ⑨... -
Página 58: Descripción Del Funcionamiento Del Panel De Control
Icono indicador de arranque del ventilador Cuando arranque el ventilador, este icono estará constantemente encendido. Se apagará cuando el ventilador se apague. Icono de arranque de la bomba de agua Cuando arranque la bomba de agua, este icono estará constantemente encendido. Se apagará cuando la bomba de agua se apague. - Página 59 estará constantemente encendido y los primeros 2 dígitos en del tubo Nixie parpadearán. Presione “ ” o “ ” para ajustar los minutos. Presione “ ” al terminar de ajustar y “ ” se apagará. 4) Ajuste del temporizador a. Ajuste de encendido programado ①...
-
Página 60: Función Auto-Bloqueo (Desbloqueo)
18.3 Funciones con combinación de botones Forzar la función de refrigeración Presione “ ” y “ ” de forma simultánea durante 3 segundos en la interfaz principal para entrar en el modo de refrigeración forzada. El icono de modo de refrigeración forzada estará constantemente encendido. - Página 61 Mando por cable táctil opcional� (EMCH-10W/1 - EMCH-12W/1 - EMCH-14W/3 - EMCH-16W/3) Funciones principales de este mando con cable: 1) Manejo del mando a través de botones de funcionamiento. 2) La pantalla LCD muestra los parámetros de funcionamiento. 3) Temporizador múltiple. 4) Alarma acústica y funciones de alarma.
- Página 62 Icono reservado. Comprobación: Este símbolo aparece en pantalla cuando la función Comprobación está activada. Anticongelante: Este símbolo se muestra en pantalla cuando la temperatura ambiente de la unidad maestra es muy baja con el fin de recordar al usuario que debe tomar medidas para evitar la congelación de la unidad.
- Página 63 2. Instrucciones de funcionamiento. a. Encendido y apagado de la unidad maestra. 1) Utilice el botón ENCENDIDO/APAGADO para controlar la función de encendido y apagado de la unidad maestra. 2) Cuando la unidad está apagada, pulse el botón ENCENDIDO/APAGADO “ ”...
- Página 64 También puede pulsar el botón FUNCTIONS para introducir el valor y a continuación pulse los botones “▲” o “▼” para ajustar. Pulse la tecla "OK" o espere a 7 segundos para confirmar. En ese momento, la pantalla LCD del mando con cable mostrará el ajuste de temperatura y el parámetro de temperatura del agua, tal y como se muestra en la figura.
- Página 65 Las horas del reloj parpadearán indicando que el ajuste actual es la hora de "Apagado" del Temporizador 1, pulse los botones “▲” o “▼” para ajustar y pulse el botón “ ” cuando haya acabado; a continuación, los minutos del reloj parpadearán indicando que el ajuste actual son los minutos de "Apagado" del Temporizador 1, pulse los botones “▲”...
- Página 66 Ejemplo de configuración de la temporización: Página principal Pulse dos veces el botón FUNCTIONS para configurar la interfaz de la hora de "Encendido" del "Temporizador 1". Utilice los botones “▲” o “▼” para ajustar en 07 el valor de la hora de "Encendido"...
- Página 67 Nota: Para evitar errores de temporización, los periodos configurados no deben solaparse. Por ejemplo: d) Configuración del reloj: Presione el botón “FUNCTIONS” 3 veces para entrar en la configuración del reloj. Las horas del reloj parpadearán indicando que le ajuste actual es la hora del reloj, pulse el botón “▲” o “▼” para ajustar el valor y finalmente, pulse el botón “...
- Página 68 Encendido forzado de la bomba de agua. Presione el botón FUNCTIONS 5 veces para encender la bomba de agua. El icono de la bomba parpadeará, pulse el botón OK para finalizar, pulse el botón CANCEL en cualquier momento para salir sin guardar los cambios Nota: a.
- Página 69 3) Pulse el botón “ ” o “ ” para ajustar el número secuencial de comprobación de la unidad; puede consultar la información sobre el estado de la unidad cuando el mando con cable está configurado en 1*: (El contenido que se puede consultar es el mismo que el de comprobación de la PCB) Orden Contenido Modo de funcionamiento:...
-
Página 70: Solución De Problemas
19.� Solución de problemas 19.1 Instrucciones de piezas del circuito impreso EMCH-07W/1 Panel PFC e IPM 1. Puerto de puente rectificador de entrada 1 2. Puerto de puente rectificador de entrada 2 3. Puerto de inductancia PFC 1 4. P-OUT 5. -
Página 71: Panel De Control Principal
Panel de control principal EMCH-07W/1 14 15 1. Capacidad L 2. Capacidad N 3. Relé de carga preliminar (puerto de entrada de puente rectificador 1) 4. Línea de puente rectificador de entrada (puerto de entrada de puente rectificador 2) 5. Fusible 5 A 6. - Página 72 Panel de filtro CC 1. Voltaje entrada N de IPM 2. Voltaje entrada P de IPM 3. Voltaje salida P de PFC 4. Voltaje salida N de PFC 5. DC 380 V (puerto de fuente de alimentación del ventilador de CC)
- Página 73 Panel de control principal EMCH-10W/1 1. Salida del transformador 2. Sensor de temperatura Tin/Tout/Tb1/Tb2 Nota: Tin: temperatura entrada del agua Tout: temperatura salida del agua Tb1: Temperatura 1 del intercambiador de calor de placas Tb2: Temperatura 2 del intercambiador de calor de placas 3.
- Página 74 15. Puerto de puente rectificador de entrada N 16. Puerto de puente rectificador de entrada L 17. Tubo fusible 8A 18. Válvula solenoide (Reservado) 19. Puerto resistencia de vávula de salida 21. Resistencia intercambiador de calor de placas 22. Puerto resistencia válvula presión diferencial 23.
- Página 75 1.Puerto de salida +18V 2. Puerto de entrada P de IPM 3. Puerto de alimentación U del compresor 4. Puerto de alimentación V del compresor 5. Puerto de alimentación W del compresor 6. PFC salida N 7. PFC salida P 8.
-
Página 76: Interruptor De Alta Presión
1. Puerto de entrada para alimentación 2. Puerto de depuración 3. Puerto del panel de visualización y funcionamiento 4. Sensor de temperatura Tin/Tout/Tb1/Tb2 Nota: Tin: temperatura entrada del agua Tout: temperatura salida del agua Tb1: Temperatura 1 del intercambiador de calor de placas Tb2: Temperatura 2 del intercambiador de calor de placas 5. - Página 77 Modulo IPM EMCH-12W/1 / EMCH-14W/3 / EMCH-16W/3 1. + 15V puerto de salida 2. Puerto de comunicación al tablero de control principal. 3. Puerto de entrada IPM N 4. Puerto de conexión del compresor W 5. Puerto de conexión del compresor V 6.
-
Página 78: Instrucciones Para Interruptores De Configuración De Función 7Kw
Panel filtro EMCH-12W/1 / EMCH-14W/3 / EMCH-16/W3 1. Fuente de alimentación puerto L3 2. Fuente de alimentación puerto L2 3. Entrada de alimentación del puerto L1 4. Entrada de alimentación del puerto N 5. cable de tierra 6. Puerto de alimentación cargado para el tablero de control principal 7. -
Página 79: Función De Consulta
19.3. Función de consulta a. Para introducir una función de comprobación de parámetro presione “ ” y “ ” simultáneamente durante 2 segundos para entrar en la interfaz de la función de consulta de parámetro. En este momento, los primeros 2 dígitos del tubo digital mostrarán un número de secuencia y los últimos 2 dígitos mostrarán parámetros específicos. - Página 80 10-16kW Núm Contenido Nota Muestra la hora cuando la unidad está en modo de espera. Muestra temperatura del agua de entrada cuando la unidad está en funcionamiento, muestra dF cuando está descongelando, Pb cuando 0 Pantalla inicial está en funcionamiento el modo de anticongelación . Se muestra d0 cuando cunado retorna aceite, d8 cuando el control remoto está...
-
Página 81: Tabla De Códigos De Error
19.4 Tabla de códigos de error Código Nota Contenido error Error de EEPROM Error en la comunicación entre el chip principal e IPDU Error del sensor T3,T4 Igual 5-7 Error de la protección de tensión 10-16 kW Error del motor del ventilador de CC Un ventilador en la zona A ha funcionado durante más de 5 minutos en modo calefacción Se producen dos errores E6 en 10 minutos (recuperación tras apagado) Error del sensor de temperatura del agua de entrada (modelos 5-7 kW) - Página 82 Error E9: Error de EEPROM Este error puede deberse a dos razones: 1) El EEPROM no está bien insertado; 2) El circuito impreso principal exterior está roto. El LED muestra E9 Error de EEPROM Instálelo nuevamente de Compruebe si el EEPROM está instalado de forma forma adecuada.
- Página 83 Error E4: Error del sensor T3, T4 Error HH: Error del sensor de temperatura del agua de entrada Error EC: Error del sensor de temperatura del agua de salida Error CO: Error del sensor de la temperatura del intercambiador de calor de placas T3: temperatura de salida del intercambiador de calor exterior T4: temperatura ambiente exterior El LED muestra E4/HH/EC/CO...
- Página 84 Error E6: Error del motor del ventilador de CC El LED muestra E6 El ventilador de CC de la unidad exterior no funciona. Vuelva a Mire la ficha de identificación de los cables para comprobar si los conectarlos. cables de la unidad están fijados correctamente SÍ...
-
Página 85: Error P1: Protección De Alta Presión
Error P1: Protección de alta presión El LED muestra P1 Protección de alta presión Vuelva a Compruebe si la conexión del cableado es correcta. conectarlo. SÍ Compruebe si el cuerpo del cable está roto o no. Sustituya el interruptor de alta Comprobación: cortocircuito en el interruptor de alta presión. -
Página 86: P2: Protección De Baja Presión
P2: Protección de baja presión El LED muestra P2 Protección de baja presión Vuelva a conectarlos bien. Compruebe si la conexión de los cables entre el interruptor de baja presión y el circuito impreso está bien fijada. SÍ Compruebe si el interruptor de baja presión está dañado. SÍ... -
Página 87: P3: Protección De La Corriente Del Compresor
P3: Protección de la corriente del compresor Protegerá cuando la corriente de entrada sea mayor de 22 A. Se recuperará cuando la corriente de entrada sea menor de 22 A. Se recuperará automáticamente. El LED muestra P3 Protección de la corriente del compresor Compruebe si la corriente de entrada del cable de alimentación es Sustituya el circuito mayor de 22 A. - Página 88 P4: Protección de temperatura de descarga del compresor Cuando la temperatura de descarga del compresor es superior a 115 °C, la unidad deja de funcionar. Cuando la temperatura de descarga del compresor es inferior a 83 °C, la unidad continúa funcionando con normalidad de forma automática.
-
Página 89: P5: Protección De Alta Temperatura Del Condensador
P5: Protección de alta temperatura del condensador Cuando la temperatura del condensador sea superior a 65 grados, la unidad dejará de funcionar. Cuando la temperatura de la tubería exterior sea inferior a 52 grados, la unidad volverá a funcionar. El LED muestra P5 Protección de alta temperatura del condensador SÍ... - Página 90 P6: Protección del módulo IPM El LED muestra P6 Protección del módulo IPM Ajuste al rango adecuado. A Compruebe si la potencia de entrada continuación, compruebe es correcta: 220-240 V, 1 N, 50 Hz. Compruebe si la tensión P-N del módulo IPM si el sistema funciona con normalidad.
-
Página 91: P8: Protección Contra Tifones
P8: Protección contra tifones El LED muestra P8 Protección contra tifones Detenga la unidad para evitar el SÍ Compruebe si sopla aire fuerte sobre una unidad viento fuerte sobre el motor del exterior o si una unidad exterior cae sobre otra. ventilador. -
Página 92: Error Pb: Protección Anticongelante
Error Pb: Protección anticongelante El LED muestra Pb Protección anticongelante La temperatura real medida de la temperatura del agua de salida exterior y la SÍ Protección temperatura del intercambiador de calor de placas es inferior a 3 ºC en modo de sistema normal refrigeración. - Página 93 Error C8: Protección del flujo de agua del sistema El LED muestra C8 Protección del flujo de agua del sistema SÍ Repare fugas y agregue agua Compruebe si existen fugas del flujo de agua del sistema. nuevamente. SÍ Configure la bomba de agua externa Compruebe si la tubería de agua es demasiado larga y no está...
-
Página 94: Accesorios Opcionales
20. Accesorios opcionales -Filtro de malla metálica desmontable. -Kit de teclado inalámbrico. -Bomba adicional. Los accesorios anteriores son opcionales. Consulte la documentación relativa en las instrucciones de montaje y datos técnicos. Si el equipo presenta un funcionamiento anormal, por favor, en primer lugar desconecte la fuente de alimentación, y póngase en contacto con nuestro servicio la postventa (SAT). - Página 95 MINI CHILLER INVERTER INSTALLATION'S AND USER'S MANUAL EMCH-10W/1 EMCH-12W/1 EMCH-14W/3 EMCH-16W/3...
- Página 96 Water quality requirements in the circuit The quality of the water must comply with the standards of the European Directive 98/83 CE and the criteria indicated in the Standard UNE 112.076 Before connecting the outdoor unit: In both new and existing facilities, a thorough cleaning of the pipes must be carried out using an appropriate chemical cleaning product, then the pipes will be washed to clean the chemical agent.
- Página 97 Content ................... 3 OUTDOOR UNITS LINEUP ...................... 4 FEATURES ..............7 DESCRIPTION OF MAIN COMPONENTS ....................9 SPECIFICATIONS ....................13 DIMENSIONS .................... 14 PIPING DIAGRAM ................... 15 WIRING DIAGRAM ................18 ELECTRIC CHARACTERISTICS ..................19 CAPACITY TABLES ..................24 OPERATION LIMITS ..................
-
Página 98: Outdoor Units Lineup
1. Outdoor units lineup EMCH-07W/1 EMCH-10W/1 - EMCH-12W/1 - EMCH-14W/1 - EMCH16W/1 Power suply Compressor Heat Air conditioning Hydraulic Model Capacity Refrigerant (V-Ph-Hz) type Exchanger mode module Plate type EMCH-07W/1 220-240/1/50 7,0 kW DC Inverter De placas Incorporated R410A EMCH-10W/1 220-240/1/50 10 kW DC Inverter... -
Página 99: Features
2. Features 2.1 High efficient DC inverter compressor DC inverter Mini chiller adopts highly intelligent inverter-driven compressor. This advanced technology enables the output of the outdoor unit to be modulated by the real heat load demands. This advanced system ensures precise temperature regulation and highly efficient energy usage, making a significant contribution to limiting the impact on the environment. - Página 100 2.5 Low-opee rating soun nd design Optimally des sign fan sha ape and new w designed d discharge air r grille and a ir deflector, making high her air volum nd reduces running nois 2.6 Plate he a at exchange By adopting h high efficien ncy plate hea...
- Página 101 2.8 Flexible and convenient control Built-in electronic controller at factory. Compact devices with advanced function and friendly user interface. The chiller can be controlled by wired controller (EMCH-RC120), which is optional. Note: When connecting wired controller, outdoor unit control panel is mainly used for display, check parameters and diagnosis function.
-
Página 102: Description Of Main Components
3. Description of main components Structure: Panels and base are made from galvanized steel plate painted with epoxy power to ensure total resistance to atmospheric pollution, condensate collection pan as standard. Condenser coils: The coils are made from high performance and seamless copper tuber and high surface area aluminum fins to ensure optimum heat exchange capability. - Página 103 1 Operation panel 10 Expansion tank 2 4-ways valve 11 Plate heat exchanger 12 Condenser 3 Storage tank 13 Axial-flow fan 4 Pump 14 Adapter substitute (accessory) 5 Electric expansive valve 15 Security discharge 6 Compressor 16 Water supply valve (accessory) 17 Water flow switch 7 Automatic discharge valve 18 High pressure switch...
-
Página 104: Specifications
4. Specifications 220-240/1/50 Model EMCH-07W/1 EMCH-10W/1 EMCH-12W/1 Power supply V/Ph/Hz 220-240/1/50 220-240/1/50 220-240/1/50 Capacity 7.0(2.1~7.8) 10.0(2.9~10.5) 11.2(3.1~12.0) rated Input 2250 2950 3500 Cooling rated current 13.0 15.4 3.11 3.39 3.20 Capacity 10.6 12.2 rated Input 1850 2300 2650 Cooling 4.32 4.24 4.60 SEER... - Página 105 EMCH-12W/1 Model EMCH-07W/1 EMCH-10W/1 Type Plate heat exchanger Model ACH-30EQ-38H-F ACH-30EQ-50H-F ACH-30EQ-56H-F Circuits Quantity Water heat exchanger Water volume 0.53 0.78 Water flow 1.20 1.72 1.92 Water pressure drop Type RS15/6 RKC RS25/7.5 RKC RS25/7.5 RKC Pump head Water pump Water volume L/min Input (H/M/L)
- Página 106 380-415/3/50 Model EMCH-14W/3 EMCH-16W/3 Power supply V/Ph/Hz 380-415/3/50 380-415/3/50 Capacity 12.5(3.3~14.0) 14.5(3.5~15.5) rated Input 3900 4700 Cooling rated current 3.20 3.10 Capacity 14.2 15.6 rated Input 3100 3600 Cooling 4.58 4.33 SEER 6.69 6.78 Capacity 13.8(3.5~15.4) 16.0(3.7~17.0) rated Input 4250 4850 Heating rated current...
- Página 107 Model EMCH-14W/3 EMCH-16W/3 Type Plate heat exchanger Plate heat exchanger Model ACH-30EQ-64H-F ACH-30EQ-70H-F Circuits Quantity Water heat exchanger Water volume 0.78 1.06 Water flow 2.15 2.49 Water pressure drop Type RS25/7.5 RKC RS25/7.5 RKC Pump head Water pump Water volume L/min Input (H/M/L) 210/175/120...
-
Página 108: Dimensions
5. Dimensions EMCH-07W/1 (Unit: mm) EMCH-10W/1 - EMCH-12W/1 - EMCH-14W/3 - EMCH-16W/3 (Unit: mm) -
Página 109: Piping Diagram
6. Piping diagram EMCH-07W/1 HEAT PUMP 1 compressor 6 electric expansive valve 11 accumulater 2 high pressure switch 7 liquid receiver 12 low pressure switch 3 4-way valve(only HEAP PUMP) 8 plate heat exchanger 13 crankcase heater 4 condenser 9 defrost heater 5 filter 10 water Temp. -
Página 110: Wiring Diagram
7. Wiring Diagram EMCH-07W/1... - Página 111 EMCH-10W/1 - EMCH-12W/1...
- Página 112 EMCH-14W/3 - EMCH-16W/3...
-
Página 113: Electric Characteristics
8. Electric Characteristics Outdoor Unit Power Supply Compressor Model Voltage Phase Min. Max. TOCA EMCH-07W/1 50Hz 220~240V 198V 264V 10.1 15.6 29.5 0.17 1.65 EMCH-10W/1 50Hz 220~240V 198V 264V 15.1 26.0 12.1 0.20 EMCH-12W/1 50Hz 220~240V 198V 264V 15.1 25.0 12.1 0.20 EMCH-14W/3... -
Página 114: Capacity Tables
9. Capacity Tables EMCH-07W/1 Cooling Chilled water outlet temp (℃) .Ambient temp. (℃) 9.69 2.09 4.64 10.48 2.05 5.11 11.31 2.00 5.66 11.87 1.97 6.04 12.78 1.92 6.67 8.84 2.13 4.14 9.57 2.08 4.60 10.35 2.02 5.11 10.87 1.99 5.46 11.41 1.94 5.88... - Página 115 EMCH-10W/1 Cooling Chilled water outlet temp (℃) .Ambient temp. (℃) 11.08 2.23 4.97 11.77 2.25 5.22 12.93 2.28 5.67 13.74 2.29 5.99 15.17 2.32 6.54 10.99 2.45 4.49 11.66 2.47 4.72 12.81 2.50 5.12 13.61 2.52 5.40 14.66 2.55 5.75 10.62 2.68 3.97...
- Página 116 EMCH-12W/1 Cooling Chilled water outlet temp. (℃) Ambient temp. (℃) 12.41 2.65 4.69 13.18 2.67 4.93 14.48 2.70 5.36 15.39 2.72 5.65 16.99 2.75 6.18 12.31 2.90 4.24 13.06 2.93 4.46 14.35 2.97 4.83 15.24 2.99 5.10 16.42 3.03 5.43 11.89 3.18 3.74...
- Página 117 EMCH-14W/3 Cooling Chilled water outlet temp. (℃) Ambient temp. (℃) 13.87 2.97 4.66 14.92 3.02 4.94 16.38 3.07 5.34 17.39 3.10 5.60 18.92 3.15 6.00 13.75 3.24 4.24 14.79 3.29 4.49 16.23 3.35 4.84 17.23 3.39 5.08 18.28 3.45 5.30 13.29 3.55 3.75...
- Página 118 EMCH-16W/3 Cooling Chilled water outlet temp. (℃) Ambient temp. (℃) 16.07 3.46 4.64 17.32 3.53 4.91 19.03 3.61 5.27 20.21 3.66 5.52 21.99 3.74 5.89 15.98 3.78 4.23 17.19 3.86 4.45 18.87 3.94 4.80 20.02 3.99 5.02 21.25 4.07 5.22 15.44 4.13 3.74...
-
Página 119: Operation Limits
10. Operation Limits COOLING 4 5 7 DELIVERY WATER TEMPERATURE HEATING DELIVERY WATER TEMPERATURE 10.1 Ethylene Glycol Solutions Water and ethylene glycol solutions used as a thermal vector in the place of water reduce the performance of the unit. Multiply the performance figures by the values given in the following table. Freezing point (°C) Percentage of ethylene glycol in weight 0.98... -
Página 120: Fouling Factors
Note: 1. During winter leaving the unit unused, please drain water out completely from unit if no anti-freeze were charged into pipeline, or keep power on (at standby or off status) and ensure that water is contained inside of unit. 2. -
Página 121: Hydraulic Data
11. Hydraulic Data 11.1 Useful pump head curves P-C (constant) curve for 7 kW P-C(constant) curve for 10/12/14/16 kW... - Página 122 11.2 Water Side Water Pressure Drop EMCH-07W/1 EMCH-10W/1 Heat exchanger pressure drop (water side) 研发提供...
- Página 123 EMCH-12W/1 EMCH-14W/3...
- Página 124 EMCH-16W/3...
-
Página 125: Sound Level
12. Sound Level Outdoor Unit Microphone 1.4m 1.0m Model Noise level (dB(A)) EMCH-07W/1 EMCH-10W/1 EMCH-12W/1 EMCH-14W/3 EMCH-16W/3 Note: It is tested 1 meter away from the machine in a semi-anechoic room (sound pressure). -
Página 126: Exploded View
13. Exploded View EMCH-07W/1... - Página 127 22.1 22.2 22.5 22.4 22.3 22.7 22.6 Part Name Quantity Part Name Quantity Grille Heat-exchanger base ass'y Front panel Water inlet fixing board ass'y Axial fan ass'y E-part box ass'y 22.1 Side plate ass'y of front PFC inductance 22.2 Handle Inverter module ass'y 22.3 Base plate parts...
- Página 128 EMCH-10W/1 - EMCH-12W/1...
- Página 129 25.6 25.9 25.1 25.7 25.2 25.3 25.8 25.4 25.5 Part Name Quantity No. Part Name Quantity Right-front plate ass'y Gas-liquid separator Four-way valve parts Differential pressure switch Four-way valve ass'y Hydraulic meter Pressure switch Display box ass'y Welded parts of base Outdoor electrical control box ass'y Suction pipe ass'y 25.1...
- Página 130 EMCH-14W/3 - EMCH-16W/3...
- Página 131 25.4 25.9 25.1 25.5 25.2 25.3 25.6 25.10 25.8 25.7 25.11 Part Name Quantity Part Name Quantity Right-front plate ass'y Differential pressure switch Four-way valve parts Hydraulic meter Four-way valve ass'y Display box ass'y Pressure switch Outdoor electrical control box ass'y Welded parts of base 25.1 Inverter module...
-
Página 132: Installation
14. Installation 14.1 Installation of general information General warning 1. These units have been designed to chilled and hot water and must be used in applications compatible with their performance characteristics; these appliances are designed for residential or similar applications. 2. -
Página 133: Installation Of Outdoor Unit
3. Hydraulic connections should be carried out as indicated in the instructions to guarantee correct operation of the unit. Empty the water circuit or add glycol if the unit is not used during the winter. Handle the unit with the utmost care to avoid damage. 14.2 Installation of outdoor unit Choice of installation site Before installing the unit, agree with the customer the site where it will be installed, taking the following... -
Página 134: Hydraulic Connection
Single unit installation (Wall or obstacle) Air inlet >300 Maintain channel Air inlet >600 Air outlet Parallel connect two units or above >300 >600 >2000 Parallel connect the front with rear sides >2000 >500 >3000 >3000 >300 All the pictures in this manual are for explanation purpose only. They may be slightly different from the air conditioner you purchased (depend on model). -
Página 135: Water Inlet
Connecting drawing of pipeline system EMCH-07W/1 EMCH-10W/1 - EMCH-12W/1 - EMCH-14W/1 - EMCH-16W/1 Factory Connections Installer Connections WATER INLET WATER OUTLET Auto-watet replenishing 10 Flexible Joint Plate Heat Exchange Differential Pressure Switch Circulating Pump 11 Thermometer Pressure Gauge Automatic Discharge Valve 12 Calibrating Valve Safety Valve Expansion Tank... - Página 136 If the installation requires a useful head higher than that obtained by installing a pump assembly and storage tank, it is recommended that an additional pump is installed on the unit. Provided the additional pump installed inside of unit, the pump must be connected close to plate heat exchanger. Provided the pump installed outside of unit, the pump shall be connected at water pipe’s outlet.
- Página 137 For maximum chilled water flow rate For minimum chilled water flow rate Evaporator Evaporator Recirculation Recirculation Maximum chilled water flow Fig. 4-2 The maximum chilled water flow is limited by the permitted pressure drop in the evaporator. It is provided in the below table.
-
Página 138: Filling The Installation
In a chilled water system, the higher temperature T2 is the highest anticipated ambient temperature when the chilled water system shuts down during summer. The lower temperature in a heating system is often the ambient temperature at fill conditions(for example, 50℉ or 10℃). 14.7 Water quality control When industrial water is used as chilled water, little furring may occur;... - Página 139 Size and position of connections For EMCH-07W/1 water inlet auto-water replenishing orifice security discharge water outlet Water Auto-water Security Model inlet/outlet replenishing (mm) (mm) (mm) (mm) (mm) (mm) discharge (Ø) (Ø) (Ø) G1/2 G1/2 EMCH-07W/1 For EMCH-10W/1 - EMCH-12W/1 - EMCH-14W/1 - EMCH-16W/1 auto-water replenishing orifice water outlet...
-
Página 140: Electrical Connection
national rule the appliance shall be installed in accordance with national wiring regulations. e) If the fluid in the circuit contains anti-freeze, it should not be allowed to drain freely as it is pollutant. It should be collected for possible reuse. When draining after heat pump operation, take care as the water may be hot (up to 50°). -
Página 141: Electrical Panel
Electrical Panel The electrical panel is located inside the unit at the top of the technical compartment where the various components of the refrigerant circuit are also to be found. To access the electrical panel, remove the front panel of the unit by undoing the screws. 10~16kW Electrical Power Connection ... -
Página 142: Main Control Board
EMCH-14W/1 - EMCH-16W/1 10 11 PUMP2 Remote alarm Remote shutdown Remote cooling/heating wire controller Residual Current Circuit-breaker AC 380-415V 50Hz Additional pump Main control board 220-240V 220-240V AC contactor Additional pump “PUMP2” terminal only provides passive switching signal. Additional water pump must be controlled by the AC contactor. - Página 143 Remote alarm Main control board Remote alarm terminal only provides passive switching signal. Current passing through the terminal interface should less than 1.5A, otherwise please use AC contactor to control load indirectly. Remote shutdown SWITCH If switch is closed, the unit will be stopped forcibly. Under this circumstance, anti-frozen protection and other protection functions are still effective.
-
Página 144: Remote Controller
Remote controller 10 11 P P Q E ● The wired controller is optional. ● Please use 3-core shielded wire to connect the wired controller and the shielding layer must be grounded. ● When connecting wired controller, outdoor unit control panel is mainly used for display which can check parameters and inquiry, can’t be used to set mode and temperature. -
Página 145: Checking And Starting Up The Unit
15. Checking and Starting Up the Unit Preparing for first start up Restart after shutting down for long periods. The chiller must be started up for the first time by the Technical Service. Before starting up the chillers, make sure that: All safety conditions have been respected. - Página 146 To complete the electrical connections: - Remove the inspection panel by unscrewing the five screws. EMCH-10W/1 for example: To access the control panel, open the door: -remove the screw 1 and screw 2; -lift the door 3.
-
Página 147: Running And Maintenance
16. Running and Maintenance 16.1 Operating characteristics Set point in cooling mode (Factory set) = 12°C, Hysteresis = 3°C. The compressor starts with water temperatures above 12°C. The compressor shuts down with water temperatures of less than 9°C. Set point in heating mode (Factory set) = 40°C, Hysteresis = 4°C. -
Página 148: Routine Maintenance
16.2 Routine maintenance Never perform any cleaning operations before having disconnected the unit from the mains power supply. If the supply cord is damaged, it must be replaced by the manufacturer or its service agent or a similarly qualified manufacturer or its service agent or a similarly qualified. Regular maintenance is fundamental to maintain the efficiency of the unit both in terms of operation and energy consumption. -
Página 149: Shutting Down For Long Periods
Important In the event of partial leaks, the circuit must be completely emptied before being refilled. The R410a refrigerant must only be filled in the liquid state. Operating conditions other than nominal conditions may produce considerably different values. Seal testing or identification of leaks must only be carried out using R410a refrigerant gas, checking with a suitable leak detector. -
Página 150: Controller
17. Controller 17.1 Standard controller It is built-in with the chiller at the factory. The front panel of the device functions as the user interface and is used to perform all operations relating to the device. ① ② ③ ④ ⑤ ⑥ ⑧... -
Página 151: Clock Setting
Temperature unit icon When the control panel displays temperature, this icon will be constantly light. Current unit icon When the control panel displays current, this icon will be constantly light. Time format icon The unit is 12-hour format. “ ”will be constantly light when it is forenoon. ”... - Página 152 At this moment, last 2 digits of the nixie tube display “01” which means the first group setting begins. ② Press “ ” to the next step. By this time, mode icon will flicker and press “ ”to choose timing on mode. Press “ ”...
- Página 153 Press “ ” and “ ” simultaneously for 3s to enter into the interface of parameter query function. At this moment, first 2 digits of the nixie tube “ ” will display sequence number and the last 2 digits is specific parameters. Press “ ”...
- Página 154 17.2 Optional wired controller (EMCH-RC120) Features Touch key operation; LCD displays operation parameters; Multiple timers; Real-time clock (battery life: 5~8 years). 17.2.1 Overview MODE FUNCTIONS (Press for 3sec to (Press for 3sec to cancel timer) unlock) ①.Operation icon ⑨.Water temp. ②.Code area ⑩.ON/OFF Key ⑪.Left Right Key...
- Página 155 : Displays when check function is on; details refers to the manual; : Displays when ambient temperature is low which means the main unit need anti-freezing action; : Displays when no key operation for 2 minutes and all keys are locked. Press and hold “OK” key for 3 seconds to unlock;...
- Página 156 b. Setting operating mode and function parameters 1) Setting operating mode and water temperature Setting operating mode: Press “MODE” key to choose operation mode. The setting mode will change as the following order each time the key is pressed: → →...
- Página 157 c. Setting function parameters Press “FUNCTIONS” key to choose operation parameters. The setting function parameters will change as the following order each time the key is pressed: → → → → 1) Timing setting: 3 timing periods can be set on the wired controller: Timer 1, Timer 2, Timer 3. These 3 timers can control the main unit to be turned ON and OFF 3 times at most during a day.
- Página 158 TIMER and the LCD will display the effective timing information, as the following display: Example of Timing setting Main page Press “FUNCTIONS” key twice to enter hour setting interface of “Timer 1 On” Press the “▲” or “▼” key to set the hour number of “Timing 1 On”...
-
Página 159: Setting Clock
Setting clock Press the“FUNCTION”key 3 times to enter clock setting. The hour of the clock will flash, which means the current setting is the hour of the clock, press the “▲” or “▼” to adjust, press “ ” key when finished, and then the minute of the clock will flash, it means the current setting is the minute of the clock, press the “▲”... -
Página 160: Checking Function
Force opening water pump Press the “FUNCTIONS” key 5 times to force open the water pump. The water pump icon will flash. Press “OK” key to confirm. During the setting process, pressing the “CANCEL” key to exit without saving. Note: a. -
Página 161: Troubleshooting
18. Troubleshooting 18.1 PCB parts instructions EMCH-07W/1 PFC&IPM module 1. Input rectifier bridge port 1 7. PFC control port 2. Input rectifier bridge port 2 8. +18V port 3. PFC inductance port 1 9. IPDU communication port 4. P-OUT 10. IPM power port N 5. -
Página 162: Main Control Board
Main control board 11 12 13 25.1 25.2 26.1 26.2 Power L 16. Transformer input 17. Electronic expansion valve Power N 18. DC fan power supply port Preliminary charging relay (rectifier 19. DC fan port bridge input port 1) 20. Remote control Input rectifier bridge line (rectifier bridge 21. - Página 163 DC filter panel IPM Power supply N PFC output power N IPM Power supply P DC 380V (DC fan power supply port) PFC output power P...
-
Página 164: Main Control Panel
EMCH-10W/1 - EMCH-12W/1 Main control panel 1. Transformer output port 16. Rectifier bridge input port L 2. Tin/Tb1/Tout/Tb2 temperature sensor port 17. 8A fuse tube Note: Tin: water inlet temp. Tout: water outlet temp. 18. Solenoid valve port (Reserved) Tb1: Temp. 1 of plate heat exchanger 19. - Página 165 PFC&IPM module 1. +18V output port 7. PFC output P 2. Input Port P for IPM 8. PFC inductance port L_1 3. Power supply port U of the compressor 9. PFC inductance port L_2 4. Power supply port V of the compressor 10.
- Página 166 EMCH-14W/3 - EMCH-16W/3 Main control board 1. Input port for switching power supply 8. Checking touch switch 2. Debugging port 9. Force-cooling touch switch 3. Connection port for operation and display panel 10. Differential pressure valve port 4. Tin/Tb1/Tout/Tb2 temp. sensor port 11.
- Página 167 19. Electric heater port of Plate heat exchanger 26. Up DC fan port 20. Electric heater port of differential pressure valve 27. Down DC fan port 21. Built-in water pump port 28. Power supply port for switching power supply of 22.
- Página 168 Filter board 1. Power supply port L3 2. Power supply port L2 3. Power input port L1 4. Power input port N 5. Ground wire 6. Loaded power supply port for main control board 7. Power supply port for main control board 8.
- Página 169 18.2 Function setting dial switches instructions For 7kW For 10kW For 12-16kW 19.3. Query function for PCB checking switch Press checking touch switch on PCB to check the parameters. The check list on PCB is in table below.
- Página 170 Query content table on PCB Content Note Clock displays when standby. Inlet water temperature displays when Normal display running. dF displays when defrosting. Pb displays when anti-freeze running. d0 displays when oil return, d8 displays when remote control is off. Display operating frequency when the unit is in cooling mode and heating Frequency mode.
-
Página 171: Error Code Table
18.4 Error code table Error Note Content Code EEPROM malfunction Communication malfunctions between main chip and IPDU. T3,T4 sensor malfunction The same as Voltage protection malfunction 10-16kW DC fan motor malfunction A fan in the A region run for more than 5 minutes in heating mode There are two times E6 fault in 10 minutes (recovery after power off) Inlet water temperature sensor malfunctions for 5/7kW models. -
Página 172: Error Code
10-16kW Error Code Content Note EEPROM malfunction Communication malfunctions between main chip and IPDU. T3,T4 sensor malfunction Voltage protection malfunction The same as 7kW DC fan motor malfunction A fan in the A region run for more than 5 minutes in heating mode There are two times E6 fault in 10 minutes (recovery after power off) Inlet water temperature sensor malfunction for 10~16kW models. - Página 173 18.5 Troubleshooting 19.5.1 E9 EEPROM E9: EEPROM error Replace EEPROM Check whether EEPROM is correctly installed Replace PCB PCB is damaged 19.5.2 H0 H0: Unit communication error Check whether module board and its signal Reconnect wire wire is connected effectively Whether LED is flicker normally (green PCB is damaged, replace PCB light) while power on...
- Página 174 18.5.3 E4, C0, C1, F7, F8 E4,C0,C1,F7,F8: Malfunction of temperature sensor Connection ports for temperature sensor on Fasten or reconnect the main PCB are loose or false connected temperature sensor ports Temperature sensor is short circuited or disabled (Use a multi-meter to measure resistance, if the resistance is Replace the sensor too low, the sensor is short circuited, if the resistance in...
- Página 175 18.5.5 E6 E6: Malfunction of outdoor unit DC fan motor Fan motor terminal Refers to the wiring diagram to check Connect again whether the DC fan motor wiring is correct Check voltage of the DC fan Check voltage of PFC Replace motor, the normal voltage module “+”...
- Página 176 18.5.6 P1 When the pressure is over 4.4MPa, the system will display P1 protection, the ODUs will be standby. When the pressure is lower than 3.2MPa, P1 protection is finished and normal operation resumes. P1: High pressure protection Reconnect pressure switch Refers to the wiring diagram to check whether the high pressure switch is correctly connected The wire of high pressure is broken or short circuit...
- Página 177 18.5.7 P2 When the pressure is lower than 0.14MPa, the system will display P2 protection, the ODUs will be standby. When the pressure is higher than 0.30MPa, P2 protection finished and normal operation resumes. P2: Low pressure protection Refers to the wiring diagram to check whether the Reconnect pressure switch high pressure switch is correctly connected The wire of high pressure is broken or short circuit...
- Página 178 18.5.8 P3 When current is over the specific value (Single phase unit 5/7kW 18A, single phase unit 10/12kW 30A, three phase unit 15A), the system will display P3 protection, the ODU in standby. When the current goes back to normal range, P3 disappears and normal operation resumes. P3: Over current protection Check whether the input current is large PCB is damaged, replace PCB...
- Página 179 18.5.9 P4 When the discharge temperature is higher than 115°C, the system will display P4 protection, the ODUs will be standby. When the discharge temperature is lower than 83°C, P4 protection finished and normal operation resumes. P4: Compressor discharge temperature protection Refers to the wiring diagram to check whether the Reconnect temperature sensor discharge temperature sensor is correctly...
- Página 180 18.5.10 P5 When condenser temperature is over 62 C the system will display P5 protection, the ODUs will standby. When the condenser temperature goes back to normal range, P5 protection finishes and normal operation resumes. P5: Condenser temperature protection Check whether the condenser Check whether the condenser Replace PCB temperature sensor is incorrectly...
-
Página 181: L0 Troubleshooting
18.5.11 P6 P6: IPM module protection When P6 error code occurs, specific error code (L0/L1/L2/L4/L5/L7/L8/L9) displayed on digital tube. Specific error code for inverter module Check module and L0: inverter module protection compressor Check power L1: low voltage protection supply of module Check for inverter Check power supply L2: high voltage protection... - Página 182 Fig. A Fig.B Fig.C Fig.D If the resistance values are normal, then go to step 2. Step 2: Module check DC voltage between terminal P and terminal N should be 1.41 times the local power supply voltage. DC voltage between terminal 1 and 2 should be 510V~580V. Disconnect the terminal 3, 4, and 5 from inverter compressor.
- Página 183 Before replace module panel, the two places in red frame are needed to paint a slim layer of thermally conductive silica gel. Thermally conductive silica gel...
- Página 184 Step 3: DC detective wire check (if the unit has change the PCB or reconnect the wire, the following item should be checked) Direction of the current in DC supply wire which is running through the inductor should be the same as the direction of arrow marked on the inductor.
-
Página 185: L2 Troubleshooting
L2 troubleshooting Step 1: Check the DC voltage between terminal 1 and 2, the normal value should be 510V~580V, if the voltage is higher than 580V, go to step 2. If the value is not in the range, this indicates a problem with the electrolytic capacitor power supply, check the power supply for high or unstable voltage. - Página 186 18.5.12. P8 P8:Typhoon protection Check whether there is strong Stop the unit and until there is wind against outdoor fan no strong wind Replace outdoor fan Check whether the outdoor fan is damaged PCB is damaged Replace PCB...
- Página 187 18.5.13. PH PH: Large temperature differential protection between water out and water in Water in and water out Check whether actual temperature PCB is damaged. temperature sensor are difference between water out and Replace PCB correctly connected and water in is large than14°C effectively Correct connect the temperature sensor or replace temperature sensor...
- Página 188 18.5.14 Pb Pb: Anti-frozen protection Detect actual temperature of inlet water or plate type Its normal system protection, heat exchanger: the detected temperature is lower the system will resume when than 3℃ in cooling mode or detected temperature is temperature go up lower than 5℃...
- Página 189 18.5.15 C8&CP C8: Water volume protection CP: Water volume protection in situation of anti-frozen protection Fix the leakage and affusion again System water leakage Install a suitable additional Water pipeline too long and need water pump an additional water pump Inspect the system and fix Water system is blocked the problem...
-
Página 190: Optional Accessories
Assembly and technical data. After-sales service If the equipment exhibits abnormal operation, please first disconnect the power supply, and in contact with our after-sales service. To contact with your nearest technical service, access the web page: EAS ELECTRIC www.easelectric.es...