Publicidad
Idiomas disponibles
Idiomas disponibles
H-863, H-1231
H-4338
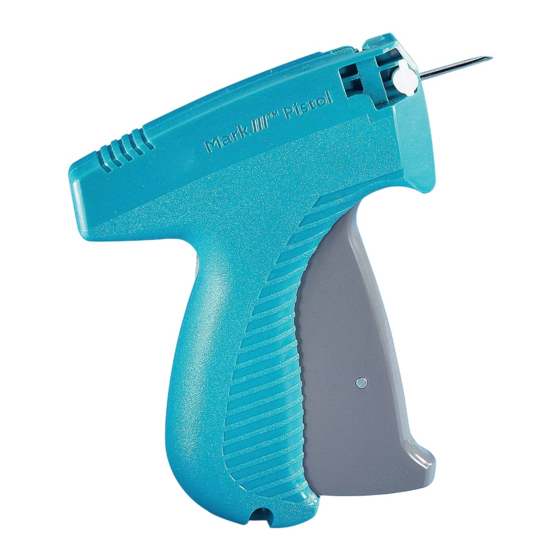
PRICE TAG GUN
IMPORTANT! Read all instructions and warnings
before using these tools.
TO INSTALL NEEDLE
1.
Slide needle guard over needle. (See Figure 1)
2. Put needle lock lever in unlocked position (lever
pointed to front of tool). (See Figure 2)
3. Place tool so lock lever faces away from you.
4. Insert needle by aligning side slot on needle with
guide slot on tool.
5. Turn needle lock lever to locked position (lever
pointed to back of tool). (See Figure 2)
6. Remove needle guard.
TO REMOVE NEEDLE
1.
Slide needle guard over needle.
2. Put needle lock lever in unlocked position (lever
pointed to front of tool). (See Figure 2)
3. Slide the needle out of the tool.
4. Dispose of needle in a Biohazard Sharps container.
NOTE: For contaminated needles, see safety
instructions on page 2.
TO LOAD FASTENERS
1.
Insert the end of the round connecting bar on the
fastener clip into the round guide slot at the top of
the tool. (See Figure 1)
2. Gently push the fastener clip into the guide as far as
it will go. Tool is ready for use.
PAGE 1 OF 6
1-800-295-5510
uline.com
INSTALLING AND REMOVING NEEDLES
LOADING AND ATTACHING FASTENERS
Figure 1
Figure 2
Locked Position
TO REMOVE A PARTIALLY USED CLIP
1.
Fully depress the trigger and remove the clip by
pulling upwards.
NOTE: Always depress the trigger when
removing a clip of fasteners from the tool.
Failure to do so may cause the tool to jam.
Para Español, vea páginas 3-4.
Pour le français, consulter les pages 5-6.
Guide
Slot
Needle
Lock Lever
Needle
Trigger
Needle
Guard
Unlocked Position
0421 IH-863
Publicidad
Tabla de contenido

Resumen de contenidos para Uline H-863
- Página 1 Para Español, vea páginas 3-4. Pour le français, consulter les pages 5-6. H-863, H-1231 1-800-295-5510 H-4338 uline.com PRICE TAG GUN IMPORTANT! Read all instructions and warnings before using these tools. INSTALLING AND REMOVING NEEDLES TO INSTALL NEEDLE Figure 1 Slide needle guard over needle. (See Figure 1)
- Página 2 * For details, see OSHA 3127 and 29 CFR 1910.1030. 2. Dispose of needle and bandage in an approved ** Call Uline Customer Service at 1-800-295-5510 for information on Biohazard Sharps container.* protective tagging gloves. TO REDUCE THE CHANCE OF NEEDLE STICKS Use a protective glove while tagging.**...
-
Página 3: Cargar Y Fijar Cinchos
H-863, H-1231 H-863, H-1231 800-295-5510 H-4338 H-4338 uline.mx ETIQUETADORA DE PRECIOS ¡IMPORTANTE! Lea todas las instrucciones y advertencias antes de utilizar estas herramientas. INSTALAR Y QUITAR LAS AGUJAS PARA INSTALAR LA AGUJA NOTA: Para las agujas contaminadas, consulte las instrucciones de seguridad en la página 2. -
Página 4: Continuación De Cargar Y Fijar Cinchos
* Para más detalles, consulte OSHA 3127 y 29 CFR 1910.1030. 2. Deseche la aguja y el vendaje en un contenedor aprobado para objetos filosos biopeligrosos*. ** Llame a la línea de Servicio a Clientes de Uline al 01-800-295-5510 para solicitar información PARA REDUCIR LAS POSIBILIDADES DE PICARSE sobre guantes protectores para colocar etiquetas. - Página 5 H-863, H-1231 H-863, H-1231 1-800-295-5510 H-4338 H-4338 uline.ca PISTOLET À ÉTIQUETTES DE PRIX MISE EN GARDE! Lisez toutes les instructions et mises en garde avant d'utiliser ces outils. INSTALLER ET RETIRER LES AIGUILLES POUR INSTALLER L'AIGUILLE Placez le protecteur sur l'aiguille. (Voir Figure 1) Figure 1...
-
Página 6: Consignes De Sécurité
* Pour en savoir plus, consultez la publication OSHA 3127 et la norme 29 CFR 1910.1030. POUR RÉDUIRE LE RISQUE DE PIQÛRES D'AIGUILLE ** Communiquez avec le service à la clientèle Uline au 1-800-295-5510 pour toute question relative aux gants protecteurs Utilisez un gant protecteur lorsque vous procédez à...


