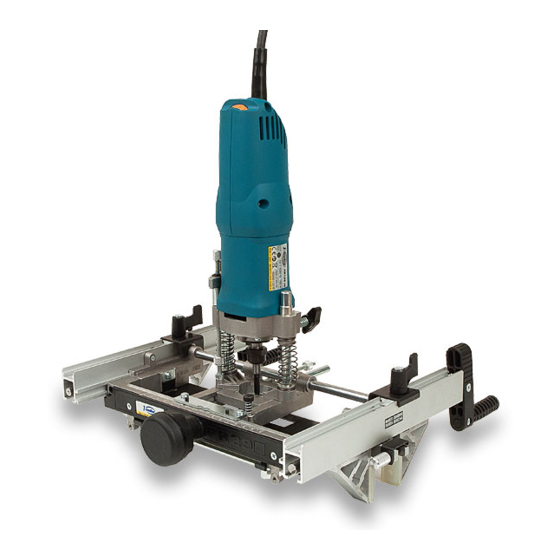
Virutex FR129 VB Guía Rápida
Fresadora de herrajes
Ocultar thumbs
Ver también para FR129 VB:
- Manual de instrucciones (57 páginas) ,
- Manual de instrucciones (20 páginas)
Publicidad
Enlaces rápidos
GUIA RÁPIDA
QUICK GUIDE
GUIDE RAPIDE
GEBRAUCHSANWEISUNG
GUIDA RAPIDA
GUIA RÁPIDA
КРАТКОЕ РУКОВОДСТВО SKRÓCONA
INSTRUKCJA OBSŁUGI
FR129 VB
Frezarka do montowania zawiasów
Fresadora de herrajes
Router for fitting hinges
Fraiseuse paumelleuse
Beschlagfräse
Fresatrice per cerniere
Fresadora de ferragens
Фрезер для петель
Publicidad

Resumen de contenidos para Virutex FR129 VB
- Página 1 GUIA RÁPIDA QUICK GUIDE GUIDE RAPIDE GEBRAUCHSANWEISUNG GUIDA RAPIDA GUIA RÁPIDA КРАТКОЕ РУКОВОДСТВО SKRÓCONA INSTRUKCJA OBSŁUGI FR129 VB Fresadora de herrajes Router for fitting hinges Fraiseuse paumelleuse Beschlagfräse Fresatrice per cerniere Fresadora de ferragens Frezarka do montowania zawiasów Фрезер для петель...
- Página 2 GUIA RÁPIDA QUICK GUIDE GUIDE RAPIDE KURZBESCHREIBUNG GUIDA RAPIDA GUIA RÁPIDA КРАТКОЕ РУКОВОДСТВО SKRÓCONA INSTRUKCJA OBSŁUGI • Ensamblaje máquina. • Assembling the machine. • Assemblage machine. • Zusammenbau der Maschine. • Montaggio della macchina. • Montagem de la máquina. • Установите фрезер на каретку. •...
- Página 3 • Montaje fresa, guía plantilla y plantilla. • Mounting the bit, guide ring and template. • Montage fraise, guide de copiage et gabarit. • Montage des Fräsers, Führungsringes und Schablone. • Montaggio della fresa, guida e sagoma. • Montagem da fresa, guia e molde. •...
- Página 4 • Tope sobre el marco. • Stopper on the frame. • Butée sur la huisserie. • Anschlag am Rahmen. • Top sul telaio. • Topo no quadro. • Настройка на толщину петли. • Ustawienie na ościeżnicy. • Regulación grosor pernio. •...
- Página 5 • Montaje tope longitudes. • Assembling the length stopper. • Montage butée de longueur. • Aufbau des Längsanschlages. • Montaggio top lunghezze. • Montagem da fresa, guia e molde. • Установите ограничитель дины. • Montaż pręta do lokalizacji zawiasów. • Tope referencia pernios. •...
- Página 6 • Topes referencia sobre puerta. • Stoppers on the door. • Butées de référence sur la porte. • Anschlag auf der Tür. • Top riferimento sulla porta. • Topo referência na porta. • Упоры для позиционирования на полотне двери. • Ustawienie urządzenia we właściwej pozycji na drzwiach.
- Página 7 • Montaje accesorio. • Assembling the accessory. • Montage accessoire. • Einbau des Zubehörs. • Montaggio accessorio. • Montagem accesório. • Установка режущего инструмента. • Montaż akcesoria. • Referencia para montaje plantilla bisagra invisible. • Reference for assembling the template for concealed hinges •...
- Página 8 • Copiado y ajuste profundidad solapa bisagra invisible. • Copying and adjusting the depth of the front plate of concealed hinge. • Copiage et réglage de la profondeur du frontal de la paumelle invisible. • Einstellen der Tiefe der Scharnierplatte. •...
- Página 9 • Copiado y ajuste profundidad caja bisabra invisible. • Copying and adjusting the depth of the body of concealed hinge. • Copiage et réglage de la profondeur du corps de la paumelle invisible. • Einstellen der Tiefe des Scharnierkörpers. • Copia e regolazione profundità corpo cer- niera invisibile.
- Página 10 • Ajuste fresado sin plantilla. • Adjusting the trimming without template. • Réglage pour fraisage sans gabarit. • Einstellen der Fräsmaschine ohne Schablone. • Regolazione fresatura senza sagoma. • Regulação fresagem sem molde. • Копирование и настройка глубины фрезерования под тело скрытой петли. •...
- Página 12 EXCEPCIONES DE USO • EXCEPTIONS OF UTILIZATION EXCEPTIONS • D’UTILIZATION AUSNAHMEN UTILIZZI SPECIALI EXCEPÇÕES AO USO • • • ИСКЛЮЧЕНИЯ Instrucciones para plantillas de más de 160 hasta 240 mm • Instructions for templa- tes over 160 mm until 240 mm • Instructions pour des charnières de plus de 160 mm jusqu’à...
- Página 13 • Paso 2 - Colocar la barra accesoria que se suministra con la plantilla y haciendo tope nuevamente en el marco proceder a repasar el fresado del primer encaje. • Step 2 - Place de supplementary rod delive- red with the template and touching the upper side of the frame proceed to enlarge the first recess.
- Página 14 • Paso 3 - Volver a colocar la barra estándar y repasar el fresado de los siguientes encajes normalmente. • Step 3 - Place the standard rod again and enlarge the other recesses as usually. • Pas 3 - Placer la tige standard à nouveau et èlargir les autres encastrements normale- ment.
- Página 15 Realización de los encajes en puerta • Making the recesses on the door • Réalisation des en- castrements sur la porte • Durchführung der Falze in der Tür • Realizzazione degli incavi nella porta Realização dos rasgos na porta • Фрезерование пазов на двери • Frezowanie gniazd pod zawiasy w skrzydle drzwiowym •...
- Página 16 • Paso 2 - Colocar la barra accesoria hacien- do tope sobre la puerta y repasar el primer fresado. • Step 2 - Place the supplementary rod on the upper side of the door and enlarge the first recess. • Pas 2 - Placer la tige supplémentaire fais- sant butée sur la partie supérieure de la porte et élargir le premier encastrement.
- Página 17 (*) Without spacers: max. rabbet Sans cales: feuillure max Sin calas: Galce max. (*) Senza cuneo: battuta max. Sem calços: Rebaixo max. Без разделителя: макс. притвор Bez przekładek: Max. głębokość felcu (*) With spacers: max. rabbet Avec cales: feuillure max. Con calas: Galce max.
- Página 18 • Nota: Para bisagras de una profundidad superior a 40 mm, el exceso de profundidad deberá realizarse de forma manual (taladro, tupí..) • Note: For hinges with a depth over 40 mm, the excess of depth must be done manually (drill, router…). •...
- Página 20 Zugang zu allen technischen Daten. Accedere a tutte le informazioni tecniche. Aceso a todas as informações técnicas. Dostęp do wszystkich informacji technicznych. Доступ ко всей технической информации. 2996801 042021 Virutex, S.A. Av. de la Llana, 57 08191 Rubí (Barcelona) Spain www.virutex.com...


