Tabla de contenido
Publicidad
Idiomas disponibles
Idiomas disponibles
Enlaces rápidos
USING THE HOOD
Downdraft Vent System . . . . . . . . . . . . . . . . . . 5
CARE AND CLEANING
Downdraft Vent System . . . . . . . . . . . . . . . . . . 6
Write the model and serial
numbers here:
Model # _________________
Serial # _________________
These numbers are also found on
the Product Property Registration
Card sent separately with your
downdraft ventilation system and
on the label located on the front
panel of the unit.
GE is a trademark of the General Electric Company. Manufactured under trademark license.
. . . . . . . . . . . 3
. . 7
. . . . . . . . 16
. . . . . . . . . . . . . 17
. . . . . . . . . . . . . . . . . . . . . 18
. . . . . . . . . . . . 20
OWNER'S MANUAL &
INSTALLATION
INSTRUCTIONS
UVD6301S
UVD6361S
ESPAÑOL
Para consultar una version en
español de este manual de
instrucciones, visite nuestro sitio de
internet GEAppliances.com.
49-2000733 Rev. 1 09-20 GEA
Publicidad
Capítulos
Tabla de contenido
Solución de problemas

Manuales relacionados para GE UVD6301S


Resumen de contenidos para GE UVD6301S
-
Página 1: Tabla De Contenido
Product Property Registration Card sent separately with your downdraft ventilation system and on the label located on the front panel of the unit. GE is a trademark of the General Electric Company. Manufactured under trademark license. 49-2000733 Rev. 1 09-20 GEA... - Página 2 THANK YOU FOR MAKING GE APPLIANCES A PART OF YOUR HOME. Whether you grew up with GE Appliances, or this is your first, we’re happy to have you in the family. We take pride in the craftsmanship, innovation and design that goes into every GE Appliances product, and we think you will too.
-
Página 3: Safety Information
Installation Instructions to remove the blower. D. Use proper pan size. Always use cookware Service parts are available from a GE Appliances appropriate for the size of the surface element. Service and Parts Center. - Página 4 IMPORTANT SAFETY INFORMATION READ ALL INSTRUCTIONS BEFORE USING How to Remove Protective Shipping Film and Packaging Tape Carefully grasp a corner of the protective shipping film ATTENTION: Please remove the bubble wrap inserted with your fingers and slowly peel it from the appliance inside of exhaust before installation.
-
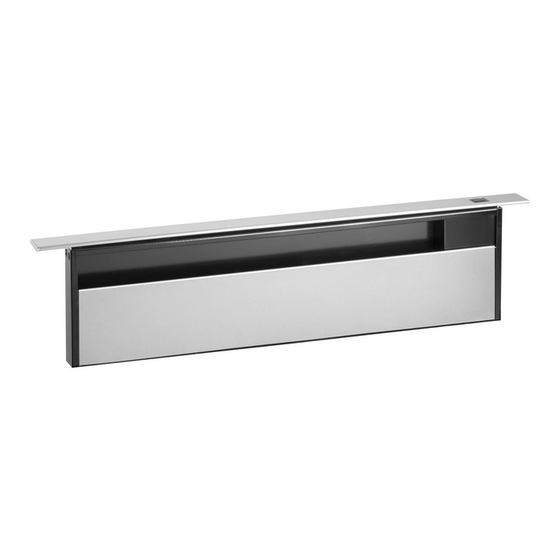
Página 5: Downdraft Vent System
Downdraft Vent System To Use The Downdraft System To raise the downdraft vent, press the button on the top The blower can be turned ON or OFF cover. The vent will rise. and the speed can be adjusted with the recessed knob on the right side of Button the air vent. -
Página 6: Downdraft Vent System
Downdraft Vent System Grease Filters The efficiency of your vent system depends on a clean filter. Frequency of cleaning depends on the type of cooking you do. Grease filters should be cleaned at least once a month. Never operate the vent system without the filters in place. -
Página 7: Installation Instructions
Installation Downdraft Vent Systems Instructions UVD6301S, UVD6361S “If you have questions, call GE Appliances at 800.GE.CARES (800.432.2737) or visit our website at: GEAppliances.com” BEFORE YOU BEGIN PARTS SUPPLIED Open the carton and remove parts package. Read these instructions completely and Check contents to be sure all pieces are carefully. -
Página 8: Safety Information
Safety Information WARNING CAUTION TO REDUCE THE RISK OF FIRE, TO REDUCE THE RISK OF FIRE ELECTRIC SHOCK OR INJURY TO PERSONS, AND TO PROPERLY EXHAUST AIR, BE SURE TO OBSERVE THE FOLLOWING: DUCT AIR OUTDOORS. DO NOT VENT EXHAUST AIR INTO SPACES WITHIN WALLS OR CEILINGS OR INTO ATTICS, CRAWL SPACES OR GARAGES. -
Página 9: Installation Preparation
Area • Gas Cooktops Above 12" Cabinet If this vent is installed in combination with a GE or Floor Monogram gas cooktop, it may operate from the same duplex outlet. • Electric Cooktops If this vent is installed in combination with a GE or... -
Página 10: Product Dimensions
Installation Preparation PRODUCT DIMENSIONS 2” 30” Models 30” 26-1/4” 36” Models 36” 32-1/4” 7” 2-1/2” 36-1/2” 22.3” 7-1/4” 49-2000733 Rev. 1... -
Página 11: Preparing For Installation
Installation Preparation PREPARING FOR INSTALLATION • Unpack the cooktop and read the Installation • Refer to the Creative Solutions section on page 13 if Instructions to understand the required countertop more counter space is needed. cutout dimensions and location in the countertop, •... -
Página 12: Venting Options
Blower the left or right side. To avoid interference problems, the downdraft vent cannot be vented to the right when installed with a GE or Monogram gas cooktop, or with a GE or Monogram non-induction electric Clamp cooktop. -
Página 13: Design Information
Design Information CREATIVE SOLUTIONS • When the kitchen providing additional countertop depth and interior Maintain Cutout Clearances to Front Edge as Specified design calls for an cabinet space. against-the-wall installation, move the base cabinet forward 3” to 5”. Filler panels or complementary moldings can be Filler Panel... - Página 14 Design Information PREPARE FOR DUCTWORK Determine the best route for ductwork; it can be routed in a variety of ways depending on the kitchen layout. IMPORTANT: The downdraft air discharge outlet accordingly. Right Discharge Typical duct arrangement countertop series. To maximize the ventilation performance of the vent system: 1.
-
Página 15: Connect Power
Installation Instructions MOUNT THE UNIT MOUNT THE UNIT (Cont.) Leveling Bracket - Screw leveling brackets to bottom of cabinet Flange Facing Out using the four wood screws (provided with the Mounting Screws unit) on each side. Tighten leveling screws through leveling Leveling Screw bracket slots to the unit on each side. -
Página 16: Troubleshooting Tips
TROUBLESHOOTING TIPS Save time and money! Review the charts on the following pages first and you may not need to call for service. Problem Possible Cause What To Do Fan does not work The vent is not fully extended. Press the button on the top cover. Vent does not work The vent is not plugged into an outlet. -
Página 17: Limited Warranty
GE Appliances with information on your appliance. If you do not want your appliance data to be sent to GE Appliances, please advise your technician not to submit the data to GE Appliances at the time of service. -
Página 18: Accessories
Accessories Looking For Something More? GE Appliances offers a variety of accessories to improve your cooking and maintenance experiences! Refer to the Consumer Support page for phone numbers and website information. The following products and more are available: Parts Black Stainless Steel Trim (30”) Black Stainless Steel Trim (36”) - Página 19 Notes 49-2000733 Rev. 1...
-
Página 20: Consumer Support
Have a question or need assistance with your appliance? Try the GE Appliances Website 24 hours a day, any day of the year! You can also shop for more great GE Appliances products and take advantage of all our on-line support services designed for your convenience. - Página 21 GE es una marca registrada de General Electric Company. Fabricado bajo licencia de marca. 49-2000733 Rev. 1 09-20 GEA...
- Página 22 GRACIAS POR HACER QUE GE APPLIANCES SEA PARTE DE SU HOGAR. Ya sea que haya crecido usando GE Appliances, o que ésta es su primera vez, nos complace tenerlo en la familia. Sentimos orgullo por el nivel de arte, innovación y diseño de cada uno de los electrodomésticos de GE Appliances, y creemos que usted también.
-
Página 23: Información De Seguridad
Las piezas para el servicio técnico se encuentran D. Utilice el tamaño de recipiente adecuado. Siempre utilice disponibles en el Centro de Servicio Técnico y Piezas de GE recipientes de cocción apropiados para el tamaño del Appliances. elemento de superficie. -
Página 24: Cómo Retirar La Película Protectora De Envío Y La Cinta De Embalaje
INFORMACIÓN IMPORTANTE DE SEGURIDAD LEA TODAS LAS INSTRUCCIONES ANTES DE USAR Cómo Retirar la Película Protectora de Envío y la Cinta de Embalaje Con cuidado tome un extremo de la película protectora ATENCIÓN: Por favor retire el envoltorio de burbujas insertado de envío con los dedos y lentamente retire la misma de la en el escape antes de la instalación. -
Página 25: Sistema De Ventilación De Corriente Descendente
Sistema De Ventilación De Corriente Descendente Sistema De Ventilación De Corriente Descendente A fin de elevar la ventilación descendente, presione el botón El ventilador se podrá girar a ON (Encender) y de la tapa superior. La ventilación se elevará. OFF (Apagar) y la velocidad se podrá ajustar con la perilla empotrada sobre el lado derecho de la salida de aire. -
Página 26: Sistema De Ventilación De Corriente Descendente
Sistema De Ventilación De Corriente Descendente Filtros De Grasa La eficiencia del sistema de ventilación depende de la limpieza del filtro. La frecuencia de limpieza depende del tipo de cocción que realice. Los filtros de grasa deben limpiarse por lo menos una vez por mes. Nunca opere el sistema de ventilación si los filtros no están colocados correctamente. -
Página 27: Instrucciones De Instalación
Instrucciones de Aire Descendente de instalación UVD6301S, UVD6361S ¿Preguntas? Llame al 800.GE.CARES (800.432.2737) o visite nuestro sitio Web en: GEAppliances.com PIEZAS PROVISTAS ANTES DE COMENZAR Abra el cartón y retire el paquete de piezas. Controle los Lea estas instrucciones por completo y con contenidos a fin de asegurar que todas las piezas estén... -
Página 28: Información De Seguridad
Información de Seguridad ADVERTENCIA PRECAUCIÓN PARA REDUCIR EL PARA REDUCIR EL RIESGO RIESGO DE INCENDIO, DESCARGA ELÉCTRICA DE INCENDIO Y PARA ELIMINAR EL AIRE DE O LESIONES A PERSONAS, CUMPLA CON LOS ESCAPE CORRECTAMENTE, ASEGÚRESE SIGUIENTES PUNTOS: DE DIRIGIR EL AIRE DEL CONDUCTO HACIA EL EXTERIOR. -
Página 29: Preparación Para La Instalación
Piso del Gabinete Si esta ventilación es instalada junto con una superficie de cocción a gas de GE o Monogram, puede funcionar desde el mismo tomacorriente doble. • Superficies de Cocción Eléctricas Si esta ventilación es instalada junto con una superficie IMPORTANTE de cocción eléctrica de GE o Monogram, la ventilación... -
Página 30: Dimensiones Del Producto
Preparación para la instalación DIMENSIONES DEL PRODUCTO 2” 30" Modelos 30" 26-1/4” 36" Modelos 36" 32-1/4” 7” 2-1/2” 36-1/2” 22.3” 7-1/4” 49-2000733 Rev. 1... -
Página 31: Preparandose Para La Instalación
Preparación para la instalación PREPARANDOSE PARA LA INSTALACIÓN • Desembale la superficie de cocción y lea las Instrucciones • De ser necesario más espacio para la mesada, consulte de Instalación a fin de entender las dimensiones la sección de Soluciones Creativas en la página 13. necesarias requeridas para la mesada y su ubicación, •... - Página 32 Canal de la a gas de GE o Monogram, o con una superficie de cocción Abrazadera Enchufe del eléctrica que no sea de inducción de GE o Monogram.
-
Página 33: Soluciones Creativas
Instrucciones de instalación SOLUCIONES CREATIVAS • Cuando el diseño de brindando profundidad adicional a la mesada y al espacio Mantenga los Espacios de la cocina requiera interno de los gabinetes. Despeje hasta el Extremo Frontal de Acuerdo con lo Especificado una instalación contra la pared, mueva el gabinete de la base... -
Página 34: Preparación Del Conducto
Preparación para la instalación PREPARACIÓN DEL CONDUCTO Determine el mejor recorrido para el conducto; el mismo puede ser conducido de diferentes formas dependiendo del esquema de la cocina. IMPORTANTE: La salida de la descarga de aire descendente para esta unidad es rectangular, y con una medida de 3 ¼”... -
Página 35: Monta La Unidad
Instrucciones de instalación MONTA LA UNIDAD MONTA LA UNIDAD (Cont.) Soporte de Nivelación – Soportes de nivelación de tornillos en la parte inferior Brida Mirando Hacia Afuera del gabinete usando los cuatro tornillos de madera Tornillos de Montaje (provistos con la unidad) a cada lado. Ajuste los tornillos de nivelación a través de las Tornillo de ranuras del soporte de nivelación a la unidad sobre... -
Página 36: Consejos Para La Solución De Problemas
Consejos para la Solución de Problemas... Antes de solicitar el servicio técnico Ahorre tiempo y dinero! Primero revise los cuadros que aparecen en las siguientes páginas y es posible que no necesite solicitar reparaciones. Problema Causa Posible Qué hacer El ventilador no El ventilador no está... -
Página 37: Exclusión De Garantías Implícitas
Para realizar el servicio técnico de su electrodoméstico, se podrá requerir el uso de datos del puerto de abordaje para su diagnóstico. Esto da al técnico del servicio de fábrica de GE Appliances la habilidad de diagnosticar de forma rápida cualquier problema con su electrodoméstico, y de ayudar a GE Appliances a mejorar sus productos al brindarle a GE Appliances la información sobre su... -
Página 38: Accesorios
Accesorios ¿Busca Algo Más? GE Appliances ofrece una variedad de accesorios para mejorar sus experiencias de cocción y mantenimiento! Para acceder a números telefónicos e información de sitios Web, consulte la página de Soporte para el Consumidor. Estos y otros productos están disponibles: Piezas Marco de Acero Inoxidable Negro (30”) - Página 39 Notas 49-2000733 Rev. 1...
-
Página 40: Soporte Para El Consumidor
En EE.UU.: GEAppliances.com/register Servicio Programado El servicio de reparación de expertos de GE Appliances está a sólo un paso de su puerta. Conéctese a través de Internet y programe su servicio a su conveniencia cualquier día del año. En EE.UU.: GEAppliances.com/service o comuníquese al 800.432.2737 durante el horario de atención comercial.