Tabla de contenido
Publicidad
Idiomas disponibles
Idiomas disponibles
Enlaces rápidos
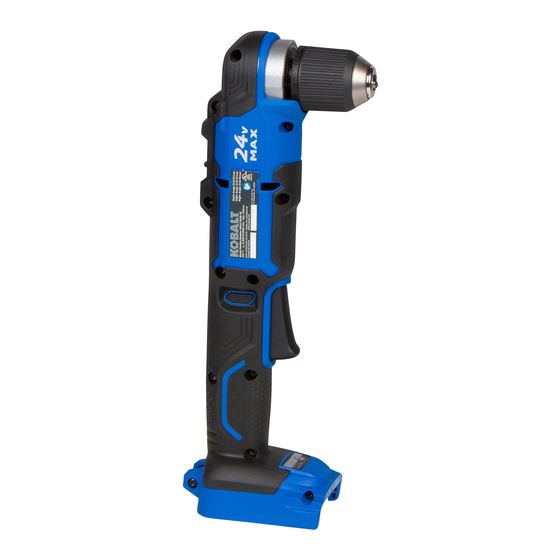
ITEM # 1439332
BRUSHLESS
RIGHT ANGLE DRILL/DRIVER
MODEL #KRAD 1224B-03
Español p. 15
ATTACH YOUR RECEIPT HERE
Serial Number
Purchase Date
Questions, problems, missing parts? Before returning to your retailer, call our customer
service department at 1-888-3KOBALT (1-888-356-2258), 8 a.m. - 8 p.m., EST,
Monday - Sunday.
PH19519
Publicidad
Capítulos
Tabla de contenido
Solución de problemas

Manuales relacionados para Kobalt KRAD 1224B-03

Resumen de contenidos para Kobalt KRAD 1224B-03
- Página 1 ITEM # 1439332 BRUSHLESS RIGHT ANGLE DRILL/DRIVER MODEL #KRAD 1224B-03 Español p. 15 ATTACH YOUR RECEIPT HERE Serial Number Purchase Date Questions, problems, missing parts? Before returning to your retailer, call our customer service department at 1-888-3KOBALT (1-888-356-2258), 8 a.m. - 8 p.m., EST, Monday - Sunday.
-
Página 2: Tabla De Contenido
TABLE OF CONTENTS Product Specifications ..................2 Packaging Contents ..................3 Safety Information .................... 4 Preparation ....................... 7 Operating Instructions ..................8 Care and Maintenance ................... 13 Troubleshooting....................14 Warranty ......................14 PRODUCT SPECIFICATIONS COMPONENT SPECIFICATION Rated voltage 24V d.c. No-load speed 0-600/0-2000 /min Chuck capacity... -
Página 3: Package Contents
PACKAGE CONTENTS PART DESCRIPTION PART DESCRIPTION Keyless chuck Torque indicator Gear selector Torque button LED worklight Belt clip with bit holder Direction-of-rotation selector Screw (forward/center-lock/reverse) Variable-speed trigger switch Double end bit WARNING • Remove the tool from the package and examine it carefully. Do not discard the carton or any packaging material until all parts have been examined. -
Página 4: Safety Information
SAFETY INFORMATION Please read and understand this entire manual before attempting to assemble or operate this product. If you have any questions regarding the product, please call customer service at 1-888-3KOBALT, 8 a.m. - 8 p.m., EST, Monday - Sunday. WARNING •... - Página 5 SAFETY INFORMATION General Power Tool Safety Warnings WARNING • Read all safety warnings, instructions, illustrations and specifications provided with this power tool. Failure to follow all instructions listed below may result in electric shock, fire and/or serious injury. Save all warnings and instructions for future reference The term “power tool”...
- Página 6 SAFETY INFORMATION • Remove any adjusting key or wrench before turning the power tool on. A wrench or a key left attached to a rotating part of the power tool may result in personal injury. • Do not overreach. Keep proper footing and balance at all times. This enables better control of the power tool in unexpected situations.
-
Página 7: Preparation
SAFETY INFORMATION • When battery pack is not in use, keep it away from other metal objects, like paper clips, coins, keys, nails, screws or other small metal objects, that can make a connection from one terminal to another. Shorting the battery terminals together may cause burns or a fire. -
Página 8: Operating Instructions
OPERATING INSTRUCTIONS 1. To Attach Battery Pack a. Align the raised portion on the battery pack with the grooves on the bottom of the tool, Battery-release then slide the battery pack onto the tool, as button shown. b. Make sure that the battery-release buttons on the battery pack snap into place and the battery pack is secured to the tool before beginning operation. - Página 9 OPERATING INSTRUCTIONS 3. Variable-speed Trigger Switch a. To turn the right angle drill/driver ON, depress the variable-speed trigger switch (E). b. To turn it OFF, release the variable-speed trigger switch. c. The variable-speed trigger switch delivers higher speed with increased trigger pressure and lower speed with decreased trigger pressure.
- Página 10 OPERATING INSTRUCTIONS The higher the torque setting, the more force the right angle drill/driver produces to turn an object. The proper setting depends on the job and the type of bit, fastener, and material you will be using. If the torque is too high, the screws may be damaged or broken.
- Página 11 OPERATING INSTRUCTIONS 8. Installing Bits a. Place the direction-of-rotation selector (D) in the center-lock position. b. Open or close the keyless chuck (A) to a point where the opening is slightly larger than the shank of the bit you intend to use. c.
- Página 12 OPERATING INSTRUCTIONS d. Depress the variable-speed trigger switch (E) to start the right angle drill/driver. e. Move the drill bit into the workpiece, applying only enough pressure to keep the bit drilling. Do not force the right angle drill/driver or apply side pressure to elongate a hole. Let the tool do the work.
-
Página 13: Care And Maintenance
CARE AND MAINTENANCE All maintenance should only be carried out by a qualified service technician. Cleaning Before cleaning or performing any maintenance, remove the battery pack. For safe and proper operation, always keep the tool and its ventilation slots clean. Always use only a soft, dry cloth to clean your right angle drill/driver wrench;... -
Página 14: Troubleshooting
TROUBLESHOOTING WARNING Turn the switch to the “OFF” position and remove the battery before performing troubleshooting procedures. PROBLEM POSSIBLE CAUSE CORRECTIVE ACTION Tool does not work. Low battery capacity. Charge the battery pack. Bit cannot be Chuck is not released Release the chuck. -
Página 15: Adjunte Su Recibo Aquí
ARTÍCULO # 1439332 TALADRO/DESTORNILLADOR EN ÁNGULO RECTO SIN ESCOBILLAS MODELO #KRAD 1224B-03 ADJUNTE SU RECIBO AQUÍ Número de serie Fecha de compra ¿Preguntas, problemas, piezas faltantes? Antes de volver a la tienda, llame a nuestro Departamento de Servicio al Cliente al 1-888-3KOBALT (1-888-356-2258), de lunes a viernes de 8 a.m. -
Página 16: Especificaciones Del Producto
ÍNDICE Especificaciones del producto ................ 16 Contenido del paquete ................... 17 Información de seguridad ................18 Preparación ....................22 Instrucciones de funcionamiento ..............23 Cuidado y mantenimiento ................29 Solución de problemas ................... 30 Garantía ......................30 ESPECIFICACIONES DEL PRODUCTO COMPONENTE ESPECIFICACIONES Rango de voltaje... -
Página 17: Contenido Del Paquete
CONTENIDO DEL PAQUETE PIEZA DESCRIPCIÓN PIEZA DESCRIPCIÓN Mandril sin llave Indicador de torsión Selector de engranajes Botón de torsión Presilla para cinturón con soporte Luz de trabajo LED para brocas Selector de dirección de rotación (adelante, bloqueo central o Tornillo reversa) Interruptor tipo gatillo de Broca doble... -
Página 18: Información De Seguridad
INFORMACIÓN DE SEGURIDAD Lea y comprenda completamente este manual antes de intentar ensamblar u operar este producto. Si tiene preguntas relacionadas con el producto, llame al Departamento de Servicio al Cliente al 1-888-3KOBALT, de lunes a domingos de 8 a.m. a 8 p.m., hora estándar del Este. ADVERTENCIA •... - Página 19 INFORMACIÓN DE SEGURIDAD Advertencias generales de seguridad en el manejo de herramientas eléctricas ADVERTENCIA • Lea todas las advertencias de seguridad, las instrucciones, las ilustraciones y las especificaciones que se incluyen para esta herramienta eléctrica. No cumplir con todas las instrucciones que se detallan a continuación podría provocar descargas eléctricas, incendios o lesiones graves.
- Página 20 INFORMACIÓN DE SEGURIDAD • Use equipo de protección personal. Use siempre lentes de protección. Los equipos de protección, como mascarillas antipolvo, zapatos de seguridad antideslizantes, cascos protectores o protección auditiva, utilizados para las condiciones adecuadas, disminuyen el riesgo de lesiones personales. •...
- Página 21 INFORMACIÓN DE SEGURIDAD • Mantenga los mangos y las superficies de agarre secos, limpios y sin aceite ni grasa. Los mangos y las superficies de agarre resbaladizos no permiten manipular ni controlar la herramienta de forma segura en situaciones inesperadas. Uso y cuidado de herramientas a batería •...
-
Página 22: Preparación
INFORMACIÓN DE SEGURIDAD • Asegure la pieza de trabajo. Las piezas de trabajo pueden sostenerse de forma más segura con dispositivos de sujeción que con las manos. • Siempre espere hasta que la herramienta eléctrica se detenga completamente antes de colocarla hacia abajo. El accesorio de la herramienta se puede atascar y provocar la pérdida de control sobre la herramienta eléctrica. -
Página 23: Instrucciones De Funcionamiento
INSTRUCCIONES DE FUNCIONAMIENTO 1. Para fijar el paquete de baterías a. Alinee la parte elevada del paquete de baterías con las ranuras de la parte inferior de Botón de liberación la herramienta y luego deslice el paquete de de la batería baterías en la herramienta, como se muestra. - Página 24 INSTRUCCIONES DE FUNCIONAMIENTO 3. Interruptor tipo gatillo de velocidad variable a. Para encender el taladro/destornillador en ángulo recto, presione el interruptor tipo gatillo de velocidad variable (E). b. Para apagarlo, suelte el interruptor tipo gatillo de velocidad variable. c. El interruptor tipo gatillo de velocidad variable proporciona mayor velocidad con mayor presión en el gatillo y menor velocidad con menor presión en el gatillo.
- Página 25 INSTRUCCIONES DE FUNCIONAMIENTO 1. El taladro en ángulo recto proporciona fuerza de torsión mínima. 2. El taladro/destornillador en ángulo recto proporciona fuerza de torsión media. 3. El taladro/destornillador en ángulo recto proporciona fuerza de torsión máxima. A mayor configuración de torsión, mayor fuerza produce el taladro/destornillador en ángulo recto para girar un objeto.
- Página 26 INSTRUCCIONES DE FUNCIONAMIENTO 7. Instalación y retiro de la presilla para cinturón con soporte para brocas a. Alinee la pestaña de la presilla para cinturón con soporte para brocas (H) con el orificio en la base del taladro/destornillador en ángulo recto.
- Página 27 INSTRUCCIONES DE FUNCIONAMIENTO ADVERTENCIA • No sostenga el cuerpo del mandril con una sola mano y use la potencia del taladro/ destornillador en ángulo recto para apretar o desajustar las mordazas del mandril en la broca para taladro. El cuerpo del mandril se puede resbalar en la mano, o la mano puede resbalarse y entrar en contacto con la pieza giratoria.
- Página 28 INSTRUCCIONES DE FUNCIONAMIENTO b. Cuando perfore metales, unte aceite ligero en la broca para taladro para evitar que se sobrecaliente. El aceite prolongará la vida útil de la broca y aumentará la acción de taladro. c. Comience perforando a una velocidad muy baja para evitar que la broca se deslice del punto de inicio.
-
Página 29: Cuidado Y Mantenimiento
CUIDADO Y MANTENIMIENTO Todas las tareas de mantenimiento deben estar a cargo únicamente de un técnico de servicio calificado. Limpieza Antes de limpiar o realizar cualquier tarea de mantenimiento, retire el paquete de baterías. Para un uso seguro y adecuado, siempre mantenga limpias la herramienta y sus ranuras de ventilación. -
Página 30: Solución De Problemas
SOLUCIÓN DE PROBLEMAS ADVERTENCIA Coloque el interruptor en la posición “OFF” (Apagado) y retire la batería de la herramienta antes de realizar procedimientos de solución de problemas. PROBLEMA CAUSA POSIBLE ACCIÓN CORRECTIVA La herramienta no La capacidad de la Cargue el paquete de baterías. funciona.