Tabla de contenido
Publicidad
Idiomas disponibles
Idiomas disponibles
Enlaces rápidos
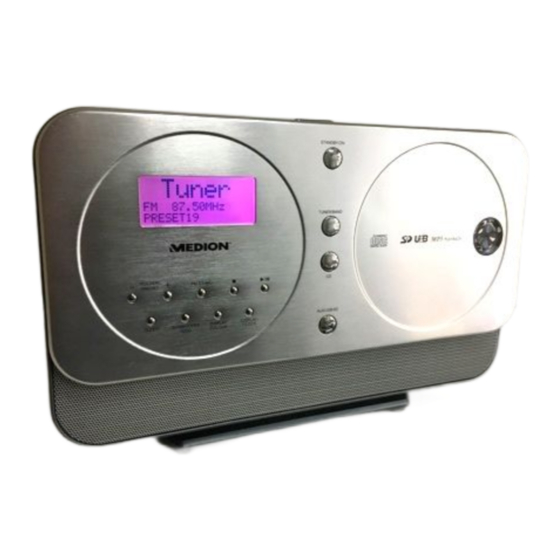
Esquema del aparato
1.
Pantalla LCD
– FOLDER / PRESET
2.
Tecla
SLEEP
3.
– Seleccionar el modo de apagado automático
+ FOLDER / PRESET
4.
Tecla
SUBWOOFER HI/LO
5.
Tecla
FM ST/MO
6.
Tecla
DISPLAY COLOUR
7.
8.
: Parar la reproducción
DISPLAY / CLOCK
9.
/
10.
: Reproducción / Interrupción de la reproducción
AUX / USB / SD
11.
CD
12.
– Seleccionar el modo CD
TUNER / BAND
13.
banda AM en el modo de radio
STANDBY / ON –
14.
ON/OFF –
15.
SD / MMC MEMORY CARD –
16.
VOL / TUN / SKIP
17.
seleccionar títulos del CD
USB
18.
– Conexión USB
JOGMODE
19.
AUX IN
20.
– Entrada de sonido analógica
21.
- Toma para auriculares
OPEN / CLOSE
22.
AM ANT
23.
– Toma para antena AM
ANT
24.
– Antena FM
25. Toma de corriente
26. Compartimento de las pilas para el modo de seguridad
Esquema del aparato
– Cambiar de estéreo a mono
– Ajuste de los colores de la pantalla
– Ajustar la hora
– Seleccionar AUX, USB o SD
– Seleccionar el modo de radio / seleccionar la banda FM o
Conectar/desconectar el modo de espera
Interruptor de red
– Regulador de volumen / búsqueda de emisoras de radio /
– Selección de la función del regulador de ajuste (17)
– Abrir y cerrar el compartimento de CD
Ranura para tarjetas SD / MMC
ES
EN
DE
PT
1
Publicidad
Capítulos
Tabla de contenido

Manuales relacionados para Medion 81919


Resumen de contenidos para Medion 81919
- Página 1 Esquema del aparato Pantalla LCD – FOLDER / PRESET Tecla SLEEP – Seleccionar el modo de apagado automático + FOLDER / PRESET Tecla SUBWOOFER HI/LO Tecla FM ST/MO Tecla – Cambiar de estéreo a mono DISPLAY COLOUR – Ajuste de los colores de la pantalla : Parar la reproducción DISPLAY / CLOCK –...
-
Página 2: Mando A Distancia
Mando a distancia STANDBY / ON – Conectar/desconectar el modo de espera DISPLAY / CLOCK – Ajustar la hora DISPLAY COLOUR – Ajuste de los colores de la pantalla SLEEP – Activar la desconexión automática TIMER – Seleccionar el modo de temporizador AUX / USB / SD –... -
Página 3: Tabla De Contenido
ÍNDICE Advertencias de seguridad ................5 Acerca de las presentes instrucciones ................5 No permita que los niños toquen aparatos eléctricos ............ 5 Colocar el aparato de forma segura................5 Conexión a la red ......................6 En caso de desperfectos....................6 En caso de problemas de funcionamiento .............. -
Página 4: Índice
CD-MP3 (buscar dentro de carpetas) ............... 16 REPEAT: repetir (sólo a través del mando a distancia) ..........16 RANDOM: reproducción aleatoria (sólo a través del mando a distancia)...... 16 INTRO: inicio de cada título (sólo a través del mando a distancia) ....... 17 Modo AUX ......................17 Funcionamiento con tarjetas de memoria SD ..........17 Modo USB ......................18... -
Página 5: Advertencias De Seguridad
Advertencias de seguridad Acerca de las presentes instrucciones Antes de la puesta en marcha, lea atentamente las presentes advertencias de seguridad. Preste atención a las advertencias detalladas en las instrucciones de funcionamiento. Mantenga siempre a su alcance las instrucciones de funcionamiento. Si vende o cede el aparato a otra persona, entréguele sin falta también las presentes instrucciones y el certificado de garantía. -
Página 6: Conexión A La Red
¡AVISO! Tenga en cuenta las distancias mínimas de seguridad y en ningún caso cubra las rejillas de ventilación. Para una ventilación suficiente se deberá guardar una distancia de 20 cm en todos los lados. Los orificios en el aparato no se deben cubrir ni obstruir. -
Página 7: Manejo Seguro De Las Pilas
Manejo seguro de las pilas El aparato funciona con pilas. Para ello, observe las siguientes indicaciones: • Mantenga las pilas alejadas de los niños. Las pilas pueden representar un peligro de muerte si se tragan. En caso de ingestión accidental de una pila hay que avisar inmediatamente a un médico. -
Página 8: Preparación
Preparación Desembalar Retire todos los materiales de embalaje. Al suministrarlo se encuentra una protección de transporte dentro del compartimento de CDs. Retire este cartón. ¡CUIDADO! No permita que los niños pequeños jueguen con el plástico. ¡Existe peligro de asfixia! Comprobar el volumen de suministro Cuando desembale la caja, asegúrese de que están incluidos los siguientes artículos: •... -
Página 9: Colocar Las Pilas En El Mando A Distancia
Colocar las pilas en el mando a distancia Coloque 2 pilas micro 1,5 V LR03, tamaño AAA en el mando a distancia. Abra la tapa del compartimento de las pilas pulsando el clip de cierre en la dirección de la flecha. Coloque las pilas de tal modo que el polo negativo esté... -
Página 10: Ajustar La Hora
Ajustar la hora Ajuste la hora cuando el aparato se encuentre en el modo de espera. DISPLAY/CLOCK Pulste la tecla hasta que en la pantalla parpadee la indicación de hora. – FOLDER / PRESET +, para introducir las horas. Pulse las teclas Vuelva a pulsar la tecla DISPLAY/CLOCK, en la pantalla parpadea la indicación de minutos. -
Página 11: Opcional: Conexión De Auriculares
Opcional: conexión de auriculares En la parte derecha del aparato se encuentra la toma para auriculares ( ). Conecte unos auriculares con una clavija jack de 3,5 mm. Los altavoces se desconectarán entonces automáticamente. ¡ATENCIÓN! ¡Antes de ponerse los auriculares, asegúrese de poner el volumen al mínimo! Un volumen alto al usar auriculares puede causar una pérdida auditiva. -
Página 12: Ajustar El Ecualizador
Ajustar el ecualizador FLAT JAZZ ROCK Este aparato dispone de 5 ajustes de ecualizador predefinidos: CLASSIC . Ajuste el modo de reproducción de la siguiente forma: Pulse la tecla del mando a distancia para ajustar uno de los modos de eculizador disponibles. -
Página 13: Sintonizar Las Emisoras
Sintonizar las emisoras JOG MODE Pulse la tecla del lado derecho del aparato hasta que en la pantalla TUNING aparezca Ajuste con las teclas del mando a distancia o con la rueda de ajuste de la derecha del aparato la emisora deseada. Para buscar una emisora automáticamente, mantenga pulsadas las teclas del mando a distancia hasta que el aparato inicie una búsqueda automática. -
Página 14: Modo Cd/Mp3
Modo CD/MP3 Advertencias relativas al compartimento de CDs No coloque objetos extraños en el compartimento de CDs, dado que podrían dañar su mecanismo. No deje la tapa del compartimento de CDs abierta durante mucho tiempo a fin de evitar que entre polvo. No toque en ningún caso la lente en el compartimento de CDs. -
Página 15: Indicaciones Después De Haber Introducido Un Cd De Audio O Mp3
Indicaciones después de haber introducido un CD de audio o MP3 Si se ha colocado un CD de audio correctamente, aparece el número total de los títulos y la duración total del CD (modo stop). Si se ha colocado un CD-MP3 correctamente, aparece el número total de carpetas y de los títulos en la pantalla (modo stop). -
Página 16: Repeat: Repetir (Sólo A Través Del Mando A Distancia)
CD-MP3 (buscar dentro de carpetas) En los CDs-MP3 los títulos pueden estar memorizados en carpetas. • Si no se encuentra ninguna carpeta en el CD-MP3, realice la búsqueda como en caso de un CD de audio. • Si en el CD-MP3 se encuentran carpetas, para buscar el título abra primero la carpeta. -
Página 17: Intro: Inicio De Cada Título (Sólo A Través Del Mando A Distancia)
INTRO: inicio de cada título (sólo a través del mando a distancia) El modo de reproducción INTRO proporciona el inicio de cada título durante 10 segundos. A continuación el reproductor CD cambia al título siguiente. INTRO Pulse la tecla INTRO. En la pantalla aparece INTRO. -
Página 18: Modo Usb
Modo USB AUX/USB/SD Pulse la tecla hasta que en la pantalla aparezca Introduzca el stick de memoria USB en la toma USB. Esta se encuentra en el lado derecho del aparato. En la pantalla aparece la indicación y se indican el número total de las carpetas y de los títulos. -
Página 19: Modo Temporizador (Sólo A Través Del Mando A Distancia)
Modo TEMPORIZADOR (sólo a través del mando a distancia) Mediante el modo de temporizador se puede conectar y desconectar el aparato a una hora preajustada. TIMER Pulse la tecla del mando a distancia para conectar o desconectar esta TIMER ON TIMER OFF función. -
Página 20: Eliminación
Eliminación Embalaje Los materiales y accesorios de embalaje son reciclables y deben ser depositados en un contenedor para reciclaje cuando ya no los necesite. Aparato No tire bajo ningún concepto el reproductor DVD a la basura doméstica normal. Consulte en su ayuntamiento la posibilidad de una eliminación del reproductor DVD apropiada y conforme con el medio ambiente. -
Página 21: Especificaciones Técnicas
Especificaciones técnicas Alimentación: 230 V ~ 50 Hz Potencia durante el funcionamiento: 42 vatios Pilas: Pilas mignon de seguridad 2 x 1,5 V, tamaño AAA, R3/LR3 Radiofrecuencia FM: 87,5 – 108 MHz Radiofrecuencia onda media: 522 -1620 kHz Toma para auriculares: clavija jack de 3,5-mm Entrada USB Versión USB 1.1 y 2.0... - Página 22 Especificaciones técnicas...
-
Página 23: Overview Of The Appliance
Overview of the appliance LCD display FOLDER / PRESET button SLEEP – select sleep mode FOLDER / PRESET + button SUWOOFER HI/LO button FM ST/MO button – to switch from stereo to mono DISPLAY COLOUR – Display colour setting : Stop playback DISPLAY / CLOCK –... -
Página 24: Remote Control
Remote control STANDBY / ON – Turn standby mode on/off DISPLAY / CLOCK – Set clock DISPLAY COLOUR – Display colour setting SLEEP – Activate automatic switch off TIMER – Select timer mode AUX / USB / SD – Select AUX, USB or SD : Playback/pause playback : Radio station search /select CD track : Stop playback... - Página 25 Contents Safety instructions ...................5 About these instructions....................5 Keeping electrical equipment out of reach of children........... 5 Setting the device up safely ................... 5 Mains connection......................6 If damage occurs ......................6 In the event of functional damage ................. 6 The CD player .......................
- Página 26 MP3-CD (search in directories) ................. 16 REPEAT: Repeat (only via remote control) ..............16 RANDOM: Random playback (only via remote control) ..........16 INTRO: Play intro (only via remote control) ..............17 AUX mode ......................17 Operation with SD memory card ..............17 USB operation....................18 SLEEP function ....................18 TIMER function (only via remote control) .............19...
-
Página 27: Safety Instructions
Safety instructions About these instructions Please read these instructions carefully before using the device. Note the warnings in the operating instructions. Always keep the operating instructions close to hand. If you sell the device or give it away, make sure you also hand over these instructions and the guarantee slip. -
Página 28: Mains Connection
Mains connection Only connect the unit to a power point (230 V ~ 50 Hz) that is easy to reach and is close to the place where you have set the unit up. The power socket must be freely accessible so that you can unplug the appliance quickly, if necessary. -
Página 29: Safe Handling Of Batteries
Safe handling of batteries You can operate the device using batteries. Please note the following: • Keep the batteries away from children. Batteries may endanger life if swallowed. If a battery is swallowed, seek medical assistance immediately. • Do not throw batteries into a fire, do not short-circuit them and do not dismantle them. -
Página 30: Preparation
Preparation Unpacking Remove all packaging materials. On delivery there is a transport protection card in the CD compartment. Remove this card. CAUTION! Do not let children play with the plastic film. There is a risk of suffocation! Check package contents Unpack the unit and ensure that the following parts are included: •... -
Página 31: Insert Backup Batteries
Insert backup batteries In order to retain the time even if mains power fails, you can insert two 1.5V batteries LR03 AAA into the battery compartment. The backup battery compartment is located on the underside of the device. Pull out the plug. Open the battery compartment by sliding the cover downwards to the side in the direction indicated by the arrow. -
Página 32: Setting Clock Time
Setting clock time Set the time when the device is in standby mode. DISPLAY/CLOCK Press the button until the hour display flashes on the screen. – FOLDER / PRESET + Press the buttons to enter the hours. DISPLAY/CLOCK Press the button again until the minute display flashes on the screen. -
Página 33: Optional: Connecting Headphones
Optional: Connecting headphones The headphone connection is on the right side of the device ( ). Connect the headphones with a 3.5mm jack plug. The loudspeakers will then be deactivated automatically. WARNING. Before putting on headphones set the volume to minimum! Listening to music at a high volume especially when using ear or headphones may result in the loss of hearing. -
Página 34: Equaliser Setting
Equaliser setting FLAT JAZZ ROCK CLASSIC This device has 5 pre-set equaliser settings: . You set these as follows in playback mode: Press the button on the remote control in order to set the available equaliser modes. The various modes are shown on the screen in succession. Mute MUTE Press the... -
Página 35: Tuning
Tuning TUNING JOG MODE Press the on the right side of the device until is displayed on the screen. Select the desired station using the buttons on the remote control or by turning the setting wheel on the device to the right. In order to find a station automatically, press and hold down the buttons on the remote control until the device starts the automatic search. -
Página 36: Cd/Mp3 Operation
CD/MP3 operation Information on the CD compartment Never insert objects into the CD compartment as this could destroy the mechanism. In order to prevent dust accumulating never leave the CD compartment open for long periods of time. Never touch the lens in the CD compartment. If the CD is very dirty or has clear finger marks playback may be delayed or may start at another location. -
Página 37: Messages After Inserting An Audio Or Mp3 Cd
Messages after inserting an audio or MP3 CD If an audio CD is inserted correctly, the complete number of tracks and the total time for the CD are shown (stop mode). If an MP3 CD has been inserted correctly the total number of directories and tracks is displayed (stop mode). - Página 38 MP3-CD (search in directories) The tracks on MP3 CDs may be organised into directories. • If the MP3 CD does not have any directories your search takes place in the same way as for an audio CD. • If the MP3 CD has directories, to search for a track first open the directory. You can look for a directory (album) by repeatedly pressing the FOLDER/PRESET + –...
-
Página 39: Aux Mode
INTRO: Play intro (only via remote control) The INTOR playback type plays each track for 10 seconds. Then the CD player moves to the next track. INTRO Press the button. INTRO will appear in the display. Normal INTRO To end the function press the button again. -
Página 40: Usb Operation
USB operation AUX/USB/SD Press the button until appears on the screen. Insert the USB memory stick into the USB socket. This is located on the right side of the device. is shown on the screen and the total number of directories and tracks are displayed. -
Página 41: Timer Function (Only Via Remote Control)
TIMER function (only via remote control) The timer function allows the device to switch itself on and off at a preset time. TIMER Press the button on the remote control to switch the function on or off. TIMER ON TIMER OFF The screen shows . -
Página 42: Disposal
Disposal Packaging All packaging and packaging materials that are no longer required can and should be recycled. Player Never dispose of the DVD player in the normal household rubbish. Ask your local or city authorities for options on disposing of the DVD player properly and in an environmentally friendly method. -
Página 43: Technical Data
Technical Data Power supply: 230V ~ 50Hz Power consumed during operation: 42 Watt Batteries: Backup mignon batteries 2 x 1.5 V size AAA, R3/LR6 Radio frequency range FM: 87.5 – 108 MHz Radio frequency range medium wave: 522 – 1,620 kHz Headphone connection: 3.5mm jack plug USB input... - Página 44 Technical Data...
- Página 45 Geräteübersicht LCD Display FOLDER / PRESET - Taste SLEEP – Sleepmodus wählen FOLDER / PRESET + Taste SUWOOFER HI/LO Taste FM ST/MO Taste – Umschaltung von Stereo auf Mono DISPLAY COLOUR – Display Farbeinstellung : Wiedergabestopp DISPLAY / CLOCK – Uhrzeit einstellen / : Wiedergabe/Wiedergabe-Unterbrechung 11.
- Página 46 Fernbedienung STANDBY / ON – Bereitschaftsmodus ein-/ausschalten DISPLAY / CLOCK – Uhrzeit einstellen DISPLAY COLOUR – Display Farbeinstellung SLEEP – Automatische Ausschaltung aktivieren TIMER – Timermodus wählen AUX / USB / SD – AUX, USB oder SD auswählen / : Wiedergabe/Wiedergabe–Unterbrechung : Radiosendersuche / CD-Titel anwählen : Wiedergabestopp 10.
- Página 47 Inhaltsverzeichnis Sicherheitshinweise ..................5 Zu dieser Anleitung ....................... 5 Elektrische Geräte nicht in Kinderhände................. 5 Das Gerät sicher aufstellen .................... 5 Netzanschluss ....................... 6 Bei Beschädigungen ...................... 6 Im Falle von Funktionsstörungen .................. 6 Der CD-Spieler ......................6 Sicherer Umgang mit Batterien..................7 Das Gerät reinigen......................
- Página 48 Audio-CD ......................... 15 MP3-CD (in Verzeichnissen suchen) ................. 16 REPEAT: Wiederholen (nur über Fernbedienung)............16 RANDOM: Zufallswiedergabe (nur über Fernbedienung) ..........16 INTRO: Intro anspielen (nur über Fernbedienung)............17 AUX-Betrieb....................17 Betrieb mit SD-Speicherkarte ................17 USB-Betrieb ....................18 SLEEP Funktion ....................18 TIMER Funktion (nur über Fernbedienung)...........19 Entsorgung ....................20 Verpackung.........................
-
Página 49: Sicherheitshinweise
Sicherheitshinweise Zu dieser Anleitung Lesen Sie vor Inbetriebnahme die Sicherheitsvorschriften aufmerksam durch. Beachten Sie die Warnungen in der Bedienungsanleitung. Bewahren Sie die Bedienungsanleitung immer in Reichweite auf. Wenn Sie das Gerät verkaufen oder weitergeben, händigen Sie unbedingt auch diese Anleitung und den Garantieschein aus. Elektrische Geräte nicht in Kinderhände Lassen Sie Kinder niemals unbeaufsichtigt elektrische Geräte benutzen. -
Página 50: Netzanschluss
Netzanschluss Schließen Sie das Gerät nur an eine gut erreichbare Steckdose (230 V ~ 50 Hz) an, die sich in der Nähe des Aufstellorts befindet. Für den Fall, dass Sie das Gerät schnell vom Netz nehmen müssen, muss die Steckdose frei zugänglich sein. Warten Sie mit dem Anschluss des Netzkabels, wenn das Gerät von einem kalten in einen warmen Raum gebracht wird. -
Página 51: Sicherer Umgang Mit Batterien
Sicherer Umgang mit Batterien Sie können das Gerät mit Batterien betreiben. Beachten Sie hierzu folgende Hinweise: • Halten Sie Batterien von Kindern fern. Batterien können bei Verschlucken lebensgefährlich sein. Wurde eine Batterie verschluckt, muss sofort medizinische Hilfe in Anspruch genommen werden. •... -
Página 52: Vorbereitung
Vorbereitung Auspacken Entfernen Sie sämtliches Verpackungsmaterial. Bei Auslieferung ist ein Transportschutz im CD-Fach eingelegt. Nehmen Sie diese Pappe heraus. VORSICHT! Lassen Sie kleine Kinder nicht mit Folie spielen. Es besteht Erstickungsgefahr! Lieferumfang prüfen Vergewissern Sie sich beim Auspacken, dass folgende Teile mitgeliefert wurden: •... -
Página 53: Batterien In Die Fernbedienung Einlegen
Batterien in die Fernbedienung einlegen Legen Sie 2 Mikro 1,5 V-Batterien LR03, Größe AAA in die Fernbedienung ein. Öffnen Sie den Batteriefachdeckel, indem Sie den Verschlussclip in Pfeilrichtung drücken. Legen Sie die Batterien so ein, dass der Minuspol der Batterien an den Federn anliegt. Schieben Sie den Batteriefachdeckel wieder auf. -
Página 54: Uhrzeit Einstellen
Uhrzeit einstellen Stellen Sie die Uhrzeit ein, wenn sich das Gerät im Bereitschaftsmodus befindet. Drücken Sie so lange die Taste DISPLAY/CLOCK bis die Stundenanzeige im Display blinkt. Drücken Sie die Tasten – FOLDER / PRESET +, um die Stunden einzugeben. Drücken Sie erneut die Taste DISPLAY/CLOCK;... -
Página 55: Optional: Kopfhörer Anschließen
Optional: Kopfhörer anschließen An der Rechten Seite des Geräts finden Sie den Kopfhöreranschluss ( ). Schließen Sie einen Kopfhörer mit einem 3,5-mm-Klinkenstecker an. Die Lautsprecher schalten sich dann automatisch ab. ACHTUNG! Bevor Sie einen Kopfhörer aufsetzen, stellen Sie die Lautstärke auf ein Minimum! Das Hören von Musik mit hoher Lautstärke kann vor allem bei der Verwendung von Ohrhörern und Kopfhörern den Verlust des Hörsinns verursachen. -
Página 56: Equalizereinstellung
Equalizereinstellung FLAT JAZZ ROCK Dieses Gerät verfügt über 5 vordefinierte Equalizereinstellungen: CLASSIC . Im Wiedergabemodus stellen Sie diese wie folgt ein: Drücken Sie die Taste EQ an der Fernbedienung, um eine der verfügbaren Equalizermodi einzustellen. Im Display erscheinen der Reihe nach die unterschiedlichen Modi. -
Página 57: Sender Einstellen
Sender einstellen TUNING Drücken Sie die Taste JOG MODE auf der rechten Seite des Gerätes bis im Display erscheint. Stellen Sie mit den Tasten an der Fernbedienung oder mit dem Einstellrad rechts am Gerät den gewünschten Sender ein. Um einen Sender automatisch zu suchen, drücken und halten Sie die Tasten an der Fernbedienung, bis das Gerät den automatischen Suchlauf beginnt. -
Página 58: Cd-/Mp3-Betrieb
CD-/MP3-Betrieb Hinweise zum CD-Fach Legen Sie keine fremden Gegenstände in das CD-Fach, da hierdurch die Mechanik zerstört werden kann. Um Verschmutzungen durch Staub zu vermeiden, lassen Sie den CD-Fach- Deckel nicht für längere Zeit offen stehen. Berühren Sie auf keinen Fall die Linse im CD-Fach. Ist die CD stark verschmutzt oder weist sie starke Fingerabdrücke auf, kann es passieren, dass das Abspielen verzögert wird oder an einer anderen Stelle beginnt. -
Página 59: Anzeigen Nach Dem Einlegen Einer Audio- Oder Mp3-Cd
Anzeigen nach dem Einlegen einer Audio- oder MP3-CD Wenn eine Audio-CD richtig eingelegt ist, erscheint die Gesamtzahl der Titel und die Gesamtzeit der CD (Stopp- Modus). Ist eine MP3-CD richtig eingelegt, erscheint die Gesamtzahl der Verzeichnisse und Titel im Display (Stopp- Modus). - Página 60 MP3-CD (in Verzeichnissen suchen) Auf MP3-CDs können die Titel in Verzeichnisse gespeichert sein. • Falls sich keine Verzeichnisse auf der MP3-CD befinden, führen Sie die Suche durch wie bei einer Audio-CD. • Falls sich Verzeichnisse auf der MP3-CD befinden, öffnen Sie für die Titelsuche zunächst das Verzeichnis um einen Titel zu suchen.
-
Página 61: Aux-Betrieb
INTRO: Intro anspielen (nur über Fernbedienung) Die Wiedergabeart INTRO ermöglicht das anspielen jedes Titels für 10 Sekunden. Danach wechselt der CD-Player zum nächsten Titel. INTRO Drücken Sie die Taste INTRO. Im Display erscheint Um die Funktion zu beenden, drücken Sie Taste INTRO erneut. Die Anzeige Normal meldet AUX-Betrieb... - Página 62 USB-Betrieb Drücken Sie die Taste AUX/USB/SD, bis im Display erscheint. Stecken Sie den USB-Speicherstick in die USB-Buchse. Diese befindet sich auf der rechten Geräteseite. Im Display erscheint die Anzeige und die Gesamtzahl der Verzeichnisse sowie der Titel werden angezeigt. HINWEIS Wurde kein USB-Speicherstick eingelegt ist, erscheint im Display die Meldung NO DEV Die Tasten zum USB-Betrieb haben die gleichen Funktionen und können wie im...
-
Página 63: Timer Funktion (Nur Über Fernbedienung)
TIMER Funktion (nur über Fernbedienung) Mit der Timer-Funktion lässt sich das Gerät zu eine zuvor eingestellten Uhrzeit ein- und ausgeschaltet werden. Drücken Sie die Taste TIMER auf der Fernbedienung, um die Funktion ein- oder TIMER ON TIMER OFF auszuschalten. Im Display erscheint oder . -
Página 64: Entsorgung
Entsorgung Verpackung Nicht mehr benötigte Verpackungen und Packhilfsmittel sind recyclingfähig und sollten grundsätzlich der Wiederverwertung zugeführt werden. Gerät Werfen Sie den DVD-Player keinesfalls in den normalen Hausmüll. Erkundigen Sie sich in Ihrer Stadt- oder Gemeindeverwaltung nach Möglichkeiten einer umwelt- und sachgerechten Entsorgung des DVD-Players. Batterien und Akkus Verbrauchte Batterien und defekte Akkus gehören nicht in den Hausmüll. -
Página 65: Technische Daten
Technische Daten Spannungsversorgung: 230 V ~ 50 Hz Leistungsaufnahme im Betrieb: 42 Watt Batterien: Backup-Mignonbatterien 2 x 1,5 V, Größe AAA, R3/LR3 Radiofrequenzbereich UKW: 87,5 – 108 MHz Radiofrequenzbereich Mittelwelle: 522 – 1620 kHz Kopfhöreranschluss: 3,5-mm-Klinkenstecker USB-Eingang USB-Version 1.1 und 2.0 Musikausgangsleistung: 2 x 5 Watt + 10 Watt Subwoofer CD-Player:... - Página 66 Technische Daten...
-
Página 67: Vista Geral Do Aparelho
Vista geral do aparelho Visor LCD FOLDER / PRESET Botão SLEEP Seleccionar modo sleep FOLDER / PRESET + Botão SUWOOFER HI/LO Botão FM ST/MO Botão – Comutação de estéreo para mono DISPLAY COLOUR – Visor ajuste da cor : Parar a reprodução DISPLAY / CLOCK –... -
Página 68: Telecomando
Telecomando STANDBY / ON – Ligar/desligar o modo de prontidão DISPLAY / CLOCK – Ajustar a hora DISPLAY COLOUR – Visor ajuste da cor SLEEP – Activar desconexão automática TIMER – Seleccionar modo de temporizador AUX / USB / SD –... - Página 69 Índice Indicações instrutivas de segurança ..............5 Sobre estas instruções ....................5 Manter os aparelhos eléctricos fora do alcance de crianças..........5 Posicionar o aparelho de forma segura ................5 Ligação à rede ....................... 6 No caso de danos ......................6 No caso de anomalias....................
- Página 70 CD MP3 (procurar nos índices) ................16 REPEAT: Repetir (apenas através do telecomando)............16 RANDOM: Reprodução aleatória (apenas através do telecomando) ......16 INTRO: Reproduzir Intro (apenas através do telecomando) ......... 17 Funcionamento AUX ..................17 Funcionamento com cartão de memória SD ..........17 Funcionamento USB..................18 Função SLEEP ....................18 Função TEMPORIZADOR (apenas através do telecomando) ......19...
-
Página 71: Indicações Instrutivas De Segurança
Indicações instrutivas de segurança Sobre estas instruções Leia estas prescrições de segurança com muita atenção antes da colocação em funcionamento. Tenha em atenção as advertências no aparelho e no manual de instruções. Mantenha o manual de instruções sempre à mão. Se vender ou entregar o aparelho a terceiros, junte também, sem falta, este manual e a garantia. -
Página 72: Ligação À Rede
AVISO! Certifique-se que seja respeitada uma distância mínima e não cubra as ranhuras de ventilação. Para uma ventilação suficiente é necessário cumprir uma distância de 20 cm para todos os lados. As aberturas no aparelho não devem estar cobertas ou obstruídas. Ligação à... -
Página 73: Manuseamento Seguro Das Pilhas
Manuseamento seguro das pilhas Pode operar o aparelho com pilhas. Tenha em atenção as seguintes indicações: • Mantenha as pilhas fora do alcance das crianças. As pilhas podem representar risco de vida ao serem ingeridas. Se uma pilha for ingerida, procure imediatamente ajuda médica. -
Página 74: Preparação
Preparação Tirar da embalagem Remova todo o material de embalagem. Aquando o fornecimento encontra-se uma protecção de transporte no compartimento de CD. Remova a protecção. CUIDADO! Nunca deixar crianças pequenas brincar com a película de plástico. Existe o perigo de asfixia! Verificar o volume do fornecimento Ao retirar o aparelho da embalagem, certifique-se de que as seguintes peças foram fornecidas:... -
Página 75: Colocar As Pilhas No Telecomando
Colocar as pilhas no telecomando Coloque 2 pilhas Mikro 1,5 V LR03, tamanho AAA no telecomando. Abra a tampa do compartimento das pilhas, premindo o clipe de fecho no sentido das setas. Coloque as pilhas para que o pólo negativo das pilhas fique virado para a mola. -
Página 76: Acertar As Horas
Acertar as horas Ajuste a hora quando o aparelho se encontrar no modo de prontidão. DISPLAY/CLOCK Prima o botão até a indicação da hora piscar no visor. – FOLDER / PRESET + Prima os botões para introduzir as horas. Prima novamente o botão DISPLAY/CLOCK; a indicação dos minutos pisca no visor. -
Página 77: Opcional: Ligar Auscultadores
Opcional: Ligar auscultadores No lado direito do aparelho encontra a ligação para os auscultadores ( ). Ligue a essa tomada auscultadores com um conector RCA de 3,5 mm. As colunas desligam-se automaticamente. ATENÇÃO! Antes de colocar os auscultadores regule o volume para o mínimo! Ouvir música com volume elevado pode originar a perda de audição no caso de utilizar auscultadores. -
Página 78: Ajuste Do Equalizador
Ajuste do equalizador FLAT JAZZ ROCK Este aparelho dispões de 5 ajustes de equalizador pré-definidos: CLASSIC . No modo de reprodução ajusta-os da seguinte forma: Prima o botão no telecomando para ajustar um modo de equalizador disponível. No visor aparecem sequencialmente os modos diferentes. Activar o modo silencioso (Mute) MUTE Prima o botão... -
Página 79: Ajustar A Emissora
Ajustar a emissora TUNING JOG MODE Prima o botão no lado direito do aparelho até aparecer visor. Ajuste a emissora desejada com os botões no telecomando ou com o regulador de ajuste no aparelho à direita. Para procurar automaticamente uma emissora, prima os botões telecomando e mantenha-os premidos até... -
Página 80: Funcionamento Cds/Mp3
Funcionamento CDs/MP3 Indicações relativamente ao compartimento do Não deixe objectos estranhos dentro do compartimento do CD, uma vez que pode danificar a mecânica do aparelho. Não deixe o compartimento do CD aberto durante muito tempo, para evitar sujidade e pó. Não toque nas lentes no interior do compartimento do CD. -
Página 81: Indicações Após Colocação De Cd Áudio Ou Mp3
Indicações após colocação de CD áudio ou MP3. Se foi colocado correctamente um CD áudio aparece a quantidade total das faixas e do CD (modo Stop). Se foi colocado correctamente um CD MP3, aparece a quantidade total dos índices e das faixas no visor (modo stop). -
Página 82: Cd Mp3 (Procurar Nos Índices)
CD MP3 (procurar nos índices) Nos CDs MP3 podem estar memorizadas as faixas nos índices. • Se não encontrar quaisquer índices nos CD MP3, efectue a localização como no CD áudio. • No case de se encontrarem índices no CD MP3, abra primeiro o índice para a localização de faixas para localizar uma faixa. -
Página 83: Intro: Reproduzir Intro (Apenas Através Do Telecomando)
INTRO: Reproduzir Intro (apenas através do telecomando) O tipo de reprodução INTRO possibilita a reprodução de cada faixa por 10 segundos. Depois o leitor CD passa para a próxima faixa. INTRO INTRO. Prima a tecla No visor surge Para terminar a função, prima novamente o botão INTRO. A indicação avisa Normal Funcionamento AUX Com a entrada AUX estéreo de 3,5 mm, pode ligar mais aparelhos externos analógicos. -
Página 84: Funcionamento Usb
Funcionamento USB Prima o botão AUX/USB/SD, até aparecer no visor. Insira o stick de memória USB na tomada USB. Esta encontra-se no lado direito do aparelho. No visor aparece a indicação e a quantidade total dos índices, bem como das faixas. NOTA Se não foi colocado qualquer stick de memória USB, aparece a mensagem no visor. -
Página 85: Função Temporizador (Apenas Através Do Telecomando)
Função TEMPORIZADOR (apenas através do telecomando) Com a função temporizador é possível ligar e desligar o aparelho a uma hora pré-ajustada. TIMER Prima o botão no telecomando para ligar ou desligar a função. No visor TIMER ON TIMER OFF aparece . -
Página 86: Eliminação
Eliminação Embalagem Embalagens e produtos auxiliares de embalagem que não sejam mais necessários, podem ser reciclados e devem ser levados aos centros de reciclagem. Aparelho Nunca deposite o leitor DVD no lixo doméstico. Informe-se junto dos serviços municipais sobre as possibilidades de uma eliminação correcta do seu leitor DVD, sem perigo para o ambiente. -
Página 87: Dados Técnicos
Dados técnicos Alimentação de tensão: 230 V ~ 50 Hz Consumo de energia em funcionamento: 42 Watt Pilhas: Pilhas Mignon de reserva 2 x 1,5 V, tamanho AAA, R3/LR3 Frequência de rádio UKW: 87,5 – 108 MHz Frequência de rádio onda média: 522 –... - Página 88 Dados técnicos...