Publicidad
Idiomas disponibles
Idiomas disponibles
Enlaces rápidos
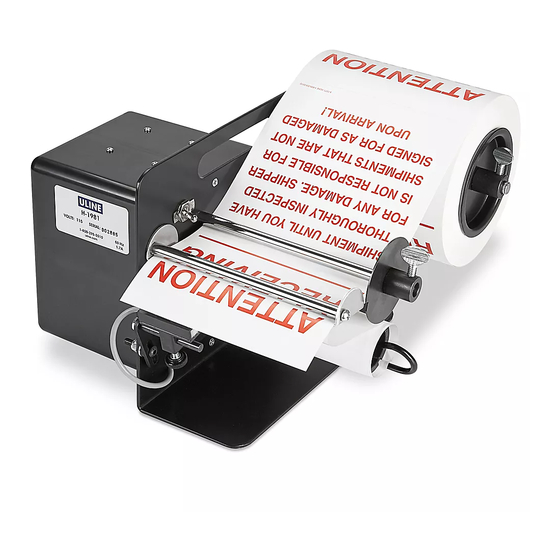
H-1276, H-1981
AUTOMATIC LABEL
DISPENSER
1. Pull photo eye away from unit approximately 2½" or
so and turn on motor. Move sensor back and forth
with finger to observe how it turns motor on and off.
Shut motor off.
2. If label roll has 3" core, install core inserts in each
side of roll – place on roll holder rod (M) at rear and
tighten locking collar with thumb screw into position
against core insert to hold roll and other core insert
against side collar and side plate of unit.
3. If label roll has smaller core diameter, mount first
core insert on rod (M) with flange against dispenser
side plate, then slide roll of labels on rod, install
second core insert against roll and then lock collar
with thumb screw.
4. Pull leading edge of carrier paper web under the
first chrome bar then between the next chrome bar
(C) and plate (D) and back around plate, down
toward take-up spool. (See Figure 1)
Switch
C
Label
Photo Eye
D
CLIP
I
Take-up
spool
PAGE 1 OF 6
1-800-295-5510
uline.com
OPERATING INSTRUCTIONS
Roll
A
of labels
M
Roll holder
retainer plate
Figure 1
5. About 5" of carrier paper is needed for a leader for
dispensing operation. Attach leader to take up spool
by pulling clip "I" off of spool and then sliding the clip
back on over the leader – leader is now engaged.
6. Adjust side guide (A) flush against web, with left
edge of print-out web about 1/8" from side plate of
dispenser.
7. Position photo eye to shut off motor just as rear of
label emerges from under rod (C). You should be
able to just see the end of the label. If the label is
permitted to advance too far, it can fall off web or
may continue down on the web without being seen
by the photo eye sensor. Adjust eye position for
smooth operation of unit as labels are removed.
8. FOR NARROW LABELS: Factory setting of the switch
accommodates labels 1¼" wide or larger. For
narrower labels, adjust lateral switch setting by
removing one or more of the spacers on the
unit. (See Figure 2) To do this, remove lock nut
and remove button head screw with a small
Allen wrench. Remove spacers until photo eye
is positioned in the center of the label. Tighten
assembly against the side plate. Replace and
tighten lock nut.
Figure 2
C
A
Para Español, vea páginas 3-4.
Pour le français, consulter les pages 5-6.
A = Lock nut
C = 1/8'' Spacer
D = 1/4'' Spacer
M
M = Round head
button screw
D
0621 IH-1276
Publicidad

Resumen de contenidos para Uline H-1276
- Página 1 Para Español, vea páginas 3-4. Pour le français, consulter les pages 5-6. H-1276, H-1981 1-800-295-5510 uline.com AUTOMATIC LABEL DISPENSER OPERATING INSTRUCTIONS 1. Pull photo eye away from unit approximately 2½" or 5. About 5" of carrier paper is needed for a leader for so and turn on motor.
- Página 2 This may or may not be beneficial to the dispensing operation. Remove periodically as necessary. It only takes a few moments when done properly. 1-800-295-5510 uline.com PAGE 2 OF 6 0621 IH-1276...
-
Página 3: Despachador Automático De Etiquetas Adhesivas
H-1276, H-1981 800-295-5510 uline.mx DESPACHADOR AUTOMÁTICO DE ETIQUETAS ADHESIVAS INSTRUCCIONES DE FUNCIONAMIENTO 1. Retire el sensor fotosensible de la unidad 5. Se requieren alrededor de 12.7 cm (5") de papel de aproximadamente 2½" y encienda el motor. Mueva arrastre para iniciar la operación de despachado. - Página 4 Esto podría ser o no ser beneficioso para la operación de despachado. Elimínelo periódicamente según sea necesario. Cuando se hace adecuadamente, solo se requieren unos cuantos minutos. 800-295-5510 uline.mx PAGE 4 OF 6 0621 IH-1276...
- Página 5 H-1276, H-1981 1-800-295-5510 uline.ca DISTRIBUTEUR D'ÉTIQUETTES AUTOMATIQUE UTILISATION 1. Écartez le capteur photoélectrique à une distance 5. Environ 12,7 cm (5 po) d'amorce est nécessaire pour d'environ 2 ½ po de l'appareil, puis démarrez le la distribution du papier. Fixez l'amorce à la bobine moteur.
- Página 6 à déplacement de l'étiquette. travers le distributeur. Cela peut s'avérer utile ou non pour la distribution. Retirez le papier périodiquement au besoin. Quelques instants suffisent pour ce faire, lorsqu'effectué correctement. 1-800-295-5510 uline.ca PAGE 6 OF 6 0621 IH-1276...


