Tabla de contenido
Publicidad
Enlaces rápidos
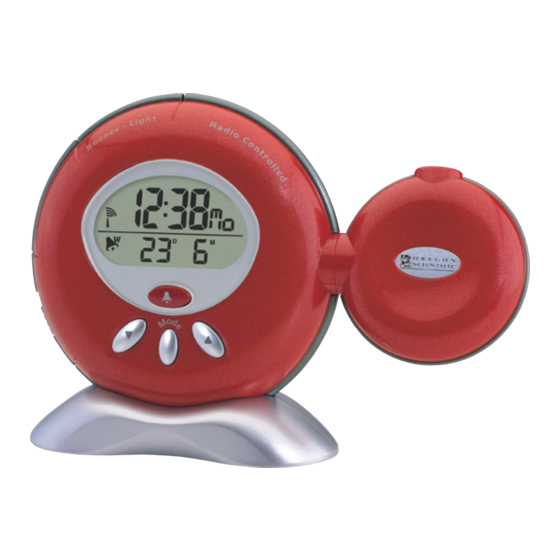
Oregon Scientific™ Radio-Controlled Projection Clock
TABLE OF CONTENTS
Introduction ....................................................................................................... 1
Key Features ..................................................................................................... 1
Front View ................................................................................................ 1
Back View ................................................................................................. 1
LCD Display Symbols ............................................................................... 2
Safety and Care Instructions ........................................................................... 3
Safety Precautions ................................................................................... 3
Caring for your Product ............................................................................ 3
Getting Started .................................................................................................. 4
Unpacking the Clock ................................................................................ 4
Batteries ................................................................................................... 4
AC Power Source ..................................................................................... 5
About Radio Reception .................................................................................... 5
Enabling / Disabling Radio Reception ...................................................... 6
To Manually Set the Clock and Calendar ....................................................... 6
Alarm Function ................................................................................................. 7
Activating / De-activating the Alarms ........................................................ 8
Setting the Alarms .................................................................................... 8
Crescendo Alarm ...................................................................................... 8
Projection Function .......................................................................................... 9
Troubleshooting Guide .................................................................................... 9
Specifications ................................................................................................... 10
Resetting the Unit ............................................................................................. 10
Additional Resources ....................................................................................... 10
Warnings ........................................................................................................... 11
Declaration of Conformity ............................................................................... 12
(RM816P / RM816PU / RM816PUL)
User Manual
Publicidad
Capítulos
Tabla de contenido
Solución de problemas

Manuales relacionados para Oregon Scientific RM816P


Resumen de contenidos para Oregon Scientific RM816P
-
Página 1: Tabla De Contenido
Oregon Scientific™ Radio-Controlled Projection Clock (RM816P / RM816PU / RM816PUL) User Manual TABLE OF CONTENTS Introduction ....................... 1 Key Features ..................... 1 Front View ....................1 Back View ....................1 LCD Display Symbols ................2 Safety and Care Instructions ................3 Safety Precautions ................... -
Página 2: Introduction
INTRODUCTION Thank you for selecting the Oregon Scientific™ Radio Controlled Projection Clock as your product of choice. This device is designed to give you many years of reliable service, including the following conveniences: • Radio-Controlled Calendar Clock* • Projection of current time •... -
Página 3: Lcd Display Symbols
[SNOOZE/LIGHT] button - Enables snooze function when alarm goes off - Activates the projector and backlight for five seconds [PROJECTION ON] switch Enables continuous projection of time when power adaptor is connected ] and [Down ] buttons Increases or decreases the value of a setting Swivel Projector For projecting the current time on walls or ceilings [ALARM] button... -
Página 4: Safety And Care Instructions
SAFETY AND CARE INSTRUCTIONS Safety precautions Please observe the following safety precautions when setting up and using this product. • LCD panel – The LCD panel is made of glass and may break if the unit is dropped or impacted. •... -
Página 5: Getting Started
GETTING STARTED Unpacking the product When you unpack your fun RF Projection clock, make sure to keep all the packing materials in a safe place, in case you need to later transport or return it for servicing. In the box, you will find: Fun RF Projection Clock 3V AC Adaptor 2 Pieces UM-3 / AA Batteries... -
Página 6: Ac Power Source
Replace the batteries whenever the low battery icon( ) is displayed, the NOTE LCD is dim, or the display does not illuminate when the power is on. Replace all the batteries at the same time – it is dangerous to mix old and new batteries. Contact your local waste disposal authority for instructions on how to dispose of used batteries. -
Página 7: Enabling / Disabling Radio Reception
Reception can be affected by a number of factors. For best reception, place the NOTE device away from metal objects and electrical appliances. Other causes for signal in- terference include electrical transmission towers, steel reinforced construction, and metal siding. Reception is ideal when placed near a window. Even though there are areas that may have more difficulty in receiving a signal, NOTE the Atomic Clock contains accurate quartz movement and will retain precise timing... -
Página 8: Alarm Function
Symbol Language English German French Italian Spanish ALARM FUNCTION The unit is equipped with 2 types of alarms: Weekday Alarm Single Alarm. Alarm Icon Alarm Type Description Weekday Alarm The Weekday Alarm will sound every Mondays to Fridays according to the preset time. It is automatically disabled during weekends (Saturdays and Sundays). -
Página 9: Setting The Alarms
Setting the Alarm(s) Instructions 1. Select the alarm you want to set by pressing the [ALARM] button. 2. Press and hold the [ALARM] button for 2 seconds when the selected Alarm is displayed. The hours will blink. 3. Enter the values by pressing [UP ] or [Down ]. 4. -
Página 10: Projection Function
PROJECTION FUNCTION Press the [SNOOZE/LIGHT] button and the projection of current time will be acti- vated for approximately 5 seconds. You can swivel the projector to the front or back by 90° to facilitate the projection angle. TROUBLESHOOTING GUIDE This section includes a list of frequently asked questions for problems you may encounter. -
Página 11: Specifications
163 x 112 x 42 mm ( H x W x D ) Weight 160 g (without battery) Radio frequency: System DCF77 (RM816P) or MSF60 (RM816PU) Display: Time format 12 hr am/pm or 24hr user selectable Time accuracy +/- 0.5 sec per day (when RF clock function is disabled) -
Página 12: Warnings
ABOUT OREGON SCIENTIFIC Visit our website (www.oregonscientific.com) to learn more about Oregon Scientific prod- ucts such as digital cameras; MP3 players; children's electronic learning products and games; projection clocks; health and fitness gear; weather stations; and digital and conference phones. -
Página 13: Declaration Of Conformity
EC-DECLARATION OF CONFORMITY This product complies with the essential requirements of Article 3 of the R&TTE 1999 / 5 / EC Directive, if used as intended and the following standards have been applied: Safety of information technology equipment (Article 3.1.a of the R&TTE Directive) Applied Standard EN 60950-1 : 2001 Electromagnetic compatibility... - Página 14 Projektions-Funkuhr von Oregon Scientific™ (RM816P/ RM816PU / RM816PUL) Bedienungsanleitung INHALTSVERZEICHNIS Einleitung ......................1 Wichtige Funktionen ..................1 Vorderansicht ................... 1 Rückansicht ....................1 LCD-Anzeige-Symbole ................2 Sicherheits- und Pflegehinweise ..............3 Vorsichtsmaßnahmen ................3 Pflege Ihres Produktes ................3 Inbetriebnahme ....................4 Auspacken der Uhr ...................
-
Página 15: Einleitung
EINLEITUNG Wir gratulieren Ihnen zum Kauf der Projektions-Funkuhr RM816P von Oregon Scientific™. Dieses Gerät wird Ihnen viele Jahre zuverlässige Dienste leisten und bietet Ihnen u.a. die folgenden Vorteile: • Funkgesteuerte Uhr mit Kalender * • Projektion der aktuellen Uhrzeit •... -
Página 16: Lcd-Anzeige-Symbole
A. [SNOOZE - LIGHT] - Taste - Aktiviert die Schlummerfunktion (Snooze), nachdem ein Alarm ausgelöst worden ist. - Aktiviert den Projektor und die Anzeigenbeleuchtung 5 Sekunden lang. B. [PROJECTION ON] – Schalter (Projektionsschalter) Einschalten der Dauerprojektion bei angeschlossenem Netzadapter. C. AUF [UP ] und AB [DOWN ] - Tasten - Anzeigewerte auf- oder abwärts einstellen. -
Página 17: Sicherheits- Und Pflegehinweise
SICHERHEITS- UND PFLEGEHINWEISE VORSICHTSMASSNAHMEN Bitte beachten Sie die folgenden Sicherheitsvorkehrungen, wenn Sie dieses Produkt in Betrieb nehmen und verwenden. • LCD-Scheibe – Die LCD-Scheibe ist aus Glas und kann zerbrechen, wenn Sie das Gerät fallen lassen oder Stößen aussetzen. • Wärmequellen –... - Página 18 INBETRIEBNAHME Auspacken der Uhr Stellen Sie beim Auspacken der „Fun Projektions-Funkuhr” sicher, dass Sie alle Verpackungsmaterialien an einem sicheren Ort aufbewahren, falls Sie sie später zum Transport oder für die Rückgabe zur Reparatur benötigen. In der Verpackung finden Sie Folgendes: Fun Projektions-Funkuhr 3V Wechselstrom-Netzadapter 2 Batterien der Größe UM-3 / AA / LR6...
-
Página 19: Stromversorgung Mittels Netzadapter
Setzen Sie sich mit Ihrer örtlichen Abfallbeseitigungsbehörde in Verbindung, um Anweisungen bezüglich der Beseitigung von alten Batterien zu erhalten. Gebrauchte Batterien können schädlich für die Umwelt sein und dürfen nicht in den Hausmüll gegeben werden. Stromversorgung mittels Netzadapter Ihr Produkt ist mit einem Wechselstrom-Netzadapter ausgestattet. Die Verwendung des Wechselstrom-Netzadapters ist für die Dauerprojektion der Zeit erforderlich. -
Página 20: Ein-/Ausschalten Des Funkempfangs
Funkempfang Beschreibung Starker Empfang des Zeitsignals. Schwacher Empfang des Zeitsignals. Kein Empfang des Zeitsignals. Zeitsignal wird gerade empfangen. Der Funkempfang des Zeitsignals wurde unterbrochen. Der Funkempfang kann durch eine Reihe von Faktoren beeinflußt werden. HINWEIS Um den besten Empfang zu erzielen, stellen Sie das Gerät bitte nicht in der Nähe von metallischen Gegenständen und elektrischen Geräten auf. -
Página 21: Manuelle Einstellung Der Uhr Und Des Kalenders
MANUELLE EINSTELLUNG DER UHR UND DES KALENDERS Bevor Sie die Uhr und den Kalender manuell einstellen können, müssen Sie die aktuelle Zeitzone, in welcher Sie wohnen, sowie das Zeitformat (12- oder 24- Stundenformat) festlegen. Anweisungen 1. Betätigen und halten Sie die Taste [MODE] 2 Sekunden lang. Die Ziffern der Zeitzonen- Stundenabweichung blinken. -
Página 22: Weckalarmfunktion
WECKALARMFUNKTION Das Gerät ist mit 2 Weckalarmarten ausgestattet: Einzel- Wochentagsweckalarm. Alarm-Indikator Weckalarmart Beschreibung Der Wochentagsweckalarm ertönt immer montags Wochentagsweckalarm bis freitags je nach der voreingestellten Zeit. Während des Wochenendes (samstags und sonntags) wird er automatisch abgestellt. Der Einzelweckalarm ertönt nur einmal je nach Einzelweckalarm der voreingestellten Zeit. -
Página 23: Ausschalten Des Weckalarms
Ausschalten des Weckalarms: Wählen Sie den Weckalarm, welchen Sie ausschalten möchten, durch Betätigen der Taste [ALARM]. Betätigen Sie [UP ] oder [DOWN ], um den ausgewählten Weckalarm auszuschalten. Es wird “—-” angezeigt, wenn der Weckalarm ausgeschaltet wird. Um den Weckalarm wieder einzuschalten, betätigen Sie erneut [UP ] oder [DOWN Crescendo-Alarm (lauter werdender Weckalarm) Wenn der Weckalarm zur voreingestellten Zeit ertönt, leuchtet der Alarm-Indikator... - Página 24 Problem Symptom Überprüfen Sie dies Abhilfe Die Uhrzeit ist nicht Stellen Sie das Gerät Kein Elektromagnetische Störungen richtig eingestellt. Funksignalempfang. weiter weg von PCs, oder Gegenstände verhindern Telefonen oder anderen den Empfang. elektronischen Geräten Die Ausrichtung oder der und in der Nähe eines Standort des Gerätes ist nicht Fensters auf.
-
Página 25: Technische Daten
163 x 112 x 42 mm ( B x H x T ) Gewicht 160 g (ohne Batterien) Funkfrequenz: System Funkzeitsignal DCF77 aus Deutschland (RM816P) (Die UK-Version RM816PU synchronisiert mit dem MSF60 Funkzeitsignal aus Rugby, England.) Anzeige: Zeitformat 12 Stunden- (am/pm) oder 24 Stundenformat vom... -
Página 26: Über Oregon Scientific
ÜBER OREGON SCIENTIFIC Besuchen Sie unsere Website (www.oregonscientific.de) und erfahren Sie mehr über unsere Oregon Scientific-Produkte wie zum Beispiel Digitalkameras, MP3-Player, Kinderlerncomputer und Spiele, Projektionsfunkuhren, Produkte für Gesundheit und Fitness, Wetterstationen und Digital- und Konferenztelefone. Auf der Website finden Sie auch Informationen, wie Sie im Bedarfsfall unseren Kundendienst erreichen und Daten herunterladen können. -
Página 27: Konformitätserklärung
EG-Konformitätserklärung Bei bestimmungsgemäßer Verwendung entspricht dieses Produkt den grundlegenden Anforderungen des Artikels 3 der R & TTE 1999 / 5 / EG Richtlinie. Folgende(r) Standard (s) wurde(n) angewandt: Schutz der Gesundheit und Sicherheit des Benutzers (Artikel 3.1.a der R & TTE Richtlinie) Angewandte(r) Standard(s) EN 60950-1 : 2001 Elektromagnetische Verträglichkeit... - Página 28 Reloj Scientific Oregon™ proyector radiocontrolado (RM816P/ RM816PU / RM816PUL) Manual del usuario ÍNDICE Introducción ...................... 1 Características principales ................1 Vista frontal ....................1 Vista posterior ................... 1 Símbolos de la pantalla ................2 Instrucciones de seguridad y mantenimiento ..........3 Consejos básicos de seguridad ..............
-
Página 29: Introducción
MSF60 que se transmite desde Rugby, Inglaterra (Modelo RM816PU) o la señal de radio DCF77 que se transmite desde Frankfurt, Alemania, para Europa Central (Modelo RM816P). Este manual, además informarle sobre el manejo y cuidado del producto, contiene información importante sobre seguridad y mantenimiento. -
Página 30: Símbolos De La Pantalla
Botón [REPETICIÓN DE ALARMA / LUZ] - Habilita la función de repetición de la alarma cuando ésta se apaga. - Activa el proyector y la retroiluminación durante cinco segundos. Interruptor [PROYECCIÓN ENCENDIDA] Habilita la proyección contínua de la hora cuando el adaptador de alimentación está... -
Página 31: Instrucciones De Seguridad Y Mantenimiento
INSTRUCCIONES DE SEGURIDAD Y MANTENIMIENTO Precauciones de seguridad Tenga en cuenta las siguientes precauciones de seguridad cuando utilice este producto. Panel LCD – El panel LCD puede romperse si la unidad se cae o si se golpea. Fuentes de calor – Mantenga este producto alejado de fuentes de calor, como radiadores, estufas, calefactores y otros productos que generen calor. -
Página 32: Inicio
INICIO Cómo desenbalar el reloj Cuando desenbale su reloj de proyección RF fun, asegúrese de guardar la caja en un lugar seguro, ya que lo puede necesitar en caso de averia. En la caja encontrará: para el Reloj de Proyección RF Fun Adaptador de 3V CA 2 pilas UM-3 / AA Manual de usuario... -
Página 33: Alimentación De Ca
Reemplace las pilas cuando aparezca el ícono de pila baja ( ), cuando la NOTA pantalla de cristal líquido esté tenue o cuando la pantalla no se ilumine al encenderla. Reemplace todas las pilas al mismo tiempo – no es aconsejable mezclar pilas usadas con las nuevas. -
Página 34: Cómo Habilitar / Desabilitar La Recepción De Radio
La recepción puede ser afectada por distitnos factores. Para tener una mejor NOTA recepción, coloque el reloj alejado de objetos metálicos y de electrodomésticos. Otras causas de interferencia de señal incluyen a las torres eléctricas de transmisión, construcciones reforzadas de acero y revestimientos exteriores metálicos. La recepción ideal se logra cuando se coloca el producto cerca de una ventana. -
Página 35: Función De Alarma De Calendario
Símbolo Idioma Inglés Alemán Francés Italiano Español FUNCIÓN DE ALARMA La unidad está equipada con 2 tipos de alarma: la alarma de día de la semana alarma simple. Icono de Tipo de Descripción alarma alarma Alarma de día de La alarma de día de la semana sonará todos los la semana días de lunes a viernes, de acuerdo a la hora preestablecida. -
Página 36: Cómo Configurar Las Alarmas
Cómo configurar la / las alarma / s Instrucciones 1. Seleccione la alrma que desea configurar presionando el botón [ALARMA]. 2. Presione y mantenga presionado el botón [ALARMA] durante 2 segundos cuando se muestre la alarma seleccioonada. Las horas parpadearán. 3. -
Página 37: Función De Proyección
FUNCIÓN DE PROYECCIÓN Presione el botón [REPETICIÓN DE ALARMA / LUZ] y la proyección de la hora actual estará activada durante aproximadamente 5 segundos. Puede girar el proyector 90° hacia el frente o hacia atrás para facilitar el ángulo de proyección. RESOLUCIÓN DE PROBLEMAS Esta sección incluye una lista de preguntas frecuentes para los problemas con los que se puede encontrar. -
Página 38: Especificaciones
163 X 112 X 42 mm (A x A x D) Peso 160 g (sin batería) Frecuencia de radio: Sistema DCF77 (RM816P) o MSF60 (RM816PU) Pantalla: Formato hora 12hr / 24hr ..seleccionable por el usuario. Exactitud de la hora +/- 0.5 seg. -
Página 39: Sobre Oregon Scientific
SOBRE OREGON SCIENTIFIC Visite nuestra página web (www.oregonscientific.com) para conocer más sobre los productos de Oregon Scientific tales como: Reproductores MP3, juegos y productos de aprendizaje electrónico para niños, relojes de proyección, productos para la salud y el deporte, estaciones meteorológicas y teléfonos digitales y de conferencia. La página web también incluye información de contacto de nuestro departamento de... -
Página 40: Declaración De Conformidad
EC-DECLARACIÓN DE CONFORMIDAD Este producto cumple con las normas esenciales que marca el Artículo 3 de la Directiva Europea R&TTE 1999 / 5 / EC siempre que cumpla los siguientes parámetros: La seguridad de equipo de tecnología de información (Artículo 3.1.a de la Directiva R&TTE) el standard(s) aplicado EN 60950-1 : 2001 La compatibilidad electromagnética... - Página 41 Réveil Oregon Scientific radio piloté avec projection (RM816P/ RM816PU / RM816PUL) Manuel d’utilisation TABLE DES MATIERES Introduction ....................... 1 Caractéristiques principales ................1 Vue avant ....................1 Vue arrière ....................1 Signes graphiques sur l'affichage à cristaux liquides ....... 2 Notices concernant la sécurité...
-
Página 42: Introduction
INTRODUCTION Félicitations d’avoir choisi ce réveil projecteur radio piloté de Oregon Scientific™. Ce produit est conçu pour vous garantir un usage fiable pendant de nombreuses années grâce à des fonctions telles que : • Réveil et Calendrier radio pilotés * •... -
Página 43: Signes Graphiques Sur L'affichage À Cristaux Liquides
Bouton [SNOOZE/LIGHT] – Permet la répétition de l'alarme quand la sonnerie s’est déclenchée – Met en marche pour 5 secondes le projecteur et le rétro-éclairage de l’écran Commutateur [PROJECTION ON] Permet la projection continue de l’heure en cas d’utilisation de l’adaptateur d’alimentation secteur Boutons [UP ] et [Down... -
Página 44: Notices Concernant La Sécurité Et L'entretien
NOTICES CONCERNANT LA SECURITE ET L’ENTRETIEN Précautions de sécurité Prière de suivre pendant le réglage et l’utilisation de ce produit les précautions de sécurité suivantes : • Affichage à cristaux liquides – l’affichage est fait de verre et peut se casser pendant une chute ou un choc. -
Página 45: Avant De Commencer
AVANT DE COMMENCER Déballage du réveil Après déballage de votre réveil projecteur radio piloté conservez tous les emballages que vous pouvez utiliser dans l’avenir en cas de transport ou de dépannage éventuel. Dans l’emballage vous trouverez : le réveil projecteur radio piloté. l’adaptateur secteur 3 V AC deux piles UM-3/ AA 1.5 V le manuel d'utilisation... -
Página 46: A Propos De La Reception Radio
Remplacer toujours les piles quand l’icône piles faibles est affiché, l’écran REMARQUE est terne ou l’affichage ne s’illumine pas après la mise en marche de l’appareil. Remplacer toujours les deux piles - il est dangereux de mélanger des piles neuves et usagées. -
Página 47: Sélecteur Marche / Arrêt De La Réception Radio
Beaucoup de facteurs peuvent influencer la réception. Pour la meilleure REMARQUE réception placer l’appareil loin des objets métalliques et des équipements électriques. Les autres éléments qui perturbent la réception sont : les pylônes de ligne électrique, armature des murs et revêtements métalliques.On peut obtenir la meilleure réception en plaçant l’appareil près d‘une fenêtre. -
Página 48: Fonction Alarme
Signe Langue Anglais Allemand Français Italien Espagnol FONCTION ALARME L’appareil est muni de deux types d’alarmes : alarme hebdomadaire alarme ponctuelle. Icône d'alarme Type d'alarme Description Alarme L’alarme hebdomadaire déclenche la sonnerie hebdomadaire du lundi au vendredi à l’heure préréglée. Le samedi et le dimanche la sonnerie ne fonctionne pas. - Página 49 Réglage de l’alarme Instructions 1. Sélectionner le type de réveil en appuyant sur le bouton [ALARM]. 2. Appuyer sur le bouton [ALARM]pendant 2 secondes quand l’alarme sélectionnée est affichée. Les heures clignoteront. 3. Entrer les valeurs en appuyant sur les boutons [UP ] ou [Down 4.
-
Página 50: Fonction De Projection
FONCTION DE PROJECTION Appuyer sur le bouton [SNOOZE/LIGHT] et la projection de l’heure actuelle sera activée pour environ 5 secondes. Vous pouvez incliner le projecteur en avant et en arrière de 90 degrés pour accommoder l’angle de projection. GUIDE DE DEPANNAGE Ce chapitre contient une liste des questions souvent posées, concernant des problèmes que vous pouvez rencontrer. -
Página 51: Caractéristiques Techniques
Largeur x hauteur x profondeur 163 x 112 x 42 mm Poids 160 g (sans piles) Fréquence radio : Système DCF77 (RM816P) ou MSF60 (RM816PU) Affichage : Format de l’heure 12 heures am/pm ou 24 heures, sélectionné par utilisateur. Précision de temps +/- 0.5 sec. -
Página 52: Avertissements
Le site indique également comment joindre notre service après-vente. Nous espérons que vous trouverez toutes les informations dont vous avez besoin sur notre site, néanmoins, si vous souhaitez contacter le service client Oregon Scientific directement, allez sur le site www2.oregonscientific.com/service/support ou appelez le 949-608-2848 aux US. -
Página 53: Déclaration De Conformité
DÉCLARATION DE CONFORMITE EUROPÉENNE Cet instrument est conforme aux exigences contenues dans l’Article 3 des Directives R&TTE 1999 / 5 / EC : si il est utilisé à bon escient et si la ou les normes suivantes sont respectées: Sécurité des appareils à technologie d’information (Article 3.1.a de la Directive R&TTE) norme(s) appliquée(s) EN 60950-1 : 2001 Compatibilité... - Página 54 Orologio sveglia radiocontrollato con videoproiezione della Oregon Scientific™ RM816P/ RM816PU / RM816PUL Manuale utente INDICE Introduzione ...................... 1 Caratteristiche principali ................. 1 Vista frontale .................... 1 Vista dal retro ................... 1 Simboli del display LCD ................2 Istruzioni d’uso e manutenzione ..............3 Avvertenze ....................
-
Página 55: Introduzione
INTRODUZIONE Grazie per avere scelto l’orologio sveglia radiocontrollato con videoproiezione della Oregon Scientific™. Questo apparecchio è progettato per offrire molti anni di affidabile servizio. Ha le seguenti caratteristiche: • Orologio radiocontrollato con calendario. • Videoproiezione dell’ora corrente • Allarme settimanale e singolo con funzione snooze di 8 minuti. -
Página 56: Simboli Del Display Lcd
Pulsante [SNOOZE/LIGHT] - Abilita la funzione snooze quando l’allarme viene spento - Attiva la videoproiezione e la retroilluminazione per 5 secondi Interruttore [PROJECTION ON] Attiva la videoproiezione continua dell’ora nel caso l’alimentatore AC/DC sia collegato Pulsanti [ ] e [ Incrementa o decrementa un valore in impostazione Proiettore orientabile Per proiettare l’ora su una parete o sul soffitto... -
Página 57: Istruzioni D'uso E Manutenzione
ISTRUZIONI D’USO E MANUTENZIONE Avvertenze Osservare queste avvertenze nell’installazione ed uso del prodotto. • Schermo LCD - Lo schermo LCD può rompersi se l’apparecchio cade o viene urtato. • Fonti di calore - Mantenere il prodotto lontano da fonti di calore, come termosifoni, forni, stufe e altri oggetti che producono calore. -
Página 58: Per Iniziare
PER INIZIARE Disimballaggio del prodotto Nel disimballare l’orologio sveglia radiocontrollato con videoproiezione, assicurarsi di conservare i materiali di imballaggio in un luogo sicuro, nel caso sia necessario riportarlo all’assistenza. Nella scatola sono presenti: Orologio radiocontrollato con videoproiezione Alimentatore 3V AC 2 batterie da 1,5 V UM-3/ AA Manuale d’uso Batterie... -
Página 59: La Ricezione Del Segnale Orario In Rf
Sostituire le batterie quando appare l’icona batterie in esaurimento ( ) o il NOTA display è poco leggibile o non si retroillumina ad apparecchio acceso. Sostituire tutte le batterie contemporaneamente - è pericoloso usare insieme batterie vecchie e nuove. Le batterie esaurite possono essere dannose per l’ambiente, non vanno gettate via con i rifiuti domestici. - Página 60 La ricezione è influenzata da molti fattori. Per una migliore ricezione porre NOTA l’apparecchio lontano da oggetti metallici e apparecchiature elettriche. Altre cause di interferenze nel segnale sono: edifici con struttura rinforzata in acciaio e pareti metalliche. La ricezione è ideale vicino ad una finestra. Sebbene ci siano zone nelle quali la ricezione possa essere difficoltosa, NOTA l’orologio ha un preciso sistema al quarzo e mantiene accuratamente l’ora, anche...
-
Página 61: La Sveglia
Simbolo Lingua Inglese Tedesco Francese Italiano Spagnolo LA SVEGLIA L’apparecchio ha due tipi di sveglia: sveglia settimanale sveglia singola Icona di sveglia Tipo di sveglia Descrizione Sveglia settimanale La sveglia settimanale suona da lunedì a venerdì secondo l’orario impostato. E’ inattiva durante il weekend (sabato e domenica). -
Página 62: Impostazione Della Sveglia
Impostazione della sveglia Istruzioni 1. Selezionare la sveglia da impostare premendo il pulsante [ALARM]. 2. Premere e mantenere premuto per 2 secondi il pulsante [ALARM] finché la sveglia desiderata è selezionata. Le ore lampeggeranno. 3. Inserire le ore premendo [UP ] o [Down 4. -
Página 63: La Videoproiezione
LA VIDEOPROIEZIONE Premere il pulsante [SNOOZE/LIGHT] e la videoproiezione dell’ora attuale si attiverà per circa 5 secondi. E’ possibile ruotare il proiettore di 90° per impostare l’angolo di proiezione. RISOLUZIONE DEI PROBLEMI Questa sezione comprende una lista di domande più frequenti poste sui problemi che si possono incontrare. -
Página 64: Reset Dell'apparecchio
163 x 112 x 42 mm ( H x W x D ) Peso 160 g (senza batterie) Frequenza radio: Sistema DCF77 (RM816P) o MSF60 (RM816PU) Display: Formato di visualizzazione dell’ora 12 ore am/pm o 24 ore, impostabile dall’utente Precisione +/- 0.5 secondo al giorno... -
Página 65: Informazioni Su Oregon Scientific
INFORMAZIONI SU OREGON SCIENTIFIC Per avere maggiori informazioni sui nuovi prodotti Oregon Scientific, come le fotocamere digitali, il lettori MP3, i computer didattici per ragazzi, gli orologi con proiezione dell’ora, le stazioni barometriche, gli orologi da polso multifunzione, gli strumenti per la cura della persona ed il fitness, ed altro ancora, visita il nostro sito internet www. -
Página 66: Informazioni Aggiuntive
DICHIARAZIONE DI CONFORMITÁ Questo prodotto è conforme ai requisiti essenziali dell’articolo 3 della Direttiva 1999 / 5 / CE di R&TTE se utilizzato per l’uso previsto e se vengono applicati i seguenti standard: Requisiti essenziali sulla sicurezza dell’apparecchio (Articolo 3.1.a della direttiva R&TTE) Standard applicati EN 60950-1 : 2001 Compatibilità... - Página 67 Oregon Scientific™ Radiogestuurde Projectieklok (RM816P / RM816PU / RM816PUL) Handleiding INHOUDSTAFEL Inleiding ......................1 Bedieningsorganen ..................1 Vooraanzicht ..................... 1 Achteraanzicht ..................1 LCD Displaysymbolen ................2 Veiligheids- en onderhoudsrichtlijnen ............3 Veiligheidsvoorschriften ................3 Onderhoud van het toestel ............... 3 Gebruiksklaar maken ..................
-
Página 68: Inleiding
INLEIDING Wij danken u voor de aankoop van de Oregon Scientific™ radiogestuurde projectieklok. Dit product werd ontworpen om u vele jaren trouwe diensten te bewijzen met inbegrip van volgende opties: • Radiogestuurde kalenderklok* • Projectie van de juiste tijd •... -
Página 69: Lcd Displaysymbolen
A. [SNOOZE/LIGHT] knop - Activeert de sluimerfunctie wanneer het alarm afgaat - Activeert gedurende vijf seconden de projector en de achtergrondverlichting B. [PROJECTION ON] schakelaar Maakt een continue tijdprojectie mogelijk wanneer de netadapter aangesloten C. [UP ] en [Down ] knoppen Verhoogt of verlaagt de instelwaarde D. -
Página 70: Veiligheids- En Onderhoudsrichtlijnen
VEILIGHEIDS- EN ONDERHOUDSRICHTLIJNEN Veiligheidsvoorschriften Neem volgende veiligheidsvoorschriften in acht wanneer u uw dit product installeert en gebruikt. • LCD scherm – Het LCD scherm is uit glas vervaardigd en kan dus breken wanneer het toestel valt of aan een schok wordt blootgesteld. •... -
Página 71: Van Start Gaan
VAN START GAAN Het product uitpakken Zorg er bij het uitpakken van je leuke RF Projectieklok voor dat u al het verpakkingsmateriaal in een veilige plaats opbergt voor later transport of bij eventuele herstellingen. In de doos zult u volgende elementen aantreffen: RF Projectieklok 3V AC Adaptor 2 UM-3 / AA Batterijen... -
Página 72: Over De Radio-Ontvangst
Vervang de Batterijen wanneer het symbool voor batterijen leeg ( BEMARK verschijnt, de LCD display flauw is of de display niet oplicht wanneer de stroom ingeschakeld is. Vervang alle batterijen tegelijkertijd - het is afgeraden oude en nieuwe batterijen samen te gebruiken. Neem contact op met uw locale afvalverwijderingsdienst inzake de richtlijnen voor oude batterijen. -
Página 73: De Radio-Ontvangst Activeren/Deactiveren
De ontvangst kan door een aantal factoren beïnvloed worden. Plaats voor NOTA een goede ontvangst het toestel niet in de buurt van metalen voorwerpen of elektrische toestellen. Andere oorzaken van signaalinterferentie zijn elektrische transmissiemasten, versterkte staalconstructies, en metalen gevelbeplatingen. De ontvangst is optimaal in de buurt van een venster. - Página 74 Symbool Taal Engels Duits Frans Italian Spanish ALARMFUNCTIE Het toestel is uitgerust met een tweevoudig alarmsysteem: weekdag alarm éénmalig alarm. Alarmsymbool Alarmtype Beschrijving Weekdag alarm Het weekdag alarm zal van maandag tot vrijdag op de ingestelde tijd afgaan. Het wordt tijdens het weekend automatisch uitgeschakeld (zaterdagen en zondagen).
- Página 75 Het(De) Alarm(en) Instellen Instructions 1. Kies het alarm dat u wenst in te stellen door de [ALARM] knop in te drukken. 2. Druk op de [ALARM] knop en houdt deze gedurende 2 seconden vast. De uren zullen knipperen. 3. Breng de waarden in door te drukken op [UP ] of [Down 4.
-
Página 76: Gids Voor Het Verhelpen Van Storingen
PROJECTIEFUNCTIE Druk op de [SNOOZE/LIGHT] knop en de projectie van de actuële tijd zal gedurende 5 seconden geactiveerd worden. U kan de projector naar voren of achteren draaien over 90°_voor een betere projectiehoek. GIDS VOOR HET VERHELPEN VAN STORINGEN Dit deel bevat een aantal veel voorkomende vragen inzake problemen die u kunt krijgen tijdens het gebruik. -
Página 77: Specificaties
Breedte x Hoogte x Diepte 163 x 112 x 42 mm ( H x B x D) Gewicht 160 g (zonder batterijen) Radiofrequentie: Systeem DCF77 (RM816P) of MSF60 (RM816PU) Display: Tijdformaat 12 Hr. am/pm of 24 Hr. selecteerbaar Tijdsnauwkeurigheid +/- 0.5 sec per dag... -
Página 78: Waarschuwingen
OVER OREGON SCIENTIFIC Bezoek onze website (www.oregonscientific.com) om meer te weten over uw nieuwe product en andere Oregon Scientific producten zoals digitale fototoestellen, gezondheids- en fitnessuitrusting en weerstations. Op deze website vindt u tevens de informatie over onze klantendienst, voor het geval u ons wenst te contacteren. -
Página 79: Eg-Verklaring Van Gelijkvormigheid
EG-VERKLARING VAN GELIJKVORMIGHEID Dit product voldoet aan de essentiële vereisten van Artikel 3 van de R&TTE-richtlijnen 1999 / 5 / EC, indien gebruikt als aangewezen en dat volgende normen werden toegepast: Veiligheid van informatietechnologische uitrusting (Artikel 3.1.a van de R&TTE-richtlijnen) Toegepasten normen: EN 60950-1 : 2001 Elektromagnetische congruentie (Artikel 3.1.b van de R&TTE-richtlijnen) - Página 80 Oregon Scientific™ Radiogestuurde Projectieklok (RM816P / RM816PU / RM816PUL) Handleiding INHOUDSTAFEL Inleiding ......................1 Bedieningsorganen ..................1 Vooraanzicht ..................... 1 Achteraanzicht ..................1 LCD Displaysymbolen ................2 Veiligheids- en onderhoudsrichtlijnen ............3 Veiligheidsvoorschriften ................3 Onderhoud van het toestel ............... 3 Gebruiksklaar maken ..................
-
Página 81: Inleiding
INLEIDING Wij danken u voor de aankoop van de Oregon Scientific™ radiogestuurde projectieklok. Dit product werd ontworpen om u vele jaren trouwe diensten te bewijzen met inbegrip van volgende opties: • Radiogestuurde kalenderklok* • Projectie van de juiste tijd •... -
Página 82: Lcd Displaysymbolen
A. [SNOOZE/LIGHT] knop - Activeert de sluimerfunctie wanneer het alarm afgaat - Activeert gedurende vijf seconden de projector en de achtergrondverlichting B. [PROJECTION ON] schakelaar Maakt een continue tijdprojectie mogelijk wanneer de netadapter aangesloten C. [UP ] en [Down ] knoppen Verhoogt of verlaagt de instelwaarde D. -
Página 83: Veiligheids- En Onderhoudsrichtlijnen
VEILIGHEIDS- EN ONDERHOUDSRICHTLIJNEN Veiligheidsvoorschriften Neem volgende veiligheidsvoorschriften in acht wanneer u uw dit product installeert en gebruikt. • LCD scherm – Het LCD scherm is uit glas vervaardigd en kan dus breken wanneer het toestel valt of aan een schok wordt blootgesteld. •... -
Página 84: De Batterijen
VAN START GAAN Het product uitpakken Zorg er bij het uitpakken van je leuke RF Projectieklok voor dat u al het verpakkingsmateriaal in een veilige plaats opbergt voor later transport of bij eventuele herstellingen. In de doos zult u volgende elementen aantreffen: RF Projectieklok 3V AC Adaptor 2 UM-3 / AA Batterijen... -
Página 85: Over De Radio-Ontvangst
Vervang de Batterijen wanneer het symbool voor batterijen leeg ( BEMARK verschijnt, de LCD display flauw is of de display niet oplicht wanneer de stroom ingeschakeld is. Vervang alle batterijen tegelijkertijd - het is afgeraden oude en nieuwe batterijen samen te gebruiken. Neem contact op met uw locale afvalverwijderingsdienst inzake de richtlijnen voor oude batterijen. -
Página 86: De Radio-Ontvangst Activeren/Deactiveren
De ontvangst kan door een aantal factoren beïnvloed worden. Plaats voor NOTA een goede ontvangst het toestel niet in de buurt van metalen voorwerpen of elektrische toestellen. Andere oorzaken van signaalinterferentie zijn elektrische transmissiemasten, versterkte staalconstructies, en metalen gevelbeplatingen. De ontvangst is optimaal in de buurt van een venster. - Página 87 Symbool Taal Engels Duits Frans Italian Spanish ALARMFUNCTIE Het toestel is uitgerust met een tweevoudig alarmsysteem: weekdag alarm éénmalig alarm. Alarmsymbool Alarmtype Beschrijving Weekdag alarm Het weekdag alarm zal van maandag tot vrijdag op de ingestelde tijd afgaan. Het wordt tijdens het weekend automatisch uitgeschakeld (zaterdagen en zondagen).
- Página 88 Het(De) Alarm(en) Instellen Instructions 1. Kies het alarm dat u wenst in te stellen door de [ALARM] knop in te drukken. 2. Druk op de [ALARM] knop en houdt deze gedurende 2 seconden vast. De uren zullen knipperen. 3. Breng de waarden in door te drukken op [UP ] of [Down 4.
-
Página 89: Gids Voor Het Verhelpen Van Storingen
PROJECTIEFUNCTIE Druk op de [SNOOZE/LIGHT] knop en de projectie van de actuële tijd zal gedurende 5 seconden geactiveerd worden. U kan de projector naar voren of achteren draaien over 90°_voor een betere projectiehoek. GIDS VOOR HET VERHELPEN VAN STORINGEN Dit deel bevat een aantal veel voorkomende vragen inzake problemen die u kunt krijgen tijdens het gebruik. -
Página 90: Specificaties
Breedte x Hoogte x Diepte 163 x 112 x 42 mm ( H x B x D) Gewicht 160 g (zonder batterijen) Radiofrequentie: Systeem DCF77 (RM816P) of MSF60 (RM816PU) Display: Tijdformaat 12 Hr. am/pm of 24 Hr. selecteerbaar Tijdsnauwkeurigheid +/- 0.5 sec per dag... -
Página 91: Waarschuwingen
OVER OREGON SCIENTIFIC Bezoek onze website (www.oregonscientific.com) om meer te weten over uw nieuwe product en andere Oregon Scientific producten zoals digitale fototoestellen, gezondheids- en fitnessuitrusting en weerstations. Op deze website vindt u tevens de informatie over onze klantendienst, voor het geval u ons wenst te contacteren. - Página 92 EG-VERKLARING VAN GELIJKVORMIGHEID Dit product voldoet aan de essentiële vereisten van Artikel 3 van de R&TTE-richtlijnen 1999 / 5 / EC, indien gebruikt als aangewezen en dat volgende normen werden toegepast: Veiligheid van informatietechnologische uitrusting (Artikel 3.1.a van de R&TTE-richtlijnen) Toegepasten normen: EN 60950-1 : 2001 Elektromagnetische congruentie (Artikel 3.1.b van de R&TTE-richtlijnen)
- Página 93 Relógio de Projeção controlado via rádio da Oregon Scientific (RM816P/ RM816PU / RM816PUL) Manual do Usuário ÍNDICE Introdução ......................1 Caracterísiticas Principais ................1 Vista frontal ....................1 Vista posterior ..................1 Símbolos do Mostrador LCD ..............2 Instruções de Segurança e Manutenção ............3 Precauções de Segurança ...............
-
Página 94: Caracterísiticas Principais
ÍNDICE Agradecemos ter escolhido o Relógio de projeção da Oregon Scientific™ como produto da sua preferência. O aparelho está concebido para lhe proporcionar muitos anos de um serviço de confiança, incluindo as seguintes funções: • Relógio-Calendário controlado via rádio* •... -
Página 95: Símbolos Do Mostrador Lcd
Botão [SNOOZE/LIGHT] - Ativa a função snooze quando o alarme dispara - Ativa o projector e a retroiluminação por 5 segundos Selector [PROJECTION ON] Ativa a projeção contínua da hora quando o adaptador de corrente está conectado Botões [UP ] e [DOWN ] Aumentam e diminuem os valores de definição Projetor rotativo Para projetar a hora atual na parede ou teto... -
Página 96: Instruções De Segurança E Manutenção
INSTRUÇÕES DE SEGURANÇA E MANUTENÇÃO Precauções de Segurança Por favor respeite as seguintes precauções de segurança referentes a montagem e utilização deste produto. • Painel LCD – O painel LCD é fabricado em vidro e pode partir-se se a unidade cair ou bater em algum objeto. -
Página 97: Como Começar
COMO COMEÇAR? Desembalar o produto Quando desembalar o seu relógio de projeção Fun RF, assegure-se que guarda todos os materiais de embalagem, para o caso de necessitar de transportar o produto ou de o devolver para assistência. Na caixa encontrará: Aptador CA 3V Relógio de Projecção 2 pilhas UM-3 / AA Manual do Usuário... - Página 98 Substitua as pilhas sempre que for indicado o símbolo ( ), que o mostrador NOTA esteja com uma luminosidade fraca, ou que o mostrador não se ilumine. Substitua todas as pilhas ao mesmo tempo – é perigoso misturar pilhas novas com antigas. Contate a sua autoridade local pra obter informações sobre como deve descartar as pilhas.
-
Página 99: Ativar / Desativar A Recepção Rádio
A recepção pode ser afetada por uma série de fatores. Para uma melhor NOTA recepção, coloque o aparelho longe de objetos metálicos e de aparelhos elétricos. Outras causas para a interferência no sinal incluem torres de transmissão elétrica, construções de aço reforçado, peças metálicas. A recepção é ideal quando o aparelho for colocado junto a uma janela. -
Página 100: Função Alarme
Símbolo Idioma Inglês Alemão Francês Italiano Espanhol FUNÇÃO ALARME A unidade está equipada com 2 tipos de alarme:Dia da semana Alarme único. Símbolo do Tipo de Descrição alarme alarme Alarme dia da O alarme de dia de semana disparará todas as semana segundas-feiras até... -
Página 101: Definir Os Alarmes
Definir o(s) alarme(s) Instruções 1. Selecione o alarme que pretende definir pressionando o botão [ALARM]. 2. Pressione continuamente o botão [ALARM] durante 2 segundos quando o alarme pretendido é indicado. As horas piscarão. 3. Introduza os valores pressionando [UP ] ou [DOWN 4. -
Página 102: Função De Projeção
FUNÇÃO DE PROJEÇÃO Pressione o botão [SNOOZE/LIGHT] e a projeção da hora atual será ativada por aproximadamente 5 segundos. Pode rodar o projector para trás ou para a frente em 90º para facilitar o ângulo de projeção. GUIA DE RESOLUÇÂO DE PROBLEMAS Esta seção inclui uma lista das questões mais frequentes relativas a problemas que possa encontrar. -
Página 103: Especificações
163 x 112 x 42 mm (A x L x P) Peso 160g (sem pilhas) Frequência rádio: Sistema DCF77 (RM816P) ou MSF60 (RM816PU) Mostrador: Formato hora 12 hr am/pm ou 24 hr selecionável pelo usuário Precisão horária +/- 0.5 segundos por dia (quando função de relógio RF estiver... -
Página 104: Avisos
Quando se desfizer do seu produto, faça-o de acordo com os regulamentos locais de remoção de resíduos. SOBRE A OREGON SCIENTIFIC Visite nosso site (www.oregonscientific.com.br) para aprender mais sobre nossos outros produtos, tais como Câmeras Digitais; Produtos de aprendizagem; Relógios de Projeção;... -
Página 105: Declaração De Conformidade
DECLARAÇÃO DE CONFORMIDADE - EC Este produto está em conformidade com os requerimentos essenciais do artigo 3 da diretriz R&TTE 1999 / 5 / EC, se usado para seu uso pretendido e os seguintes padrões foram aplicados: Segurança do Equipamento de tecnologia de informação (Artigo 3.1.a da diretriz R&TTE) Padrões Aplicados EN 60950-1 : 2001 Compatibilidade Eletromagnética... - Página 106 Oregon Scientific™ Radiostyrt projektionsur (RM816P/ RM816PU / RM816PUL) Användarmanual INNEHÅLLSFÖRTECKNING Inledning ......................1 Huvuddelar ......................1 Framsida ....................1 Baksida ..................... 1 LCD display symboler ................2 Säkerhetsföreskrifter och skötselråd ............. 3 Säkerhetsföreskrifter ................3 Skötselråd ....................3 Att komma igång ....................4 Att packa upp produkten ................
-
Página 107: Inledning
INLEDNING Grattis till ert inköp av Oregon Scientific™ radiostyrda projektionsur. Klockan är tillverkad för att fungera tillfredsställande i många år om den hanteras varsamt. • Radiostyrd klocka med kalender* • Projicering av aktuell tid • Dagligt alarm och engångsalarm med 8-minuters alarmrepetition •... -
Página 108: Lcd Display Symboler
[SNOOZE/LIGHT]-knapp - Aktiverar alarmrepetitionen då alarmet ljuder - Aktiverar projektorn och bakgrundsljuset i fem sekunder [PROJECTION ON]-knapp Möjliggör konstant projicering av tid då adaptern är ansluten [UPP ] och [NER]-knappar Ökar eller minskar värdet på en inställning Projektor För projicering av tiden på väggen eller i taket [ALARM]-knapp För inställning av de två... -
Página 109: Säkerhetsföreskrifter Och Skötselråd
SÄKERHETSFÖRESKRIFTER OCHSKÖTSELRÄD Säkerhetsföreskrifter Vänligen följ nedanstående säkerhetsföreskrifter vid installation och användning av produkten: • LCD-panel. Panelen är gjord av glas och kan gå sönder om den tappas eller utsätts för stötar. • Värmekällor. Placera ej produkten nära värmekällor såsom element, ugnar, värmepannor och andra värmegenererande produkter. -
Página 110: Att Komma Igång
ATT KOMMA IGÅNG Att packa upp produkten När du packar upp det radiostyrda projektionsuret, se till att spara förpackningsmaterialet om enheten behöver transporteras eller lämnas in för service. I kartongen finns: Radiostyrt projektionsur 3V växelströmsadapter 2 st UM-3 /AA batterier Användarmanual Batterier 2 st UM-3/AA 1.5 V batterier är inkluderade och redan installerade. -
Página 111: Om Radiomottagning
OBS:Byt batterier då symbolen för låg batterinivå framträder ( ), om displayen är otydlig eller om denna inte lyses upp då enheten är påslagen. Byt alla batterier samtidigt. Det är farligt att blanda gamla och nya batterier. Batterier kan vara skadliga för miljön. Lämna in förbrukade batterier på en för ändamålet avsedd plats. -
Página 112: Att Ställa Klockan Och Kalendern Manuellt
OBS: Mottagningen kan påverkas av ett flertal faktorer. För bästa mottagning, undvik att placera klockan nära metallföremål och elektriska apparater. Andra signalstörningar kan vara elektriska radiosändare, stålkonstruktioner och metallfasader. För bästa mottagning, placera enheten nära ett fönster. OBS: Vissa områden kan ha sämre täckning för radiosignalmottagning, men enheten har ett kvartsverk och tidsprecisionen bibehålls även om signalen inte alltid mottages. -
Página 113: Alarmfunktionen
Symbol Språk Engelska Tyska Franska Italienska Spanska ALARMFUNKTIONEN Enheten har 2 olika alarmtyper. Dagligt alarm engångsalarm. Alarmsymbol Alarmtyp Beskrivning Dagligt alarm Det dagliga alarmet ljuder varje måndag-fredag på inställd tid. Det är automatiskt frånkopplat på helger (lördagar och söndagar). Engångsalarm Engångsalarmet ljuder bara en gång på... -
Página 114: Att Ställa / Stänga Av Alarmet
Att ställa in alarmet (alarmen) Instruktioner 1. Välj den typ av alarm som ska ställas in genom att trycka på [ALARM]-knappen. 2. Tryck och håll inne [ALARM]-knappen i 2 sekunder då vald alarmtyp visas. Timsiffran börjar att blinka. 3. Ställ in rätt värde genom att använda [UPP ] eller [NER ]-knappen. -
Página 115: Felsökningsguide
PROJEKTORN Tryck på [SNOOZE/LIGHT]-knappen och aktuell tid projiceras i cirka 5 sekunder. Projektorn kan vridas fram och tillbaka i 90° för att ställa in önskad projicering. FELSÖKNINGSGUIDE Det här avsnittet innehåller en lista med vanligen återkommande frågor om produkten. Om enheten inte fungerar som förväntat, vänligen läs avsnittet innan enheten skickas för reparation. -
Página 116: Teknisk Specifikation
Höjd x Bredd x Djup 163 x 112 x 42 mm ( H x B x D ) Vikt: 160 g (utan batterier) Radiofrekvens: System: DCF77 (RM816P) eller MSF60 (RM816PU) Display: Tidsformat: 12- eller 24-timmarsvisning Precision: +/- 0.5 sekunder per dag (då... -
Página 117: Om Oregon Scientific
Vi hoppas du hittar all information du behöver på vår hemsida och om du vill komma i kontakt med Oregon Scientific kundkontakt besöker du vår lokala hemsida www.oregonscientific.se eller www.oregonscientific.com... -
Página 118: Ytterligare Information
FÖRSÄKRAN OM ÖVERENSSTÄMMELSE Den här produkten överensstämmer med de viktigaste kraven i “Artikel 3 i R&TTE 1999 / 5 / EC-direktiven” om den används för avsett bruk och följande standards har tillämpats: Säkerhet för informationsteknologisk utrustning (Artikel 3.1.a i R&TTE-direktivet) Tillämpad standard EN 60950-1 : 2001 Elektromagnetisk kompatibilitet (Artikel 3.1.b i R&TTE-direktivet)