Publicidad
Idiomas disponibles
Idiomas disponibles
Enlaces rápidos
Publicidad

Manuales relacionados para Tristar BQ-2809


Resumen de contenidos para Tristar BQ-2809
- Página 1 BQ-2809 Tristar Europe BV – Emma Goldmanweg 10 – 5032MN TILBURG – Netherlands - +31-135940300...
- Página 2 Algemene Veiligheidsaanwijzingen. Controleer of de spanning van uw stroomnetwerk overeenkomt met de spanning aangegeven op • het label van uw apparaat. Voordat u dit apparaat in gebruik gaat nemen, lees a.u.b. eerst de gebruiksaanwijzing grondig • door en bewaar het zodat u het later weer kunt nalezen. Bewaar deze gebruiksaanwijzing, het garantiecertificaat, de verkoopbon en indien mogelijk de •...
- Página 3 Let op Lees deze gebruiksaanwijzing a.u.b. zorgvuldig. Volg a.u.b. de instructies op voor een veilig gebruik en een langere levensduur. De informatie in deze gebruiksaanwijzing is slechts bedoeld als naslagwerk, en de gegevens zijn slechts geschikt voor huishoudelijk gebruik. Houdt a.u.b. rekening met de volgende waarschuwingen, om verwondingen te voorkomen: Controleer dat het voltage van uw elektriciteitsnet gelijk is aan het voltage op het label alvorens het apparaat in te schakelen.
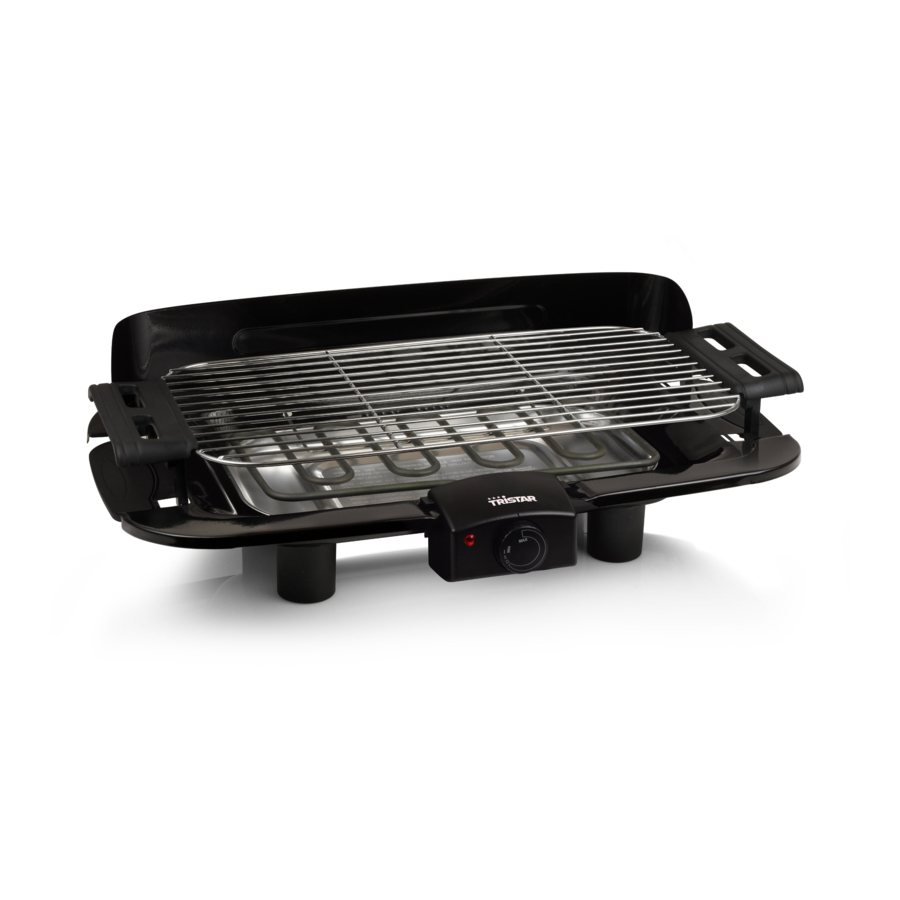
- Página 4 ONDERDELEN VAN DE BARBECUE Windkap Grillrooster 3-standen Verwarmingselement (gloeidraadspiraal) Controlelampje Thermostaathuis Stroomvoorziening Schakelaar Aluminium hitteschild Bodemplaat BALKONBEVESTIGING aandraaiknop veiligheidskabel met veerhaak borgpen beveiligingsarm beugel tussenstuk verstevigingsplaat aandraaiknop V10-01...
- Página 5 Het apparaat installeren Pak eerst het pakket uit, installeer a.u.b. volgens het diagram. • Installeer de verwarmingselementen, controleer dat de aan/uit-schakelaar vastzit aan de rand • van de bodemplaat. Installeer de windkap en plaats in de bodemplaat zoals getoond in het diagram. •...
- Página 6 Het instellen van het grillrooster op de juiste hoogte Zet het grillrooster in stand 1,2 of 3, afhankelijk van de behoefte, plaats handmatig de 4 pinnen en het grillrooster in de gaten in de bodemplaat. handvat Grillrooster Stand Stand Stand Grillen Het apparaat kan worden gebruikt voor het grillen van worst, vis en dergelijke.
- Página 7 General safety instructions Check if the tension of your supply corresponds with the voltage indicated on the rating plate of your appliance. Before commissioning this device please read the instruction manual carefully and keep this so • that you can check them later . Please keep these instructions, the guarantee certificate, the sales receipt and, if possible, the •...
- Página 8 Cautions Please carefully read this Instruction Manual before using the product. Please follow the instructions for giving service from your safe operation and longer life. The information in this Instruction Manual only reference, data provided only suitable rated value. In order to avoid hurt, please pay attention to the following safety cautions: Make sure the power supply meets the voltage marked on the label before power on the appliance The appliance is to be connected to a socket-outlet having an earthing contact.
- Página 9 MAIN PARTS OF BARBECUE GRILL BALCONY MOUNTING V10-01...
- Página 10 Installing the appliance First, unpack the package ,please install follow the diagram. • Install the heating elements ,make sure the safety switch be buckled at the edge of the base. • Install wind shield, insert into base as per diagram. •...
- Página 11 How to adjust the grill rack to suitable height Fix the grill rack in position 1,2 or 3 according to actual requirement, manually insert the 4 columns and grill rack into the holes of the base. Baking The appliance can be used for baking sausage and fish and so on. It is not allowed to bake with such inflammable materials as charcoal and wood.
- Página 12 Allgemeine Sicherheitshinweise Überprüfen Sie, ob Ihre Haushaltsspannung mit der Spannung auf dem Typenschild Ihres Geräts übereinstimmt. Lesen Sie diese Bedienungsanleitung vor der Inbetriebnahme bitte sorgfältig durch und • bewahren Sie diese für die Zukunft gut auf. Bewahren Sie bitte diese Bedienungsanleitung, den Garantieschein, die Kaufquittung, und •...
- Página 13 Achtung Bitte lesen Sie vor Gebrauch dieses Produkts sorgfältig diese Bedienungsanleitung. Bitte befolgen Sie die Anweisungen zur Wartung für sicheren Betrieb und längere Laufzeit. Die Information in dieser Bedienungsanleitung ist nur als Empfehlung gedacht, und die bereit gestellten Angaben sind nur als Nennwert geeignet.
- Página 14 HAUPRBESTANDTEILE DES GRILLS Windschutz Grillrost (3-fach verstellbar) Heiz Kontrollleuchte (Drahtspirale) Thermostatgehäuse Bedienschalter Stromversorgung Aluminium Reflektor Basis BALKON MONTAGE Arretierschraube Arretierstift mit Sicherheitskabel mit Sicherungshebel Karabinerhaken Klammer, Abstandshalter Kreuzstrebe Arretierschraube V10-01...
- Página 15 Aufstellen des Geräts Zuerst Verpackung entfernen, bitte laut Abbildung montieren. • Heizelement installieren, sicher stellen, dass der Sicherheitsschalter am Rand der Basis • festklemmt. Windschutz montieren, laut Abbildung in die Basis stecken. • Den Grillrost über dem Heizelement installieren. • Die 4 Füße nacheinander unter die Basis setzen und gegen den Uhrzeigersinn drehen.
- Página 16 Den Grillrost auf die entprechende Höhe einstellen Den Grillrost, je nach Bedarf, auf Position 1, 2, oder 3 stellen, die 4 Pfeiler und den Grillrost manuell in die Löcher der Basis stecken. Grillgriff Grillrost Position 3 Position 2 Position 1 Grillen Das Gerät kann zum Grillen für Wurst, Fisch usw.
- Página 17 Instructions générales de sécurité Vérifiez si la tension de votre alimentation correspond au voltage indiqué sur le label de votre appareil. Avant de mettre cet appareil en service, veuillez lire le manuel d’instructions attentivement • et conservez-le afin de pouvoir vous y référer dans le futur. Veuillez conserver ces instructions, le certificat de garantie, le ticket de caisse et, si possible, •...
- Página 18 Précautions Veuillez lire attentivement le Manuel d'Instructions avant d'utiliser le produit. Veuillez suivre les instructions d'entretien pour un fonctionnement en toute sécurité et une meilleure durée de vie. Les informations contenues dans ce Manuel d'Instructions ne sont là que pour référence et les données fournies ne conviennent qu'à...
- Página 19 PIÈCES PRINCIPALES DU BARBECUE GRILL Unité de ventilation Grille (3 positions) Élément chauffant (filament en spirale) Témoin lumineux de Boîtier du thermostat contrôle Alimentation Thermostat Réflecteur en aluminium Base MONTAGE SUR BALCON Vis de fixation Câble de sécurité avec mousqueton Broche de rétention avec levier de sécurité...
- Página 20 Installation de l'appareil Tout d'abord, déballez l'appareil et suivez le schéma d'installation. • Installez les éléments chauffants, vérifiez que l'interrupteur de sécurité soit enclenché au bord de • la base. Installez le pare-brise, insérez-le dans la base comme représenté sur le schéma. •...
- Página 21 Comment ajuster la grille à la bonne hauteur Positionnez la grille en 1,2 ou 3 en fonction du mode de cuisson requis, insérez manuellement les 4 colonnes et la grilledans les trous de la base. Poignée de la grille Grille Position 3 Position 2 Position 1...
- Página 22 Istruzioni di sicurezza generale Controllare che la tensione dell’alimentazione corrisponda con quella indicate nella targhetta di classificazione dell’apparecchio. Prima di far usare a qualcuno questo dispositivo si prega di leggere attentamente il manuale • d’istruzioni e tenerlo in modo da poterlo controllare in futuro. Si prega di tenere queste istruzioni, il certificato di garanzia, la ricevuta di acquisto e, se •...
- Página 23 Attenzione Si prega di leggere attentamente questo Manuale di istruzioni prima di usare il prodotto. Si prega di seguire le istruzioni per avere una revisione da un funzionamento sicuro e una vita più lunga. Le informazioni in questo Manuale di istruzioni è solo di riferimento e i dati forniti sono adatti solo al valore stimato.
- Página 24 COMPONENTI PRINCIPALI DELLA GRIGLIA BARBECUE Unità vento Griglia 3 posizioni Elemento riscaldante (filamento a spirale) Lampada indicatore controllo Armadietto termico Interruttore controllo Alimentazione Riflettore in alluminio Base MONTAGGIO BALCONE Vite fissante Cavo di sicurezza con Vite di mantenimento con leva di gancio a molla sicurezza supporto...
- Página 25 Installazione dell’apparecchio Per prima cosa, togliere dall’imballaggio, si prega di installare il seguente schema. • Installare gli elementi riscaldanti, assicurarsi l’interruttore di sicurezza sia scaricato sul bordo della • base. Installare lo schermo vento, inserire nella base come nello schema. •...
- Página 26 Come regolare la griglia all’altezza adatta Fissare la griglia in posizione 1,2 o 3 secondo il bisogno reale, inserire manualmente le 4 colonne e la griglia nei fori della base. Manico griglia Griglia Posizione 3 Posizione 2 Posizione 1 Cottura L’apparecchio può...
- Página 27 Instrucciones generales de seguridad Asegúrese de que el voltaje de la toma de corriente se corresponde con el voltaje indicado en la placa de especificaciones del aparato. Antes de utilizar el aparato, lea el manual de instrucciones atentamente y consérvelo para •...
- Página 28 Precauciones Por favor lea cuidadosamente este Manual de Instrucciones antes de utilizar el producto. Por favor siga las instrucciones para dar mantenimiento con una operación segura y una vida más duradera. La información en este Manual de Instrucciones es sólo para referencia, y la información proporcionada es sólo apropiada como valor nominal.
- Página 29 PARTES PRINCIPALES DE LA PARRILLA DE BARBACOA Unidad de viento Armazón de la parrilla (3 posiciones) Elemento de calentamiento (Filamento espiral) Indicador de control Luz Gabinete termostático Interruptor de Fuente de poder control Reflector de aluminio Base MONTAJE DE BALCÓN Tuerca de seguridad Cable de seguridad con Clavija de retención con...
- Página 30 Instalación del artefacto Primero, desempaquete, por favor instale siguiendo el diagrama. • Instale los elementos de calentamiento, asegúrese de que el interruptor de seguridad se encorve • en el borde de la base. Instale el anti viento, insértelo dentro de la base como indica el diagrama. •...
- Página 31 Cómo ajustar el armazón de la parrilla a una altura adecuada Fije el armazón de la parrilla 1,2 o 3 de acuerdo al requerimiento actual, inserte manualmente las 4 columnas y el armazón de la parrilla dentro de los agujeros de la base. Agarradera de parrilla Armazón de la parrilla Posición 3...
- Página 32 Instruções gerais de segurança Verifique se a sua tensão de alimentação corresponde à tensão indicada na placa de identificação do seu aparelho. Antes de ligar este aparelho, leia o manual de instruções, e guarde-o para consulta futura. • Guarde estas instruções, o certificado de garantia, o recibo de compra e, se possível, a caixa •...
- Página 33 Precauções Leia atentamente este manual de instruções antes de utilizar o produto. Siga as instruções de assistência para o seu funcionamento em segurança e vida mais prolongada. As informações incluídas neste manual de instruções são só para referência, e os dados fornecidos só se adequam para o valor nominal.
- Página 34 PEÇAS PRINCIPAIS DO GRELHADOR Unidade ventiladora Grelha (com 3 posições) Elemento de aquecimento (filamento em espiral) Botão indicador Caixa termostática luminoso Alimentação eléctrica Botão de comando Projector de alumínio Base MONTAGEM DO SUPORTE NO PARAPEITO DA VARANDA Parafuso de aperto Cabo de segurança com Perno de retenção mosquetão...
- Página 35 Instalação do aparelho Em primeiro lugar, retire o aparelho da caixa, e instale-o de acordo com o diagrama. • Instale o elemento de aquecimento, e certifique-se de que o interruptor de segurança está ligado • à ponta da base. Instale a protecção ventiladora, e insira a base de acordo com o diagrama. •...
- Página 36 Ajuste da grelha com uma altura adequada Ajuste a grelha para as posições 1, 2 ou 3 de acordo com as necessidades presentes, e insira manualmente as 4 colunas e a grelha nos orifícios da base. Pega da grelha Grelha Posição 3 Posição 2 Posição 1...
- Página 37 Opće sigurnosne upute Provjerite da li napon vaše mreže odgovara naponu navedenom na nazivnoj pločici aparata. Prije puštanja u rad ovog uređaja, molimo pažljivo pročitajte priručnik s uputama i čuvajte ga na • mjestu gdje ga možete lako i kasnije koristiti. Molimo vas da čuvate ove upute, jamstvenu izjavu, račun o kupnji i ako je moguće, ambalažu s •...
- Página 38 Mjera opreza Molimo, pažljivo pročitajte ovaj korisnički priručnik prije korištenja proizvoda. Molimo slijedite upute za korištenje kako biste osigurali siguran rad i dug radni vijek. Podaci u ovom Korisničkom priručniku su samo za vaše potrebe i podaci u njemu su prikladni samo za nazivne vrijednosti.
- Página 39 OSNOVNI DIJELOVI ROŠTILJA Jedinica vjetrobrana Rešetkasta polica (3 položaja) Grijaći element (spiralno punjenje) Lampica indikatora Kućište termostata regulatora Električno napajanje Sklopka regulatora Aluminijski reflektor Baza MONTAŽA NADSTREŠNICE Vijak za učvršćenje Zatik za osiguranje s sigurnosno uže s karabinom ručicom za pričvršćenje nosač...
- Página 40 Postavljanje aparata Prvo otpakirajte aparat i zatim ga montirajte u skladu sa sljedećim nacrtom. • Montirajte grijaće elemente, i pobrinite se da sigurnosna sklopka bude prikvačena uz rub baze. • Postavite vjetrobran i uložite ga u bazu prema uputama s nacrta. •...
- Página 41 Kako ćete podesiti rešetkastu policu na prikladnu visinu Učvrstite rešetkastu policu na svom mjestu 1,2 ili 3 već prema stvarni potrebama, ručno umetnite 4 stupa i rešetkastu policu u rupe na bazi. Drška roštilja Rešetkasta polica Položaj 3 Položaj 2 Položaj 1 Pečenje Aparat se može koristiti za pečenje kobasica, ribe i tako dalje.
- Página 42 Aanwijzingen ter bescherming van het milieu Dit product mag aan het einde van zijn levensduur niet bij het normale huisafval worden gedeponeerd, maar dient bij een speciaal inzamelpunt voor het hergebruik van elektrische en elektronische apparaten te worden aangeboden. Het symbool op artikel, gebruiksaanwijzing en verpakking attendeert u hier op.
- Página 43 Avvertenza per la tutela dell’ambiente Come indicato dal simbolo riportato sul prodotto, sulle istruzioni per l'uso oppure sull'imballaggio, una volta terminata la vita utile di questo prodotto, non smaltirlo nei normali rifiuti domestici, bensì portarlo ad un centro di raccolta per il riciclaggio di apparecchi elettrici ed elettronici.