Publicidad
sauder.com
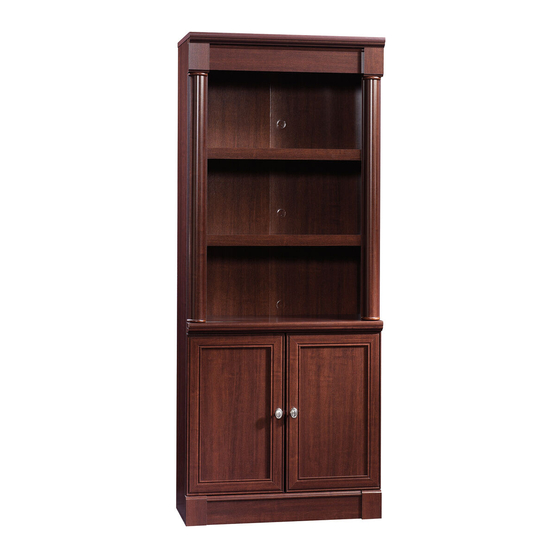
Library with Doors
Palladia Collection | Model 412019
Need help? Visit Sauder.com to view video assembly tips or chat with a live rep.
Prefer the phone? Call 1-800-523-3987.
Share your journey!
The stories of your life.
NOTE: THIS INSTRUCTION
BOOKLET CONTAINS IMPORTANT
SAFETY INFORMATION.
PLEASE READ AND KEEP FOR
FUTURE REFERENCE.
English pg 1-22
Français pg 23-25
Español pg 26-28
Lot # 397873
11/21/16
Purchased: __________________
Be sure to give us a ring before
making any returns. 1-800-523-3987
Publicidad
Tabla de contenido

Manuales relacionados para Sauder Palladia 412019


Resumen de contenidos para Sauder Palladia 412019
- Página 1 Palladia Collection | Model 412019 NOTE: THIS INSTRUCTION BOOKLET CONTAINS IMPORTANT SAFETY INFORMATION. Need help? Visit Sauder.com to view video assembly tips or chat with a live rep. PLEASE READ AND KEEP FOR FUTURE REFERENCE. Prefer the phone? Call 1-800-523-3987.
- Página 2 SHELF MOLDING (1) SHELF (1) HORIZONTAL MOLDING (1) BACK (1) ADJUSTABLE SHELF MOLDING (2) DOOR (2) BOTTOM MOLDING (1) ADJUSTABLE SHELF (2) VALANCE (1) LOWER ADJUSTABLE SHELF (1) PLINTH (4) SKIRT (1) HALF DISK (4) BACK SKIRT (1) Page 2 412019 www.sauder.com/services...
-
Página 3: Part Identifi Cation
Part Identifi cation www.sauder.com/services 412019 Page 3... - Página 4 RUBBER SLEEVE - 12 BLACK 9/16" LARGE HEAD SCREW - 29 SILVER 1-1/8" FLAT HEAD SCREW - 12 BLACK 1/2" FLAT HEAD SCREW - 8 BROWN 1" FLAT HEAD SCREW - 8 BLACK 1-1/8" MACHINE SCREW - 2 Page 4 412019 www.sauder.com/services...
- Página 5 fl oor. Scan this QR code or go to this address: http://qr.sauder.com/?ID=1654 To begin assembly, push a SAUDER TWIST-LOCK® å to watch a video on how to assemble your unit. FASTENER (7F) into the large holes in the ENDS (A and B).
- Página 6 å two TWIST-LOCK® FASTENERS. Remember: Righty tighty. Lefty loosey. How to use the SAUDER TWIST-LOCK ® FASTENER 1. Insert the dowel end of the FASTENER into the hole of the adjoining part. NOTE: The dowel end of the FASTENER must remain fully inserted in the hole of the adjoining part while locking the FASTENER.
- Página 7 Use six BLACK 9/16" LARGE HEAD SCREWS (1S). NOTE: Be sure the edges of the ANGLE BRACKETS are even å with the edges of the MOLDINGS. BLACK 9/16" LARGE HEAD SCREW (6 used in this step) www.sauder.com/services 412019 Page 7...
- Página 8 Fasten the END MOLDINGS (L) to the ENDS (A and B). å Use six BLACK 9/16" LARGE HEAD SCREWS (1S). BLACK 9/16" LARGE HEAD SCREW (6 used in this step) These edges should be even. These edges should be even. Page 8 412019 www.sauder.com/services...
- Página 9 The large hole should be facing away BROWN 1" FLAT HEAD SCREW from the VERTICAL MOLDING (M). (4 used in this step) Flat edge down The large hole should be facing away from the VERTICAL MOLDING (M). www.sauder.com/services 412019 Page 9...
- Página 10 NOTE: Be sure the HALF DISK is against the PLINTH (T) before å tightening any screw. The screws should tighten into the groove of the VERTICAL MOLDING. Do not overtighten. SILVER 1-1/8" FLAT HEAD SCREW (6 used in this step) Page 10 412019 www.sauder.com/services...
- Página 11 SHELF MOLDING (O). Use three SILVER 1-1/8" FLAT HEAD SCREWS (10S). Fasten the SHELF MOLDING (O) to the SHELF (E). å Tighten two TWIST-LOCK® FASTENERS. SILVER 1-1/8" FLAT HEAD SCREW (3 used in this step) Curved edge Rounded edge www.sauder.com/services 412019 Page 11...
- Página 12 Curved edge S u r r f a I S T w i t - L O ® r f a I S T w i t Curved edge - L O Unfi nished edge ® Page 12 412019 www.sauder.com/services...
- Página 13 E R S T E N F A S K ® T - L W I S u t T i t h o f a c S u r Curved edge These surfaces should be even. www.sauder.com/services 412019 Page 13...
- Página 14 TIE PLATES (3G) to the VALANCE (S). Use six BLACK 9/16" LARGE HEAD SCREWS (1S). BROWN 1" FLAT HEAD SCREW (4 used for the SKIRTS) (6 used) BLACK 9/16" LARGE HEAD SCREW (6 used for the TIE PLATES) Page 14 412019 www.sauder.com/services...
- Página 15 SKIRT (K). Use four BLACK 9/16" LARGE HEAD SCREWS (1S). Fasten the VALANCE (S) to the PLINTHS (T). Use four BLACK å 9/16" LARGE HEAD SCREWS (1S). BLACK 9/16" LARGE HEAD SCREW (10 used in this step) Rounded edge www.sauder.com/services 412019 Page 15...
- Página 16 å the SHELF (E). NOTE: Perforations have been provided for access through the å BACK. Carefully cut out the holes needed. NAIL (62 used in this step) These holes must line up over the SHELF (E). Page 16 412019 www.sauder.com/services...
- Página 17 Step 13 Fasten the HINGES (13H) to the DOORS (G). Use eight å BLACK 1/2" FLAT HEAD SCREWS (11S). BLACK 1/2” FLAT HEAD SCREW (8 used in this step) www.sauder.com/services 412019 Page 17...
- Página 18 Fasten a KNOB (33K) to the DOOR (G). Use a BLACK 1-1/8" å MACHINE SCREW (21S). Repeat this step for the other door. å See the next step for DOOR adjustments. å BLACK 1-1/8" MACHINE SCREW (2 used in this step) Page 18 412019 www.sauder.com/services...
- Página 19 To adjust the DOORS in or out (depth), loosen the mounting screw one å turn and move the DOORS in or out, as needed. Tighten the mounting screw after making adjustments. Mounting screw (depth) Adjusting screw (horizontal) (vertical adjustment) www.sauder.com/services 412019 Page 19...
- Página 20 ADJUSTABLE SHELF (I). Almost time to Slide the ADJUSTABLE SHELF MOLDING (Q) onto the å celebrate! With a nap. notched edge of the SHELF (H). *U.S. Patent No. 5,499,886 å These edges should be even. Notched edge Page 20 412019 www.sauder.com/services...
- Página 21 NOTE: Before moving your unit to a diff erent location, unscrew the SAFETY DRYWALL ANCHOR (61M) from your wall. The nylon sheath will remain behind your wall. BLACK 9/16" LARGE HEAD SCREW (1 used in this step) www.sauder.com/services 412019 Page 21...
- Página 22 å polish or a damp cloth. Wipe dry. And to celebrate, why not share your success story? No load (3 used) To cover screws 25 lbs. 25 lbs. (12 used) 35 lbs. 25 lbs. 35 lbs. Page 22 412019 www.sauder.com/services...
-
Página 23: Liste De Pièces
QUANTITÉ d’ a chat de cet élément et conserver le livret pour future référence. EXTRÉMITÉ DROITE ..........1 FIXATION TWIST-LOCK® ........20 Pour contacter Sauder EXTRÉMITÉ GAUCHE ..........1 CONSOLE EN MÉTAL ..........2 en ce qui concerne cet DESSUS ................1 PLAQUE D’ATTACHE ..........6 élément, faire référence... - Página 24 Fixer la MOULURE DE TABLETTE (O) à la TABLETTE (E). Serrer Pour commencer l'assemblage, enfoncer une FIXATION deux FIXATIONS TWIST-LOCK®. TWIST-LOCK® SAUDER (7F) dans les gros trous dans les EXTRÉMITÉS (A et B), le DESSOUS (D) et la TABLETTE (E). ÉTAPE 8 ÉTAPE 2...
- Página 25 Essuyer. Pour ajuster les PORTES vers l'intérieur où vers l'extérieur (profondeur), desserrer la vis de montage un tour et déplacer les PORTES vers l'intérieur ou vers l'extérieur. Serrer la vis de montage après avoir ajusté. www.sauder.com/services 412019 Page 25...
-
Página 26: Biblioteca Con Puertas
SUJETADOR TWIST-LOCK® ........20 et conserver le livret EXTREMO IZQUIERDO ............1 SOPORTE DE METAL ..........2 pour future référence. Pour contacter Sauder PANEL SUPERIOR ..............1 PLACA DE CONEXIÓN ...........6 en ce qui concerne cet FONDO .................... 1 SOPORTE ANGULAR ..........6 élément, faire référence... - Página 27 Fije la MOLDURA DE ESTANTE (O) al ESTANTE (E). Apriete dos Para comenzar el ensamblaje, empuje un SUJETADOR SUJETADORES TWIST-LOCK®. TWIST-LOCK® SAUDER (7F) dentro de los agujeros grandes de los EXTREMOS (A y B), del FONDO (D) y del ESTANTE (E). PASO 8...
- Página 28 Para ajustar las PUERTAS hacia atrás o hacia adelante (profundidad), afl oje el tornillo de montaje una vuelta y mueva las PUERTAS hacia el interior o hacia el exterior según sea necesario. Apriete el tornillo de montaje después de hacer los ajustes. Page 28 412019 www.sauder.com/services...
- Página 29 Les téléviseurs peuvent être un téléviseur. cet eff et. particulièrement lourds. De plus, le poids et l’emplacement du tube image ont tendance à rendre les téléviseurs instables et enclins à tomber vers l’ a vant. www.sauder.com/services 412019 Page 29...
- Página 30 Además, el peso y la ubicación del tubo de imagen tienden a causar la inestabilidad de televisores y propensa a volcarse hacia adelante. Page 30 412019 www.sauder.com/services...
-
Página 31: Garantie Limitée De 5 Ans
à compter de la date d'achat la première fois et qui sont signalés à Sauder dans les limites de couverture de la contre tout défaut de matériaux ou de fabrication des composantes de mobilier Sauder. - Página 32 Dear Valued Customer: So, how did it go? Thanks so much for choosing Sauder® furniture. I hope the Set a world record for speed? purchase and assembly process was a positive experience Feeling good about yourself? and you feel good about the furniture you just built. If you Nice.