Sauder Carson Forge Serie Manual Del Usuario
Ocultar thumbs
Ver también para Carson Forge Serie:
- Manual del usuario (40 páginas) ,
- Instrucciones de montaje (32 páginas) ,
- Manual del usuario (20 páginas)
Publicidad
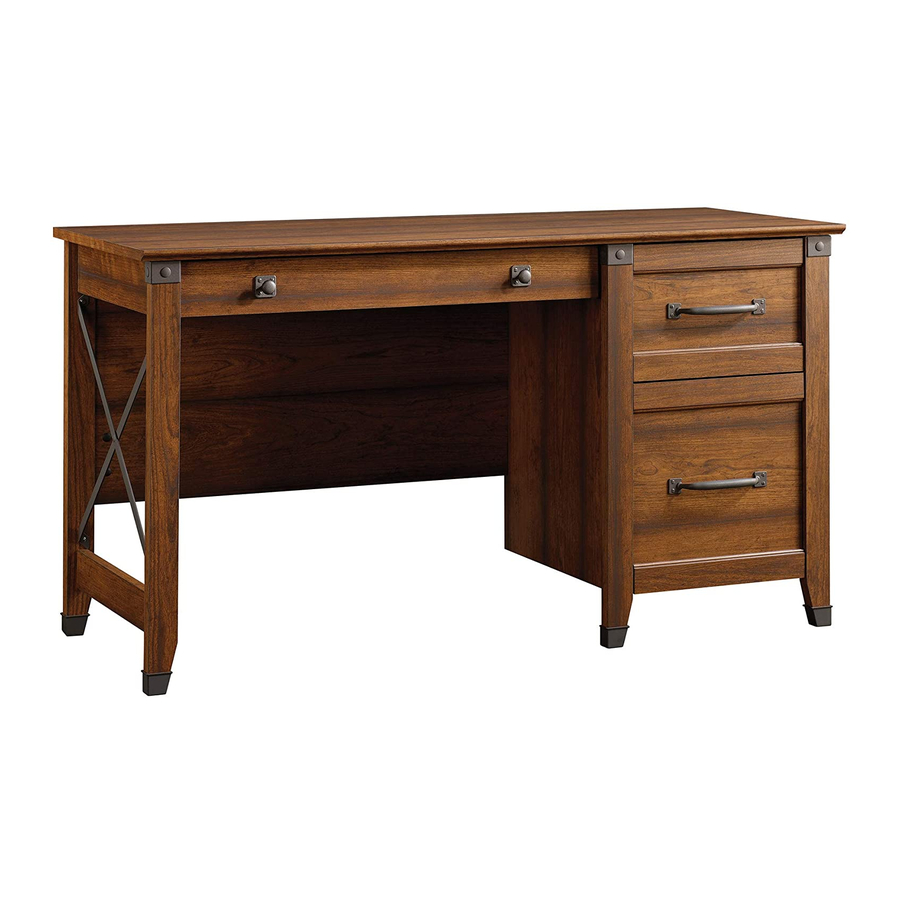
Desk
Carson Forge Collection | Model
Share your journey!
WARNING
CHOKING HAZARD - Small Parts
Not for children under 3 years.
Adult assembly required.
NOTE: THIS INSTRUCTION
BOOKLET CONTAINS IMPORTANT
SAFETY INFORMATION.
PLEASE READ AND KEEP FOR
FUTURE REFERENCE.
English pg 1-34
Français pg 35-39
Español pg 40-44
Lot # 547518
08/18/20
Purchased: __________________
Publicidad
Tabla de contenido

Manuales relacionados para Sauder Carson Forge Serie


Resumen de contenidos para Sauder Carson Forge Serie
- Página 1 WARNING CHOKING HAZARD - Small Parts Not for children under 3 years. Adult assembly required. Desk Carson Forge Collection | Model NOTE: THIS INSTRUCTION BOOKLET CONTAINS IMPORTANT SAFETY INFORMATION. PLEASE READ AND KEEP FOR FUTURE REFERENCE. English pg 1-34 Français pg 35-39 Español pg 40-44 Share your journey! Lot # 547518...
- Página 2 Table of Contents Assembly Tools Required Part Identifi cation No. 2 Phillips Screwdriver Tip Shown Actual Size Hardware Identifi cation Assembly Steps 6-34 Hammer Français 35-39 Not actual size Español 40-44 Safety 45-46 Masking Tape Warranty Scissors Now you know Part Identifi...
-
Página 3: Part Identifi Cation
Part Identifi cation D716 D113 D574 D574 D716 D113 Page 3... - Página 4 Hardware Identifi cation å Screws are shown actual size. You may receive extra hardware with your unit. 40CA CABINET RIGHT - 3 40CB CABINET LEFT - 3 40CC DRAWER RIGHT - 3 40CD DRAWER LEFT - 3 FILE GLIDE - 2 FOOT - 5 TACK GLIDE - 5 HIDDEN CAM - 23...
- Página 5 Hardware Identifi cation å Screws are shown actual size. You may receive extra hardware with your unit. 3S GOLD 5/16" FLAT HEAD SCREW - 24 SILVER 1-1/8" FLAT HEAD SCREW - 2 BLACK 7/8" LARGE HEAD SCREW - 3 BLACK 2-1/4" FLAT HEAD SCREW - 3 30S BLACK 1-9/16"...
- Página 6 Look for this icon. It means a Step 1 video assembly tip is available at www.sauder.com/services/tips Assemble your unit on a carpeted fl oor or on the empty å carton to avoid scratching your unit or the fl oor. Push ten HIDDEN CAMS (1F) into the RIGHT END (A), å...
- Página 7 Step 2 Push thirteen HIDDEN CAMS (1F) into the holes in the å ENDS (A and C), UPRIGHT (D), MODESTY PANEL (G), and BRACE (I). Arrow (13 used) Arrow Arrow Arrow Hole The arrow in the HIDDEN CAM must point toward the hole in the edge of the board.
- Página 8 Step 3 Turn thirteen CAM SCREWS (8F) into the LEGS (U, V, X, and Y). å NOTE: Be sure to use the exact holes shown. å Remember: Righty tighty. Lefty loosey. (13 used) Page 8...
- Página 9 Step 4 Fasten the CORNER ACCENTS (8E) to the LEGS (U, V, and Y). å Use two BLACK 7/8" MACHINE SCREWS (37S) through the LEGS (U and Y). Use one SILVER 1/2" MACHINE SCREW (38S) through the LEFT FRONT LEG (V). BLACK 7/8"...
- Página 10 Step 5 Turn two BLACK 9/16" FLAT HEAD SCREWS (32S) into å the RIGHT END (A) until the shoulders of the SCREWS rest on the surface of the END. NOTE: Do not overtighten the SCREWS. å Slide the END MOLDING (M75) onto the END (A). Line å...
- Página 11 Step 6 Fasten the END (A) to the RIGHT FRONT LEG (U) as å shown in the right diagram. Tighten three HIDDEN CAMS. Fasten the RIGHT REAR LEG (W) to the RIGHT END (A). å Use three BLACK 2-1/4" FLAT HEAD SCREWS (26S). Fasten the UPRIGHT (D) to the CENTER LEG (Y) as shown å...
- Página 12 Step 7 First, fi ll the holes in one edge of the UPPER LEFT END (B) 1/4 å to 1/2 full with GLUE (177M). Then, insert the WOOD DOWELS (15F) into the holes. Wipe away the excess GLUE. 177M Repeat adding GLUE and inserting the WOOD DOWELS in å...
- Página 13 Step 8 First, fi ll the four holes in the edge of the LEFT REAR LEG (X) å 1/4 to 1/2 full with GLUE (177M). Then, insert the WOOD DOWELS in the ENDS (B and C) and BRACE (I) into the holes of 177M the LEG.
- Página 14 Step 9 Fasten two CABINET RIGHTS (40CA) to the RIGHT å END (A) and two CABINET LEFTS (40CB) to the UPRIGHT (D). Use eight GOLD 5/16" FLAT HEAD SCREWS (3S) through holes #1 and #3. GOLD 5/16" FLAT HEAD SCREW (8 used in this step) Roller end These holes must be here.
- Página 15 Step 10 Carefully fl ip the UPRIGHT (D) over. å Fasten the EXTENSION BLOCK (Z) to the UPRIGHT (D). å Use two SILVER 2" FLAT HEAD SCREWS (57S). Fasten one CABINET RIGHT (40CA) to the EXTENSION å BLOCK (Z) and one CABINET LEFT (40CB) to the BRACE (I).
- Página 16 Step 11 Insert a WOOD DOWEL (15F) into the hole in the TOP (E2). å Caution Fasten the BRACE (I) to the TOP (E2). Tighten two å Do not stand the unit upright without the HIDDEN CAMS. BACK fastened. The unit may collapse. NOTE: Be sure the WOOD DOWEL in the TOP inserts å...
- Página 17 Step 12 Fasten the UPRIGHT (D) to the TOP (E2). Tighten two å HIDDEN CAMS. Maximum Arrow 210 degrees Fasten the UPRIGHT (D) to the MODESTY PANEL (G). å Use two SILVER 2" FLAT HEAD SCREWS (57S). Minimum Fasten the METAL BRACE (159M) to the LEFT å...
- Página 18 The embedded wireless charging system is designed for the following smartphones: • Apple (iPhone 8 or newer) • Samsung (Galaxy 6 or newer) • For a complete compatibility list, go to sauder.com. Wirelessly charge your phone by setting it on top of your furniture here.
- Página 19 "Changes or modifi cations not expressly approved by the party responsible for compliance could void the user's authority to operate this device". "Changes or modifi cations not expressly approved by Sauder Woodworking Co. could void the user's authority to operate this device".
- Página 20 Step 15 Fasten the BOTTOM (F) to the UPRIGHT (D). Tighten å two HIDDEN CAMS. Maximum Arrow 210 degrees Fasten the RIGHT END (A) to the TOP (E2) and å BOTTOM (F). Tighten four HIDDEN CAMS. Minimum 190 degrees Unfi nished edge S u r f a c H I D...
- Página 21 Step 16 Push a FOOT (10E) over the bottom edge of å each LEG (U, V, W, X, and Y). Don't worry. It isn't Rome. This can be built With a hammer, tap a TACK GLIDE (12E) through å in a day. the holes of the FEET (10E).
- Página 22 Step 17 Carefully turn your unit over onto its front edges and lay å Caution the BACK (H) over the large opening. Do not stand the unit upright without the Fasten the BACK (H) to your unit using the NAILS (1N). å...
- Página 23 Use this STICKER TEMPLATE to line up the sticker with the Hidden Wireless Qi Compatible Charger by Eggtronic. Utiliser ce GABARIT D'AUTOCOLLANT pour aligner l'autocollant sur la Chargeur compatible Qi sans fi l dissimulé de Eggtronic. Usa esta PLANTILLA PARA PEGATINAS para alinear la pegatina con el cargador CARGADOR COMPATIBLE Qi INALÁMBRICO OCULTO de EGGTRONIC.
- Página 24 This page was intentionally left blank. Cette page a été intentionnellement laissée vierge. Esta página fue dejada en blanco intencionalmente. Page 24...
- Página 25 Step 18 Optional Hidden Wireless Qi Compatible Charger by Eggtronic (sold separately) IMPORTANT: The WIRELESS CHARGING SPOT STICKER must be placed directly above the CHARGER. å Cut out the STICKER TEMPLATE if you have not done so already. å First, use masking tape to fasten the sticker template edges to the corners of the TOP (E2) as shown. Then, center the å...
- Página 26 Step 19 With the palm of your hand, tap the DRAWER BOTTOM down into the groove. BLACK 1-9/16" FLAT HEAD SCREW (10 used in this step) U n fi n i s h s u r Surface without hole f a c Hidden part using D113 D113...
- Página 27 Step 20 Fasten a DRAWER RIGHT (40CC) and a DRAWER LEFT (40CD) å to the PENCIL DRAWER SIDES (D113). Use four GOLD 5/16" FLAT HEAD SCREWS (3S) through holes #2 and #4. Fasten two KNOB SETS (52K) to the PENCIL DRAWER FRONT (R3). å...
- Página 28 Step 21 Pull the FILE DRAWER FRONT BRACKETS (10G) apart and slide å them into the grooves in the FILE DRAWER SIDES (D48 and D49). Tap down with your NOTE: The FILE DRAWER FRONT BRACKETS are marked "RH" screwdriver and hammer. å...
- Página 29 Step 22 Fasten the FILE DRAWER BACK (D78) to the å FILE DRAWER SIDES (D48 and D49). Use four BLACK 1-9/16" FLAT HEAD SCREWS (30S). NOTE: Be sure the SMALL DRAWER å BOTTOM (D716) inserts into the groove in the FILE DRAWER BACK (D78). Start each screw a few turns before completely tightening any of them.
- Página 30 Step 23 Push down With the palm of your hand, tap the DRAWER BOTTOM down into the groove. Groove U n fi n i s h s u r f a c D716 BROWN 9/16" LARGE HEAD SCREW (4 used in this step) Pull the DRAWER FRONT BRACKETS (9G) apart and slide them å...
- Página 31 Step 24 Fasten a DRAWER RIGHT (40CC) to the FILE RIGHT DRAWER å SIDE (D48) and a DRAWER LEFT (40CD) to the FILE LEFT DRAWER SIDE (D49). Use four GOLD 5/16" FLAT HEAD SCREWS (3S) through holes #2 and #4. Repeat this step for the other drawer.
- Página 32 Step 25 Push the FILE GLIDES (4B) onto the top edges of the FILE å DRAWER SIDES (D48 and D49). Fasten the PULLS (53K) to the DRAWER FRONTS (J and N). å Use four SILVER 1/2" MACHINE SCREWS (38S). SILVER 1/2" MACHINE SCREW (4 used for the PULLS) Page 32...
- Página 33 Step 26 To insert the drawer into your unit, tip the front of the drawer down and drop the rollers on the drawer behind the rollers on å the unit. Lift the front of the drawer up and slide it into the unit. To make adjustments to the drawer, loosen the SCREWS in the DRAWER FRONT BRACKETS, make needed adjustments, å...
- Página 34 Troubleshooting (for optional Hidden Wireless Qi Compatible Charger by Eggtronic) A. CHARGER/ADAPTER/OUTLET DEFECTS 1) Is the charger USB cable plugged in the wall adapter? (normal conditions: yes) 2) Is the wall adapter plugged in the power outlet? (normal conditions: yes) 3) Does the power outlet work? (normal conditions: yes) 4) Does the charger work when plugged in another power outlet?
-
Página 35: Liste De Pièces
EXTRÉMITÉ DROITE ..........1 ARMATURE POUR DOSSIERS ......2 pour future référence. EXTRÉMITÉ GAUCHE SUPÉRIEURE .....1 ACCENT D’ANGLE .............3 Pour contacter Sauder B59 FOND DE GRAND TIROIR ........1 10E PIED ..................5 en ce qui concerne cet EXTRÉMITÉ GAUCHE INFÉRIEURE ....1 12E PATIN ..................5 élément, faire référence... - Página 36 ÉTAPE 1 ÉTAPE 7 Ne pas serrer les EXCENTRIQUES ESCAMOTABLES dans cette étape. Attention: Examiner bien les pièces avant d'assembler. Il est diffi cile de séparer des pièces une fois encollées. Assembler l'élément sur un sol à moquette ou sur le carton vide pour éviter d'endommager l'élément ou le sol.
- Página 37 fi xé l’ARRIÈRE. L'élément risque de s'eff ondrer. Pour une liste complète des éléments compatibles, consulter cet Insérer une CHEVILLE EN BOIS (15F) dans le trou du DESSUS (E2). article sur le site Web sauder.com. Fixer l'ENTRETOISE (I) au DESSUS (E2). Serrer deux EXCENTRIQUES ESCAMOTABLES.
- Página 38 ÉTAPE 16 ÉTAPE 20 Mettre un PIED (10E) sur le chant inférieur de Fixer un TIROIR DROIT (40CC) et un TIROIR GAUCHE (40CD) chaque PIED (U, V, W, X et Y). aux CÔTÉS DE TIROIR À CRAYONS (D113). Utiliser quatre VIS TÊTE PLATE 8 mm DORÉES (3S) à...
- Página 39 ÉTAPE 23 Dépannage 1 Séparer les CONSOLES DE DEVANT DE TIROIR (9G) et les enfi ler A. DÉFAUTS DE CHARGEUR/D'ADAPTATEUR/DE PRISE dans les rainures des CÔTÉS DE TIROIR (D36 et D37). 1) Le câble du chargeur USB est-il branché dans l'adaptateur mural ? (conditions normales : oui) REMARQUE : Les CONSOLES DE DEVANT DE TIROIR ont 2) L'adaptateur mural est-il branché...
-
Página 40: Lista De Partes
15F PASADOR DE MADERA .........9 PARAL ....................1 MÉNSULA DE CAJÓN PARA LÁPICES ..1 contacto con Sauder en D36 LADO DERECHO DE CAJÓN ........1 MÉNSULA DE CARA DE CAJÓN .....1 cuanto a esta unidad, D37 LADO IZQUIERDO DE CAJÓN ........1 10G MÉNSULA DE CARA DE CAJÓN... - Página 41 PASO 1 PASO 7 No apriete los EXCÉNTRICOS ESCONDIDOS en este paso. Precaución: Revise las partes cuidadosamente antes de ensamblar. La separación de las piezas ya pegadas es muy difícil. Ensamble la unidad sobre un piso alfombrado o sobre el cartón vacío para evitar rayar la unidad o el piso.
- Página 42 Cargue su teléfono simplemente colocándolo en la parte superior IZQUIERDO (40CB) restantes a la RIOSTRA (I) y al BLOQUE DE de sus muebles. Para comprar, vaya al sauder.com. EXTENSIÓN (Z). Utilice cuatro tornillos DORADOS de cabeza Lista de Teléfonos Inteligentes Aprobados Compatibles con Qi PERDIDA de 8 mm (3S) a través de los agujeros No.
- Página 43 PASO 16 PASO 20 Introduzca una PATA (10E) sobre el borde inferior de Fije un CAJÓN DERECHO (40CC) y un CAJÓN IZQUIERDO (40CD) cada PATA (U, V, W, X y Y). a los LADOS DE CAJÓN PARA LÁPICES (D113). Utilice cuatro TORNILLOS DORADOS DE CABEZA PERDIDA de 8 mm (3S) a Con un martillo, inserte una TACHUELA DESLIZANTE (12E) a través de los agujeros No.
-
Página 44: Solución De Problemas
PASO 23 Solución de Problemas Separe las MÉNSULAS DE CARA DE CAJÓN (9G) y deslícelas A. CARGADOR/ADAPTADOR/DEFECTOS DE LA TOMA dentro de las ranuras de los LADOS DE CAJÓN (D36 y D37). 1) ¿Está enchufado el cable USB del cargador en el adaptador de pared? NOTA: Las MÉNSULAS DE CARA DE CAJÓN tienen una inscripción "RH"... - Página 45 WARNING Please use your furniture correctly and safely. Improper use can cause safety hazards, or damage to your furniture or household items. Carefully read the following chart. Look out for: What can happen: How to avoid the problem: • Overloaded shelves and drawers. •...
- Página 46 ADVERTENCIA Por favor use el mobiliario correcta y seguramente. El mal uso puede causar riesgos de seguridad o daño a las unidades o artículos domésticos. Cuidadosamente lea la tabla a continuación. Esté alerto de: Puede ocurrir: Evitar el problema: • Estantes y cajones sobrecargados •...
-
Página 47: Garantie Limitée De 5 Ans
à compter de la date d'achat contre tout défaut la première fois et qui sont signalés à Sauder dans les limites de couverture de la de matériaux ou de fabrication des composantes de mobilier Sauder. Le mot « défaut », garantie. - Página 48 Monday through Friday – 9 a.m. to 5:30 p.m. ET (except holidays) General Conformity Certifi cate 1. This certifi cate applies to the Sauder Woodworking Product identifi ed by this Instruction Book. 2. This certifi cate applies to compliance of this product with the CPSC Ban on Lead-Containing Paint (16 CFR 1303).