Tabla de contenido
Publicidad
Idiomas disponibles
Idiomas disponibles
Enlaces rápidos
■ Slide the handle into the slots until it locks
into place.
■ Insert the screws into the holes and
tighten the screws with a phillips head
screwdriver (not included).
Screws
Missing parts, accessories or need a service center?
Do Not Return to Store
Call : 1-888-909-6757
www.GreenWorksTools.com
Rev:01
This Quick Start Guide is not a substitute for reading the operator's manual. To reduce the risk
WARNING:
of injury or death, user must read and understand operator's manual before using this product.
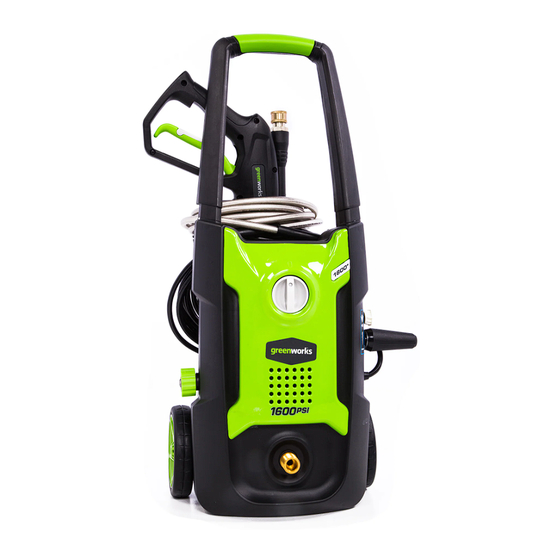
1600 PSI / 1.2 GPM
ELECTRIC PRESSURE WASHER
GPW1600 RC
INSTALLING DETERGENT BOTTLE
■ Insert the male end of the bottle into the female outlet on the
trigger handle.
■ While pushing in the bottle firmly, turn clockwise until tabs lock
into place to ensure a leak-free connection.
■ Unscrew the bottle from the assembly and fill with pressure
washer detergents/soaps only.
SPRAY TIP
SPRAY TIP APPLICATION
White - Wide fan tip (40° )
■ The white 40 degree tip, referred to as the "fan" tip creates the
widest area of cleaning with relatively low pressure. This pressure
washer tip is best used for light or delicate cleaning applications. It
40
O
is recommended for light cleaning on wood decks and other soft or
delicate surfaces.
Turbo Nozzle Tip
■ The nozzle rotates in a zero to 15 degree spray pattern in a circular
motion to break down tough dirt and grime. The spray pattern can
cover area of 4 to 8 inches wide, depending on a distance between
the tip and the surface being cleaned.
CONNECTING DESIRED SPRAY TIP
■ Pull back the quick-connect collar
■ Push the spray tip into place
■ Push the collar forward
Set-up
1
Connect garden hose to pressure
washer water intake.
Assemble pressure washer gun to spray
2
wand.
3
Insert high pressure hose into trigger
handle.
4
Insert high pressure hose into the pressure
washer.
5
Turn on water at outlet.
6
Run water hose for 120 seconds with the
motor in OFF position. This helps drain air
120S
from the tank and lines.
120S
7
Connect power cord to wall outlet
Extension cord not recommended.
8
Turn on Pressure Washer
IMPORTANT: Ensure water outlet is On
before turning power On to avoid damage
to the pump.
NOTE:
AUTO ON/OFF SWITCH: This Pressure washer is equipped
with an Auto Start/Stop feature.
To operate: Turn on power switch. Pump will pressurize
and shut down immediately.
Once the trigger of the gun is depressed the unit will turn on.
Unit will shut off and be in standby mode when trigger is
released.
Publicidad
Capítulos
Tabla de contenido
Solución de problemas

Manuales relacionados para GreenWorks GPW1600 RC


Resumen de contenidos para GreenWorks GPW1600 RC
- Página 1 Assemble pressure washer gun to spray wand. 1600 PSI / 1.2 GPM ELECTRIC PRESSURE WASHER GPW1600 RC Insert high pressure hose into trigger handle. INSTALLING DETERGENT BOTTLE ■ Insert the male end of the bottle into the female outlet on the trigger handle.
- Página 2 LAVADORA ELÉCTRICA A PRESIÓN DE 1600 LBS/PULG 1.2 GPM Meta la manguera para alta presión GPW1600 RC en la manija con gatillo. CÓMO INSTALAR LA BOTELLA DE DETERGENTE ■ Introduzca el extremo macho de la botella en la salida hembra de Meta la manguera para alta presión en la...
- Página 3 1600 PSI / 1.2 GPM ELECTRIC PRESSURE WASHER GPW1600RC OPERATOR’S MANUAL TOLL-FREE HELPLINE: 1-888-90WORKS (888.909.6757) Read all safety rules and instructions carefully before operating this tool. www.greenworkstools.com...
-
Página 4: Tabla De Contenido
INSTRUCTION Imporatant Safety Instructions………………………………………………………........3-4 Specific Safety Rules………………………………………………………………........5-6 Symbols………………………………………………………………………………........7-8 Electrical………………………………………………………………………………........9 Know Your Pressure Washer…………………………………………………………........10 Packing List..............................11 Assembly………………………………………………………………………………........12-15 Operation………………………………………………………………………………........16-20 Maintenance…………………………………………………………………………........21-23 Troubleshooting……………………………………………………………………….........24-26 Warranty…………………………………………………………………………………….......27 Exploded View…………………………………………………………………………........….28 Parts List…………………………………………………………………………………........29 PRODUCT SPECIFICATION Induction Motor……………………………………………………….........120V,60Hz,13Amps Max. Pounds Per Square Inch Pressure……………………………………........1600psi Rated Gallons Per Minute………………………………………………………........1.2gpm Maximum Inlet Water Temperature……………………………………………..……....104°F(40℃) Cleaning Units..........................1920 C.U …... -
Página 5: Ground Fault Circuit Interrupter Protection
IMPORTANT SAFETY INTRODUCTIONS W A R N I N G Read and understand all instructions. Failure to follow all instructions listed below may result in electric shock, fire, and /or serious personal injury. W A R N I N G When using this product, basic precaution should always be followed, including the following. -
Página 6: Extension Cords
IMPORTANT SAFETY INTRODUCTIONS EXTENSION CORDS When using a power tool at a considerable distance from a power source, be sure to use an extension cord that has the capacity to handle the current the product will draw. An undersized cord will cause a drop in line voltage, possibly resulting in overheating, loss of power, and/or circuit breaker or GFCI tripping. -
Página 7: Specific Safety Rules
SPECIFIC SAFETY RULES ■ Know your product. Read the operator’s manual carefully. Learn the machine’s applications and limitations as well as the specific potential hazards related to this product. ■ To reduce the risk of injury, keep children and visitors away. All visitors should wear safety glasses and be kept a safe distance from the work area. - Página 8 SPECIFIC SAFETY RULES ■ Make sure your extension cord is in good condition. When using an extension cord, be sure to use one heavy enough to carry the current your product will draw. A wire gauge size (A.W.G.) of at least 14 is recommended for an extension cord 25 feet or less in length. If in doubt, use the next heavier gauge.
-
Página 9: Symbols
SYMBOLS Some of the following symbols may be used on this product. Please study them and learn their meaning. Proper interpretation of these symbols will allow you to operate the product better and safer. SYMBOL NAME DESIGNATION/EXPLANATION Volts Voltage Amperes Current Hertz Frequency (cycles per second) - Página 10 If you do not understand the warnings and instructions in the operator’s manual, do not use this product. Call GREENWORKS customer service for assistance. The operation of any power tool can result in foreign objects being thrown into your eyes, which can result in severe eye damage.
-
Página 11: Electrical
ELECTRICAL W A R N I N G The double insulated system is intended to protect the user from shock resulting from a break in the product’s internal insulation. Observe all normal safety precautions to avoid electrical shock. dOUBLE INSULATEd Double insulation is a concept in safety in electric power tools, which eliminates the need for the usual three-wire grounded power cord. -
Página 12: Know Your Pressure Washer
KNOW YOUR PRESSURE WASHER The safe use of this product requires an understanding of the information on the tool and in this operator’s manual, as well as a knowledge of the project you are attempting. Before using this product, familiarize yourself with all operating features and safety rules. (See Figure 2.) Trigger Handle Handle... -
Página 13: Packing List
AN T: 120S 120 S rnillos Missing parts, accessories or need a service center Do Not Return to Stor Call : 1-888-909-675 w. GreenWorks To ols.co the tip and the surface being clean ed . TI P NOTE: to the pump. -
Página 14: Unpacking
ASSEMBLY UNPACKING This product requires assembly. ■ Carefully remove the product and any accessories from the box. Make sure that all the contents from the packaging list are included. W A R N I N G Do not use this product if any parts on the Packing List are already assembled to your product when you unpack it. - Página 15 ASSEMBLY ASSEMBLING THE PRESSURE WASHER HANdLE (See Figure 3.) ■ Slide the handle into the slots until it locks into place. ■ Insert the screws into the holes and tighten the screws with a phillips head screwdriver (not included). Screws Fig.
-
Página 16: Detergent Tank
ASSEMBLY CONNECTING HIGH PRESSURE HOSE TO TRIGGER HANdLE (See Figure 5.) ■ Connect the high pressure hose to the pressure washer gun assembly by turning the fitting clockwise. Ensure the fitting is fully tightened to the pressure washer gun. NOTE: For easier installation of the hose to the unit or trigger it is suggested to add pressure washer or dish detergent to the rubber seal at each end of the hose. - Página 17 ASSEMBLY CONNECTING THE GARdEN HOSE (See Figure 7.) C A U T I O N : Always observe all local regulations when connecting hoses to the water main. Some areas have restrictions against connecting directly to public drinking water supply to prevent the feedback of chemicals into the drinking water supply.
-
Página 18: Operation
OPERATION W A R N I N G Do not allow familiarity with the product to make you careless. Remember that a careless fraction of a second is sufficient to inflict serious injury. W A R N I N G Never direct a water stream toward people or pets, or any electrical device. - Página 19 OPERATION STARTING ANd STOPPING THE PRESSURE WASHER C A U T I O N : Do not run the pump without the water supply connected and turned on. ■ Connect the garden hose. ■ Turn the garden hose on then squeeze the high pressure trigger to relieve air pressure. Once a steady stream of water appears, release the trigger.
- Página 20 OPERATION USING THE SPRAY WANd TRIGGER For greater control and safety, keep both hands on the pressure washer gun at all times. ■ Pull back and hold the trigger to operate the pressure washer. ■ Release the trigger to stop the flow of water through the spray wand.
- Página 21 OPERATION CHANGING THE SPRAY TIP (See Figure 10.) W A R N I N G NEVER change spray tips without engaging the lock-out on the trigger handle and NEVER point the wand at your face or at others. The quick-connect feature contains small springs that could eject the spray tip with some force.
-
Página 22: Operating The Pressure Washer
OPERATION OPERATING THE PRESSURE WASHER (See Figure 11.) Use only detergents designed for pressure washers. Soap is applied under low pressure high volume for optimum performance. Soap can not be applied under high pressure with this machine. To clean: ■ Install the soap attachment on the spray wand. ■... -
Página 23: General Maintenance
MAINTENANCE W A R N I N G When servicing, use only identical replacement parts. Use of any other parts may create a hazard or cause product damage. W A R N I N G Before inspecting, cleaning or servicing the machine,turn off the unit, unplug from the outlet, pull trigger to release water pressure and disconnect the high pressure hose. -
Página 24: Spray Tip Maintenance
MAINTENANCE SPRAY TIP MAINTENANCE (See Figure 12.) Excessive pump pressure (a pulsing sensation felt while squeezing the trigger) may be the result of a clogged or dirty spray tip. Fig. 12 ■ Unplug the pressure washer. ■ Turn off the pressure washer and shut off the water supply. Pull trigger to release water pressure. ■... - Página 25 MAINTENANCE QUICK WINTERIZING PROCEdURE If you cannot do the Optimum Winterizing procedure, you can still protect your pressure washer from winter damage by doing below: ■ Disconnect all water connections. ■ Turn on the machine for a few second, until the remaining water in the pump exits. Turn off immediately. ■...
-
Página 26: Troubleshooting
TROUBLESHOOTING PROBLEM POSSIBLE CAUSE SOLUTION On/Off switch is Turn switch to the “ON” ( | ) position. Squeeze gun in the “OFF” (O) trigger. position. Power cord is not Plug in power cord. plugged in. Extension cord is too long. Replace extension cord with either a 25’... - Página 27 TROUBLESHOOTING PROBLEM POSSIBLE CAUSE SOLUTION Filter on detergent Run warm water through the filter to remove build suction tube is clogged. Unit does not reach Damaged or clogged Remove obstruction or replace detergent suction high pressure. detergent suction tube. (continued) tube.
- Página 28 TROUBLESHOOTING PROBLEM POSSIBLE CAUSE SOLUTION Supply voltage below Verify that only the pressure washer is running on minimum. this circuit. System has residual Turn unit “OFF”, squeeze trigger on spray wand to pressure. release pressure, then turn unit “ON”. Voltage loss due to Unplug any extension cords attached and plug the Motor buzzes but fails unit directly into the outlet.
-
Página 29: Warranty
GREENWORKS™ hereby warranties this product, to the original purchaser with proof of purchase, for a period of one (1) years against defects in materials, parts or workmanship. GREENWORKS™, at its own discretion will repair or replace any and all parts found to be defective, through normal use, free of charge to the customer. -
Página 30: Exploded View
EXPLODED VIEW EN - 28... -
Página 31: Parts List
PARTS LIST ITEM NO. PART NO. DESCRIPTION 341091639 Switch knob 341041639 Performance label panel 341031639 Front panel 341011639 Upper housing 311161639 Switch over assy 363021628 Power switch 311151639 Motor pump assy 32202847 Screw ST4.2*15-F 3410801 Cord clamp 34222302 Power cord sleeve 34211319 Nozzle grommet 31208363... - Página 32 TOLL-FREE HELPLINE: 1-888-90WORKS (888.909.6757) Rev: 00 (14-10-13)
- Página 33 LAVADORA ELÉCTRICA A PRESIÓN DE 1600 LBS/PULG 2 1.2 GPM GPW1600 RC MANUAL DEL OPERADOR LÍNEA TELEFÓNICA GRATIS PARA AYUDA: 1-888-90WORKS(888.909.6757) Antes de hacer funcionar esta herramienta, lea cuidadosamente todas las reglas de seguridad y las instrucciones. www.greenworkstools.com...
-
Página 34: Introducción
INTRODUCCIÓN Instrucciones importantes sobre seguridad……………………………………….........3-4 Reglas específicas sobre seguridad …………………………………………………........5-6 Símbolos………………………………………………………………………………........7-8 Sistema eléctrico………………………………..………………………………….........9 Familiarícese con su lavadora a presión………………………………………………….......10 Listado de embalaje..........................11 Ensamblaje………………………………………………………………………........12-15 Funcionamiento......……………………………………………………….........16-20 Mantenimiento……………………………………………………………………........21-23 Resolución de averías……………………………………………………………........24-26 Garantía……………………………………………………………………………………........27 Diagrama de componentes……………………………………………………..........28 Lista de piezas……………………………………………………………………….........29 ESPECIFICACIONES DEL PRODUCTO Motor universal………………………………………………………........120V,60Hz,13Amps Cable de alimentación con GFCI en línea....................35ft Presión máxima en libras por pulgada cuadrada……………………..........1600psi Clasificación en galones por mimuto………………………………………..........1.2gpm... -
Página 35: Instrucciones Importantes Sobre Seguridad
INSTRUCCIONES IMPORTANTES SOBRE SEGURIDAD A D V E R T E N C I A Lea y comprenda todas las instrucciones. No obedecer todas las instrucciones que se listan a continuación podría resultar en choques eléctricos, incendios o lesiones personales graves. A D V E R T E N C I A Al utilizar este producto se debe siempre observar ciertas precauciones básicas, incluyendo las siguientes:... - Página 36 INSTRUCCIONES IMPORTANTES SOBRE SEGURIDAD CORDONS PROLONGATEURS Quand vous utilisez l’outil électrique à une distance considérable de la source d’alimentation en électricité, résulter ainsi une surchauffe, une perte de puissance, et / ou déclenchement de disjoncteur ou le disjoncteur de fuite à la terre pour un cordon prolongateur.
-
Página 37: Reglas Específicas Sobre Seguridad
REGLAS DE SEGURIDAD ESPECÍFICAS ■ Familiarícese con el producto. Lea cuidadosamente el manual del operador. Aprenda los usos y limitaciones de la máquina así como los peligros potenciales específicos para elproducto. ■ Para reducir los riesgos de lesiones, mantenga alejados a los niños y los visitantes. Todos los visitantes deben utilizar gafas de seguridad y mantenerse a una distancia prudencial de la zona de trabajo. - Página 38 REGLAS DE SEGURIDAD ESPECÍFICAS acopla, póngase en contacto con un electricista califcado para instalar un tomacorriente apropiado en la pared. No altere de ninguna forma el enchufe del equipo, los tomacorrientes ni los enchufes de los cordones para extensión. ■ Asegúrese de que su cordón para extensión se encuentra en buenas condiciones. Al utilizar un cordón para extensión, asegúrese de usar uno lo sufcientemente grueso como para transmitir la corriente que necesita el producto.
-
Página 39: Símbolos
SÍMBOLOS Este producto podría contener algunos de los siguientes símbolos. Sírvase estudiarlos y aprender su significado. La interpretación apropiada de esos símbolos le pemitirá operar mejor el producto y de una forma más segura. SÍMBOLO NOMBRE DESIGNACIÓN/EXPLICACIÓN Voltios Voltaje Amperios Corriente Hertz Frecuencia (ciclos por segundo) - Página 40 Si no comprende las advertencias y las instrucciones que aparecen en el manual del operador, no use el producto. Llame al departamento de servicio al cliente de GREENWORKS para recibir ayuda. A D V E R T E N C I A Toda herramienta eléctrica al funcionar puede lanzar objetos extraños hacia sus ojos, lo que...
-
Página 41: Sistema Eléctrico
SISTEMA ELÉCTRICO A D V E R T E N C I A El objetivo del sistema de aislamiento doble es proteger al usuario de los choques que resultan al romperse el aislamiento interno del producto. Para evitar choques eléctricos observe todas las precauciones normales de seguridad. -
Página 42: Familiarícese Con Su Lavadora A Presión
FAMILIARÍCESE CON SU LAVADORA A PRESIÓN Los enchufes con GFCI no evitan los cortocircuitos, las sobrecargas ni los choques eléctricos. Para usar con seguridad este producto es necesario comprender la información que se presenta en la herramienta y en el presente manual del operador, así como tener conocimiento del proyecto que se intenta efectuar. -
Página 43: Descripción
TI P NOTE: to the pump. IMPORT AN T: ashe Call : 1-888-909-675 w. GreenWorks Rev:0 Do Not Return to Stor To ols.co of f release Deje correr el agua de la manguera por 30 segundos sin llevar el motor a la 120S posición de encendido (ON). -
Página 44: Desempaquetado
ENSAMBLAJE DESEMPAQUETADO Es necesario ensamblar este producto. ■ Saque cuidadosamente el producto y los accesorios de la caja. Asegúrese de encontrar todos los artículos mencionados en el listado de embalaje. A D V E R T E N C I A No use este producto si a la hora de desempaquetarlo cualquiera de las piezas mencionadas en el Listado de Embalaje se encuentra ya ensamblada al producto. -
Página 45: Montaje Del Asa De La Hidrolimpiadora
ENSAMBLAJE MONTAJE DEL ASA DE LA HIDROLIMPIADORA (Vea ka figura 3.) ■ Introduzca el asa en las ranuras hasta que quede bloqueada. ■ Introduzca los tornillos en los orificios y apriételos con un destornillador de estrella (no incluido). Tornillos Fig. 3 MONTAJE DEL SOPORTE DE LA PISTOLA ■... -
Página 46: Cómo Conectar La Manguera Dealta Presión A La Manija Con Gatillo
ENSAMBLAJE CÓMO CONECTAR LA MANGUERA DEALTA PRESIÓN A LA MANIJA CON GATILLO (Vea ka figura 5.) ■ Conecte la manguera de alta presión a la pistola de la hidrolimpiadora girando el conector en sentido de las agujas del reloj. Asegúrese de que el conector se encuentra bien sujeto a la pistola de la hidrolimpiadora. -
Página 47: Cómo Conectar La Manguera De Jardín
ENSAMBLAJE CÓMO CONECTAR LA MANGUERA DE JARDÍN (Vea ka figura 7.) P R E C A U C I O N : Obedezca siempre los reglamentos locales al conectar mangueras a las tuberías de abastecimiento de agua. Algunas municipalidades imponen restricciones contra la conexión directa al suministro público de agua potable para evitar la retroalimentación de productos químicos. -
Página 48: Aplicaciones
FUNCIONAMIENTO A D V E R T E N C I A No permita que la familiarización con el producto se convierta en descuido. Recuerde que un descuido por una fracción de segundo es suficiente para producir lesiones graves. A D V E R T E N C I A Nunca dirija el chorro de agua hacia otras personas ni animales o dispositivos eléctricos. -
Página 49: Cómo Arrancar Y Parar La Lavadora A Presión
FUNCIONAMIENTO CÓMO ARRANCAR Y PARAR LA LAVADORA A PRESIÓN P R E C A U C I O N : No haga funcionar la bomba sin que el suministro de agua esté conectado y encendido. ■ Conecte la manguera de jardín. ■... -
Página 50: Cómo Usar El Gatillo De La Vara Para Rocío
FUNCIONAMIENTO CÓMO USAR EL GATILLO DE LA VARA PARA ROCÍO Para lograr un mayor control y seguridad, en todo momento sostenga la manija con gatillo con ambas manos. ■ Para operar la lavadora a presión, tire del gatillo y manténgalo apretado. ■... -
Página 51: Cambio De La Punta De Pulverización
FUNCIONAMIENTO CAMBIO DE LA PUNTA DE PULVERIZACIÓN (Ver figura 10.) A D V E R T E N C I A NUNCA cambie las punta de pulverizacións sin activar primero el bloqueador que se encuentra en la manija con gatillo y NUNCA apunte la vara hacia su cara ni hacia otras personas. El sistema de conexión rápida contiene pequeños resortes que pudieran lanzar la punta de pulverización con cierta fuerza. -
Página 52: Cómo Operar La Lavadora A Presión
FUNCIONAMIENTO CÓMO OPERAR LA LAVADORA A PRESIÓN (Ver figura 11.) Use solamente detergentes diseñados para lavadoras a presión. Jabón se aplica bajo volumen de alta presión bajo para un rendimiento óptimo El jabón no se puede aplicar a alta presión con esta máquina Para limpiar: ■... -
Página 53: Mantenimiento General
MANTENIMIENTO A D V E R T E N C I A Al dar servicio, use solamente repuestos idénticos. Usar cualquier otro repuesto podría provocar peligros o crear daños al producto. A D V E R T E N C I A Antes de inspeccionar, apague el aparato, desenchúfelo, apriete el gatillo para eliminar la presión del agua y desconecte la manguera de alta presión. -
Página 54: Mantenimiento De Las Boquillas
MANTENIMIENTO MANTENIMIENTO DE LAS BOQUILLAS (Ver figura 12.) Las boquillas obstruidas o sucias podrían generar excesiva presión de la bomba (una sensación pulsante al apretar el gatillo). Fig. 12 ■ Desenchufe la lavadora a presión. ■ Apague la lavadora a presión y cierre el suministro de agua. Tire del gatillo para eliminar la presión de agua. -
Página 55: Procedimiento Rápido De Preparación Para El Invierno
MANTENIMIENTO PROCEDIMIENTO RÁPIDO DE PREPARACIÓN PARA EL INVIERNO Si no puede efectuar el procedimiento óptimo de preparación para el invierno, aun puede proteger su lavadora a presión de los daños del invierno haciendo lo siguiente: ■ Destrabe todas las conexiones de agua. ■... -
Página 56: Resolución De Averías
RESOLUCIÓN DE AVERÍAS PROBLEMA CAUSAS POSIBLES SOLUCIONES El interruptor de encendido y apagado se Lleve el interruptor a la posición de encendido ( | ). encuentra en la posición Apretar el gatillo. de apagado (O). El cordón de alimentación no está Enchufe el cordón de aliment-ación. - Página 57 RESOLUCIÓN DE AVERÍAS PROBLEMA CAUSAS POSIBLES SOLUCIONES El filtro del tubo para succiónde Haga pasar agua tibia por el filtropara detergente está obstruido. remover las acumulaciones. La unidad no El tubo para succión de detergente Quite la obstrucción o reemplace el tubo alcanza la está...
- Página 58 RESOLUCIÓN DE AVERÍAS PROBLEMA CAUSAS POSIBLES SOLUCIONES Los sellos para el Hay aceite goteando. aceite es-tán dañados Llame a la línea de ayuda gratuita. o deteriorados. El voltaje de Compruebe que sólo la lavadora a presión está alimentación está por conectada en el circuito.
-
Página 59: Garantía
DÍAS GARANTIE Por este medio y por un período de 3 días GREENWORKS™ garantiza este producto contra defectos en materiales, piezas o mano de obra al comprador original que cuente con una prueba de compra. GREENWORKS™, a su sola discreción reparará o reemplazará, sin costo alguno para el cliente, cualquier pieza que determine como defectuosa, siempre y cuando se haya hecho uso normal de ella. -
Página 60: Diagrama De Componentes
DIAGRAMA DE COMPONENTES ES - 28... -
Página 61: Lista De Piezas
LISTA DE PIEZAS ELEMENTO Nº PIEZA Nº DESCRIPCIÓN 341091639 Perilla del interruptor 341041639 Etiqueta con panel de desempeño 341031639 Panel frontal 341011639 Carcasa superior 311161639 Conjunto para cambio de modo 363021628 Interruptor de encendido 311151639 Conjunto de bomba-motor 32202847 Tornillo ST4.2*15-F 3410801 Abrazadera del cable 34222302... - Página 62 LÍNEA TELEFÓNICA GRATIS PARA AYUDA: 1-888-90WORKS (888.909.6757) Rev: 00 (14-10-13)