
Manuales relacionados para Klarstein Height Cool


Resumen de contenidos para Klarstein Height Cool
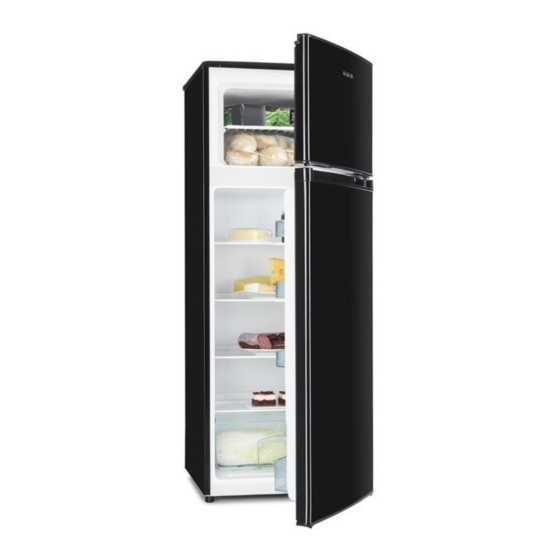
- Página 1 Height Cool Kühl-Gefrierkombination Freezer Refrigerator Frigorífico combi Combiné réfrigérateur congélateur Combinazione frigo e freezer 10030373 10030374...
-
Página 3: Tabla De Contenido
Sehr geehrter Kunde, wir gratulieren Ihnen zum Erwerb Ihres Gerätes. Lesen Sie die folgenden Hinweise sorgfältig durch und befolgen Sie diese, um möglichen Schäden vorzubeugen. Für Schäden, die durch Missachtung der Hinweise und unsachgemäßen Gebrauch entstehen, übernehmen wir keine Haftung. Scannen Sie den folgenden QR-Code, um Zugriff auf die aktuellste Bedienungsanleitung und weitere Informationen rund um das Produkt zu erhalten:... -
Página 4: Sicherheitshinweise
SICHERHEITSHINWEISE • Prüfen Sie vor der Benutzung die Spannung auf der Geräteplakette. Schließen Sie das Gerät nur an Steckdosen an, die der Spannung des Geräts entsprechen. • Kinder ab 8 Jahren, physisch und körperlich eingeschränkte Menschen dürfen das Gerät nur benutzen, wenn sie vorher von einer für Sie verantwortlichen Aufsichtsperson ausführlich mit den Funktionen und den Sicherheitsvorkehrungen vertraut gemacht wurden. - Página 5 Dieses Gerät enthält das Kältemittel Isobutan (R600a), ein Naturgas mit hoher Umweltverträglichkeit, aber brennbar. Obwohl es brennbar ist, schädigt es nicht die Ozonschicht und verstärkt nicht den Treibhauseffekt. Die Verwendung dieses Kältemittels führt zu einer etwas höheren Geräuschentwicklung des Gerätes. Zusätzlich zum Kompressorgeräusch können Sie den Fluss des Kältemittels hören.
-
Página 6: Geräteübersicht
GERÄTEÜBERSICHT... -
Página 7: Türanschlag Drehen
TÜRANSCHLAG DREHEN • Benötigte Werkzeuge: Kreuzschlitzschraubenzieher und flacher Schraubenzieher • Versichern Sie sich, dass das Gerät leer ist und ziehen Sie den Stecker aus der Steckdose. • Wenn Sie die Tür entfernen müssen Sie das Gerät zurückneigen. Lehnen Sie das Gerät an eine stabile Wand, von der es nicht wegrutschen kann. - Página 8 Schrauben Sie das mittlere Setzen Sie die Schrauben Sie das untere Scharnier ab. Scharnierlochblenden von Scharnier ab. Entfernen der linken auf die rechte Sie anschließend die Seite. beiden verstellbaren Füße auf beiden Seiten. Schrauben Sie den unteren Scharnierbolzen ab und entfernen Sie ihn. Wenden Sie den Scharnieranschlag und bringen Sie ihn wieder an.
- Página 9 Setzen Sie die Drehen Sie das mittlere Setzen Sie die obere Scharnieranschläge Scharnier um 180° und Tür wieder ein. Achten wieder an. setzen Sie es auf der Sie darauf, dass die linken Seite an. Führen Tür waagerecht und Sie den Scharnierbolzen senkrecht ist, so dass die durch das obere Loch der Dichtungen an allen Seiten...
- Página 10 Montage des Türgriffs Abstandhalter Rückseite Schrauben Sie die Abstandhalter auf der Rückseite des Gerätes an. Platzbedarf • Lassen Sie ausreichend Raum zum Öffnen der Tür. • Lassen Sie zu den Seiten hin mindestens 5 cm Raum. Den Gefrierschrank waagerecht ausrichten Stellen Sie die Füße ein, um den Kühlschrank waagerecht auszurichten.
-
Página 11: Bedienung
BEDIENUNG Vor dem ersten Gebrauch Bevor Sie das Gerät erstmals benutzen, waschen Sie die Innenseite und das Zubehör mit lauwarmem Wasser und etwas Spülmittel ab, um den produktionsbedingten Geruch zu entfernen. Trocknen Sie alles danach sorgfältig ab. Benutzen Sie zur Reinigung niemals Lösemittel oder Scheuermittel. -
Página 12: Reinigung Und Pflege
REINIGUNG UND PFLEGE Abtauen • An der Innenseite des Gerätes kann sich Frost ansammeln, der während des Kompressorzyklus automatisch abtaut. • Das Wasser wird über die Ablauföffnung in die Auffangwanne oberhalb des Kompressors geleitet, wo es verdampft. • Stellen Sie sicher, dass das Ablaufloch regelmäßig gereinigt wird, damit das Wasser aus dem Staufach austreten kann. -
Página 13: Fehlerbehebung
FEHLERBEHEBUNG Problem Mögliche Ursache Lösungsansatz Das Gerät läuft nicht. Der Stecker ist nicht Stecken Sie den Stecker eingesteckt oder lose. fest in die Steckdose. Die Sicherung ist raus oder Prüfen Sie die Sicherung. Kaputt. Das Essen ist warm. Die Temperatur ist nicht Stellen Sie die Temperatur richtig eingestellt auf eine kühlere Stufe. -
Página 14: Hinweise Zur Entsorgung
HINWEISE ZUR ENTSORGUNG Befindet sich die linke Abbildung (durchgestrichene Mülltonne auf Rädern) auf dem Produkt, gilt die Europäische Richtlinie 2012/19/EU. Diese Produkte dürfen nicht mit dem normalen Hausmüll entsorgt werden. Informieren Sie sich über die örtlichen Regelungen zur getrennten Sammlung elektrischer und elektronischer Gerätschaften. - Página 15 Dear Customer, Congratulations on purchasing this equipment. Please read this manual carefully and take care of the following hints to avoid damages. Any failure caused by ignoring the items and cautions mentioned in the instruction manual is not covered by our warranty and any liability. Scan the QR code to get access to the latest user mannual and other information about the product CONTENT...
- Página 16 SAFETY INSTRUCTIONS • Check that the voltage of the power supply in your home is the same as the voltage shown on the rating label of this product. • This appliance can be used by children aged from 8 years and above and persons with reduced physical, sensory or mental capabilities or lack of experience and knowledge if they have been given supervision or instruction concerning use of the appliance in a safe way and understand the hazards involved.
- Página 17 This appliance contains the coolant isobutane (R600a), a natural gas which is environmentally friendly. Although it is fl ammable, it does not damage the ozone layer and does not increase the greenhouse effect. The use of this coolant has,however,led to a slight increase in the noise level of the appliance. In addition to the noise of the compressor,you might be able to hear the coolant fl owing around the system.
- Página 18 PRODUCT OVERVIEW...
- Página 19 REVERSE DOOR • Ensure the unit is unplugged and empty. • To take the door off, it is necessary to tilt the unit backwards. You should rest the unit on something solid • so that it will not slip during the door reversing process. •...
- Página 20 Unscrew middle hinge. Move the hinge hole Unscrew bottom Then lift lower door and covers from left side to hinge. Then remove the place it on a soft pad to right side. adjustable feet from both avoid scratches. sides. Unscrew and remove the bottom hinge pin, turn the bracket over and replace it.
- Página 21 Refit the bracket fitting the Make the middle Place the upper door back bottom hinge pin. Replace hinge reverse the on. Ensure the door is both adjustable feet. direction180oC, then aligned horizontally and Transfer the lower door to transfer it to the left vertically so that the seal the property position.
- Página 22 Installation of the door handle Rear spacer Screw the rear spacers at the rear of the unit. Space Requirement • Keep enough space of door open. • Keep at least 50mm gap at two sides. Levelling the unit To do this adjust the two levelling feet at front of the unit. If the unit is not level, the doors and magnetic seal alignments will not be covered properly.
- Página 23 OPERATION Before first use Before using the appliance for the first time, wash the interior and all internal accessories with lukewarm water and some neutral soap so as to remove the typical smell of a brand new product, then dry thoroughly. Do not use detergents or abrasive powders, as these will damage the finish.
- Página 24 CARE AND MAINTENANCE Defrosting • Frost may accumulate on the inside of the unit and defrost automatically during the compressor cycle. • The water is led through the drain opening into the collecting tray above the compressor where it evaporates. •...
- Página 25 TROUBLESHOOTING Problem Possible cause Solution Appliance does not work. Mains plug is not plugged Insert mains plug. in or is loose Fuse has blown or is Check fuse, replace if defective necessary. The food is too warm. Temperature is not properly Please look in the initial adjusted.
- Página 26 HINTS ON DISPOSAL According to the European waste regulation 2012/19/EU this symbol on the product or on its packaging indicates that this product may not be treated as household waste. Instead it should be taken to the appropriate collection point for the recycling of electrical and electronic equipment.
- Página 27 Estimado cliente: Le felicitamos por la adquisición de este producto. Lea atentamente el siguiente manual y siga cuidadosamente las instrucciones de uso con el fin de evitar posibles daños. La empresa no se responsabiliza de los daños ocasionados por un uso indebido del producto o por haber desatendido las indicaciones de seguridad.
- Página 28 INDICACIONES DE SEGURIDAD • Antes de utilizar el aparato, compruebe la tensión en la placa técnica del mismo. Conecte el aparato solamente a tomas de corriente que se adecuen a la tensión del mismo. • Los niños mayores de 8 años y las personas con discapacidades físicas o psíquicas solamente podrán utilizar el aparato si han sido previamente instruidas sobre su uso y conocen las indicaciones de seguridad.
- Página 29 Este aparato contiene refrigerante isobutano (R600a), un gas natural que no es nocivo para el medioambiente pero sí infl amable. Aunque sea infl amable, no es perjudicial para la capa de ozono ni aumenta el efecto invernadero. La utilización de este refrigerante provoca un aumento de ruido del aparato. Además del ruido del compresor, podrá...
- Página 30 VISTA GENERAL DEL APARATO...
- Página 31 CAMBIO DE ORIENTACIÓN DE LA PUERTA • Herramientas necesarias: destornillador de estrella y destornillador plano • Asegúrese de que el aparato está vacío y desconecte el enchufe de la toma de corriente. • Cuando tenga que retirar la puerta, deberá inclinar el aparato hacia atrás. Apoye el aparato sobre una pared estable que evite que se deslice.
- Página 32 Desatornille la bisagra Pase los embellecedores Desatornille la bisagra intermedia. de la bisagra de la parte inferior. Retire por último izquierda a la derecha. ambas patas ajustables de ambos lados. Desatornille el perno de la bisagra inferior y retírelo. Revierta la bisagra y vuelva a montar el perno.
- Página 33 Vuelva a colocar los topes Gire la bisagra intermedia Fije la puerta superior de las bisagras. 180° y colóquela en la de nuevo. Asegúrese parte izquierda. Pase el de que la tapa queda perno de la bisagra por completamente en el orificio superior de la posición vertical para que puerta inferior.
- Página 34 Montaje del asa Separador de la parte trasera Atornille el separador a la parte trasera del apara- to.. Necesidad de espacio • Deje suficiente espacio para abrir la puerta. • Deje una distancia de 5 cm a los laterales del aparato. Colocar el frigorífico en posición vertical Ajuste las patas para mantener el aparato en posi- ción completamente vertical.
- Página 35 UTILIZACIÓN Antes del primer uso Antes de utilizar el aparato por primera vez, limpie el interior y los accesorios con agua tibia y jabón y un poco de lavavajillas para que desaparezcan los olores producidos durante la fabricación. Seque todas las piezas completamente. No utilice productos abrasivos ni disolventes para limpiar el aparato.
- Página 36 LIMPIEZA Y CUIDADO Descongelación • Las heladas pueden acumularse en el interior de la unidad y descongelarse automáticamente durante el ciclo del compresor. • El agua es conducida a través de la abertura de salida a la bandeja colectora situada encima del compresor, donde se evapora. •...
- Página 37 RESOLUCIÓN DE PROBLEMAS Problema Posible causa Solución de problemas La unidad no funciona. El enchufe no está Conecte el enchufe enchufado o suelto. firmemente en la toma de corriente. El fusible se apagó o se Revise el fusible. rompió. La comida está caliente. La temperatura no está...
- Página 38 RETIRADA DEL APARATO Si el aparato lleva adherida la ilustración de la izquierda (el contenedor de basura tachado) entonces rige la normativa europea, directiva 2012/19/UE. Este producto no debe arrojarse a un contenedor de basura común. Infórmese sobre las leyes territoriales que regulan la recogida separada de aparatos eléctricos y electrónicos.
- Página 39 Cher client, Toutes nos félicitations pour l’acquisition de ce nouvel appareil. Veuillez lire attentivement les instructions suivantes de branchement et d’utilisation afin d’éviter d’éventuels dommages. Le fabricant ne saurait être tenu pour responsable des dommages dus au non-respect des consignes de sécurité et à la mauvaise utilisation de l’appareil.
- Página 40 CONSIGNES DE SÉCURITÉ • Avant d‘utiliser l‘appareil vérifiez la tension sur la plaque signalétique. Branchez l‘appareil sur des prises de tension correspondante uniquement. • Les enfants à partir de 8 ans ainsi que les personnes dont les capacités physiques, mentales ou sensorielles sont réduites peuvent utiliser l’appareil à condition d’avoir assimilé...
- Página 41 Cet appareil contient du liquide réfrigérant Isobutane (R600a), un gaz naturel très respectueux de l’environnement mais infl ammable. Bien qu’il soit infl ammable, il ne détruit pas la couche d’ozone et ne renforce pas l’effet de serre. L’utilisation de ce liquide réfrigérant provoque toutefois un niveau sonore de l’appareil légèrement plus élevé.
- Página 42 APERÇU DE L’ APPAREIL...
- Página 43 INVERSION DU SENS D’OUVERTURE DE LA PORTE • Outils nécessaires : tournevis cruciforme et tournevis plat. • S’assurer que l’appareil est vide et débrancher la fiche d’alimentation de la prise. • Incliner l’appareil en arrière pour retirer la porte. Appuyer l’appareil contre un mur stable duquel il ne puisse pas glisser.
- Página 44 Dévisser la charnière du Enlever la plaque de la Dévisser la charnière du milieu. charnière de gauche et bas. Enfin, dévisser et l’installer à droite. enlever les deux pieds ajustables de chaque côté. Dévisser le boulon du bas et l’enlever. Retourner la butée de charnière et le remonter de l’autre côté.
- Página 45 Réinstaller la butée de la Retourner la charnière Réinstaller la porte du charnière. intermédiaire à 180 ° et la haut. Veiller à ce que placer sur le côté gauche. la porte soit à niveau et Faire passer le boulon de d’aplomb afin que le joint charnière à...
- Página 46 Montage de la poignée de porte Pièces d’écartement à l’arrière Visser les pièces d’écartement à l’arrière de l’appa- reil. Espace libre nécessaire • Laisser suffisamment d’espace pour l’ouverture de la porte. • Laisser un espace d’au moins 5 cm sur les côtés. Mettre le congélateur d’aplomb Ajuster la hauteur des pieds pour mettre le congé- lateur d’aplomb.
- Página 47 BEDIENUNG Avant la première utilisation Avant d’utiliser l’appareil pour la première fois, nettoyer les parois internes ainsi que les accessoires à l’eau tiède et un peu de liquide vaisselle pour éliminer les odeurs liées au processus de fabrication. Puis sécher le tout minutieusement. Ne jamais utiliser de solvant ou de produit abrasif pour nettoyer l’appareil.
- Página 48 NETTOYAGE ET ENTRETIEN Décongélation • Le givre peut s‘accumuler à l‘intérieur de l‘appareil et dégivrer automatiquement pendant le cycle du compresseur. • L‘eau est conduite par l‘ouverture de sortie dans le bac collecteur au-dessus du compresseur, où elle s‘évapore. • Veillez à ce que le trou de vidange soit nettoyé régulièrement afin que l‘eau puisse s‘échapper du compartiment de stockage.
- Página 49 RÉSOLUTION DES PROBLÈMES Problème Cause possible Solution L‘appareil ne fonctionne La fiche n'est pas branchée Branchez correctement la pas. ou mal branchée. fiche dans la prise. Le fusible s'est déclenché Contrôlez le fusible. ou est endommagé. Les aliments sont chauds. La température est mal Réglez une température réglée...
- Página 50 CONSEILS POUR LE RECYCLAGE Le pictogramme ci-contre apposé sur le produit signifie que la directive européenne 2012/19/UE s‘applique (poubelle à roues barrée d’une croix). Ces produits ne peuvent être jetés dans les poubelles domestiques courantes. Renseignez- vous concernant les règles appliquées pour la collecte d’appareils électriques et électroniques.
- Página 51 Gentile cliente, La ringraziamo per aver acquistato il dispositivo. La preghiamo di leggere attentamente le seguenti istruzioni per l’uso e di seguirle per evitare possibili danni tecnici. Non ci assumiamo alcuna responsabilità per danni scaturiti da una mancata osservazione delle avvertenze di sicurezza e da un uso improprio del dispositivo.
-
Página 52: Avvertenze Di Sicurezza
AVVERTENZE DI SICUREZZA • Prima dell‘uso, controllare la tensione sulla targhetta del dispositivo. Collegare il dispositivo solo ad una presa che corrisponde alla tensione indicata. • I bambini maggiori di 8 anni, le persone con capacità fisiche, sensoriali o mentali ridotte possono utilizzare il dispositivo solo se attentamente sorvegliate o ben istruite relativamente all’utilizzo del dispositivo stesso da parte di un supervisore responsabile della loro sicurezza. - Página 53 Questo dispositivo contiene il refrigerante isobutano (R600a), un gas naturale ecocompatibile ma infi ammabile. Anche se è infi ammabile, non danneggia lo strato di ozono e non aumenta l´effetto serra. Tenere presente che l´utilizzo di questo refrigerante comporta rumori del dispositivo. Oltre al rumore del compressore si può sentire anche il fl usso del liquido refrigerante.
-
Página 54: Descrizione Del Prodotto
DESCRIZIONE DEL PRODOTTO... -
Página 55: Girare Il Cardine Della Porta
INVERTIRE IL LATO DI APERTURA DELLO SPORTELLO • Attrezzi necessari: cacciavite a croce e cacciavite piatto. • Rimuovere gli alimenti e staccare la spina dalla presa. • Per rimuovere lo sportello è necessario inclinare il dispositivo. Appoggiare il dispositivo ad una parete stabile per evitare che possa cadere. •... - Página 56 Svitare la cerniera Spostare il coperchio Svitare la cerniera centrale. della cerniera da sinistra inferiore e rimuovere a destra. i piedi regolabili su entrambi i lati. Svitare il perno della cerniera inferiore e rimuoverlo. Invertire la staffa della cerniera di apertura e assemblarla.
- Página 57 Inserire di nuovo le staffe Ruotare la cerniera Inserire di nuovo lo della cerniera. centrale di 180°C e sportello superiore. metterla sul lato sinistro. Prestare attenzione che lo Inserire il perno della sportello sia ben allineato cerniera attraverso il foro in modo che le guarnizioni superiore dello sportello chiudano su ogni lato.
- Página 58 Montaggio dell‘impugnata Distanziatore posteriore Avvitare il distanziatore sul retro del dispositivo. Spazio libero • Lasciare spazio libero sufficiente per aprire lo sportello. • Lasciare almeno 5 cm di spazio libero ai lati. Posizionamento Regolare i piedi di appoggio per compensare even- tuali dislivelli. Se il dispositivo non è...
-
Página 59: Utilizzo
UTILIZZO Avvertenze per il primo utilizzo Prima di utilizzare il dispositivo per la prima volta, lavare la parte interna e gli accessori con acqua tiepida e con un po’ di detersivo per rimuovere gli odori di produzione. In seguito asciugare con cura. Non utilizzare solventi o prodotti abrasivi. Impostare la temperatura •... -
Página 60: Pulizia E Manutenzione
PULIZIA E MANUTENZIONE Scongelamento • Il gelo può accumularsi all‘interno dell‘unità e sbrinarsi automaticamente durante il ciclo del compressore. • L‘acqua viene convogliata attraverso l‘apertura di uscita nel vassoio di raccolta sopra il compressore, dove evapora. • Assicurarsi che il foro di scarico venga pulito regolarmente, in modo che l‘acqua possa fuoriuscire dal vano di stivaggio. -
Página 61: Risoluzione Degli Errori
RISOLUZIONE DEGLI ERRORI Problema Possibile causa Soluzioni Il dispositivo non funziona. La spina non è inserita Collegare bene la spina. bene nel-la presa o è staccata. Il fusibile è fuori posizione Controllare il fusibile. o gua-sto. Gli alimenti sono caldi. La temperatura non è... -
Página 62: Smaltimento
SMALTIMENTO Se sul prodotto è presente la figura a sinistra (il cassonetto dei rifiuti mobile sbarrato), si applica la direttiva europea 2012/19/UE. Questi prodotti non possono essere smaltiti con i rifiuti normali. Informarsi sulle disposizioni vigenti in merito alla raccolta separata di dispositivi elettrici ed elettronici. Non smaltire i vecchi dispositivi con i rifiuti domestici.