Tabla de contenido
Publicidad
Idiomas disponibles
Idiomas disponibles
Enlaces rápidos
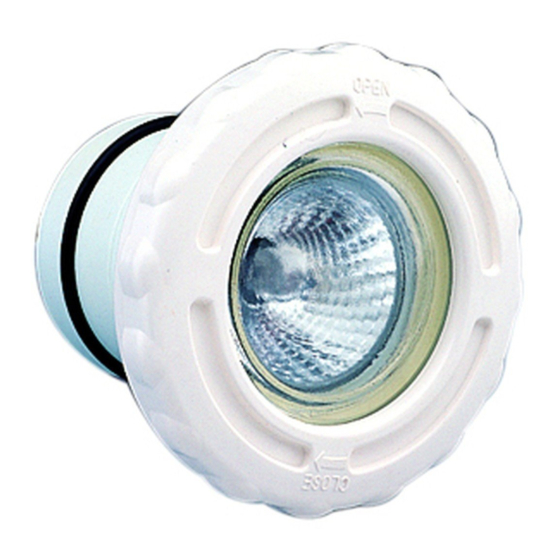
"MINI" LIGHT FOR RAPID INSTALLATION
PROJECTEUR "MINI" À EMBOITEMENT RAPIDE
PROYECTOR "MINI" DE ACOPLE RÁPIDO
FARO "MINI" DI COLLEGAMENTO RAPIDO
MINI-SCHEINWERFER MIT SCHNELLVERSCHLUSS
PROJECTOR "MINI" DE INSTALAÇAO RAPIDA
INSTALLATION AND MAINTENANCE MANUAL
MANUEL D'INSTALLATION ET D'ENTRETIEN
MANUAL DE INSTALACIÓN Y MANTENIMIENTO
MANUALE DI INSTALAZIONE E MANUTENZIONE
EINBAU-UND BETRIEBSANLEITUNG
MANUAL DE INSTRUÇÕES E MANUNTENÇÃO
1
Publicidad
Tabla de contenido

Resumen de contenidos para Astralpool 33708
- Página 1 “MINI” LIGHT FOR RAPID INSTALLATION PROJECTEUR “MINI” À EMBOITEMENT RAPIDE PROYECTOR “MINI” DE ACOPLE RÁPIDO FARO “MINI” DI COLLEGAMENTO RAPIDO MINI-SCHEINWERFER MIT SCHNELLVERSCHLUSS PROJECTOR “MINI” DE INSTALAÇAO RAPIDA INSTALLATION AND MAINTENANCE MANUAL MANUEL D’INSTALLATION ET D’ENTRETIEN MANUAL DE INSTALACIÓN Y MANTENIMIENTO MANUALE DI INSTALAZIONE E MANUTENZIONE EINBAU-UND BETRIEBSANLEITUNG MANUAL DE INSTRUÇÕES E MANUNTENÇÃO...
-
Página 2: General Characteristics
To achieve optimum performance of the Mini light for rapid installation, follow the instructions provided below: 1. VERIFY THE CONTENTS OF THE PACKING: The following accessories are included inside the box: Mini light for rapid installation 33708 - 33684 • Floodlamp unit •... -
Página 3: Safety Warnings
5. MAINTENANCE: 1. In case of an installation with wall conduit, pull the floodlamp out of the swimming pool (Fig. 5). 2. If a coloured lens has been fitted, then remove it. 3. Twist the front bezel through 90º to remove it from the light (Fig. 6). Reverse the bezel and use as a key to remove the light retaining ring, by turning it anti-clockwise (Fig. -
Página 4: Caractéristiques Générales
Pour optimiser le rendement du Projecteur Mini à emboitement rapide, il est recommandé de bien suivre les instructions qui vous sont données ci-dessous : 1. BIEN VÉRIFIER LE CONTENU DE L’EMBALLAGE : Vous devez trouver à l’intérieur de la boîte les accessoires suivants : Projecteur Mini à emboitement rapide 33708 - 33684 • Ensemble projecteur •... -
Página 5: Mise En Marche
2. Enlever la lentille de coleur (si c’est le cas). 3. Effecteur une rotation de 90º afin d’enlever l’enjoliveur du projecteur (Fig. 6), une fois celui-li retiré, retournez-le et utilisez-le comme clé pour enlever la collerette du projecteur par une rotation sur la gauche (Fig. -
Página 6: Compruebe El Contenido Del Embalaje
Para conseguir un óptimo rendimiento del Proyector Mini de acoplamiento rápido, es conveniente observar las instrucciones que se indican a continuación: 1. COMPRUEBE EL CONTENIDO DEL EMBALAJE: En el interior de la caja encontrará los siguientes accesorios: Proyector Mini de acoplamiento rápido 33708 - 33684 • Conjunto proyector •... -
Página 7: Puesta En Marcha
4. Extraer suavemente la lámpara con reflector y separarla del portalámparas, aflojando los dos tornillos que la sujetan. (Fig. 8). Proceder al montaje del Proyector, de modo inverso al descrito, teniendo especial cuidado en: • Poner la Junta plana bien centrada en su alojamiento. •... -
Página 8: Caratteristiche Generali
Per ottenere un ottimo rendimento dello Proiettore Mini di collegamento rapido, è conveniente fare attenzione alle seguenti istruzioni: VERIFICARE IL CONTENUTO DELL’IMBALLAGGIO: Nella cassa troverà i seguenti accessori: Proiettore Mini par di collegamento rapido 33708 - 33684 • Insieme proiettore •... -
Página 9: Messa In Servizio
3. Girare di 90º per togliere la flangia frontale del faro (Fig. 6), una volta fatto, girarla ed utilizzarla come chiave per togliere l’anello frontale del faro innestato a baionetta, mediante un giro verso sinistra (Fig. 4. Estrarre la lampada con riflettore e separarla dal portalampade allentando le due viti che la sostengono (Fig. - Página 10 Um die beste Leistung des Mini-scheinwerfer mit schnellverschluss, zu erzielen, empfiehlt es sich, die nachfolgenden Anweisungen zu befolgen: 1. ÜBERPRÜFEN SIE DEN INHALT DES PACKSTÜCKES: Im Inneren des Kartons befindet sich folgendes Zubehör: Mini-scheinwerfer mit schnellverschluss 33708 - 33684 • Satz strahler •...
-
Página 11: Sicherheitsvorschriften
5. WARTUNG: 1. Im Fall einer Installation mit Wanddurchgang muß der Strahler aus dem Swimmingpool herausgezogen werden (Fig.5). 2. Ist der Scheinwerfer mit einem farbigen Glas ausgestattet, dieses enfermen. 3. Die Schinwerferblende mit einer Drehung von 90º abnehmen (Fig. 6) . Die umgedrehte Blende dient zur Entfernung des Scheinwerferringes, wetcher nach links ausgerastet wird (Fig. -
Página 12: Verifique O Conteúdo Da Embalagem
Para conseguir um óptimo rendimento do Projector Mini de instalaçao rapida, é conveniente observar as instruções que se indicam abaixo: 1. VERIFIQUE O CONTEÚDO DA EMBALAGEM: No interior da caixa encontrará os seguintes acessórios: Projector Mini de instalaçao rapida 33708 - 33684 • Conjunto projector •... -
Página 13: Colocação Em Funcionamento
3. Girar 90º para tirar o embelecedor de projector (Fig. 6). Assim sendo, podemos utilizar o embelecedor como chave para retirar o anel do corpo do projector mediante uma volta para esquerda (Fig. 7). 4. Extrair a lâmpada com reflectore separá-la do porta-lâmpadas, afrouxando os dois parafusos que a prendem. - Página 15 ENGLISH Nº CODE DESCRIPTION 33708 33684 CANT 18881/18882 (*) Coloured lens: Red / Yellow (*) 18883/18884 (*) Coloured lens: Green / Blue (*) 17883R0003 Decorative key 08554R0005 Decorative cover 17883R0002 Floodlamp ring 08523 D.63 floodlamp lens 19334 GX-5.3 50W 12V Halogen bulb with reflector...
-
Página 16: Descripción
ESPAÑOL Nº CODIGO DESCRIPCIÓN 33708 33684 CANT 18881/18882 (*) Lente de color Rojo / Amarillo (*) 18883/18884 (*) Lente de color Verde / Azul (*) 17883R0003 Tapa embellecedora 08554R0005 Tapa embellecedora 17883R0002 Anillo proyector 08523 Lente D.63 proyector 19334 Lámpara halógena GX-5.3 50W 12V reflector... - Página 17 DEUTSCH Nº ARTIKEL NR. BESCHREIBUNG 33708 33684 MENG 18881/18882 (*) Farblinse Rot / Gelb (*) 18883/18884 (*) Farblinse Grün / Blau (*) 17883R0003 Verschönerungsdeckel 08554R0005 Verschönerungsdeckel 17883R0002 Ring des Kaltlichtslrahlers 08523 Linse D. 63 Kaltlichtslrahler 19334 Halogene lampe GX-5.3 50W 12V mit reflektor...
- Página 19 •...
- Página 20 CARACTERISTICAS TECNICAS • • DATI TECNICI • TECHNISCHE ANGABEN CARACTERISTICAS TECNICAS • Model: 33708 Model: 33684 DESCRIPTION Model “MINI” Rated voltage / tension nominale / Tensión nominal 12 V AC Tensione nominale / Anschlusspannung / Tensao nominal 12V AC 50 W Halogen lamp with aluminised reflector and front lens Réflecteur aluminise et lentille frontale...


