Publicidad
Enlaces rápidos
Asesoría y Servicio Técnico:
Consultancy and Technical
Service:
servicio.tecnico@helvex.com.mx
PIU-200
E-702
E-700
Hola soy Fluxy, te
ayudaré a instalar
tu producto.
Hi I'm Fluxy, I'll
help you to install
your product.
Herramientas y Materiales Recomendados /
Recommended Tools and Materials
perico
teflón
adjustable
plumber's
wrench
tape
Dimensiones para la Instalación
Ranure el muro con las dimensiones indicadas en los diagramas.
1
shown in the diagrams.
Vista Superior
/ Top View
pared con
acabado final
finished wall
A
*B
C
GUÍA DE INSTALACIÓN
INSTALLATION GUIDE
(52) 55 53 33 94 31
Agradecemos su elección por los productos HELVEX.
Estamos seguros de que su confiabilidad por el producto excederá sus más altas expectativas, cuya
funcionalidad, estética, durabilidad, respaldo integral y alta calidad le otorgarán plena satisfacción por años,
reflejando el compromiso con la calidad, innovación y el medio ambiente que forman parte de Helvex.
Thank you for choosing HELVEX products.
We are confident that the product reliability will exceed your maximum expectations. The functionality,
aesthetics, durability, quality and support will grant you full satisfaction for years, it is Helvex commitment to
the quality, innovation and the environment.
Para disminuir el riesgo de lesiones o daños a la propiedad, lea todas las instrucciones antes de instalar el
producto. Utilice gafas de seguridad. En obras de construcción, instalación, modificación, ampliación y
reparación deben cumplir con el reglamento de construcción y obras de su localidad. El producto ilustrado
puede sufrir cambios de aspecto como resultado de la mejora continua a la que está sujeto.
To reduce the risk of injury or property damage, read all instructions before installing the product. Please
remember to use safety glasses. In construction, installation, alteration, extension and repair, the rules of
constructions must be applied. As result of continuous improvement, the illustration product may change in
appearance.
Esta Guía de Instalación Aplica al Producto en Cualquier Acabado
This Installation Guide Applies to the Product in any Finishing
Requerimientos de Instalación
Requerimientos de Instalación
Installation Requirements
Installation Requirements
Para el correcto funcionamiento de éstos productos, se
recomiendan las siguientes presiones:
For the correct operation of these products, the following
pressures are recommended:
Mínima
Modelo
/ Model
kg/cm²
PIU-200,
1,0
E-700, E-702
desarmador de cruz
phillips screwdriver
/ Dimensions for Installation
1,2 cm (EDI) ERROR DE INSTALACIÓN
(0,49") (IE)
Vista Frontal
D
Modelo
/ Model
A
*B
10,3
10,9
11,6
PIU-200, E-700, E-702
(4,09)
4,33
(4,58)
Acotación: cm (pulg.)
/ Dimension: cm (inch.)
*Medidas Recomendadas
/ Recommended Dimensions
Refacciones Originales:
Original Spare Parts:
www.refaccioneshelvex.com.mx
refacciones@helvex.com.mx
ADVERTENCIA
/ Minimum
Máxima
/ Maximum
PSI
kPa
kg/cm²
14,22
98,06
6,0
85,3
cutter
silicón antihongos
antifungus silicone
/ Slot the wall with the dimensions
INSTALLATION ERROR
/ Front View
*1,20 m
(47,2")
NPT Nivel de Piso Terminado
FFL Finished Floor Level
C
D
10,0
(3,93)
1-05-2180-1
PIURA
VÉRTIKA
PREMIER
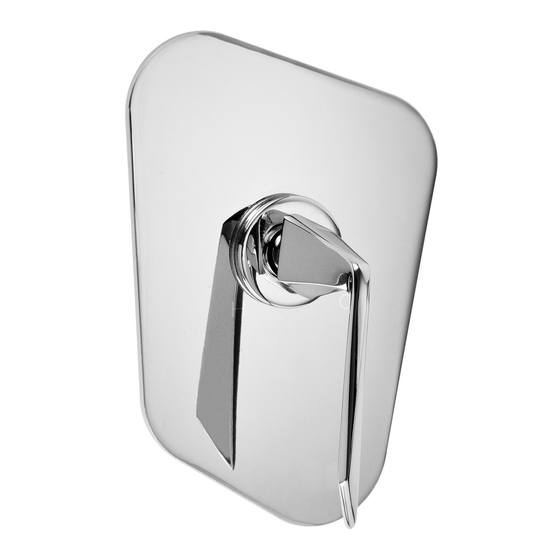
Monomando para Regadera o Tina sin Desviador
Single Handle Control for Shower or Tub Spout
(52) 55 53 33 94 00
(52) 55 53 33 94 21
Ext. 5913, 5068 y 4815
/ WARNING
Cada metro de altura de
su producto a la base del
tinaco equivalen a
(0,1 kg/cm²) [1,42 PSI].
Every meter of height of
your product to the base
PSI
kPa
of the tube is equivalent
to (0,1 kg/cm²) [1,42 PSI].
588,3
Artículos Incluidos en el Producto /
Hardware Included in the Product
llave allen 5/64"
llave para
5/64" allen wrench
mantenimeinto
maintenance
2
cámara
de aire
air chamber
NPT
30 cm
FFL
11,8"
max.
*20-30 cm
7,8"-11,8"
max.
tubo Ø ½" (no incluído)
Ø ½" tube (not included)
PIU-200
E-700
E-702
without Diverter
wrench
tapón
plug
*70 cm
27,5" min.
*1,90 m
74,8"
1,20 m
(47,2")
NPT
FFL
Publicidad

Resumen de contenidos para Helvex PIURA PIU-200
- Página 1 Thank you for choosing HELVEX products. We are confident that the product reliability will exceed your maximum expectations. The functionality, aesthetics, durability, quality and support will grant you full satisfaction for years, it is Helvex commitment to the quality, innovation and the environment.
- Página 2 Instalación General / General Installation Inserte la caja armada dentro del ranurado de la Enrosque los conectores con las tuberías a las conexiones de la válvula. / Screw pared, nivele y fije la instalación. / Insert the assembly the connectors with the pipes to the valve connections. box within the slotted wall, level and fix the installation.
- Página 3 Coloque el chapetón, enrosque la tuerca chapetón con la llave de mantenimiento (incluida), coloque el antifricción, el empaque y el chapetón maneral. Posteriormente coloque el maneral y fije Si el nivel de Instalación rebasó el Límite Máximo del indicador, enroscando el opresor con la llave allen (incluida). / Place the puede desplazar el porta cartucho hacia afuera 3 mm.
- Página 4 Visite nuestras páginas www.helvex.com.mx para México y www.helvex.com Visit our pages www.helvex.com.mx for Mexico and www.helvex.com para el mercado Internacional for the International market. HELVEX, S. A. DE C. V. Calzada Coltongo # 293, Col. Industrial Vallejo, Alcaldía Azcapotzalco, C. P. 02300, Ciudad de México.


