Tabla de contenido
Publicidad
Enlaces rápidos
Publicidad
Tabla de contenido

Resumen de contenidos para Rowenta DW52 Serie
- Página 1 DW52XX DW53XX DW82XX DW83XX www.rowenta.com...
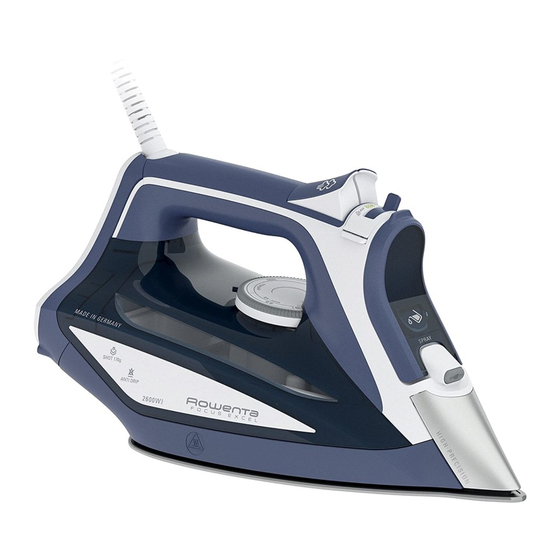
- Página 2 PRODUCT DESCRIPTION 1. Thermostat pilot light 2. Auto off indicator light* 3. Burst of steam button 4. Spray button 5. Steam lever 6. Filling inlet 7. Precision tip 8. Self clean 9. Anti calc valve 10. Anti drip 11. Temperature control dial DESCRIPTIF PRODUIT 1.
-
Página 3: Important Safety Instructions
IMPORTANT SAFETY SAVE THESE INSTRUCTIONS INSTRUCTIONS FOR YOUR SAFETY PLEASE READ THESE INSTRUCTIONS CAREFULLY AND KEEP THEM READ ALL INSTRUCTIONS BEFORE USING THE FOR FUTURE REFERENCE. IRON. This appliance complies with the technical rules and standards for When using your iron, basic safety precautions should always be safety currently in force (Electromagnetic Compa ti-bility, Low Voltage, followed, including the following: Environnement). - Página 4 • This product has been designed for domesic and indoor use only. If there is a problem? The manufacturer will accept no responsibility and the gua-rantee will be terminated, if this product is used for commercial purposes, inappropriate use or failure to comply with the instructions. PROBLEM POSSIBLE CAUSE SOLUTION...
-
Página 5: Consignes De Securite
CONSERVEZ CES INSTRUCTIONS CONSIGNES DE SECURITE POUR VOTRE SÉCURITÉ MERCI DE LIRE LISEZ ENTIÈREMENT LE MODE D’EMPLOI AVANT D’UTILISER LE FER. ATTENTIVEMENT CE MODE D’EMPLOI ET DE LE CONSERVER. Lorsque vous utilisez votre fer à repasser, veillez à prendre quelques précautions élémentaires, les suivantes, en particulier : Pour votre sécurité, cet appareil est conforme aux normes et 1. -
Página 6: Protection De L'environnement
vapeur qui peut occasionner des brûlures, spécialement lorsque vous Y a-t-il un problème ? repassez sur un angle de votre table à repasser. Ne dirigez jamais la vapeur sur des personnes ou des animaux. • Votre fer doit être utilisé et posé sur une surface stable résistant à la PROBLÈME CAUSE POSSIBLE SOLUTION... -
Página 7: Instrucciones De Seguridad
INSTRUCCIONES DE el cable de forma que sea imposible jalar de él o tropezar con él por inadvertencia. Si el cordón de alimentación es dañado, éste debe ser SEGURIDAD reemplazado por el fabricante o su agente de servicio o por personal calificado para evitar el riesgo. - Página 8 • La suela de la plancha puede estar muy caliente : no la toque nunca y En caso de algún problema deje que la plancha se enfríe antes de guardarla. El aparato emite vapor que puede producir quemaduras, especialmente cuando planche en un PROBLEMA POSIBLE CAUSA SOLUCIÓN...
- Página 9 1. SET UP / MISE EN ROUTE / PONER EN MARCHA Stop filling water when MAX level is reached. Remove the soleplate cover. Arrêtez de remplir le réservoir lorsque Enlevez la protection de la semelle. le niveau MAX est atteint. Retire la proteccion de la suela.
- Página 10 When Auto Off function is on the Auto The pilot light is switched on when the Off indicator light blinks and the iron iron is heating up. starts to cool down. Le voyant lumineux est allumé lorsque Lorsque la fonction Arrêt Automatique le fer est en chauffe.
- Página 11 3. SETTING THE TEMPERATURE 6. SHOT OF STEAM / JET DE VAPEUR / GOLPE DE VAPOR Set the thermostat knob on MAX position. Synthetics Placez le bouton de thermostat sur la Wool - Silk position MAX. Linen - Cotton Girar el botón de termostato al MAX. 4.
- Página 12 7. VERTICAL STEAM / VAPEUR VERTICALE / VAPOR VERTICAL Do not do vertical steaming on yourself Set the thermostat knob on MAX or on others. position. Ne défroissez pas verticalement sur Placez le bouton de thermostat sur la vous même ou sur les autres. position MAX.
- Página 13 Do not use detergent to clean the queda adento agua. soleplate. We recommend the Rowenta soleplate cleaning kit. Do not use sharp Let the iron cool down for 1 hour after or abrasive cleaning accessories to unplugging it.
- Página 14 11. CLEANING THE ANTI CALC VALVE (every two months) NETTOYAGE DE LA TIGE ANTI Wrap the cord around the iron’s heel and store it in vertical position. CALCAIRE (tous les deux mois) LIMPIEZA DE LA VARILLA Enroulez le cordon autour du talon du fer et rangez le en position verticale.
- Página 15 Soak the anti calc valve in a cup of plain lemon juice or a cup of white vinegar for 4 hours. WARNING: never touch the end of the valve. Empty the water tank over a sink. Laissez tremper la tige anti calcaire pendant 4 heures dans un verre de Videz le réservoir au dessus d’un évier.
- Página 16 12. SELF CLEANING ( every two ) / AUTO NETTOYAGE ( weeks toutes ) / AUTOLIMPIEZA les 2 semaines Set the thermostat knob on MAX position. cada 2 semanas Placez le bouton de thermostat sur la We recommend to clean the calc position MAX.
- Página 17 Hold the iron over a sink. Replace the anti calc valve into position. CLICK Tenez votre fer au dessus d’un évier. Remettez la tige anti calcaire en place. Colocar la plancha sobre un lavabo. Volver a colocar la válvula anticálcarea. Push the 2 buttons on the left &...
- Página 18 Una vez que la suela haya enfriado puede limpiarla con un trapo húmedo ó con un estropajo. Do not use detergent to clean the soleplate. We recommend the Rowenta soleplate cleaning kit. Do not use sharp or abrasive cleaning accessories to clean the soleplate.
- Página 19 1103916933/02...


