Publicidad
Enlaces rápidos
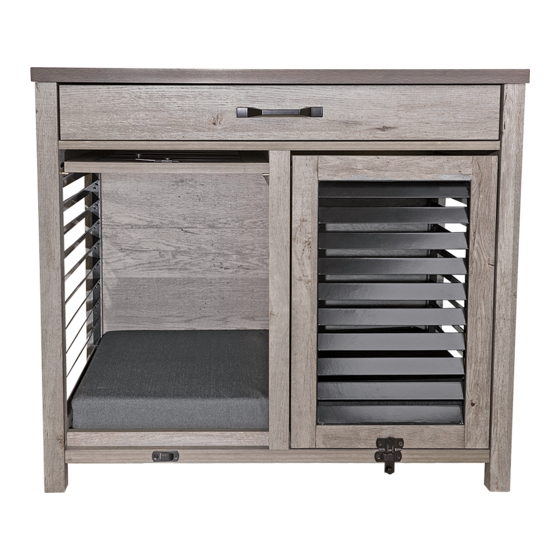
WHISKER BARRISTER DOG CRATE
support@whisker.com | 1.877.250.7729 | Mon-Fri, 9am-5pm EST
If you have assembly questions or need a replacement part, please contact Sauder directly at
www.sauder.com or 800-445-1527.
Customer Service is available Monday-Friday - 9 a.m. to 5:30 p.m. EST (except holidays)
Publicidad

Manuales relacionados para Sauder whisker barrister dog crate


Resumen de contenidos para Sauder whisker barrister dog crate
- Página 1 WHISKER BARRISTER DOG CRATE support@whisker.com | 1.877.250.7729 | Mon-Fri, 9am-5pm EST If you have assembly questions or need a replacement part, please contact Sauder directly at www.sauder.com or 800-445-1527. Customer Service is available Monday-Friday - 9 a.m. to 5:30 p.m. EST (except holidays)
- Página 2 THANK YOU FOR PURCHASING THE BARRISTER DOG CRATE! I am thrilled that Whisker and Sauder furniture have partnered together to bring you the highest-quality pet furniture. At Whisker, we design and deliver refined pet accessories that delight both pets and people. Whisker and Sauder products...
- Página 3 PART IDENTIFICATION Now you know our ABCs. å While not all parts are labeled, some of the parts will have a label or an inked letter on the edge to help distinguish similar parts from each other. Use this part identification to help identify similar parts. TOP (1) RIGHT END (1) DRAWER BACK (1)
- Página 4 HARDWARE IDENTIFICATION å Screws are shown actual size. You may receive extra hardware with your unit. (EXTENSION SET SHOWN SEPARATED) EXTENSION EXTENSION HIDDEN RAIL - 2 SLIDE - 2 CAM - 21 SCREW - 21 LARGE WOOD SMALL WOOD BUSHING - 4 GROMMET - 1 DOWEL - 28 DOWEL - 2...
- Página 5 HARDWARE IDENTIFICATION å Screws are shown actual size. You may receive extra hardware with your unit. 2" HEX HEAD SCREW - 1 2" PAN HEAD SCREW - 2 1-9/16" PAN HEAD SCREW - 5 1-3/16" FLAT HEAD SCREW - 4 13/16"...
- Página 6 HARDWARE USAGE GUIDE HOW TO USE A HIDDEN CAM & CAM SCREW OR CAM DOWEL NOTE: Various CAM SCREWS or a CAM DOWEL may be used. Turn the CAM SCREW or gently tap the CAM DOWEL until the shoulder is against the surface of the part.
- Página 7 STEP 1 View our assembly video at www.whisker.com/support å NOTE: You will need someone's help later in assembly. Go on, spoil 'em Assemble your unit on a carpeted floor or å a little. on the empty carton to avoid scratching your unit or the floor.
- Página 8 STEP 2 Push four HIDDEN CAMS (3) into the BOTTOM (C). å NOTE: Be sure the HIDDEN CAMS are completely å inserted into the holes. å Insert two LARGE WOOD DOWELS (5) into the BOTTOM MOLDING (H). å Fasten the BOTTOM (C) to the BOTTOM MOLDING (H). Use three 1-9/16"...
- Página 9 STEP 3 å Push four HIDDEN CAMS (3) into the SHELF (B). Insert one LARGE WOOD DOWEL (5) into the SHELF (B). å å Fasten the SHELF (B) to the UPRIGHT (S). Use two 1-9/16" PAN HEAD SCREWS (18). NOTE: You should start each SCREW a few turns å...
- Página 10 STEP 4 Fasten the BOTTOM (C) to the UPRIGHT (S). å Use one 2" PAN HEAD SCREW (17). 2" PAN HEAD SCREW (1 used in this step) w i t r f a H I D whiskersupport.com Page 10 429421...
- Página 11 STEP 5 å Push three HIDDEN CAMS (3) into the BACKS (D and E). Insert three LARGE WOOD DOWELS (5) into the edge of å the UPPER BACK (D). å Push the LOWER BACK (E) onto the WOOD DOWELS in the UPPER BACK (D).
- Página 12 STEP 6 NOTE: You will need someone's help in this step. å Insert two LARGE WOOD DOWELS (5) into the å LOWER BACK (E). å Fasten the BOTTOM (C) to the LOWER BACK (E). Use one 2" PAN HEAD SCREW (17). å...
- Página 13 STEP 7 å Turn five CAM SCREWS (4) into the RIGHT END (G). Push two HIDDEN CAMS (3) into the RIGHT END (G). å å Fasten one BUSHING (7) to the RIGHT END (G). Use one 9/16" MACHINE SCREW (21). The large hole must be here.
- Página 14 STEP 8 å Separate the EXTENSION SLIDES (2) from the EXTENSION RAILS (1) as shown in the upper diagram below. Be prepared, the parts are greasy. Fasten one EXTENSION RAIL (1) to the RIGHT END (G). Use three 1/2" FLAT HEAD SCREWS (23). å...
- Página 15 STEP 9 Insert seven LARGE WOOD DOWELS (5) into å the RIGHT END (G). Hey! It's starting to look like å Fasten the RIGHT END (G) to the SHELF (B), something! BOTTOM (C), and LOWER BACK (E). Tighten five HIDDEN CAMS. NOTE: Be sure the WOOD DOWELS in the å...
- Página 16 STEP 10 Turn five CAM SCREWS (4) into the LEFT END (F). å Push two HIDDEN CAMS (3) into the LEFT END (F). å Fasten one BUSHING (7) to the LEFT END (F). Use å one 9/16" MACHINE SCREW (21). Arrow 9/16"...
- Página 17 STEP 11 å Fasten one EXTENSION RAIL (1) to the LEFT END (F). Use three 1/2" FLAT HEAD SCREWS (23). NOTE: For each EXTENSION RAIL, turn a SCREW into å the 1st hole shown in the diagram. Then, slide the inner cartridge of the EXTENSION RAIL in to find the other holes that line up with the holes in the END.
- Página 18 STEP 12 Insert seven LARGE WOOD DOWELS (5) into å the LEFT END (F). å Fasten the LEFT END (F) to the SHELF (B), BOTTOM (C), and LOWER BACK (E). Tighten five HIDDEN CAMS. å NOTE: Be sure the WOOD DOWELS in the END insert into the SHELF, BOTTOM, and both BACKS.
- Página 19 STEP 13 å Fasten the FOOT (K) to the BOTTOM (C). Tighten one 2" HEX HEAD SCREW (16) using the L-WRENCH (15). Peel FELT DISCS from the FELT DISC CARD (12) å and stick them onto the FOOT (K) and each LEG. 2"...
- Página 20 STEP 14 Turn five CAM SCREWS (4) into the TOP (A). å Insert six LARGE WOOD DOWELS (5) into å the TOP (A). å Fasten the TOP (A) to the UPPER BACK (D) and ENDS (F and G). Tighten five HIDDEN CAMS.
- Página 21 STEP 15 å Fasten the LATCHES from the LATCH SETS (10) to the DOORS (J). Use four 9/16" FLAT HEAD SCREWS (22). Fasten two PIVOT HINGES (11) to the LEFT å sides of the DOORS (J). Use six 1/2" FLAT HEAD SCREWS (23).
- Página 22 STEP 16 Carefully stand your unit upright. å Insert the POSTS in two PIVOT HINGES (11) into the å tracks in the RIGHT END (G) and UPRIGHT (S). å NOTE: The PIVOT HINGES will hang down. Fasten the CATCHES from the LATCH SETS (10) to the å...
- Página 23 STEP 17 å With someone's help, fasten the PIVOT HINGE in the UPRIGHT (S) to the RIGHT side of the DOOR (J) as shown. Use three 1/2" FLAT HEAD SCREWS (23). å Repeat this step for the other DOOR using the PIVOT HINGE in the RIGHT END (G).
- Página 24 STEP 18 å Remove the POWER PLUG from the USB END of the USB POWER HUB (14). Feed the USB END through the hole in the å RIGHT END (G) and out through the hole in the UPPER BACK (D). The USB PORT END will snugly insert into the å...
- Página 25 STEP 19 Turn six CAM SCREWS (4) into the DRAWER å FRONT (M) and DRAWER BACK (N). If you're doing this to help a friend, don't å Push six HIDDEN CAMS (3) into the DRAWER leave without a bite. SIDES (O and P) and DRAWER BRACE (Q). Arrow Arrow whiskersupport.com...
- Página 26 STEP 20 Fasten the DRAWER SIDES (O and P) to the DRAWER BACK (N). å Use four 1-3/16" FLAT HEAD SCREWS (19). å NOTE: You should start each SCREW a few turns before completely tightening any of them. Insert one SMALL WOOD DOWEL (6) into the DRAWER BACK (N). å...
- Página 27 STEP 21 å Slide the DRAWER BOTTOM (R) into the grooves in the DRAWER SIDES (O and P) and DRAWER BACK (N). Insert one SMALL WOOD DOWEL (6) into the DRAWER FRONT (M). å å Fasten the DRAWER FRONT (M) to the DRAWER SIDES (O and P) and DRAWER BRACE (Q).
- Página 28 STEP 22 Fasten two EXTENSION SLIDES (2) to the å DRAWER SIDES (O and P). Use six 1/2" FLAT HEAD SCREWS (23). Fasten one PULL (9) to the DRAWER FRONT (M). å Use two 13/16" MACHINE SCREWS (20). 1/2" FLAT HEAD SCREW (6 used for the SLIDES) Open end Open end...
- Página 29 STEP 23 å To insert the drawer into your unit, line up the EXTENSION SLIDES on the drawer with the EXTENSION RAILS on the unit and push the drawer into the unit until the drawer is fully inserted. The drawer will push in hard until it is all the way in, then it will slide in and out easier.
- Página 30 STEP 24 Peel APPLIQUES from the APPLIQUE CARD (13) and stick them onto each visible HIDDEN å CAM in the DRAWER SIDES (O and P). å NOTE: Please read the back pages of the instruction booklet for important safety information. å...
- Página 31 REFERENCE DESCRIPTION QUANTITÉ conserver le livret pour future référence. DESSUS ........1 (ENSEMBLE DE GLISSIÈRE ILLUSTRÉ À PART) Pour contacter Sauder GLISSIÈRE D'EXTENSION ..2 TABLETTE ........1 en ce qui concerne cet élément, faire COULISSE D'EXTENSION ..2 DESSOUS ........1 référence au numéro EXCENTRIQUE ESCAMOTABLE 21 ARRIÈRE SUPÉRIEUR....1...
- Página 32 Guide d'utilisation de la visserie ÉTAPE 3 UTILISATION DE LA EXCENTRIQUE Enfoncer quatre EXCENTRIQUES ESCAMOTABLES (3) ESCAMOTABLE ET DE LA VIS D'EXCENTRIQUE dans la TABLETTE (B). OU DE LA CHEVILLE D’EXCENTRIQUE Insérer une GRANDE CHEVILLE EN BOIS (5) dans REMARQUE : Plusieurs VIS D'EXCENTRIQUE ou une la TABLETTE (B).
- Página 33 ÉTAPE 7 ÉTAPE 10 Faire tourner cinq VIS D'EXCENTRIQUE (4) dans Faire tourner cinq VIS D'EXCENTRIQUE (4) dans l'EXTRÉMITÉ DROITE (G). l’EXTRÉMITÉ GAUCHE (F). Enfoncer deux EXCENTRIQUES ESCAMOTABLES (3) Enfoncer deux EXCENTRIQUES ESCAMOTABLES (3) dans l'EXTRÉMITÉ DROITE (G). dans l’EXTRÉMITÉ GAUCHE (F). Fixer un MANCHON (7) à...
- Página 34 ÉTAPE 13 ÉTAPE 17 Fixer le PIED (K) au DESSOUS (C). Serrer une VIS À l'aide d'une autre personne, fixer la CHARNIÈRE TÊTE HEX 51 mm (16) à l’aide de la CLÉ EN L (15). À PIVOT dans le MONTANT (S) à côté DROIT de la PORTE (J) comme l'indique le schéma.
- Página 35 ÉTAPE 20 ÉTAPE 22 Fixer les CÔTÉS DE TIROIR (O et P) à Fixer deux COULISSES D'EXTENSION (2) aux l'ARRIÈRE DE TIROIR (N). Utiliser quatre VIS CÔTÉS DE TIROIR (O et P). Utiliser six VIS TÊTE TÊTE PLATE 30 mm (19). PLATE 13 mm (23).
- Página 36 BUJE ..........4 futura. Si necesita OJAL ..........1 ESTANTE ........1 ponerse en contacto FONDO .........1 TIRADOR ........1 con Sauder en cuanto a esta unidad, DORSO SUPERIOR .....1 CONJUNTO DE PESTILLO ..2 refiérase al número DORSO INFERIOR .......1 BISAGRA DE PIVOTE ....4 de lote y al número...
- Página 37 Guía de uso de herrajes PASO 3 CÓMO UTILIZAR EL EXCÉNTRICO ESCONDIDO Y LA Empuje cuatro EXCÉNTRICOS ESCONDIDOS (3) BIELA DE EXCÉNTRICO O PASADOR DE EXCÉNTRICO dentro del ESTANTE (B). NOTA: Varias BIELAS DE EXCÉNTRICO o un PASADOR Inserte un PASADOR DE MADERA GRANDE (5) en DE EXCÉNTRICO pueden ser utilizados.
- Página 38 PASO 7 PASO 10 Atornille cinco BIELAS DE EXCÉNTRICO (4) en el Gire cinco BIELAS DE EXCÉNTRICO (4) en el EXTREMO DERECHO (G). EXTREMO IZQUIERDO (F). Empuje dos EXCÉNTRICOS ESCONDIDOS (3) en el Empuje dos EXCÉNTRICOS ESCONDIDOS (3) en EXTREMO DERECHO (G). el EXTREMO IZQUIERDO (F).
- Página 39 PASO 13 PASO 17 Fije la PATA (K) al FONDO (C). Apriete uno TORNILLO Con la ayuda de otra persona, fije la BISAGRA DE DE CABEZA HEXAGONAL de 51 mm (16) utilizando la PIVOTE en el PARAL (S) al lado DERECHO de la LLAVE EN L (15).
- Página 40 PASO 20 PASO 22 Fije los LADOS DE CAJÓN (O y P) al DORSO DE Fije dos CORREDERAS DE EXTENSIÓN (2) a los CAJÓN (N). Utilice cuatro TORNILLOS DE CABEZA LADOS DE CAJÓN (O y P). Utilice seis TORNILLOS DE PERDIDA de 30 mm (19).
- Página 41 WARNING Please use your furniture correctly and safely. Improper use can cause safety hazards, or damage to your furniture or household items. Carefully read the following chart. Look out for: What can happen: How to avoid the problem: • Children climbing on furniture. •...
- Página 42 ADVERTENCIA Por favor use el mobiliario correcta y seguramente. El mal uso puede causar riesgos de seguridad o daño a las unidades o artículos domésticos. Cuidadosamente lea la tabla a continuación. Esté alerto de: Puede ocurrir: Evitar el problema: • Los niños subiendo al mobiliario. •...
- Página 43 “as is”, at a distress or going-out-of business sale, or from a liquidator. whichever is shorter. Some states do not allow limitations on how long an 3. As the exclusive remedy under this Warranty, Sauder will (at its sole implied Warranty lasts, so the above limitation may not apply to you.
- Página 44 | 1.877.250.7729 | Mon-Fri, 9am-5pm EST (except holidays) WHISKERSUPPORT.COM General Conformity Certificate 1. This certificate applies to the Sauder Global Sourcing Product identified by this Instruction Book. 2. This certificate applies to compliance of this product with the CPSC Ban on Lead-Containing Paint (16 CFR 1303).