Tabla de contenido
Publicidad
Idiomas disponibles
Idiomas disponibles
Enlaces rápidos
Publicidad
Tabla de contenido
Solución de problemas

Manuales relacionados para Oster POGYME1502G


Resumen de contenidos para Oster POGYME1502G
- Página 1 MODELO / POGYME1502G POGYME1502G MODEL Manual de instrucciones HORNO DE MICROONDAS PARA MOSTRADOR LEA TODAS LAS INSTRUCCIONES ANTES DE USAR ESTE APARATO Instruction Manual COUNTERTOP MICROWAVE OVEN PLEASE READ ALL INSTRUCTIONS BEFORE USING THIS APPLIANCE...
- Página 2 ÍNDICE Precauciones importantes................ 2 Instrucciones importantes de seguridad............. 3 Reducir lesiones a las personas..............5 Limpieza y utensilios................. 6 Instrucciones de operación............... Solución de problemas................Es paño l-1...
- Página 3 ANEXO Si el aparato no se mantiene en buen estado de limpieza, su superficie podría degradarse y afectar la vida útil del aparato y provocar una situación de peligro. ESPECIFICACIONES POGYME1502G Modelo: 220V~60Hz 220V~ 0Hz Voltaje nominal:...
-
Página 4: Instrucciones Importantes De Seguridad
INSTRUCCIONES IMPORTANTES DE SEGURIDAD ADVERTENCIA: Para reducir el riesgo de incendio, descarga eléctrica, lesiones a personas o la exposición a un horno de microondas excesivo energía al utilizar su aparato, siga las precauciones, incluyendo las siguientes: 1. Lea y siga las "PRECAUCIONES PARA EVITAR LA POSIBLE EXPOSICIÓN A UN EXCESO DE ENERGÍA DE MICROONDAS". - Página 5 16. El aparato no debe instalarse detrás de una puerta decorativa para evitar el sobrecalentamiento. (Esto no es aplicable a los aparatos con puerta decorativa). 17. Utilice únicamente la sonda de temperatura recomendada para este horno (para hornos provistos de la posibilidad de utilizar una sonda de temperatura). 18.
-
Página 6: Para Reducir El Riesgo De Lesiones A Las Personas
Para reducir el riesgo de lesiones a las personas Instalación de la toma de tierra: PELIGRO Peligro de descarga eléctrica tocar algunos de los componentes internos puede causar lesiones personales graves o la muerte. No desmonte este aparato. Consulte a un electricista o técnico cualificado si las instrucciones de conexión a tierra no se entienden completamente o si existen dudas sobre si el aparato está... -
Página 7: Limpieza Y Utensilios
LIMPIEZA Y UTENSILIOS LIMPIEZA Asegúrese de desenchufar el aparato de la red eléctrica. 1. Limpie la cavidad del horno después de usarlo con un paño ligeramente húmedo. 2. Limpie los accesorios de la forma habitual con agua jabonosa. 3. El marco y la junta de la puerta y las partes vecinas deben limpiarse cuidadosamente con un paño húmedo cuando estén sucios. - Página 8 Materiales que puede usar en el microondas Observaciones Utensilios Plato de dorar Siga las instrucciones del fabricante. El fondo de la bandeja de dorado debe estar al menos 3/16 pulgadas (5mm) por encima del plato giratorio. Un uso incorrecto puede provocar la rotura del plato giratorio.
- Página 9 Materiales que deben evitarse en el horno de microondas Utensilios Observaciones Bandeja de aluminio Puede producirse un arco eléctrico. Transfiera los alimentos a un plato apto para microondas. Caja de cartón para alimentos Puede producirse un arco eléctrico. Transfiera los alimentos a un con asa metálica plato apto para microondas.
-
Página 10: Instalación Del Plato Giratorio
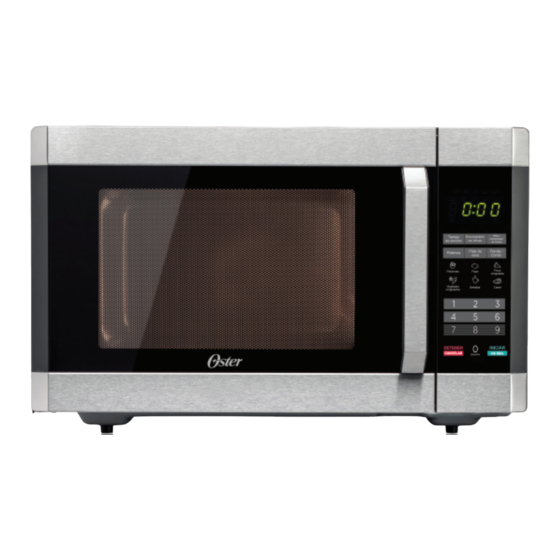
¿CÓMO PREPARAR EL HORNO? Nombres de las piezas y accesorios del horno Saque el horno y todos los materiales de la caja de cartón y de la cavidad del horno. Su horno viene con los siguientes accesorios: Bandeja de vidrio Conjunto de anillo giratorio Manual de instrucciones A) Panel de control... -
Página 11: Instalación
Instalación de la encimera Retire todo el material de embalaje y los accesorios. Gabinete: Retire cualquier película protectora que se Examine el horno para ver si hay algún daño, como encuentre en la superficie del gabinete del horno abolladuras o una puerta rota. No instale el horno si microondas. - Página 12 INSTRUCCIONES DE OPERACIÓN 1. Nivel de potencia 10 niveles de potencia disponibles. Nivel 100% Potencia PL10 Indicador 2. Ajuste del reloj (1) Pulse "Reloj/Temporizador de cocina" una vez, aparecerá "00:00". (2) Pulse las teclas numéricas e introduzca la hora actual. Por ejemplo, la hora actual es 12:10, por favor pulse "1,2,1,0"...
- Página 13 Ejemplo: cocinar los alimentos con una potencia de microondas del 50% durante 15 minutos. a. Pulse una vez "Tiempo de cocción". Aparece "00:00". b. Pulse "1", "5", "0", "0" en orden. c. Pulse "Power" una vez, luego pulse "5" para seleccionar el 50% de la potencia del microondas. d.
- Página 14 7. Cocina rápida (1) En estado de espera, la cocción instantánea al 100% de potencia puede iniciarse seleccionando un tiempo de cocción de 1 a 6 minutos pulsando los botones numéricos 1 a 6. Pulse "INICIAR/+30SEG." para aumentar el tiempo de cocción; el tiempo máximo de cocción es de 99 minutos y 99 segundos.
- Página 15 11. Cocina rápida (a) Pulse repetidamente "Papas" hasta que aparezca el número que desee en la pantalla, "1", "2", "3" aparecerán en orden. "1 "SET : 1 papa (aproximádamente 230 gramos) "2 "SETS: 2 papas (aproximádamente 460 gramos) "3 "SETS: 3 papas (aproximádamente 690 gramos) Por ejemplo, si pulsa una vez "Papas", aparecerá...
- Página 16 C) Menú de Carne de Cerdo (a) Pulse tres veces "Carnes" para elegir el menú de carne de cerdo, aparece "PO". (b) Pulse "INICIAR/+30SEG." para confirmar el menú. Aparece "150". (c) Mantenga pulsado "Carnes" para elegir el peso del cerdo. Se pueden seleccionar "300", "450", "600"...
- Página 17 18. Función de bloqueo para niños Bloqueo: En estado de espera, pulse "DETENER/CANCELAR" durante 3 segundos, se escuchará un largo "bip" que indica la entrada en el estado de bloqueo para niños; mientras tanto, la pantalla mostrará Salir del bloqueo: En estado de bloqueo, pulse "DETENER/CANCELAR" durante 3 segundos, habrá...
- Página 18 21. Función de recordatorio de fin de cocción Cuando la cocción haya terminado, el zumbador emitirá 5 "bips" para avisar al usuario de que la cocción ha terminado. 22. Otras especificaciones (1) En estado de espera, si el tubo digital del reloj ajustado muestra la hora actual, el icono ":"...
-
Página 19: Solución De Problemas
SOLUCIÓN DE PROBLEMAS La recepción de radio y televisión puede verse afectada por el funcionamiento del horno microondas. Es similar a la interferen- El horno microondas interfiere cia de los pequeños aparatos eléctricos, como la batidora, la en la recepción de la televisión aspiradora y el ventilador eléctrico. -
Página 20: Tabla De Contenido
INDEX Precautions to avoid possible exposure to excessive microwave energy..............2 Important safety instructions..............3 To reduce the risk of injury to persons............5 Cleaning and utensils................6 Operating instructions................Trouble Shooting..................Eng li sh -1... -
Página 21: Precautions To Avoid Possible Exposure
ADDENDUM If the appliance is not kept in a good state of cleanliness, its surface may degrade and affect the life of the appliance and cause a hazardous situation. ESPECIFICACIONES POGYME1502G Model: 220V~60Hz 220V~ 0Hz Rated Voltage:... -
Página 22: Important Safety Instructions
IMPORTANT SAFETY INSTRUCTIONS WARNING: To reduce the risk of fire, electric shock, injury to persons, or exposure to excessive microwave oven energy when using your appliance, follow the precautions, including the following: 1. Read and follow the "PRECAUTIONS TO AVOID POSSIBLE EXPOSURE TO EXCESS MICRO- WAVE ENERGY". - Página 23 16. The appliance must not be installed behind a decorative door to prevent overheating. (This does not apply to appliances with a decorative door). 17. Use only the temperature probe recommended for this oven (for ovens equipped with the possibility of using a temperature probe).
-
Página 24: To Reduce The Risk Of Injury To Persons
To reduce the risk of injury to persons Installation of the grounding system: DANGER Electric shock hazard touching some of the internal components can cause serious personal injury or death. Do not disassemble this appliance. Consult a qualified electrician or serviceman if the grounding instructions are not completely understood or if there is any doubt as to whether the appliance is properly grounded. -
Página 25: Cleaning And Utensils
CLEANING AND UTENSILS CLEANING Be sure to unplug the unit from the mains. 1. Clean the oven cavity after use with a slightly damp cloth. 2. Clean the accessories in the usual way with soapy water. 3. The door frame and gasket and neighboring parts should be carefully wiped with a damp cloth when dirty. - Página 26 Materials you can use in microwave oven Remarks Utensils Browning dish Follow the manufacturer's instructions. The bottom of the browning pan must be at least 3/16 inch (5mm) above the turntable. Incorrect use may cause the turntable to break. Dinnerware Microwave safe only.
- Página 27 Materials to be avoided in the microwave oven Utensils Remarks Aluminum tray May cause arcing. Transfer food into microwave-safe dish. Food carton with metal May cause arcing. Transfer food into microwave-safe dish. handle Metal or metal-trimmed Metal shields the food from microwave energy. Metal trim may utensils cause arcing.
-
Página 28: Names Of Oven Parts And Accessories
SETTING UP YOUR OVEN Names of oven parts and accessories Remove the oven and all materials from the carton and oven cavity. Your oven comes with the following accessories: Glass tray Turntable ring assembly Instruction Manual A) Control panel B) Turntable shaft C) Turntable ring assembly D) Glass tray E) Observation window... - Página 29 Instalación de la encimera Retire todo el material de embalaje y los accesorios. Gabinete: Retire cualquier película protectora que se Examine el horno para ver si hay algún daño, como encuentre en la superficie del gabinete del horno abolladuras o una puerta rota. No instale el horno si microondas.
-
Página 30: Operating Instructions
OPERATING INSTRUCTIONS 1. Power Level 10 power levels are available. Level Power 100% Display PL10 2. Clock Setting Clock/Kitchen Timer (1) Press " "once, "00:00" will display. (2) Press the number keys and enter the current time. For example, time is 12:10 now, please press " 1,2,1,0 " in turn. (3) Press "... - Página 31 Example: cooking food at 50% microwave power for 15 minutes. a. Press "Cooking time" once. 00:00" appears. b. Press "1", "5", "0", "0" in order. c. Press "Power" once, then press "5" to select 50% microwave power. d. Press "START/+30SEG." to start cooking. Note: (1) In the setting process, if the "STOP/ CANCEL"...
- Página 32 7. Quick cooking (1) In standby mode, instantaneous cooking at 100% power can be started by selecting a cooking time from 1 to 6 minutes by pressing the number buttons 1 to 6. Press "START/+30SEC." to increase the cooking time; the maximum cooking time is 99 minutes and 99 seconds.
- Página 33 11. Quick cooking (a) Press "Potato" repeatedly until the desired number appears on the display, "1", "2", "3" will appear in order. "1 "SETS : 1 potato (approx. 230 grams) "2 "SETS: 2 potatoes (approximately 460 grams) "3 "SETS: 3 potatoes (approximately 690 grams). For example, if you press "Potatoes"...
- Página 34 C) Pork Menu (a) Press "Meat" three times to select the pork menu, "PO" is displayed. (b) Press "START/+30SEG." to confirm the menu. 150" appears. (c) Press and hold "Meats" to choose the weight of pork. You can select "300", "450", "600" or "750"...
- Página 35 18. Lock function for children Lock: In standby status, press "STOP/CANCEL" for 3 seconds, there will be a long "beep" indicating entering into the child lock status; meanwhile, the display will show Exit lock: In lock status, press "STOP/CANCEL" for 3 seconds, there will be a long "beep" indicating the lock is released.
- Página 36 21. Cooking end reminding function When cooking is finished, the buzzer will beep 5 times to alert the user that cooking is finished. 22. Other specifications (1) In standby status, if the set digital clock tube shows the current time, the ":" icon will flash;...
-
Página 37: Trouble Shooting
Trouble Shooting It is forbidden to run the unit without any food inside. It is very dangerous. According to Waste of Electrical and Electronic Equipment (WEEE) directive, WEEE should be separately collected and treated. If at any time in future you need to dispose of this product please do NOT dispose of this product with household waste. -
Página 38: Impreso En China
Household Solutions, S.A., licenciatario oficial de este producto. Garantía limitada de un año. HECHA EN CHINA © 2022 Sunbeam Products, Inc. All rights reserved. The Oster™ logo is a trademark of Sunbeam Products, Inc. used under license. Manufactured, distributed or sold by Household Solutions, S.A., official licensee for this product.