Tabla de contenido
Publicidad
Idiomas disponibles
Idiomas disponibles
Enlaces rápidos
Publicidad
Capítulos
Tabla de contenido

Manuales relacionados para Oster POGYME3703M


Resumen de contenidos para Oster POGYME3703M
- Página 1 MODELO POGYME3703M Manual de instrucciones HORNO MICROONDAS PARA COCINA POR FAVOR LEA TODAS LAS INSTRUCCIONES ANTES DE USAR ESTE APARATO Instruction manual KITCHEN MICROWAVE PLEASE READ ALL INSTRUCTIONS BEFORE USING THIS DEVICE...
-
Página 3: Tabla De Contenido
ÍNDI C E INSTRUCCIONES DE SEGURIDAD IMPORTANTES........2 GUÍA DE INSTALACIÓN................4 INSTRUCCIONES DE CONEXIÓN...............4 DIAGRAMA DEL PRODUCTO..............7 PANEL DE CONTROL................8 INSTRUCCIONES DE OPERACIÓN.............9 GUÍA DE UTENSILIOS................14 ESPECIFICACIONES................15 MANTENIMIENTO..................16 Esp año l-1... -
Página 4: Impor Tan Te Ins Tr Ucci Ones De Segur Ida D
IMPOR TAN TE INS TR UCCI ONES DE SEGUR IDA D Cuando utilice aparatos eléctricos debe seguir instrucciones de seguridad básicas, incluyen- do las siguientes: ADVERTENCIA: Para reducir el riesgo de quemaduras, choque eléctrico, incendio, lesiones a personas o exposición a energía de microondas excesiva: 1. - Página 5 Para reducir el riesgo de lesiones a personas: 1. No sobrecaliente los líquidos. 2. Revuelva el líquido antes y a la mitad de la cocción. 3. No use contenedores con lados rectos y cuellos angostos. 4. Después de calentar, permita que el contenedor se mantenga en el horno microondas por un período de tiempo corto antes de retirarlo.
-
Página 6: Guía De Instalación
GU ÍA DE INSTA LACIÓ N Instalación de Cocina Remueva todo el material de empaque y Gabinete: Remueva cualquier film protector accesorios. Examine la puerta del horno encontrado en el microondas o en la para cualquier daño como dentaduras o superficie del gabinete. - Página 7 Consulte a un electricista calificado o a un personal de servicio si las instrucciones de conexión no son entendibles por completo, o si existe alguna duda respecto a si la aplicación está apropiadamente conectada a tierra. Si es necesario utilizar un cable de extensión, utilice únicamente una extensión de 3 alambres que tenga un conector de 3 púas, y con un receptáculo de tres agujeros que aceptará...
- Página 8 9. No caliente contenedores con cuellos angostos, como botellas de sirope. 10. No intente freír cosas en su horno microondas. 11. No intente envasar al vacío en este horno microondas, ya que es imposible asegurarse que todos los contenidos del envase hayan alcanzado una temperatura de ebullición. 12.
-
Página 9: Diagrama Del Producto
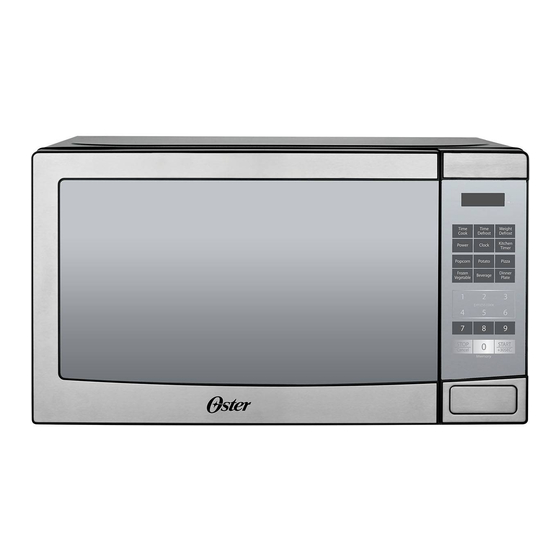
DIAG R AMA D E PROD UC T O Nombres de Partes del Horno y Accesorios Remueva el horno y todos los materiales del cartón y la apertura del horno. Su horno viene con los siguientes accesorios: Bandeja de vidrio Anillo de tornamesa Manual de instrucciones A. -
Página 10: Panel De Control
PA NEL D E CONTR OL Descongelado Descongelado Tiempo de cocción por tiempo por peso Temporizador Potencia Reloj de cocina Palomitas Papas Pizza Vegetales Bebidas Cenas Congelados COCCINADO RÁPIDO PARAR INICIAR Cancelar MEMORIA 1. Tiempo de Cocina 2. Tiempo de descongelación 3. -
Página 11: Instrucciones De Operación
INS TR UCCI ONES D E OP ER ACIÓN 1. Nivel de Energía 10 niveles de energía están disponibles. 2. Configuración del reloj Cuando el horno microondas está enchufado a una toma de corriente, el horno mostrará "0:00" 1. Presione " CLOCK", el LED mostrará 00: 00. Las cifras de la hora parpadearán; 2. - Página 12 5. Cocinado Rapido (3) Durante la cocción con microondas, “Potencia” puede ser presionado para cambiar el nivel de energía que necesita. Después de presionar “Potencia”, el display brillará por 3 1. En estado de espera, la cocción instantánea al 100% de potencia se puede iniciar segundos, ahora usted puede presionar el botón numeral para cambiar el nivel de energía.
- Página 13 9. Papas b. Presione “Iniciar/+30Seg.” Para cocinar, la alarma sonará una vez. Cuando la cocción finalice, la alarma sonará cinco veces y luego regresará a modo de espera. (a) Presione “POTATO” repetidamente hasta que el numero que desea aparezca en la pantalla “1”, “2”, “3”...
- Página 14 5. Presione “Iniciar/+30Seg.” Para iniciar la cocción. 14. Funcion de Memoria 1. Presione “ 0/MEMORY” para selecionar la configuracion de memoria, funcion de 1 a 3. El led 18. Función de bloqueo para niños mostrara 1,2,3. Bloqueo: En modo de espera, presione “Detener/Cancelar” por 3 segundos, habrá una 2.
- Página 15 16. Funcion de Consulta 1. En funcion multifase presione “CLOCK” el led mostrara la hora 3 segundos si la hora ha sido configurada. 2. En estado de coccion del horno, presione “POWER” para consultar el nivel de potencia y se mostrará la potencia actual de microondas. Después de tres segundos, el horno volvera a su estado anterior.
-
Página 16: Guía De Utensilios
GUÍA DE UTENSI LI OS ADVERTENCIA – Riesgo de lesión personal Los utensilios cerrados ajustadamente podrían explotar. Contenedores cerrados deberán ser abiertos y bolsas plásticas deberán ser perforadas antes de cocinar. Vea las instrucciones en “Materiales que puede utilizar en un horno microondas o a evitar en un horno microondas.”... -
Página 17: Especificaciones
El foam plástico puede derretirse o contaminar el líquido dentro cuando se expone a Foam plástico temperaturas altas. Madera La madera se seca al utilizar en microondas y puede quebrarla o rajarla. Especificaciones Modelo: POGYME3703M Voltaje/ Frecuencia: 220V~60Hz Potencia Entrada (Microondas): 1050W Potencia de Salida (Microondas): 700W Capacidad Litros 9.7 kg... -
Página 18: Mantenimiento
MA NTENI MIENTO Solución de Problemas Revise su problema utilizando la tabla inferior e intente las soluciones para cada problema. Si el microondas sigue sin funcionar apropiadamente, contacte al contacto de servicio autorizado más cercano. PROBLEMA POSIBLE CAUSA POSIBLE REMEDIO Horno no inicia a. - Página 19 INDE X IMPORTANT SAFETY INSTRUCTIONS............2 INSTALLATION GUIDE................4 CONNECTION INSTRUCTIONS..............5 PRODUCT DIAGRAM..................7 CONTROL PANEL ..................8 OPERATING INSTRUCTIONS..............9 TOOL GUIDE...................14 SPECIFICATIONS..................15 MAINTENANCE..................16 Eng lish -1...
-
Página 20: Important Safety Instructions
IM POR TANT SAFETY INS TR UCTIO NS When using electrical appliances basic safety precautions should be followed, including the following: WARNING: To reduce the risk of burns, electric shock, fire, injury to persons or exposure to excessive microwave energy: 1. - Página 21 To reduce the risk of injury to persons: 1. Do not overheat liquids. 2. Stir the liquid before and halfway through cooking. 3. Do not use containers with straight sides and narrow necks. 4. After heating, allow the container to stand in the microwave for a short time before removing it.
-
Página 22: Installation Guide
IN STALLATION GUID E Kitchen Installation Remove all packing material and acces- Cabinet: Remove any protective film sories. Examine the oven door for any found in the microwave or on the surface damage such as dentures or broken door. of the cabinet. Do not remove the light Do not install if the oven is damaged. - Página 23 Consult a qualified electrician or service personnel if the connection instructions are not completely understood, or if there is any doubt as to whether the application is properly grounded. If an extension cord is required, use only a 3-wire extension cord that has a 3-pin connector, and a 3-hole receptacle that will accept the connector in the application.
- Página 24 9. Do not heat containers with narrow necks, such as syrup bottles. 10. Do not try to fry things in your microwave oven. 11. Do not attempt to vacuum pack in this microwave oven, as it is impossible to be sure that all the contents of the container have reached boiling temperature.
-
Página 25: Product Diagram
PRODUCT DIAGRAM Oven Part Names and Accessories Remove the oven and all materials from the cardboard and the oven opening. Your oven comes with the following accessories: Glass tray Turntable ring Instruction Manual A. Control Panel B. Turntable wheel C. Turntable Ring Assembly D. -
Página 26: Control Panel
CONTROL PANEL Descongelado Descongelado Tiempo de cocción por tiempo por peso Temporizador Potencia Reloj de cocina Palomitas Papas Pizza Vegetales Bebidas Cenas Congelados COCCINADO RÁPIDO PARAR INICIAR Cancelar MEMORIA 1. Cooking Time 2. Defrosting time 3. Defrosting by weight 4. Clock function 5. -
Página 27: Operating Instructions
OPE R ATI NG INSTRUCT IONS 1. Energy Level 10 energy levels are available. 2. Clock settings When the microwave oven is plugged into an outlet, the oven will display "0:00" 1. Press "CLOCK", the LED will show 00: 00; 2. - Página 28 5. Fast Cooking (3) Durante la cocción con microondas, “Potencia” puede ser presionado para cambiar el nivel de energía que necesita. Después de presionar “Potencia”, el display brillará por 3 1. In standby mode, instantaneous cooking at 100% power can be started by selecting a segundos, ahora usted puede presionar el botón numeral para cambiar el nivel de energía.
- Página 29 9. Potatoes b. Presione “Iniciar/+30Seg.” Para cocinar, la alarma sonará una vez. Cuando la cocción finalice, la alarma sonará cinco veces y luego regresará a modo de espera. (a) Press "POTATO" repeatedly until the number you want appears on the display "1", "2", "3" appears in order.
- Página 30 14. Memory function 1. Press "0/MEMORY" to select memory setting, function 1 to 3. 2. If the setting has been programmed, press "START/+30SEC" to use it. If not, continue until the configuration is chosen. Only 1 or 2 attempts are allowed. 3.
- Página 31 16. Consultation Function 1. In multiphase function press "CLOCK" the led will show the time 3 seconds if the time has been set. 2. In oven cooking status, press "POWER" to check the power level and the current microwave power will be displayed. After three seconds, the oven will return to its previous state.
-
Página 32: Tool Guide
TOOL GUIDE WARNING - Risk of personal injury Tightly closed utensils could explode. Closed containers should be opened and plastic bags punctured before cooking. See instructions under "Materials You Can Use in a Microwave Oven or Avoid in a Microwave Oven. There may be certain non-metallic utensils that are not microwave safe. -
Página 33: Specifications
Plastic foam can melt or contaminate the liquid inside when exposed to high Plastic Foam temperatures. Wood The wood dries when used in the microwave and may crack or split. Specifications Model: POGYME3703M Rated Voltage: 220V~60Hz Rated Input Power(Microwave): 1050W Rated Output Power(Microwave): 700W... -
Página 34: Maintenance
MAINTENANCE Problem solving Review your problem using the table below and try the solutions for each problem. If the microwave still does not work properly, contact the nearest authorized service contact. PROBLEM POSSIBLE CAUSE POSSIBLE SOLUTION a. The electric cable for the oven is not a. - Página 36 Household Solutions, S.A., licenciatario oficial de este producto. Garantía limitada de un año. Hecho en China. © 2021 Sunbeam Products, Inc. All rights reserved. The Oster™ logo is a trademark of Sunbeam Products, Inc. used under license. Manufactured, distributed or sold by Household Solutions, S.A., official licensee for this product.