
Manuales relacionados para Graco FastAction SE 2.0


Resumen de contenidos para Graco FastAction SE 2.0
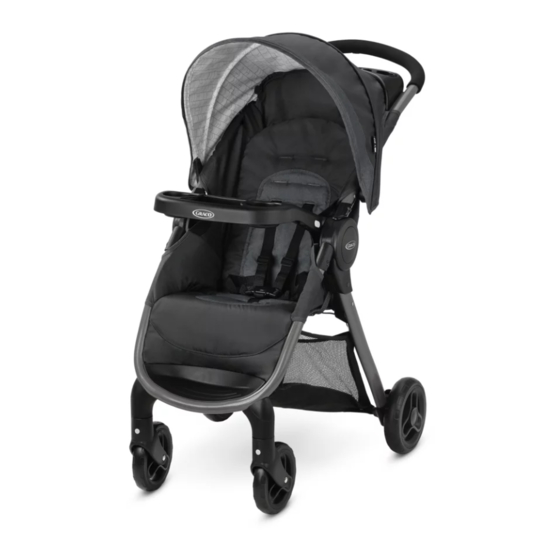
- Página 1 FastAction SE 2.0 ™ Stroller Cochecito • Owner’s Manual Manual del propietario • www.gracobaby.com ©2022 Graco NWL0001410504D 9/22...
- Página 2 To Recline Seat • Cómo ajustar el respaldo To Fold Stroller • Cómo plegar el cochecito To Attach Graco ® Infant Car Seat • Cómo instalar el asiento de automóvil para bebé Graco ® 23-24 5 Care • Cuidado Pages • Páginas Care and Maintenance •...
- Página 3 Failure to follow these warnings and the assembly instructions could result in serious injury or death. Only use product as instructed. PLEASE SAVE OWNER’S USE OF THE STROLLER with a MANUAL FOR FUTURE USE. child weighing more than 50 lb (22.5 kg) or taller than 45 in.
- Página 4 USING GRACO® INFANT CAR • READ THE MANUAL provided SEAT WITH STROLLER: with your Graco car seat before using it with your stroller. • TO AVOID INJURY TO YOUR CHILD: THIS STROLLER IS • ALWAYS SECURE your child ONLY COMPATIBLE WITH with the car seat harness when GRACO®...
- Página 5 ADVERTENCIA No observar estas advertencias y las instrucciones de ensamblaje podría resultar en lesiones serias o la muerte. Use solamente el producto según las instrucciones. POR FAVOR, GUARDE EL NUNCA USE EL COCHECITO EN MANUAL DEL PROPIETARIO ESCALERAS o escaleras PARA USO FUTURO.
- Página 6 • LEA EL MANUAL incluido con su asiento de automóvil Graco antes de usarlo con su cochecito. • SUJETE SIEMPRE a su niño con el arnés del asiento de automóvil cuando usa el asiento...
- Página 7 FastAction™ SE 2.0 Use Positions • Posiciones del uso FastAction™ SE 2.0 Parts List • Lista de las piezas Check that you have all the parts Verifique que tenga todas las piezas de for this model BEFORE este modelo ANTES de armar su assembling your product.
- Página 8 To Open Stroller • Abrir el cochecito Before assembly be sure to place stroller on top of a piece of cardboard or other protective cover to prevent damage to floor surface. Antes de armarlo, tenga la seguridad de poner el cochecito arriba de un pedazo de cartón u otro tipo de protección para prevenir el daño a la superficie del piso.
- Página 9 2. Push down on seat and pull up on handle to latch open. Tip: If tray is attached, you can also pull up on tray and handle to ensure stroller is latched open. CHECK that the stroller is completely latched open EVERY TIME you open the stroller and before continuing with the rest of the assembly steps.
- Página 10 Canopy • Capota 1. Insert canopy wire into the canopy mounts on each side of the stroller as shown. 1. Inserte el alambre de la capota en los montajes de la capota en cada costado del cochecito como se indica. SNAP! ¡CRAC! Front Wheels •...
- Página 11 Rear Wheels • Las ruedas traseras 1. Brake levers point toward rear of stroller. 1. Las palancas del freno deben apuntar hacia la parte trasera del cochecito.
- Página 12 2. Insert axle rod through axle opening. Axle key must line up with key holes. 2. Inserte la varilla del eje por la apertura del eje. La llave del eje debe alinearse con los agujeros correspondientes. 3. Place wheel on axle. 3.
- Página 13 4. Push straight side of pin through axle hole. Pin will separate around the axle. Curved end of pin MUST face up as shown. 4. Empuje el lado recto de la clavija por el agujero del eje. La clavija se separará alrededor del eje. El lado curvo de la clavija DEBE mirar hacia arriba como se indica.
- Página 14 Child’s Tray • Bandeja para niños WARNING Always secure your child with the seat belt. The tray is not a restraint device. DO NOT lift the stroller by the child’s tray. Use care when snapping the tray on the stroller with a child in the stroller. ADVERTENCIA Proteja siempre a su niño con el cinturón de seguridad.
- Página 15 To Secure Child • Cómo sujetar al niño WARNING Fall Hazard: ALWAYS use the restraint system. ADVERTENCIA Peligro de caídas: Use SIEMPRE el sistema de seguridad. 5 Point Harness • Arnés de 5 puntos 1. To open, press button on buckle to release the waist straps.
- Página 16 3 Point Buckle • Hebilla de 3 puntos 1. To open, press button on buckle to release the waist straps. 1. Para abrirlo, oprima el botón de la hebilla para liberar las correas de la cintura. 2. Slide shoulder strap connectors off of waist straps.
- Página 17 5. Use slide adjuster at waist for tighter adjustment. 5. Use el ajustador deslizable de la cintura para ajustarlo más apretadamente. 6. To open, press button on buckle to release the waist straps. 6. Para abrirlo, oprima el botón de la hebilla para liberar las correas de la cintura.
- Página 18 1. Push harness anchor through the front of the seat then re-insert through desired slots at the same height level. Use either shoulder harness anchor in the slots that are closest to child’s shoulder height. Use slide adjuster for further adjustment.
- Página 19 4-C Canopy • Capota 1. Pull forward to open canopy. 1. Tire hacia adelante para abrir la capota. 2. Push backwards to close canopy. 2. Empuje hacia atrás para cerrar la capota. To Recline Seat • Cómo ajustar el respaldo WARNING When making adjustments to the stroller seat, make sure child’s head, arms, and legs are clear of moving seat parts and stroller...
- Página 20 To Fold Stroller • Cómo plegar el cochecito WARNING DO NOT allow child to play with the fold handle. ADVERTENCIA NO deje que el niño juegue con la manija para plegarlo. TO FOLD/UNFOLD PULL STRAP LOCATED UNDER THIS POCKET. PARA PLEGAR/DESPLEGAR TIRE DE LA CORREA UBICADA DEBAJO DE ESTE BOLSILLO.
- Página 21 Lea el manual incluido con su asiento de automóvil Graco antes de usarlo con su producto. • Sujete siempre a su niño con el arnés del asiento de automóvil para bebé...
- Página 22 1. Recline the stroller seat back to its Mounts lowest position. Locate the 2 Click Soportes Connect™ mounts. 1. Recline el respaldo del asiento del cochecito hasta la posición más baja. Ubique los 2 montantes Click Connect™. 2. Insert car seat into stroller and push down on car seat until the latches snap into the Click Connect™...
- Página 23 • FROM TIME TO TIME CHECK YOUR STROLLER for loose screws, worn parts, torn material or stitching. Replace or repair the parts as needed. Use only Graco replacement parts. • TO CLEAN SEAT COVER, refer to your care tag on the seat pad for washing instructions.
- Página 24 1-800-345-4109 5-C Product Registration (USA) • Registro del producto (EE.UU.) To register your Graco product from within the U.S.A. visit us online at www.gracobaby.com/productregistration or return registration card provided with your product. We currently do not accept product registrations from those living outside the United States of America.