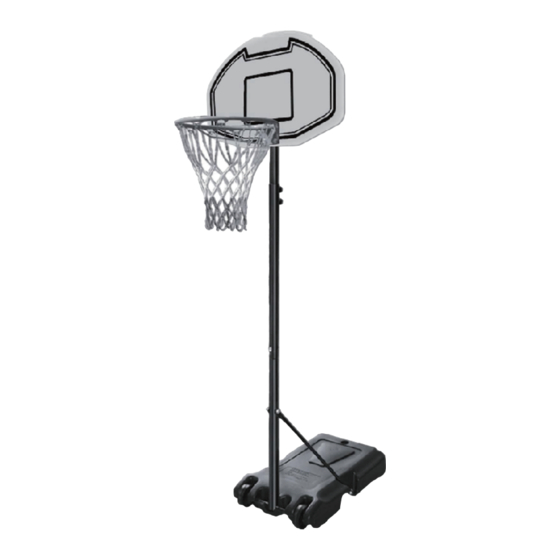
Resumen de contenidos para HOMCOM A61-028
- Página 1 IN221002136V02_ES A61-028 60MIN IMPORTANTE - CONSERVE ESTA INFORMACIÓN PARA SU CONSULTA POSTERIOR: LEER DET ALLA DAMENTE INSTRUCCIONES DE MONTAJE...
- Página 2 Queridos clientes, Gracias por comprar este producto. Para que su electrodoméstico le sirva mejor, lea todas las instrucciones de este manual del usuario. Si tiene alguna pregunta, comuníquese con nuestro Centro de Atención al Cliente. Nuestros datos de contacto son los siguientes: País Teléfono Correo electrónico...
- Página 3 INSTRUCCIONES DE SEGURIDAD NO SEGUIR ESTAS ADVERTENCIAS PUEDE PROVOCAR LESIONES GRAVES O DAÑOS A LA PROPIEDAD. Por motivo de garantizar la seguridad, no intente instalar este producto sin leer y seguir todas las instrucciones con cuidado. Verifique toda la caja y dentro de todos los materiales de empaque para examinar si hay piezas y / o material adicional.
- Página 4 ADVERTENCIA NO SEGUIR ESTAS ADVERTENCIAS PUEDE PROVOCAR LESIONES GRAVES Y / O DAÑOS A LA PROPIEDAD. LOS PROPIETARIOS DEBEN ASEGURARSE DE QUE TODOS LOS JUGADORES COMPRENDEN Y SIGAN ESTAS REGLAS PARA MANTENER QUE EL SISTEMA FUNCIONE SEGURAMENTE. 1. Nunca permita que los niños muevan o ajusten el sistema. 2.
- Página 5 TRANSPORTAR LA BASE PORTÁTIL 1. Asegúrese de que la base esté vacía antes de transportarla. 2. Mire hacia el frente de la base donde están ubicadas las ruedas y tire hacia atrás d e l p o s t e h a s t a q u e e l s i s t e m a e s t é equilibrado sobre las ruedas.
- Página 6 LISTA DE PIEZAS Pieza No. Nombre & Cantidad Observaciones especificación Perilla de cabezal de Fije el poste superior (W) en el plástico poste central (X). B1、B2、B3 Perno, M8×35 MM Conecte el borde (l), el tablero trasero (K) y el poste superior (W).
- Página 8 Utilice el juego de pernos (D1), (D2) y (D3) para conectar el poste cen- tral (X) y el poste inferior (Y). Inserte el eje de rueda (M) en la rueda (G), la base (S) y el extremo del poste inferior (Y). Como se muestra:...
- Página 9 Utilice el juego de pernos (El), (E2) y (E3) para fijar los extremos de las abrazaderas del poste (L1) y (L2) en el poste inferior (Y). Utilice el juego de pernos (C1), (C2 y (C3) para fijar los otros ex- tremos de las abrazaderas de poste (L1) y (L2) en dos lados de la base (S).
- Página 10 Utilice el juego de pernos (B1), (B2) y (B3) para fijar el borde (I) y el poste superior (W) en el tablero trasero (K). Inserte el poste superior (W) en el poste central (X), ajústelo a la altura deseada. Luego utilice la perilla de cabezal de plástico (A) y el juego de pernos (D1), (D2) y (D3) para apretarlos.
- Página 11 Coloque la red (J) en el borde (I). -11-...
- Página 12 Arena Tapa de agua Agua Llene la(s) base(s) con agua o arena para mantenerla resistente y estable. -12-...
- Página 13 IN221002136V02_EN A61-028 60MIN IMPORTANT, RETAIN FOR FUTURE REFERENCE: READ CAREFULLY ASSEMBLY INSTRUCTION -13-...
- Página 14 SAFETY INSTRUCTIONS FAILURE TO FOLLOW THESE WARNINGS MAY RESULT IN SERIOUS INJURY OR PROPERTY DAMAGE. To ensure safety, do not attempt to assemble this product without reading and following all instructions carefully. Check the entire box and inside all packing materials for parts and/or additional instruction material. Before beginning assembly, identify and inventory all parts and hardware using the parts and hardware lists and identifiers in this document.
- Página 15 WARNING OWNERS MUST ENSURE THAT ALL PLAYERS KNOW AND FOLLOW THESE RULES FOR SAFE OPERATION OF THE SYSTEM. 1. Do Not allow children to move or adjust the system. 2. Always make sure adjustment knob is securely tightened before play. 3.
- Página 16 TRANSPORTING THE PORTABLE BASE 1. Make sure the base is empty before moving. 2. Face the front of the base where the wheels are located and pull back on the pole until the unit is balanced on its wheels. 3. Move the unit to the desired location and carefully set it down.
- Página 17 Fixtop pole(W) on middle pole(X) Connect the rim (l), backboard (K) & top pole (W) Connect base (S) & base brace (L1) and (L2) Attach middle pole (X) & bottom pole (Y), then attach top pole (W) & middle pole (X) -17-...
- Página 18 -18-...
- Página 19 Connect the middle pole(X) and bottom pole (Y), using the bolt set (D1), (D2) & (D3). Insert the wheel shaft (M) into the wheel (G), base (S) and end of the bottom pole (Y). -19-...
- Página 20 Place one end of the pole brace (L1) & (L2) onto the bottom pole (Y), using the bolt set (El), (E2) & (E3). Place the other end of the pole brace (L1) & (L2) onto two sides of the base (S), using the bolt Set (C1), (C2 & (C3). -20-...
- Página 21 Place the rim (I) and top pole (W) onto the backboard (K), using the bolt set (B1), (B2) & (B3). Insert the top Pole(W) into the middle pole (X), adjust it to the required height. then tighten them using the plastic head Knob(A) & bolt set (D1), (D2) & (D3). Adjust the height by placing the bolt Set (D1), (D2)&...
- Página 22 Place the net (J) onto the rim (I). -22-...
- Página 23 Fill the base (s) with water or sand to keep sturdy -23-...


