
Manuales relacionados para Bresser NATIONAL GEOGRAPHIC EXPLORER 4


Resumen de contenidos para Bresser NATIONAL GEOGRAPHIC EXPLORER 4
- Página 1 E X P LO R E R 4 ULTRA HD | WIFI Bedienungsanleitung Operating instructions Instrucciones de uso Manual de instruções Instrukcja użytkownika Art.No. 8683500...
- Página 2 Besuchen Sie unsere Website über den folgenden QR Code oder Weblink um weitere Informatio- nen zu diesem Produkt oder die verfügbaren Übersetzungen dieser Anleitung zu finden. Visit our website via the following QR Code or web link to find further information on this product or the available translations of these instructions.
- Página 3 FULL MANUAL & VIDEO DOWNLOAD: www.bresser.de/download/8683500 APP DOWNLOAD „YUTUPRO“: SERVICE AND WARRANTY: www.bresser.de/warranty_terms Bedienungsanleitung ......... 4 Operating instructions ........24 Instrucciones de uso ........40 Manual de instruções ........56 Instrukcja użytkownika ........72 Apple and the Apple logo are trademarks of Apple Inc., registered in the U.S. and other countries. App Store is a service mark...
-
Página 4: Allgemeine Informationen
Allgemeine Informationen Lesen Sie vor der Benutzung des Geräts aufmerksam die Sicherheitshinweise und die Bedienungsanleitung. Bewahren Sie diese Bedienungsanleitung für die erneute Verwendung zu einem späteren Zeitpunkt auf. Bei Verkauf oder Weitergabe des Gerätes ist die Bedienungsanleitung an jeden nachfolgenden Besitzer/Benutzer des Produkts weiterzugeben. -
Página 5: Eg-Konformitätserklärung
• Reinigen Sie die Schutzhülle nach jedem Gebrauch mit klarem, sauberem Wasser und trock- nen Sie es gründlich. EG-Konformitätserklärung Hiermit erklärt Bresser GmbH, dass der Funkanlagentyp mit Artikelnummer: 8683500 der Richtlinie 2014/53/EU entspricht. Der vollständige Text der EU-Konformitätserklä- rung ist unter der folgenden Internetadresse verfügbar:... -
Página 6: Garantie & Service
Die reguläre Garantiezeit beträgt 2 Jahre und beginnt am Tag des Kaufs. Um von einer verlän- gerten, freiwilligen Garantiezeit wie auf dem Geschenkkarton angegeben zu profitieren, ist eine Registrierung auf unserer Website erforderlich. Die vollständigen Garantiebedingungen sowie Informationen zu Garantiezeitverlängerung und Serviceleistungen können Sie unter www.bresser.de/garantiebedingungen einsehen. -
Página 7: Lieferumfang
Lieferumfang Kamera Stangenmontierung für z.B. Surf- oder Wasserdichtes Gehäuse Skateboard Offenes Gehäuse Fahrradhalterung für z.B. Powerbank Fahrradhalterung USB Kabel Flügelschrauben Gurte, Sicherungsdraht Basis-Verbindungsstück und Putztuch Multifunktions-Verbindungsstück Akku und Ersatzakku Basis-Halterungen für flache oder Powerbank gebogene Oberflächen + Klebepads Fernbedienung... -
Página 8: Erste Schritte
Erste Schritte Wasserdichtes Gehäuse öffnen/schließen: Gehäuse öffnen: Gehäuse schließen: Drücken Sie am Pfeil nach unten Drücken Sie die Klappe an das Gehäuse (1), und und dann die Klemme nach oben, lassen sie die Klemme am Gelenk einrasten (2). Nun um das Gehäuse zu öffnen (1). die Klemme nach unten drücken (3) um zu schließen. - Página 9 Akku einsetzen oder entfernen A. Die Sperre lösen und die Batteriefachabdeckung öffnen. B. Akku in korrekter Richtung einsetzen. C. Akku entfernen: Batteriefachabdeckung öffnen und den Akku entfernen. Akku aufladen Der Akku kann über das beiliegende USB-C Kabel am Computer oder mit der beiliegenden Power bank aufgeladen werden.
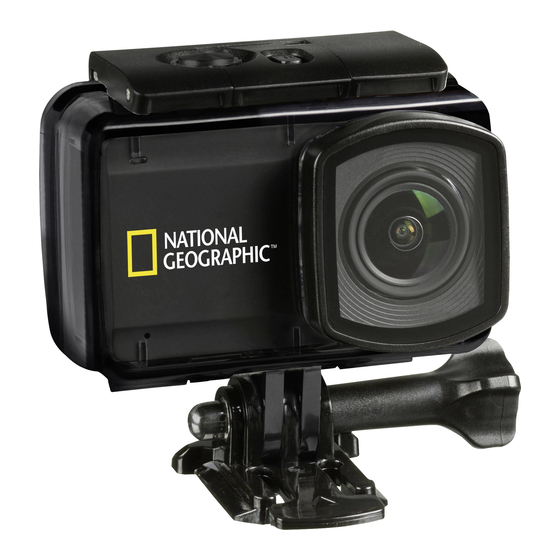
- Página 10 Funktionen EXPLORER 4 30fps...
- Página 11 EXPLORER 4 30fps EXPLORER 4 30fps 1. Zugriffsanzeige 7. Betriebsanzeige 2. Linse 8. Lautsprecher 3. Bildschirm 9. Batteriefachabdeckung 4. USB Type-C Anschluss für 10. Micro SD Steckplatz Video, Audio und Datenüber- (im Batteriefach) tragung 11. Stativanschlussgewinde 5. Mikrofon 6. Ein/Ausschalter &...
- Página 12 Verwendung der Halterungen Befestigung an flachen oder gebogenen Oberflächen: Wählen Sie, je nach Oberfläche, die flache oder gebogene Basis-Halterung aus. Befestigung an Basis-Halterung (z.B. Helm-Montierung):...
- Página 13 Montierungen - Beispiele: Basis-Montierung / Helm-Montierung: Fahrradhalterung: Surf/Skateboard Adapter:...
- Página 14 Fahrradhalterung für z.B. Powerbank:...
- Página 16 Betrieb Kurz auf den Bildschirm drücken um die Kamera-Modus auswählen Bildschirmanzeigen (OSD) ein oder auszublenden Photo Mode 12MP Drücken Sie hier um die Einstellungen Drücken Sie hier zu öffnen für die Wiedergabe Wischen Sie nach links oder rechts um zwischen dem Schnellwahl-Menü...
- Página 17 Moduswechsel Drücken Sie mit Ihrem Finger in den unteren Bereich des Touch- Bildschirms, wo der aktuelle Modus angezeigt wird. Sie können jetzt aus 9 verschiedenen Kamera-Modi auswählen (Benutzen Sie Ihren Finger zum scrollen): Kamera-Modus Beschreibung Videomodus Video-Aufnahmemodus Zeitraffervideo erstellt ein Video bestehend aus Ein- Zeitraffervideo zelbildern die in bestimmten Intervallen aufgenommen wurden (einstellbar 3-60 Sekunden)
- Página 18 Einstellungen vornehmen Sobald Sie einen Modus ausgewählt haben befindet sich im rechten unteren Bereich das Sym- bol für die Einstellungen [ ]. Drücken Sie auf das [ ] Symbol um in die Einstellungen für den ausgewählten Modus zu gelangen. Die Einstellungen sind für jeden Modus unterschiedlich. Schnellwahl-Menü...
- Página 19 ]. Drücken Sie [ ] erneut um die Aufnahme zu stoppen. Warten Sie jetzt bis die Aufnahme auf der Speicherkarte gesichert wurde. Fotos aufnehmen Wechseln Sie in den Foto-Aufnahmemodus. In der linken oberen Ecke wird jetzt das Symbol [ angezeigt. Drücken Sie [ ], um Fotos aufzunehmen.
- Página 20 Wi-Fi Modus/ Kamera App Installieren Sie zuerst die App auf Ihrem Smartphone. Suchen Sie dazu im Appstore oder dem Google Play Store nach „YUTUPRO“. Nach der Installation, aktivieren Sie das „Wi-Fi „[ ]“ der WIFI Kamera über das Schnellwahl-Menü (Touch-Bewegung nach unten). Verbinden Sie jetzt die Kamera mit ihrem Smartphone (Suchen Sie ein Netzwerk mit dem auf der Kamera angezeigten Namen z.B.
-
Página 21: Technische Daten
Fernbedienung Aktivieren Sie die Fernbedienung „[ ]“ über das Schnellwahl-Menü (Touch- Bewegung nach unten). Nun können Sie mit der im Lieferumfang enthaltenen Fernbedienung Fotos und Videos machen. 1. Fotos aufnehmen 2. Videos aufnehmen 3. Bildschirmschoner 4. USB Ladeanschluß Technische Daten Hisilicon Hi3559 Sony IMX 377 Sensor... - Página 22 4k (3840*2160) 30 FPS Video-Auflösung 2K (2560*1440) 60 FPS 1080p (1920*1080) 120/60 FPS 720p (1280*720 ) 240/120/60 FPS VGA (640*480) 240 FPS Videoformat Videokodierung H.264 / H.265 (HEVC) Micro SD-Speicherkarte (bis 64 GB) Speicher (nicht enthalten) (Class 10 SDHC oder höher erforderlich) Zeitraffer / Zeitlupe / Einzelbild / Aufnahme-Modi Serienaufnahme / Aufnahme-Schleife /...
- Página 23 Fehlerbehebung Die Kamera lässt sich Stellen Sie sicher, dass Ihre Kamera aufgeladen nicht einschalten ist. Verwenden Sie zum Aufladen Ihrer Kamera ein USB-C Kabel und einen Computer. Die Kamera reagiert 1. Akku für kurze Zeit entfernen nicht mehr 2. Akku wieder einlegen und Kamera einschalten 3.
-
Página 24: Intended Use
About this Instruction Manual Please read the safety instructions and the operating instructions carefully before use. Keep these instructions for renewed use at a later date. When the device is sold or given to someone else, the instruction manual must be provided to the new owner/user of the product. -
Página 25: Ec Declaration Of Conformity
• Clean the protective case after each use with clear, clean water and dry it thoroughly. EC Declaration of Conformity Hereby, Bresser GmbH declares that the equipment type with part number: 8683500 is in compliance with Directive: 2014/30/EU. The full text of the EU declaration of conformity is available at the following internet address: http://www.bresser.de •... -
Página 26: Warranty & Service
You can consult the full guarantee terms as well as information on extending the guarantee period and details of our services at www.bresser.de/warranty_terms. -
Página 27: Scope Of Delivery
Scope of delivery Camera Pole mount for e.g. surf or skateboard Waterproof case Bicycle mount for e.g. power bank Open case USB cable Bicycle mount Straps, Wire rope and cleaning cloth Thumb knobs Battery pack and spare battery pack Retaining clip for Base mount Power bank Multifunction mount Base for flat and curved surface + sticker... -
Página 28: First Steps
First Steps How to open and close the waterproof case: How to open: How to close: Press the arrow down and then Press the case door all the way down (1) and then the clamp upwards to open the snap the clamp to the hinge (2). Now, simply press housing (1). - Página 29 Installing or removing the battery A. Press on the battery cover to open it B. Correctly install the battery into the camera. C. Remove Battery: Simply open battery cover to take the battery out. Charging Charging can be done by connecting the action camera to a computer via the included USB-C cable or with the included power bank.
- Página 30 Functions EXPLORER 4 30fps...
- Página 31 EXPLORER 4 30fps EXPLORER 4 30fps 1. Indicator light 7. Working indicator light 2. Lens 8. Loudspeaker 3. Display 9. Battery cover 4. USB Type-C connection for 10. Micro SD port video, audio and data trans- (inside battery compartment) mission 11.
- Página 32 How to use the Base mount Flat surface or curved surface mount: Choose the flat or curved base depending on the surface. Base mount (e.g. for helmet mount):...
- Página 33 Mount examples: Base mount / Helmet mount: Bicycle mount: Surf/Skateboard mount:...
- Página 34 Bicycle mount for e.g. power bank:...
- Página 36 Operating Press briefly on the screen to show or hide the Select the camera mode on-screen display (OSD) Photo Mode 12MP Press here for settings Press here for playback Swipe left or right to switch between video and photo Open the recording mode shortcut menu...
- Página 37 Mode change Press with your finger on the lower part of the touch screen, where the current mode is displayed. You can now choose from 9 different camera modes (Use your finger to scroll): Camera mode Description Video Mode Video recording Timelapse video creates a video consisting Timelapse Video of individual frames taken at certain intervals...
- Página 38 Change settings Once you have selected a mode, the settings icon will appear in the lower right corner ]. Press the [ ] symbol to enter the settings for the selected mode. The settings are different for each mode. Speed-dial menu (Shortcut mode) On the touch screen, use your finger to make a fast swipe down to enter the speed dial menu.
- Página 39 ]. Press [ ] again if you want to stop the recording. Wait until the recor- ding has been saved on the memory card. Photo shooting Switch to photo shooting mode. There will be an [ ] icon in the upper left corner. Press [ to take a single photo.
- Página 40 Wi-Fi Mode / Camera App First, install the app on your smartphone. Look for „YUTUPRO“ in the AppStore or Google Play Store. After installation, you need to activate the Wi-Fi [ ] of your camera via the speeddial WIFI menu (fast touch movement downwards). Connect the camera to your smartphone (find a network with the name displayed on the camera e.g.
-
Página 41: Technical Data
Remote control You need to activate the Remote control [ ] of your camera via the speeddial menu (fast touch movement downwards). Now you can take pictures and videos with the included remote control. 1. Take a photo 2. Video recording 3. - Página 42 4k (3840*2160) 30 FPS Resolution of videos 2K (2560*1440) 60 FPS 1080p (1920*1080) 120/60 FPS 720p (1280*720 ) 240/120/60 FPS VGA (640*480) 240 FPS Video format Video codec H.264 / H.265 (HEVC) Micro SD card up to 64 GB (not included) Storage (SDHC Class 10 or higher required) Timelapse / Slow motion / Single photo /...
- Página 43 Troubleshooting The camera will not Make sure your camera is charged. Use a USB-C turn on cable and a computer to charge your camera. The camera stops 1. Remove the battery for a short time responding 2. Re-insert the battery and turn on the camera 3.
-
Página 44: Informaciones De Carácter General
Informaciones de carácter general Lea atentamente las indicaciones de seguridad recogidas en este manual. Emplee este producto exclusivamente de la forma descrita en el manual, con el fin de evitar daños en el aparato o lesiones. Conserve el manual de instrucciones para poder volver a informarse en todo momento sobre las funciones de manejo. -
Página 45: Declaración De Conformidad De La Unión Europea (Ce)
Declaración de conformidad de la Unión Europea (CE) Por la presente, Bresser GmbH declara que el tipo de equipo con número de pieza: 8683500 cumple con la Directiva: 2014/30 / EU. El texto completo de la declaración de conformidad de la UE está disponible en la siguiente dirección de Internet:... -
Página 46: Garantía Y Servicio
Las condiciones de garantía completas así como informaciones relativas a la ampliación de la garantía y los servicios pueden encontrarse en www.bresser.de/warranty_terms. -
Página 47: Volumen De Suministro
Volumen de suministro Cámara Montaje en barra, por ejemplo, para tabla de surf o monopatín Carcasa sumergible Soporte de bicicleta, por ejemplo, para Caso abierto power bank Soporte de bicicleta Cable USB Tornillos para la fijación del soporte Correas, Alambre y paño de limpieza Base de la montura Batería y Batería de repuesto Adaptador de multifunción... -
Página 48: Primeros Pasos
Primeros Pasos Como abrir y cerrar la carcasa sumergible: Como abrirla: Como cerrarla: Presione la flecha hacia abajo y Presione la puerta trasera hacia abajo (1) y luego después la pinza hacia arriba para encaje la abrazadera en la bisagra (2). Ahora, abrir la carcasa (1). - Página 49 Instalar o quitar la batería A. Presione la tapa de la batería para abrirla. B. Instale correctamente la batería en la cámara. C. Quitar la batería: simplemente abra la tapa de la batería para sacar la batería. Carga La carga se puede realizar conectando la cámara a un ordenador a través de un cable USB o con el dispositivo de memoria incluido.
-
Página 50: Funcionamiento
Funcionamiento EXPLORER 4 30fps... - Página 51 EXPLORER 4 30fps EXPLORER 4 30fps 1. Luz indicadora 7. Luz indicador funcionamiento 2. Lente 8. Altavoz 3. Pantalla 9. Tapa batería 4. Conexión USB tipo C para 10. Puerto Micro SD vídeo, audio y transmisión (en el compartimento de las de datos pilas) 5.
-
Página 52: Como Usar La Base Del Soporte
Como usar la base del soporte Montaje en una superficie plana o curva: Elija la base plana o curva dependiendo de la superficie. Instalación en una base (p.e. para el soporte del casco):... - Página 53 Montaje - Ejemplos: Montaje de la base/Montaje de la carcasa: Soporte para bicicleta: Montaje de la surf/monopatín:...
- Página 54 Soporte de bicicleta, por ejemplo, para power bank:...
- Página 56 Funcionamiento Pulse brevemente la pantalla Seleccionar el modo para mostrar u ocultar las de cámara indicaciones en la pantalla (OSD) Photo Mode 12MP Pulse aquí para la Pulse aquí para abrir reproducción los ajustes Arrastre hacia la izquierda para cambiar entre el Abrir el menú...
- Página 57 Cambio de modo Pulse con el dedo en la parte inferior de la pantalla táctil, donde se indica el modo actual. Ahora puede seleccionar entre 9 modos de cámara distintos (utilice el dedo para avanzar): Modo de Cámara Descripción Modo de vídeo Modo de grabación de vídeo El vídeo de cámara rápida crea un vídeo compuesto por Vídeo de cámara rápida...
- Página 58 Realizar ajustes Una vez seleccionado un modo, en la zona inferior derecha aparece el símbolo de ajustes [ Pulse el símbolo [ ] para entrar en los ajustes del modo seleccionado. Los ajustes son diferentes para cada modo. Menú de selección rápida (modo de shortcut) Realice un movimiento rápido hacia abajo con el dedo en el centro de la pantalla táctil para abrir el menú...
- Página 59 Presione otra vez [ ] si quiere parar la grabación. Espere hasta que se haya guardado la toma en la tarjeta de memoria. Fotografías & Ajustes Cambie el modo de fotografía. El botón se encuentra en la esquina superior [ ] izquierda.
-
Página 60: Compresión Del Vídeo H.264/H
Modo Wi-Fi / Aplicación de la cámara Primero, instale la aplicación en su teléfono móvil. Busque „YUTUPRO“ en la AppStore ó Google Play Store. Después de la instalación, active el símbolo “Wi-Fi” “[ ]”I FdIe la cámara a través WIFI del menú... -
Página 61: Datos Técnicos
Mando a distancia Debes activar el control remoto [ ] de tu cámara a través del menú de selección rápida (movimiento rápido hacia abajo). A continuación, puede realizar fotos y vídeos con el mando a distancia proporcionado. 1. Permite hacer una sola foto 2. -
Página 62: Autodisparador
4k (3840*2160) 30 FPS Resolución de los videos 2K (2560*1440) 60 FPS 1080p (1920*1080) 120/60 FPS 720p (1280*720 ) 240/120/60 FPS VGA (640*480) 240 FPS Formato de video Videocodec H.264 / H.265 (HEVC) Tarjeta Micro SD hasta 64 GB (no incluida) Almacenaje (Necesaría clase 10 SDHC o superior ) Cámara rápida / Cámara lenta / Imagen única... -
Página 63: Resolución De Problemas
Resolución de problemas No se puede encender la Asegúrese de que la cámara está cargada. Para cámara cargar la cámara, utilice un cable USB-C y un ordenador. La cámara 1. Quitar la batería durante un rato ya no reacciona 2. Volver a instalar la batería y encender la cámara 3. -
Página 64: Informações Gerais
Informações gerais Este manual de instruções deve ser considerado como parte do aparelho. Antes de utilizar o aparelho, leia com atenção as advertências de segurança e o manual de instruções. Guarde este manual de instruções de forma a poder consultá-lo mais tarde. -
Página 65: Declaração De Conformidade Ce
Declaração de conformidade CE Bresser GmbH declara pelo presente que este equipamento (Art. No. 8683500) está em conformidade com os requisitos essenciais e outras disposições relevantes da Directiva 2014/53/EU. O texto integral da Declaração de Conformidade da UE está... -
Página 66: Garantia E Serviço
é necessário registar-se no nosso Website. Todas as condições de garantia bem como informações sobre o prolongamento da garantia e prestações de serviço podem ser consultadas em www.bresser. de/warranty_terms. -
Página 67: Conteúdo Da Embalagem
Conteúdo da embalagem Base de fixação para áreas planas ou Câmara superfícies curvas + autocolante Caixa impermeável Montagem de barras para por ex. prancha Caso aberto de surf ou skate Suporte para a bicicleta Suporte de bicicleta para por ex. Power bank Parafuso de orelhas Cabo USB Base de adaptador de fixação... -
Página 68: Primeiro Passo
Primeiro Passo Como abrir e fechar a caixa estanque: Como abrir: Como fechar: Pressione a seta para baixo e, de Pressione a porta da caixa ao máximo (1) e depois seguida, o terminal para cima para encaixe o dispositivo de fixação na dobradiça (2). abrir a caixa (1). - Página 69 Instalar ou retirar a bateria A. Pressione a tampa da bateria para abri-la. B. Instale a bateria corretamente na câmara. C. Para retirar a bateria, basta abrir a tampa da bateria. Carregar O carregamento pode ser feito conectan- do a câmera de ação a um computador através do cabo USB-C incluído ou com o banco de potência incluído.
- Página 70 Funcionamento EXPLORER 4 30fps...
- Página 71 EXPLORER 4 30fps EXPLORER 4 30fps 1. Indicador de energia 7. Indicador de potência 2. Lente 8. Altifalante 3. Monitor 9. Tampa da bateria 4. Ligação USB Type-C para vídeo, 10. Entrada Micro SD áudio e transmissão de dados (no compartimento da bateria) 5.
- Página 72 Utilização do suporte de capacete Suporte de superfície plana ou de superfície curva: Escolha a base plana ou curva, dependendo da superfície. Suporte na base (por exemplo, para a montagem no capacete):...
- Página 73 Montagem - Exemplo: Montagem da Base / Montagem do Capacete: Suporte para a bicicleta: Montagem da surf/skate:...
- Página 74 Suporte de bicicleta para por ex. Power bank:...
- Página 76 Funcionamento Pressionar brevemente o ecrã para exibir ou ocultar as Selecionar o modo de câmara exibições do ecrã (OSD) Photo Mode 12MP Pressione para abrir as Pressione aqui para a definições reprodução Limpe para a esquerda ou para a direita para comutar entre o Abrir o menu de modo de gravação...
- Página 77 Mudança de modo Pressione com o dedo na área inferior do ecrã táctil, onde é exibido o modo atual. Pode agora selecionar entre 9 modos de câmara diferen- tes (utilize o dedo para rolar): Modo da câmara Descrição Modo de vídeo Modo de gravação de vídeo Vídeo com lapso de tempo cria um vídeo composto Vídeos com lapso de tempo...
- Página 78 Efetuar definições Assim que tenha selecionado um modo, encontra-se na área inferior direita o símbolo para as definições [ ]. Pressione o [ ] para aceder às definições para o modo selecionado. As definições são diferentes para cada modo. Menu de seleção rápida (Shortcut mode) Execute no centro do ecrã...
- Página 79 Prima novamente [ ] se quiser parar a gravação. Aguarde até a gravação ter sido guardada no cartão de memória. Disparo de fotografias e definições Altere para modo de fotografia. No canto superior esquerdo irá aparecer este símbolo [ Pressione em [ ] para tirar fotos individuais.
- Página 80 Modo Wi-Fi / App da Câmara Instale primeiro a aplicação no seu Smartphone. Procure na Appstore ou na Google Play Store por “YUTUPRO“. Após a instalação, ative o „[ ]“I FdIa câmara através do menu de seleção WIFI rápida (movimento táctil rápido para baixo). Conecte agora a câmara com o seu Smartphone (Procure uma rede com o mesmo nome exibido na câmara “4K Sports DV”).
-
Página 81: Dados Técnicos
Controlo Remoto Ative o „[ ]“I FdIa câmara através do menu de seleção rápida (movimento táctil rápido para baixo). Agora pode tirar fotografias e fazer filmagens com o dispositivo (Controlo Remoto) fornecido. 1. Tirar uma única fotografia 2. Gravação de vídeos 3. - Página 82 4k (3840*2160) 30 FPS Resolução dos vídeos 2K (2560*1440) 60 FPS 1080p (1920*1080) 120/60 FPS 720p (1280*720 ) 240/120/60 FPS VGA (640*480) 240 FPS Formato dos vídeos Formato comprimido dos H.264 / H.265 (HEVC) vídeos Cartão micro SD até 64 GB (não fornecido) Armazenamento (Classe 10 SDHC ou superior, requerido) Lapso de tempo / Câmara lenta / Imagem...
-
Página 83: Resolução De Erros
Resolução de erros Não é possível ligar a Garanta que a sua câmara está carregada. Para câmara carregar a sua câmara, utilize um cabo USB-C e um computador. A câmara já não reage 1. Remover a bateria por um curto período de tempo 2. -
Página 84: Ogólne Informacje
Ogólne informacje Przed rozpoczęciem korzystania z urządzenia należy uważnie przeczytać wskazówki dotyczące bezpieczeństwa i instrukcję obsługi. Niniejsza instrukcja powinna zostać zachowana do ponownego wykorzystania w późniejszym czasie. W przypadku sprzedaży lub udostępnienia urządzenia instrukcję obsługi należy przekazać jego każdemu kolejnemu właścicielowi/użytkownikowi. Przeznaczenie Ten produkt przeznaczony jest wyłącznie do użycia w zakresie prywatnym. -
Página 85: Wskazówki Dotyczące Czyszczenia
• Myć pokrowiec ochronny po każdym użyciu w klarownej, czystej wodzie i wycierać do sucha. Deklaracja zgodności WE Bresser GmbH niniejszym oświadcza, że typ urządzenia radiowego 8683500 jest zgodny z dyrektywą; 2014/30/UE. Pełny tekst deklaracji zgodności UE jest dostępny pod następującym adresem internetowym: http//www.bresser.de • info@bresser.de UTYLIZACJA Materiały, z których wykonano opakowanie, należy utylizować... -
Página 86: Gwarancja I Serwis
Wszelkie informacje dotyczące gwarancji jak również informacje na temat przedłużenia czasu gwa- rancji i świadczeń serwisowych można znaleźć na stronie: www.bresser.de/warranty_terms. Service Hotline ... -
Página 87: Zakres Dostawy
Zakres dostawy Kamera Montaż drążków dla np. deski surfingowej Wodoodporna obudowa lub deskorolki Otwarta skrzynka Uchwyt rowerowy dla np. banku zasilania Mocowanie do roweru Kabel USB Śrubki motylkowe Paski, przewód zabezpieczający, Podstawa- część łącząca ściereczka do czyszczenia Adapter wielofunkcyjne Akumulator i zapasowy akumulator Podstawa mocowania na płaskich i Bank zasilania wypukłych powierzchniach + Naklejka... -
Página 88: Pierwsze Kroki
Pierwsze kroki Otwieranie/zamykanie wodoodpornej obudowy: Otwieranie obudowy: Zamykanie obudowy: Naciśnij przy strzałce na dół i wów- Przycisnąć klapkę do obudowy (1) i pozwolić, aby czas zacisk do góry, aby otworzyć zacisk zaskoczył (2). Przycisnąć zacisk w dół (3), obudowę (1). aby zamknąć. - Página 89 Wkładanie lub wyciąganie akumulatora A. Odblokować blokadę i otworzyć klapkę na baterie. B. Włożyć akumulator we właściwym kierunku. C. Wyciąganie akumulatora: Otworzyć klapkę na baterie i wyciągnąć akumulator. Ładowanie akumulatora Akumulator można ładować za pomocą kabla USB w komputerze lub w dołą- czonym „Bank zasilania”.
- Página 90 Funkcje EXPLORER 4 30fps...
- Página 91 EXPLORER 4 30fps EXPLORER 4 30fps 1. Wskaźnik dostępu 7. Wskaźnik operacyjny 2. Soczewka 8. Głośnik 3. Ekran 9. Klapka na baterie 4. Przyłącze USB typu C do 10. Szczelina czytnika Micro SD przesyłania obrazu, dźwięku (w komorze baterii) i danych 11.
- Página 92 Korzystanie z mocowań Montaż na płaskich lub wypukłych powierzchniach: W zależności od powierzchni należy wybrać płaską lub wypukłą podstawę mocowania. Montaż na podstawie mocowania (np. montaż na kasku):...
- Página 93 Mocowanie - Przykłady: Mocowanie podstawowe / Mocowanie do kasku: Uchwyt rowerowy: Mocowanie surfingowej/deskorolki:...
- Página 94 Uchwyt rowerowy dla np. banku zasilania:...
- Página 96 Obsługa Naciśnij krótko na ekranie, aby wyświetlić lub ukryć Wybierz tryb kamery wskazania na ekranie (OSD) Photo Mode 12MP Naciśnij tutaj, aby otworzyć Naciśnij tutaj w ustawienia celu odtwarzania Przesuń w lewo lub w prawo, aby przełączyć między Otwórz menu trybem filmowania szybkiego wyboru a trybem fotografowania.
- Página 97 Zmiana trybu Naciśnij palcem w dolnym obszarze ekranu dotykowego, w którym wyświetlany jest aktualny tryb. Teraz możesz wybrać z 9 różnych trybów kamery (użyj palca do przewijania): Tryby kamery Opis Tryb wideo Tryb filmowania Film poklatkowy tworzy wideo składające się z poje- Film poklatkowy dynczych obrazów zarejestrowanych w określonych odstępach czasu (regulowanych 3-60 sekund)
- Página 98 Wykonywanie ustawień Gdy wybrałeś tryb, symbol ustawień pojawia się w prawym dolnym rogu [ ]. Naciśnij na sym- bol [ ], aby przejść do ustawień wybranego trybu. Ustawienia są różne dla każdego trybu. Menu szybkiego wyboru (Shortcut mode) Na środku ekranu dotykowego przesuń szybko palcem w dół, by wejść do menu szybkiego wyboru.
- Página 99 Robienie zdjęć Przełącz aparat na tryb robienia zdjęć. W lewym górnym rogu pojawi się symbol ]. Naciśnij [ ], aby wybrać wykonywanie pojedynczych zdjęć. Tryb odtwarzania (Playback) Naciśnij na symbol [ ] w lewym dolnym rogu, aby przejść do trybu odtwarzania. Przy pomocy strzałek skierowanych w lewo i w prawo możesz przechodzić...
- Página 100 Tryb Wi-Fi / aplikacja do kamery W pierwszej kolejności konieczna jest instalacja aplikacji na smartfonie. W tym celu w Google Play Store należy wyszukać „YUTUPRO”. Po instalacji włącz „Wi-Fi „[ ]“I FkIamery poprzez WIFI menu szybkiego wyboru (szybki ruch dotykowy na dół). Następnie należy połączyć kamerę ze smartfonem (w tym celu należy wybrać...
-
Página 101: Dane Techniczne
Pilot zdalnego sterowania Włącz „Pilot zdalnego sterowania „[ ]“ poprzez menu szybkiego wyboru (szybki ruch dotykowy na dół). Teraz możesz wykonywać zdjęcia i nagrywać filmy za pośrednictwem pilota. 1. Robienie pojedynczych zdjęć 2. Nagrywanie filmów 3. Wygaszacz ekranu 4. Port ładowania USB ... - Página 102 4k (3840*2160) 30 FPS Rozdzielczość filmów 2K (2560*1440) 60 FPS 1080p (1920*1080) 120/60 FPS 720p (1280*720 ) 240/120/60 FPS VGA (640*480) 240 FPS Format wideo Kodek wideo H.264 / H.265 (HEVC) Karta pamięci Micro SD (do 64 GB) Pamięć (nie objęta dostawą) (wymagana karta klasy 10 SDHC lub wyższej) poklatkowy / zwolnione tempo / pojedyncze Tryby nagrywania...
-
Página 103: Usuwanie Usterek
Usuwanie usterek Kamera nie daje się Upewnij się, że kamera jest naładowana. Do włączyć ładowania kamery użyj kabla USB-C i komputera. Kamera nie reaguje 1. Wyjmij akumulator na krótki czas 2. Włóż ponownie akumulator i włącz kamerę 3. Przeprowadź „Factory Reset“ (reset do ustawień... - Página 104 © 2018 National Geographic Partners LLC. All rights reserved. NATIONAL GEOGRAPHIC and Yellow Border Design are trademarks of the National Geographic Society, used under license. Bresser GmbH Gutenbergstr. 2 DE-46414 Rhede Irrtümer und technische Änderungen vorbehalten. www.bresser.de · info@bresser.de Errors and technical changes reserved. Manual_8683500_ActionCam-Explorer-4_de-en-es-pt-pl_NATGEO_v052018a...