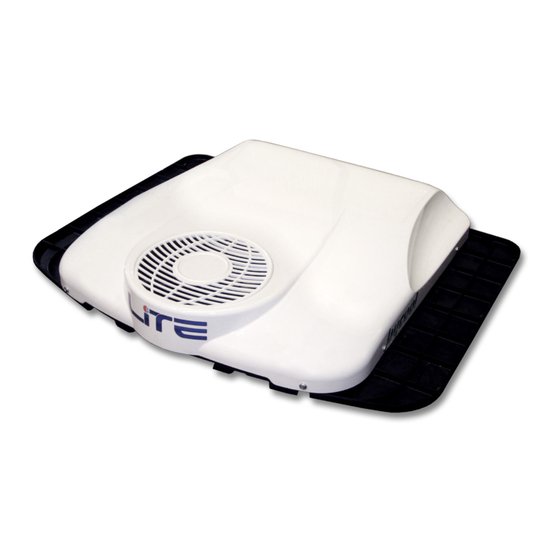
dirna Bergstrom bycool green lineLITE Actros MP5 Instrucciones De Montaje
Ocultar thumbs
Ver también para bycool green lineLITE Actros MP5:
- Instrucciones de montaje (64 páginas)
Tabla de contenido
Publicidad
Idiomas disponibles
Idiomas disponibles
Enlaces rápidos
Publicidad
Tabla de contenido

Manuales relacionados para dirna Bergstrom bycool green lineLITE Actros MP5


Resumen de contenidos para dirna Bergstrom bycool green lineLITE Actros MP5
- Página 1 ® LITE Actros MP5 Instrucciones de Montaje Spanish Mounting Instructions English Instructions de Montage French Montageanweisungen German Istruzioni di Montaggio Italian Calidad en Empresa Automoción Registrada 1002487616 IATF 16949 ISO 9001...
-
Página 2: Recomendaciones Para El Montaje
LITE ® Herramientas Recomendaciones Para el montaje Juego de Llaves Torx Juego de Llaves Allen • Antes de iniciar el montaje leer las instrucciones y Llave fija 10, 13, 14 seguirlas durante el proceso de instalacion. Tijeras Flexómetro • Usar herramientas adecuadas para... - Página 3 LITE ® Desmontar escotilla y los elementos de fijación y entregar éstos al cliente. Pegue la junta EPDM 30x25 alrededor del hueco escotilla (mirar detalle para cortar los bordes finales de la unión de la junta). Junta EPDM Nervio Atención: La junta EPDM tiene que estar pegada junto al saliente del hueco de la escotilla.
- Página 4 LITE ® 15 mm COMO CORTAR LA JUNTA EPDM PARA EVITAR FILTRACIÓN DE AGUA EN LA CABINA A- Pegar la junta, manteniendo 100 mm de papel protector por cada lado. B- Quitar los dos piezas de papel. C- Pegue presionado ambos finales. Junta Junta Techo cabina...
- Página 5 LITE ® Roscar (4) hexágonos M8/125x26 con arandela goma, arandela plana en insertos de la base y apretar con un par de apriete de 12,7±10 Nm. Base Arandela goma Arandela plana Hexágono M8/125x26 Colocar soportes de fijación con arandela plana, arandela grower y tornillo M8/125x45 sin apretar.
-
Página 6: Parte Delantera
LITE ® Presentar consola y centrar el equipo. Una vez centrado, retirar consola y apretar tornillos M8/125x45 hasta hacer tope con los hexágonos para fijar el equipo. Atención: Es muy importante verificar por la parte interior, que una vez centrado el equipo no quedan por dentro de la junta, las rejillas de entrada de aire del condensador, para evitar la entrada de agua en el interior de la cabina a través de ellas. - Página 7 LITE ® Llevar cables de alimentación hasta escotilla y grapar en éstos los terminales suministrados y colocar caja de 2 vías suministrada. Atención: hacer coincidir cables según se indica, R= (+) y N= (-). Colocar la consola con (4) tornillos M6/100x15 allen y (4) tapones 10 mm de plástico gris.
-
Página 8: Vista Explosionada Hasta La Fijación De Los Soportes
LITE ® Vista explosionada hasta la fijación de los soportes (4) Arandelas goma Ø 8 Junta EPDM 30X25 (4) Arandelas planas Ø 8 (4) Hexágonos M8 M-H L=26 Soporte de fijación Techo cabina (4) Aradelas planas Ø 8 (4) Aradelas grower Ø 8 (4) Tornillo 8/125x45 Vista explosionada hasta la fijación de la consola Hexágono M6 M-H L=98... -
Página 9: Esquema Eléctrico
LITE ® Esquema eléctrico ¡AVISO IMPORTANTE! Precaución de no invertir las polaridades al conectar el equipo a la batería. Si esto sucediera la placa de mandos no se enciende y el equipo no funciona. Sensor aire de retorno Soplador Sensor antihielo Control electrónico... - Página 10 The installing personnel must have a sufficient training ! Warning in vehicles air conditioning. dirna Bergstrom s.l. shall not be responsible for When installing air conditioning equipment on roof, the breakdowns or damages coming from an inadequate upper cabin part must be protected with a cloth or a...
- Página 11 LITE ® Take down the hatch and the fastening elements, and hand them over to the customer. Attach the EPDM 30x25 seal around the hatch gap (see the details to cut the ends of the seal joint). EPDM seal Nerve Caution: The EPDM seal must be attached next to the ridge of the hatch gap.
- Página 12 LITE ® 15 mm HOW TO CUT EPDM GASKET TO AVOID WATER FILTRATION INTO THE CABIN A- Glue gasket, keeping 100 mm of protection paper at each side. B- Remove the two pieces of paper. C- Glue by pressing both ends. Gasket Gasket Cabin roof...
- Página 13 LITE ® Screw (4) M8/125x26 hexagons with rubber washer and flat washer in the base inserts, and tighten with a torque of 12.7±10 Nm. Base Rubber washer Flat washer Hexagon M8/125x26 Position the fastening supports with flat washer, grower washer and M8/125x45 screw, without tightening.
- Página 14 LITE ® Position the console and align the unit. Once aligned, remove the console and tighten the M8/125x45 screws until it comes up against the hexagons in order to secure the unit. Caution: Once aligned, it is very important to check on the inside that the condenser’s air input grilles are not inside the seal, thus ensuring water cannot enter the cabin through them.
- Página 15 LITE ® Run power cables to the hatch and secure the supplied terminals on them, positioning the supplied 2-way box. Caution: match the cables as indicated, R= (+) and B= (-). Position the console with (4) M6/100x15 Allen screws and (4) 10 mm grey plastic plugs.
- Página 16 LITE ® Exploded drawing to fixing brackets (4) Ø8 rubber washers 30x25 EPDM Seal (4) Ø8 flat washers (4) M8 M-F L=26 hexagons Attachment bracket Cabin roof (4) Ø8 flat washers (4) Ø8 grower washers (4) 8/125x45 screws Exploded view to securing the console M6 M-F L=98 hexagon (4) 6/100x15 Allen screws Console...
-
Página 17: Wiring Diagram
LITE ® Wiring diagram IMPORTANT WARNING! Take care not to invert the polarities when connecting the unit to the battery. If this happens, the control plate does not come on and the unit does not work. Return air sensor Blower Anti-freeze sensor Electronic... - Página 18 Lors de l’installation de l’appareil d’air conditionné sur le dirna Bergstrom, s.l., ne sera pas responsable des toit, il faudra protéger la partie supérieure de la cabine dommages ou des bris dérivés d’une installation ou avec un linge ou une couverture de protection afin d’éviter...
- Página 19 LITE ® Démonter l’écoutille et les éléments de fixation et les remettre au client. Coller le joint EPDM 30x25 autour du creux de l’écoutille (suivre le détail pour couper les bords finaux d’union du joint). Joint EPDM Nervure Attention : le joint EPDM doit être collé à la partie saillante du creux de l’écoutille.
- Página 20 LITE ® 15 mm COMMENT COUPER LE JOINT EPDM POUR A EVITER LES FILTRATIONS DANS LA CABINE A- Coller le joint en maintenant une protection en papier de 100 mm de chaque côté. B- Retirer les deux morceaux de papier. C- Coller en faisant pression sur les deux extrémités.
- Página 21 LITE ® Visser (4) hexagones M8/125x26 avec une rondelle en caoutchouc et une rondelle à surface large dans les inserts de la base et appliquer un couple de serrage de 12,7±10 Nm. Base Rondelle caoutchouc Rondelle plate Hexagone M8/125x26 Placer les supports de fixation avec une rondelle plate, une rondelle grower et une vis M8/125x45 sans serrer.
- Página 22 LITE ® Présenter la console et centrer l’équipement. Une fois centré, retirer la console et serrer les vis M8/125x45 jusqu’à atteindre la butée des hexagones pour fixer l’équipement. Attention : il est très important de vérifier par la partie intérieure que les grilles d’entrée d’air du condenseur ne restent pas à...
- Página 23 LITE ® Porter les câbles d’alimentation jusqu’à l’écoutille et agrafer ces derniers aux terminaux fournis et placer le boîtier à 2 voies fourni. Attention : faire coïncider les câbles tel que cela est indiqué R= (+) et N= (-). Placer la console avec (4) vis M6/100x15 allen et (4) bouchons 10 mm en plastique gris.
-
Página 24: Vue Éclatée Jusqu'à La Fixation De Console
LITE ® Vue éclatée jusqu’à la fixation des supports (4) Rondelles caoutchouc Ø 8 Joint EPDM 30X25 (4) Rondelles plates Ø 8 (4) Hexagones M8 M-H L=26 Support de fixation Plafond cabine (4) Rondelles plates Ø 8 (4) Rondelles grower Ø 8 (4) Vis 8/125x45 Vue éclatée jusqu’à... -
Página 25: Schéma Électrique
LITE ® Schéma électrique AVIS IMPORTANT ! Attention de ne pas inverser les polarités au moment de connecter l’équipement à la batterie. Si cela se produisait, la plaque de commande ne s’allumerait pas et l’équipement ne fonctionnerait pas. Capteur d’air de retour Souffleur Capteur antigel... - Página 26 LITE ® Werkzeuge Empfehlungen Zur montage Torx-Schraubenschlüssel Inbusschraubenschlüssel • Vor und während der Montage bitte diese Anweisungen 10er, 13er, 14er Schraubenschlüssel lesen und beachten. Schere Metermaß • Benutzen Sie für jeden Arbeitsschritt die geeigneten Werkzeuge. Zugehörige Dokumentation Elektrizität Montageanweisungen 1002487616 •...
- Página 27 LITE ® Luke und Befestigungselemente ausbauen und diese dem Kunden aushändigen. EPDM-Dichtung 30x25 um die Lukenöffnung herum kleben (siehe Detailzeichnung für das Zurechtschneiden der äußeren Fugenränder der Dichtung). EPDM-Dichtung Rippe Achtung: Die EPDM-Dichtung muss am Vorsprung der Lukenaussparung angeklebt sein.
- Página 28 LITE ® 15 mm WIE DIE EPDM-DICHTUNG GESCHNITTEN A WIRD, UM WASSERUNDICHTIGKEITEN IN DIE KABINE ZU VERMEIDEN A- Dichtung aufkleben und dabei einen Papierschutz von 100 mm auf jeder Seite beibehalten. B- Die zwei Papierstücke entfernen. C- Unter Anpressen beider Enden aufkleben. Dichtung Dichtung Kabinendach...
- Página 29 LITE ® (4) Sechskant-Abstandshalter M8/125x26 mit Gummi-Unterlegscheibe und Flachscheibe in die Einsätze der Grundplatte schrauben und auf 12,7±10 Nm anziehen. Grundplatte Gummiunterlegscheibe Flachscheibe Sechskant-Verbindungsmutter M8/125x26 Befestigungshalterungen Flachscheibe, Federring und Schraube M8/125x45 einsetzen ohne anzuziehen. (4) Sechskant-Abstandshalter M6 L=98 mit Gummi- Unterlegscheibe und Flachscheibe einschrauben und auf 4,75±10% Nm anziehen.
- Página 30 LITE ® Konsole auflegen und Gerät zentrieren. Nach dem Zentrieren Konsole entfernen und Schrauben M8/125x45 bis zum Anschlag an die Sechskant- Abstandshalter anziehen, um das Gerät zu befestigen. Achtung: Unbedingt von innen sicherstellen, dass die Lufteintrittsgitter des Kondensators nach dem Zentrieren des Geräts nicht von der Dichtung verdeckt werden, damit kein Wasser in die Kabine gelangen kann.
- Página 31 LITE ® Netzkabel zur Luke führen, die mitgelieferten Kabelschuhe daran heften und den mitgelieferten 2-Wege-Kasten anbringen. Achtung: Die Kabel müssen wie angegeben übereinstimmen: R= (+) und S= (-). Konsole Innensechskantschrauben M6/100x15 und (4) grauen Kunststoffkappen 10 mm anbringen.
- Página 32 LITE ® Explosionsansicht bis zur befestigung der halterungen (4) Gummiunterlegscheibe Ø 8 EPDM-Dichtung 30x25 (4) Flachscheiben Ø 8 (4) Sechskant-Abstandshalter M8 außen-/innen L=26 Befestigungshalterung Kabinendecke (4) Flachscheiben Ø 8 (4) Federringe Ø 8 (4) Schrauben 8/125x45 Seitliche explosionsansicht bis zur befestigung der konsolen Sechskant-Abstandshalter M6 außen-/innen M-H L=98 (4) Innensechskantschrauben 6/100x15...
- Página 33 LITE ® Schaltplan WICHTIGER HINWEIS! Achtung: Die Polaritäten beim Anschluss des Geräts an die Batterie nicht invertieren. Ist dies der Fall, schaltet sich die Bedientafel nicht ein und das Gerät funktioniert nicht. Abluftsensor Gebläse Frostschutzfühler Elektroniksteuerung Autorisierte Originalbatterie oder –anschluss Schaltzentrale Kondensatorlüfter Verdichtersteuerung...
- Página 34 L’installatore deve essere in possesso della formazione necessaria in materia di aria condizionata per veicoli. ! Attenzione dirna Bergstrom, s.l. declina ogni responsabilità per danni o rotture derivanti dall’errata installazione Quando si installa l’impianto di aria condizionata sul o dall’errato uso dell’impianto o da sostituzioni...
- Página 35 LITE ® Smontare il coperchio del tettuccio apribile e gli elementi di fissaggio e consegnarli al cliente. Incollare la guarnizione EPDM 30x25 intorno al vano del tettuccio apribile (vedi il particolare per tagliare i bordi finali di attacco della guarnizione). Guarnizione EPDM Nervatura Attenzione: la guarnizione EPDM deve essere...
- Página 36 LITE ® 15 mm COME TAGLIARE LA GUARNIZIONE EPDM EVITARE INFILTRAZIONI NELLA CABINA A- Incollare la guarnizione mantenendo una protezione di carta di 100 mm su ogni lato. B- Rimuovere i due pezzi di carta. C- Incollare premendo su entrambe le estremità.
- Página 37 LITE ® Avvitare (4) perni esagonali M8/125x26 con rondella di gomma e rondella piana negli inserti della base e stringere con una coppia di serraggio di 12,7±10 Nm. Base Rondelle gomma Rondelle piane Perno esagonale M8/125x26 Inserire i supporti di fissaggio con rondella piana, rondella grower e vite M8/125x45, senza stringere.
-
Página 38: Parte Anteriore
LITE ® Sistemare provvisoriamente la console e centrare l’impianto. Una volta centrato l’impianto, rimuovere la console e stringere le viti M8/125x45 fino a battuta con i perni esagonali per fissare l’impianto. Attenzione: è molto importante verificare dall’interno che, una volta centrato l’impianto, le griglie d’entrata dell’aria del condensatore non siano inserite all’interno della guarnizione, per evitare l’entrata dell’acqua all’interno della cabina attraverso di esse. - Página 39 LITE ® Condurre i cavi di alimentazione fino al tettuccio apribile e aggraffarvi i terminali in dotazione, quindi montare la scatola a 2 vie in dotazione. Attenzione: fare coincidere i cavi come indicato, R= (+) e N= (-). Fissare la console con (4) viti a brugola M6/100x15 e (4) tappini 10 mm di plastica grigia.
- Página 40 LITE ® Esploso fino al fissaggio dei supporti (4) Rondelle gomma Ø 8 Guarnizione EPDM 30x25 (4) Rondelle piane Ø 8 (4) Perni esagonali M8 M-F L=26 Supporto fissaggio Tettuccio cabina (4) Rondelle piane Ø 8 (4) Rondelle grower Ø 8 (4) Viti 8/125x45 Esploso laterale fino al fissaggio delle console Perno esagonale M6 M-F...
-
Página 41: Schema Elettrico
LITE ® Schema elettrico AVVERTENZA IMPORTANTE! Fare attenzione a non invertire le polarità quando si esegue il collegamento dell’impianto alla batteria. Infatti, in tal caso il quadro comandi non si accende e l’impianto non funziona. Sensore aria ritorno Ventilatore Sensore antigelo Controllo elettronico... - Página 42 LITE ®...
- Página 43 LITE ®...
- Página 44 Dirna Bergstrom behält sich vor, aus technischen oder kaufmännischen Gründen jederzeit Änderungen HIWEIS: der Angaben dieser Veröffentlichung vorzunehmen. Dirna Bergstrom si riserva il diritto di effettuare modifiche in qualsiasi momento ai dati contenuti in questa ATTENZIONE: pubblicazione, per motivi tecnici o commerciali.