Publicidad
Idiomas disponibles
Idiomas disponibles
Enlaces rápidos
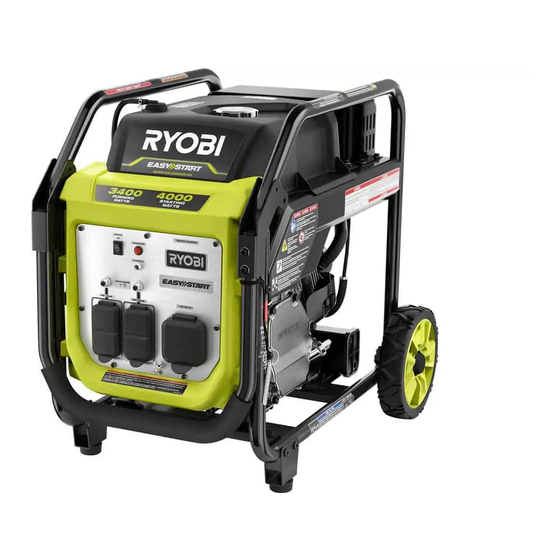
INVERTER GENERATOR
GÉNÉRATRICE D'INVERSEUR
GENERADOR DEL INVERSOR
RYi4022X
NOTICE
Do not use E15 or E85 fuel in this
product. It is a violation of federal
law and will damage the unit and void
your warranty. Only use unleaded gasoline containing up to
10% ethanol.
Ne pas utiliser d'essence E15 ou E85 dans ce produit. Une
telle utilisation représente une violation de la loi fédérale
et endommagera l'appareil et annulera la garantie. Utiliser
seulement de l'essence sans plomb ne contenant pas plus
de 10 % d'éthanol.
No utilice combustibles E15 o E85 con este producto. Esto
constituye una violación a la ley federal, dañará la unidad y
anulará la garantía. Utilice únicamente gasolina sin plomo
que contiene hasta 10% de etanol.
TABLE OF CONTENTS
Important Safety Instructions ............3-4
Specific Safety Rules ........................4-5
Symbols ............................................6-8
Electrical .........................................9-10
Features ........................................11-12
Assembly ......................................12-13
Operation ......................................13-16
Maintenance .................................16-19
Troubleshooting ............................19-20
Parts Ordering/Service ......... Back Page
WARNING:
To reduce the
risk of injury, the user must read and
understand the operator's manual before
using this product.
SAVE THIS MANUAL FOR
FUTURE REFERENCE
AVIS
AVISO
TABLE DES MATIÈRES
concernant la sécurité ......................3-4
Règles de sécurité particulières ........4-5
Symboles ..........................................6-8
Caractéristiques électriques ...........9-10
Caractéristiques ............................11-12
Assemblage ..................................12-13
Utilisation ......................................13-16
Entretien ........................................16-20
Dépannage ....................................21-22
Commande de pièces /
réparation ............................Páge arrière
AVERTISSEMENT :
réduire les risques de blessures,
l'utilisateur doit lire et veiller à bien
comprendre le manuel d'utilisation avant
d'employer ce produit.
CONSERVER CE MANUEL
POUR FUTURE RÉFÉRENCE
OPERATOR'S MANUAL
MANUEL D'UTILISATION
MANUAL DEL OPERADOR
NEUTRAL FLOATING
FLOTTANTE NEUTRE / NEUTRAL DE FLOTACIÓN
Reglas de seguridad específicas ......4-5
Símbolos ...........................................6-8
Aspectos eléctricos ........................9-10
Características ..............................11-12
Armado .........................................12-13
Funcionamiento ............................13-16
Mantenimiento ..............................17-20
Corrección de problemas .............21-22
Pedidos de piezas/
Pour
el riesgo de lesiones, el usuario debe leer
y comprender el manual del operador
antes de usar este producto.
PARA FUTURAS CONSULTAS
ÍNDICE DE CONTENIDO
importantes .......................................3-4
servicio ............................ Pág. posterior
ADVERTENCIA:
GUARDE ESTE MANUAL
Para reducir
Publicidad
Capítulos

Manuales relacionados para Ryobi RYi4022X


Resumen de contenidos para Ryobi RYi4022X
-
Página 1: Tabla De Contenido
OPERATOR’S MANUAL MANUEL D’UTILISATION MANUAL DEL OPERADOR INVERTER GENERATOR GÉNÉRATRICE D’INVERSEUR GENERADOR DEL INVERSOR RYi4022X NOTICE AVIS AVISO Do not use E15 or E85 fuel in this product. It is a violation of federal law and will damage the unit and void your warranty. - Página 2 See this fold-out section for all of the figures referenced in the operator’s manual. Consulter l’encart à volets afin d’examiner toutes les figures mentionnées dans le manuel d’utilisation. Consulte esta sección desplegable para ver todas las figuras a las que se hace referencia en el manual del operador.
- Página 3 Fig. 1 Q - Muffler heat shield (écran de chaleur de A - Folding handle (poignée repliable, mango H - CO sensor LED indicator (voyant DEL du capteur CO, indicador LED del sensor de CO) silencieux, pantalla térmica del silenciador) plegable) I - Wheel (roue, rueda) R - Oil cap/dipstick (bouchon / jauge d’huile,...
- Página 4 Fig. 4 Fig. 6 Fig. 8 A - Funnel (entonnoir, embudo) B - Fuel cap (bouchon du réservoir, tapa del tanque de combustible) A - Bolts (boulons, pernos) A - Frame (cadre, armazón) B - Frame (renfort transversal, través del B - Hole (trou, agujero) Fig.
- Página 5 Fig. 11 Fig. 13 Fig. 15 A - Muffler outlet (sortie de silencieux, salida del silenciador) A - Oil drain plug (huiler le bouchon d’égout, B - Spark arrestor (pare-étincelles, parachispas) tapón de drenaje del aceite) C - Wire brush (balai de roue, cepillo de alambre) B - Container (conteneur, recipiente) Fig.
-
Página 6: Grounding The Generator
To register your Ryobi product, please visit: www.ryobitools.com LOCATE GENERATOR AT LEAST 20 FT.* AWAY TO REDUCE THE RISK OF CARBON MONOXIDE GETTING INSIDE THE HOME * Minimum distance as recommended by U.S. Department of Health and Human Services Centers for Disease Control and Prevention (www.cdc.gov/co). Your specific home and/or wind conditions may require additional distance. -
Página 7: Important Safety Instructions
IMPORTANT SAFETY INSTRUCTIONS Do not start or operate the engine in a confined space, building, near open windows, or in other unventilated DANGER: space where dangerous carbon monoxide fumes can Carbon Monoxide. Using a generator indoors CAN KILL collect. Carbon monoxide, a colorless, odorless, and YOU IN MINUTES. -
Página 8: Specific Safety Rules
IMPORTANT SAFETY INSTRUCTIONS For power outages, permanently installed stationary gen- Use only recommended or equivalent replacement parts erators are better suited for providing back-up power to and accessories and follow instructions in the Maintenance the home. Even a properly connected portable generator section of this manual. - Página 9 SPECIFIC SAFETY RULES The carbon monoxide sensor on this generator is not DO NOT tamper with, adjust, or modify the carbon monox- designed to detect smoke, fire, or any other gas. It will ide (CO) sensor module on your generator. Failure to follow only activate due to the presence of carbon monoxide these instructions can cause the monitor to malfunction gas at the sensor.
-
Página 10: Symbols
SYMBOLS The following signal words and meanings are intended to explain the levels of risk associated with this product. SYMBOL SIGNAL MEANING Indicates a hazardous situation, which, if not avoided, will result in death or DANGER: serious injury. Indicates a hazardous situation, which, if not avoided, could result in death or WARNING: serious injury. -
Página 11: Safety Labels
SYMBOLS SAFETY LABELS The information below can be found on the generator. For your safety, please study and understand all of the labels before starting the generator. If any of the labels come off the unit or become hard to read, contact cus- tomer service or a qualified service center for replacement. - Página 12 SYMBOLS FUEL WARNING No smoking when filling with gasoline. Do not overfill. Full level is 1 in. below the top of the fuel neck. Stop the engine for five minutes before refueling to avoid the heat from the muffler igniting fuel vapors. ENGINE LUBRICANT WARNING You must add lubricant before first operating the generator.
-
Página 13: Extension Cord Cable Size
ELECTRICAL EXTENSION CORD CABLE SIZE Refer to the table below to ensure the cable size of the extension cords you use are capable of carrying the required load. Inadequate size cables can cause a voltage drop, which can damage the appliance and overheat the cord. Load in Watts Maximum Allowable Cord Length Current in... -
Página 14: Generator Capacity
ELECTRICAL GENERATOR CAPACITY 3. Permit the generator output to stabilize (engine runs smoothly and attached device operates properly). Make sure the generator can supply enough continuous (run- 4. Plug in and turn on the next load. ning) and surge (starting) watts for the items you will power at the same time. -
Página 15: Product Specifications
FEATURES PRODUCT SPECIFICATIONS GENERATOR ENGINE Rated Voltage .............. 120V Engine Type ............212cc OHV Rated Amps .............. 25.83A REPLACEMENT SPARK PLUG Rated Output*............3,100 W Manufacturing # 099930627 or Starting Watts ............4,000 W 099930667 ........ LG F6RTC or equivalent Rated Frequency ............ -
Página 16: Assembly
FEATURES OIL CAP/DIPSTICK RESET BUTTON Remove the oil fill cap to check and add lubricant to the The reset button is used to restore power if an overload generator when necessary. occurs. To restore power, remove the last electrical load OIL DRAIN PLUG added, then depress the reset button. -
Página 17: Operation
ASSEMBLY Thread lock nuts onto bolts and tighten one full turn past Slide the axle through the hole in the center of the wheel. snug. Slide a washer onto the axle, then slide the axle into the NOTE: Be careful not to overtighten so that foot mate- wheel mounting hole as shown. - Página 18 OPERATION In some areas, generators are required to be registered with local utility companies. WARNING: If the generator is used at a construction site, there may Do not allow familiarity with this product to make you be additional regulations which must be observed. careless.
-
Página 19: Adding Fuel
OPERATION ETHANOL-BLENDED FUELS STARTING THE ENGINE See Figures 9 - 10. NOTICE: NOTICE: Do not use E15 or E85 fuel in this product. It is a viola- tion of federal law and will damage the unit and void On a level surface with the engine off, check the lubricant your warranty. -
Página 20: Maintenance
OPERATION HIGH ALTITUDE OPERATION altitude may increase its emissions, decrease fuel efficiency, degrade performance, and cause irreversible damage. Your engine is configured for operation below altitudes of Engines configured for high altitude operation cannot be 2,000 feet for 099930628 and 095930628, or 3,000 feet for operated in standard altitude conditions. - Página 21 MAINTENANCE CHANGING ENGINE LUBRICANT SPARK ARRESTOR See Figure 13. See Figure 15. For best performance, engine lubricant should be changed NOTICE: after every 100 hours or 6 months of operation. This product is equipped with a spark arrestor that has ...
-
Página 22: Maintenance Schedule
MAINTENANCE TRANSPORTING Do not drop or strike unit or place under heavy objects. Verify the easy start lever is in the OFF position. If transporting in a vehicle, drain the fuel tank, close the fuel valve, and securely restrain the generator. ... -
Página 23: Troubleshooting
MAINTENANCE STORAGE When preparing the generator for storage, allow the unit to cool for 30 minutes then follow the guidelines below. STORAGE TIME PRIOR TO STORING Less than 2 months Drain gasoline from tank and dispose of in a suitable container according to state and local ordinances. 2 months to 1 year Drain fuel from carburetor. - Página 24 TROUBLESHOOTING PROBLEM POSSIBLE CAUSE SOLUTION Engine hard to start. Water in gasoline. Drain entire system and refill with fresh fuel. Weak spark at spark plug. Contact a qualified service center. Engine lacks power. Engine stored without treating or Drain fuel and carburetor. Refuel with draining gasoline, or refueled with bad fresh gasoline.
- Página 25 Pour enregistrer votre produit de Ryobi, s’il vous plaît la visite : www.ryobitools.com INSTALLER ET ÉLOIGNER LA GÉNÉRATRICE D’AU MOINS 6 M (20 PI)* AFIN DE RÉDUIRE LE RISQUE D’INFILTRATION DE MONOXYDE DE CARBONE À L’INTÉRIEUR DE LA MAISON Distance minimale recommandée par le Service de santé et les Centres pour le contrôle et la prévention des maladies américains (www.cdc.gov/co).
-
Página 26: Instructions Importantes Concernant La Sécurité
INSTRUCTIONS IMPORTANTES CONCERNANT LA SÉCURITÉ CONSERVER CES INSTRUCTIONS DANGER : Ce manuel relate à propos d’instructions importantes lesquelles devraient être suivies pendant l’installation et Monoxyde de Carbone. Utiliser une génératrice à l’entretien des piles et de la génératrice. l’intérieur d’un bâtiment CAUSERA LA MORT EN Ne pas brancher au circuit électrique d’un bâtiment à... -
Página 27: Règles De Sécurité Particulières
INSTRUCTIONS IMPORTANTES CONCERNANT LA SÉCURITÉ Poser la machine sur un sol plat, arrêter le moteur et le Il est préférable d’utiliser une génératrice fixe comme laisser refroidir pendant cinq minutes avant de faire le source d’énergie de secours pour alimenter la maison plein. - Página 28 RÈGLES DE SÉCURITÉ PARTICULIÈRES Ne pas laisser le réservoir d’essence de la génératrice NE JAMAIS ignorer un événement d’arrêt automatique. déborder lors du remplissage. Remplir le réservoir jusqu’à SI UN ARRÊT AUTOMATIQUE SURVIENT — VOUS 25,4 mm (1 po) de l’ouverture du goulot du réservoir pour DEVEZ quitter la zone immédiatement et vous rendre permettre l’expansion du carburant.
-
Página 29: Symboles
SYMBOLES Les termes de mise en garde suivants et leur signification ont pour but d’expliquer le degré de risques associé à l’utilisation de ce produit. SYMBOLE SIGNAL SIGNIFICATION Indique une situation dangereuse qui, si elle n’est pas évitée, aura pour con- DANGER : séquences des blessures graves, voire mortelles. -
Página 30: Autocollants De Sécurité
SYMBOLES AUTOCOLLANTS DE SÉCURITÉ Les informations ci-dessous se trouvent sur le génératrice. Pour des raisons de sécurité, étudier et comprendre tous les autocollants avant de mettre le génératrice en marche. Si un autocollant se détache ou devient illisible, contacter le Service à la clientèle ou un centre de réparations qualifié... - Página 31 SYMBOLES AVERTISSEMENT CONCERNANT LE CARBURANT Ne pas fumer lors du plein. Ne pas trop remplir. Le plein est obtenu à 25 mm (1 po) en dessous du haut du goulot de remplissage. Arrêter le moteur pendant cinq minutes avant de faire le plein pour éviter que la chaleur du silencieux n’allume les vapeurs de carburant.
-
Página 32: Caractéristiques Électriques
CARACTÉRISTIQUES ÉLECTRIQUES TAILLE DU CÂBLE DU CORDON PROLONGATEUR Voir le tableau ci-dessous pour vérifier que la taille de câble des cordons prolongateurs utilisés est capable de porter la charge requise. Des tailles de câbles inadéquates peuvent causer une chute de tension qui peut détériorations l’appareil et surchauffer le cordon. -
Página 33: Gestion De L'énergie
CARACTÉRISTIQUES ÉLECTRIQUES CAPACITÉ DU GÉNÉRATRICE 3. Laisser la sortie du génératrice se stabiliser (le moteur tourne régulièrement et l’appareil relié fonctionne S’assurer que le génératrice peut fournir les watts continus correctement). (de fonctionnement) et de surtension (démarrage) suffisants 4. Brancher et mettre la charge suivante en marche. pour tous les articles alimentés au même moment. -
Página 34: Caractéristiques
CARACTÉRISTIQUES FICHE TECHNIQUE MOTEUR GÉNÉRATRICE Type de moteur............212cc OHV Tension nominale ............. 120 V REMPLACER LA BOUGIE 25.83 Ampérage nominal ............Sortie nominale* ............3 100 W Fabricant # 099930627 ou 099930667 ........LG F6RTC ou équivalent Watts démarrage ............4 000 W Fréquence nominale ............ -
Página 35: Bouton De Réarmement
CARACTÉRISTIQUES PROTECTEUR D’ARRÊT EN CAS DE BAS HUILER LE BOUCHON D’ÉGOUT NIVEAU D’HUILE Lors de la vidange de lubrifiant moteur, la huiler le bouchon L’indicateur de bas niveau d’lubrifiant clignote et le moteur d’égout est retirée pour permettre à l’huile d’être vidangée. s’arrête automatiquement lorsque le niveau d’lubrifiant est bas. -
Página 36: Outils Nécessaires
ASSEMBLAGE OUTILS NÉCESSAIRES Localiser les pièces suivantes : Voir la figure 3. 2 essieux Les outils suivants (non inclus ou dessiné pour escalader) 2 axes de blocage sont nécessaires pour effectuer l’assemblage : 2 couvercles des roues Clés à douille et/ou clés mixte 2 rondelles 2 roues NOTE : Ne pas mettre du carburant ou du lubrifiant dans... -
Página 37: Avant D'utiliser L'unité
UTILISATION AVIS : AVERTISSEMENT : Avant chaque utilisation, inspecter au complet le produit afin de s’assurer qu’aucune pièce (vis, écrous, boulons, NE JAMAIS ignorer un événement d’arrêt automatique. SI chapeaux, etc.) n’est endommagée, manquante ou UN ARRÊT AUTOMATIQUE SURVIENT — VOUS DEVEZ desserrée. -
Página 38: Ajout De Carburant
UTILISATION AJOUT DE CARBURANT 4 temps conforme ou supérieure aux exigences de service Voir la figure 8. SJ API. Ce moteur est doté d’un dispositif qui arrête le moteur lorsque DANGER : le niveau de lubrifiant est incorrect. Le moteur ne redémarre pas tant que le niveau de lubrifiant correct n’est pas atteint. -
Página 39: Arrêt Du Moteur
UTILISATION MISE EN MARCHE DU MOTEUR AVERTISSEMENT : Voir les figures 9 et 10. Pendant le fonctionnement ou lors du rangement, AVIS : allouez un espace libre de 91,4 cm (3 pi) de chaque Sur une surface à niveau, avec le moteur sur arrêt, vérifier côté... -
Página 40: Entretien Général
ENTRETIEN Si les élément du filtre à air est sale, les nettoyer avec de l’eau savonneux chaude. Rincer et laisser sécher. AVERTISSEMENT : Appliquer une légère couche d’huile moteur sur les Lors de la réparation, utiliser seulement les pièces de éléments puis l’essorer. - Página 41 ENTRETIEN VIDANGE DU RÉSERVOIR DE CARBURANT/ avant de la réinstaller. Si l’isolateur est fissuré ou écaillé, remplacer la bougie. Pour remplacer la bougie, consulter CARBURATEUR les Fiche technique au début du manuel ou le manuel Voir la figure 16. fourni avec le moteur, si nécessaire. Afin de prévenir les dépôts de gommes dans le circuit ...
-
Página 42: Calendrier D'entretien
ENTRETIEN CALENDRIER D’ENTRETIEN NOTE : Si un autre manuel du moteur est fourni avec cette génératrice, veuillez respecter le calendrier d’entretien présenté dans le manuel du moteur au lieu de suivre les instructions d’entretien décrites ci-dessous. Après 1 Tous les 3 Chaque année Avant Tous les 6 mois... -
Página 43: Lubrifiant Moteur
ENTRETIEN REMISAGE Lors de la préparation du génératrice pour le remisage, laisser l’appareil refroidir pendant 30 minutes puis suivre les instructions ci-dessous. DURÉE DU AVANT LE REMISAGE REMISAGE Moins d’2 mois Vidanger l’essence du réservoir et la disposer dans un récipient adapté selon les règlements nationaux et locaux en vigueur. -
Página 44: Dépannage
DÉPANNAGE PROBLÈME CAUSE POSSIBLE SOLUTION Le moteur ne démarre pas. Le contacteur du moteur est sur arrêt. Mettre le contacteur du moteur sur marche. Le robinet de carburant est OFF Mettre le robinet de carburant sur ON (ARRÊT). (MARCHE). Pas de carburant. Remplir le réservoir de carburant. - Página 45 DÉPANNAGE PROBLÈME CAUSE POSSIBLE SOLUTION La prise c.a. ne fonctionne pas. L’appareil branché est défectueux. Essayer un autre article. Le génératrice est surchargé. Enlever des chargements et appuyer le bouton de réarmement. Disjoncteur débranché. Réinitialisez à nouveau le disjoncteur c.a. Le génératrice émet un cognement ou Un cognement ou un cliquettement Choisir une autre marque et s’assurer...
-
Página 46: Conexión A Tierra Del Generador
Para registrar su producto de Ryobi, por favor visita: www.ryobitools.com UBIQUE EL GENERADOR A UNA DISTANCIA DE POR LO MENOS 6 M (20 PIES)* PARA REDUCIR EL RIESGO DE QUE EL MONÓXIDO DE CARBONO INGRESE EN LA CASA Distancia mínima recomendada por el Departamento de Salud y Servicios Humanos y por los Centros para el Control y la Prevención de Enfermedades de los Estados Unidos (www.cdc.gov/co). -
Página 47: Instrucciones De Seguridad Importantes
INSTRUCCIONES DE SEGURIDAD IMPORTANTES GUARDE ESTAS INSTRUCCIONES PELIGRO: Este manual contiene importantes instrucciones que se deben seguir durante la instalación y las actividades de Monóxido de carbono. Usar un generador en el interior mantenimiento del generador y las baterías. LO MATARÁ EN POCOS MINUTOS. No conecte la unidad al sistema eléctrico de un edificio a Los gases de escape del generador contienen niveles menos que el generador y el interruptor de transferencia... -
Página 48: Reglas De Seguridad Específicas
INSTRUCCIONES DE SEGURIDAD IMPORTANTES Los generadores fijos instalados de manera permanente Almacene el combustible en un recipiente aprobado para gasolina. son la mejor alternativa para abastecer de electricidad al hogar durante los cortes de energía. Incluso Coloque la unidad sobre el piso nivelado, apague el los generadores portátiles que están conectados motor, y deje que se enfríe durante cinco minutos antes correctamente pueden sobrecargarse. - Página 49 REGLAS DE SEGURIDAD ESPECÍFICAS NUNCA ignore un evento de apagado automático. SI No toque el silenciador ni el cilindro durante el funcionamiento de la unidad ni inmediatamente después; SE PRODUCE EL APAGADO AUTOMÁTICO, DEBE están CALIENTES y causan lesiones por quemadura. abandonar el lugar de inmediato y dirigirse a un área al aire libre.
-
Página 50: Símbolos
SÍMBOLOS Las siguientes palabras de señalización y sus significados tienen el objeto de explicar los niveles de riesgo relacionados con este producto. SÍMBOLO SEÑAL SIGNIFICADO Indica una situación peligrosa, la cual, si no se evita, causará lesiones graves PELIGRO: o mortales. Indica una situación peligrosa, la cual, si no se evita, podría causar lesiones ADVERTENCIA: graves o mortales. -
Página 51: Etiquetas De Seguridad
SÍMBOLOS ETIQUETAS DE SEGURIDAD L a s i g u i e n t e i n f o r m a c i ó n p u e d e encontrarse en el generador. Para su propia seguridad, le sugerimos estudiar y entender todas la etiquetas antes de poner marcha el generador. -
Página 52: Advertencia Para La Tapa Del Tanque De Combustible
SÍMBOLOS ADVERTENCIA DE COMBUSTIBLE No fume al abastecer el combustible. No llene de más. El nivel de lleno es 25 mm (1 pulg.) debajo del cuello del tanque de combustible. Pare la marcha del motor cinco minutos antes del reabastecimiento de combustible para evitar que el calor del silenciador encienda los vapores de combustible. -
Página 53: Aspectos Eléctricos
ASPECTOS ELÉCTRICOS CALIBRE DEL CORDÓN DE EXTENSIÓN Consulte el cuadro mostrado abajo para asegurarse de que el calibre de los cordones de extensión que utilice puedan con la carga eléctrica requerida. Los cordones de calibre insuficiente pueden causar una caída de voltaje, lo cual puede quemar el dispositivo y recalentar el cordón mismo. -
Página 54: Capacidad Del Generador
ASPECTOS ELÉCTRICOS CAPACIDAD DEL GENERADOR 3. Deje que se estabilice la salida del generador (el motor marcha uniformemente y el dispositivo acoplado funciona Cerciórese que el generador pueda suministrar suficientes correctamente). vatios de potencia continua (en marcha) y de sobrecorriente 4. -
Página 55: Características
CARACTERÍSTICAS ESPECIFICACIONES DEL PRODUCTO MOTOR GENERADOR Tipo de motor ............212cc OHV Voltaje nominal ..............120 V BUJÍA DE REPUESTO Amperaje nominal............25.83 A Salida nominal* ............3 100 W Fabricante # 099930627 o 099930667 ........LG F6RTC o equivalente Salida máxima. -
Página 56: Desempaquetado
CARACTERÍSTICAS BOTÓN DE REAJUSTE TAPA DE ACEITE/VARILLA PARA MEDIR EL ACEITE El botón de reajuste es utilizado para restablecer la corriente si una sobrecarga ocurre. Para restablecer la corriente, Retire la tapa de aceite/varilla para medir el aceite para revisar retire la final carga eléctrica agregada, luego oprima el botón reset. -
Página 57: Herramientas Necesarias
ARMADO HERRAMIENTAS NECESARIAS 2 arandelas 2 ruedas Vea la figura 3. Eleve el extremo del generador donde está ubicado el Para armar la unidad se necesitan las siguientes herramientas mango hasta una altura suficiente que permita el acceso (no incluido o dibujado para escalar): a la parte inferior del bastidor;... -
Página 58: Aplicaciones
FUNCIONAMIENTO AVISO: ADVERTENCIA: Antes de cada uso, inspeccione todo el producto para NUNCA ignore un evento de apagado automático. SI detectar partes dañadas, faltantes o sueltas, como SE PRODUCE EL APAGADO AUTOMÁTICO, DEBE tornillos, tuercas, pernos, tapas, etc. Apriete firmemente abandonar el lugar de inmediato y dirigirse a un área al todos los sujetadores y las tapas y no accione este aire libre. -
Página 59: Uso De Estabililzador De Combustible
FUNCIONAMIENTO COMBUSTIBLES MEZCLADOS CON ETANOL El lubricante de motor empleado es un factor de gran importancia en el rendimiento y vida de servicio del motor. AVISO: Para uso general, a todas temperaturas, se recomienda el No utilice combustibles E15 o E85 con este producto. aceite SAE 10W-30. -
Página 60: Arranque Del Motor
FUNCIONAMIENTO NOTA: Siempre utilice gasolina sin plomo con un octanaje ADVERTENCIA: nominal inicial de 86 o mayor. Nunca utilice gasolina vieja, pasada o contaminada, y no utilice mezcla de aceite y Tanto en funcionamiento como al guardarlo, mantenga gasolina. No permita que entre tierra o agua en el tanque siempre 91,4 cm (3 pies) de espacio libre en todos los de combustible. -
Página 61: Mantenimiento General
MANTENIMIENTO Para limpiar la unidad: Cualquier establecimiento o técnico de reparaciones calificado puede realizar el mantenimiento normal, el Con un cepillo de cerdas suaves y/o una aspiradora afloje reemplazo o la reparación de los dispositivos y sistemas y elimine la tierra y la basura. de control de emisiones, con repuestos originales o ... -
Página 62: Mantenimiento De La Bujía
MANTENIMIENTO PARACHISPAS Reabastezca de lubricante la unidad de conformidad con las instrucciones indicadas en el apartado Verificación y Vea la figura 15. abastecimiento de lubricante. Para conocer la cantidad AVISO: de lubricante que se debe agregar, consulte la sección anterior Especificaciones del producto de este manual Este producto cuenta con un parachispas que ha sido o el manual del motor adjunto, si corresponde. -
Página 63: Transporte
MANTENIMIENTO Cuando el combustible se haya drenado del tanque, la forma correcta de desechar el combustible usado. coloque la palanca de arranque fácil en la posición OFF TRANSPORTE (cerrado) y vuelva a instalar el conducto de combustible Asegúrese de que la palanca de arranque fácil en la firmemente en la conector de manguera dentada. -
Página 64: Almacenamiento
MANTENIMIENTO ALMACENAMIENTO Al preparar el generador para guardarlo, deje que la unidad se enfríe durante 30 minutos y luego siga los lineamientos señalados abajo. TIEMPO DE ANTES DE GUARDARLO ALMACENAMIENTO Menos de dos meses Vacíe el tanque de combustible y colóquelo en un recipiente apropiado según lo establecido por las disposiciones estatales y locales. -
Página 65: Corrección De Problemas
CORRECCIÓN DE PROBLEMAS PROBLEMA CAUSA POSIBLE SOLUCIÓN El motor no arranca. El interruptor del motor está en Ponga el interruptor del motor en apagado. encendido. La válvula de combustible está OFF Coloque la válvula de combustible (APAGADO). hasta la posición ON (ENCENDIDO). No hay combustible en el tanque. - Página 66 CORRECCIÓN DE PROBLEMAS PROBLEMA CAUSA POSIBLE SOLUCIÓN El generador produce un ruido como de Un leve ruido ocasional de “cascabeleo” Cambie a una marca diferente de “cascabeleo” o “explosiones”. o “explosiones” si la carga es pesada gasolina, y asegúrese de que sea de no debe ser causa de preocupación.
- Página 67 NOTES / NOTAS...
-
Página 68: Manual Del Operador (No Se Muestra)
1-800-860-4050. RYOBI is a trademark of Ryobi Limited and is used pursuant to a license granted by Ryobi Limited. • PIÈCES ET SERVICE : Avant de faire la demande de service ou l’achat de pièces de remplacement, veuillez obtenir le numéro d’article, le numéro de fabrication et le numéro de série à...