Tabla de contenido
Publicidad
Idiomas disponibles
Idiomas disponibles
Enlaces rápidos
Publicidad
Tabla de contenido

Resumen de contenidos para HQ-Power VDP1000SWN
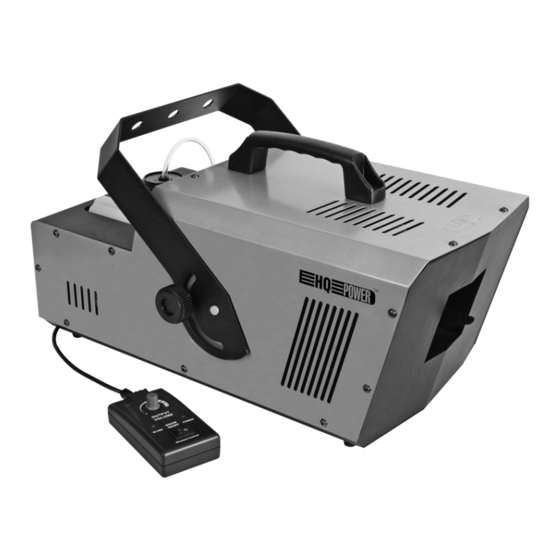
- Página 1 VDP1000SWN 1000W DMX-CONTROLLED SNOW MACHINE DMX-GESTUURDE SNEEUWMACHINE 1000W MACHINE À EFFET NEIGE CONTRÔLÉ PAR DMX DE 1000W MÁQUINA DE NIEVE CONTROLADA POR DMX - 1000W SCHNEEMASCHINE - 1000W - DMX-GESTEUERT USER MANUAL GEBRUIKERSHANDLEIDING NOTICE D’EMPLOI MANUAL DEL USUARIO BEDIENUNGSANLEITUNG...
-
Página 2: Safety Instructions
• Keep the device away from children and unauthorised users. 3. General Guidelines • This device is designed for professional use on stage, in discos, theatres, etc. The VDP1000SWN should only be used indoors with an alternating current of max. 230VAC / 50Hz. - Página 3 Connect the provided XLR cable to the female 3-pin XLR output of your controller and the other side to the male 3- pin XLR input of the VDP1000SWN. Multiple VDP1000SWNs can be linked through serial linking. The linking cable should be a two-core screened cable with XLR input and output connectors. Please refer to the diagram.
-
Página 4: Cleaning And Maintenance
In the case of the 1-channel VDP1000SWN, you will have to set the start address of the first VDP1000SWN to 1, the second VDP1000SWN to 2 (1 + 1), the third to 3 (1 + 1) and so on. -
Página 5: Veiligheidsinstructies
VDP1000SWN – DMX-GESTUURDE SNEEUWMACHINE 1000W 1. Inleiding Aan alle ingezetenen van de Europese Unie Belangrijke milieu-informatie betreffende dit product Dit symbool op het toestel of de verpakking geeft aan dat, als het na zijn levenscyclus wordt weggeworpen, dit toestel schade kan toebrengen aan het milieu. -
Página 6: Installatie
Sluit de meegeleverde XLR-kabel aan de vrouwelijke 3-pin XLR-uitgang van de controller en de andere kant van de mannelijke 3-pin XLR-ingang van de VDP1000SWN. U kunt verscheidene VDP1000SWN’s aan elkaar koppelen met behulp van een seriële koppeling. Gebruik daarvoor een 2-aderige afgeschermde kabel met XLR ingang- en uitgangsaansluitingen. -
Página 7: Reiniging En Onderhoud
In het geval van de 1-kanaals VDP1000SWN, zult u het startadres van het eerste toestel op 1 moeten instellen, van het tweede toestel op 2 (1 + 1), van het derde op 3 (2 + 1) enz. -
Página 8: Prescriptions De Sécurité
• Débranchez l’appareil s’il n’est pas utilisé ou pour le nettoyer. Tirez la fiche pour débrancher l'appareil ; non pas le câble. • Les dommages occasionnés par des modifications à l'appareil par le client, ne tombent pas sous la garantie. • Gardez votre VDP1000SWN hors de la portée de personnes non qualifiées et de jeunes enfants. 3. Directives générales •... - Página 9 Connectez un bout du câble XLR inclus à la sortie XLR femelle à 3 broches de votre contrôleur et l’autre bout à l’entrée XLR mâle à 3 broches du VDP1000SWN. Il est possible de reliez plusieurs VDP1000SWNs à partir d’une connexion sérielle.
-
Página 10: Nettoyage Et Entretien
"écoutera" son propre canal. Par conséquent, un ajustement des réglages d’un canal n’influence que l'appareil sur ce canal. Pour le VDP1000SWN à 1 canal, l’adresse de départ du premier appareil est 1, du deuxième 2 (1 + 2), du troisième 3 (2 + 1) etc. -
Página 11: Introducción
3. Normas generales • Este aparato es un efecto de luz para uso profesional en una discoteca, un teatro, etc. La VDP1000SWN sólo está permitida para una conexión con una fuente de corriente CA de máx. 230VCA/50Hz y para el uso en interiores. -
Página 12: Instalación
Conexiones DMX512 Conecte la salida XLR hembra, 3 polos del controlador a la entrada XLR macho, 3 polos de la VDP1000SWN con el cable XLR (incluido). Es posible conectar varias VDP1000SWN en serie. Use un cable de conexión blindado de 2 conductores con conectores XLR de entrada y de salida. -
Página 13: Limpieza Y Mantenimiento
En el caso de de la VDP1000SWN de 1 canal, la dirección inicial del primer aparato es 1. Introduzca 2 (1 + 2) para el segundo aparato, 3 (2 + 1) para el tercer aparato, etc. -
Página 14: Sicherheitsvorschriften
Falls Zweifel bestehen, wenden Sie sich für Entsorgungsrichtlinien an Ihre örtliche Behörde. Danke für den Kauf des VDP1000SWN! Bitte lesen Sie diese Bedienungsanleitung vor Inbetriebnahme sorgfältig durch. Überprüfen Sie, ob Transportschäden vorliegen. Sollte dies der Fall sein, verwenden Sie das Gerät nicht und wenden Sie sich an Ihren Händler. - Página 15 Verbinden Sie ein XLR-Kabel mit dem 3-Pin XLR-Ausgang der Steuerung und die andere Seite mit dem 3-Pin XLR- Eingang des VDP1000SWN. Sie können verschiedene VDP1000SWN in Serie schalten. Verwenden Sie ein abgeschirmtes Kabel mit XLR Ein- und Ausgangsanschlüssen. Siehe die Abbildung unten.
-
Página 16: Wartung Und Pflege
Gerät auf einem anderen Kanal Signale empfangen. Wenn Sie die Einstellungen ändern, wird nur das besagte Gerät beeinflusst. Im Falle des 1-Kanal-VDP1000SWN, werden Sie die Startadresse des ersten VDP1000SWN auf 1, des zweiten VDP1000SWN auf 2 (1 + 1), des dritten auf 3 (1 + 1) usw.


