Tabla de contenido
Publicidad
Idiomas disponibles
Idiomas disponibles
Enlaces rápidos
ÍNDICE
• MEDIDAS DE SEGURIDAD ........................ 1
• RECIBIMIENTO E INSTALACIÓN ................ 2
1er. Paso - Control del equipo ......................... 2
• IDENTIFICAR LA UNIDAD
• EXAMINAR EL ENVÍO
• ROOF CURB
• MONTAJE SOBRE LOSA
Unidad ........................................................... 6
para el Drenaje del Condensado ...................... 8
• IZAJE DE LA UNIDAD
• DATOS FÍSICOS
• DATOS DE PERFONMANCE
• POTENCIA DE SONIDO
• DATOS ELÉCTRICOS
• ALIMENTACIÓN SUMINISTRADA
EN CAMPO
• CONEXIONES DE FUERZA MOTRIZ
• CABLEADO DE CONTROL EN CAMPO
• CONEXIONES DE CONTROL DE TENSIÓN
Opcionales ................................................... 15
• PERSIANA MANUAL DE AIRE EXTERIOR
• ECONOMIZADOR
Ventilador del Evaporador ............................. 16
• PRE-PUESTA EN MARCHA ....................... 17
• PUESTA EN MARCHA ............................... 17
• SERVICE .................................................. 19
• CIRCUITO ESQUEMÁTICO TÍPICO ........... 24
• RESOLUCIÓN DE PROBLEMAS ................ 25
• LISTADO DE VERIFICACIÓN DE
PUESTA EN MARCHA ............................... 26
Carrier S.A.
Instrucciones de Instalación,
Puesta en Marcha y Service
UNIDADES ROOF-TOP R410A
Capacidad Nominal de 35,2 a 44,0 kW (10 a 12,5 Tons)
MEDIDAS DE SEGURIDAD
Las tareas de instalación y servicio de los equipos
de aire acondicionado pueden ser peligrosas debido
a la presión del sistema y las piezas eléctricas.
Sólo el personal capacitado y especializado deberá
realizar las tareas de instalación, reparación o
servicio de los equipos de aire acondicionado.
El personal no capacitado puede realizar las
tareas básicas de mantenimiento de limpieza
de serpentinas y fi ltros y reposición de fi ltros.
El personal de servicio capacitado debe llevar
a cabo toda otra tarea operativa. Siempre que
operen equipos de aire acondicionado, se deberán
tomar las precauciones indicadas en el manual,
etiquetas y rótulos que acompañan la unidad,
y demás medidas de seguridad que puedan
aplicarse. Observe todos los códigos de seguridad.
Utilice anteojos y guantes de seguridad. Utilice
tela ignífuga para tareas de soldadura. Tenga
extintores de fuego a mano para todas las tareas
de soldadura.
Antes de realizar tareas de servicios o
mantenimiento de la unidad interrumpa la
alimentación eléctrica principal de la unidad.
toda descarga eléctrica puede ocasionar
lesiones físicas.
ENGLISH Instructions beginning on page 27.
50TCN120-140
ALTA EFICIÊNCIA
FRÍO SÓLO
Publicidad
Capítulos
Tabla de contenido
Solución de problemas

Manuales relacionados para Carrier 50TCN120


Resumen de contenidos para Carrier 50TCN120
-
Página 1: Tabla De Contenido
Instrucciones de Instalación, Puesta en Marcha y Service 50TCN120-140 UNIDADES ROOF-TOP R410A ALTA EFICIÊNCIA FRÍO SÓLO Capacidad Nominal de 35,2 a 44,0 kW (10 a 12,5 Tons) ÍNDICE • MEDIDAS DE SEGURIDAD ......1 • RECIBIMIENTO E INSTALACIÓN ....2 1er. -
Página 2: Recibimiento E Instalación
MONTAJE A TIERRA - La unidad puede ser instalada en falta algúno de ellos, Anotifíquelo inmediatamente losa o ubicada directamente sobre la tierra, si lo permiten a la ofi cina de Aire Acondicionado Carrier más los códigos locales. Ubique a la unidad a nivel de tierra cercana. -
Página 3: Nomenclatura De Códigos
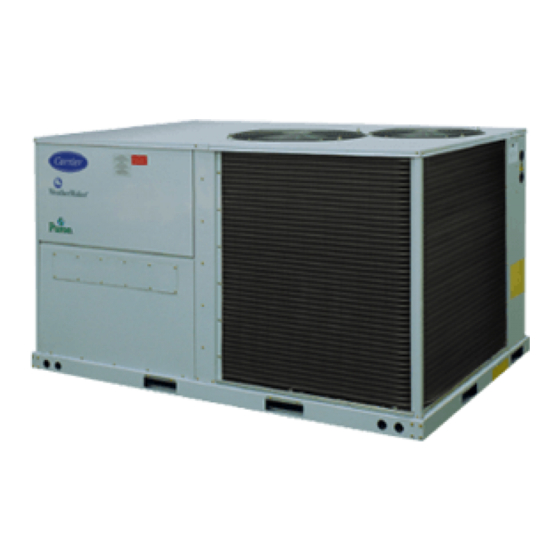
Nomenclatura de Códigos 50TC N - 120 9 0 1 50TC ROOF TOP R410A Volumen Constante Descarga / Vertical Retorno Embalaje Descarga / Retorno Horizontal 1 - Exportación Liviana Revisión Frio Solo V - F - Hz 9 - 380/400 - 3 - 50 Capacidad Nominal 120 - 35.2 kW (10 Ton.) 140 - 44.0 kW (12,5 Ton.) - Página 4 Dimensiones de la Unidad - 50TCN120-140 Fig. 2 - Dimensiones de la Unidad...
- Página 5 Dimensiones Roof Curb - 50TCN120-140 Fig. 3 - Roof Curb...
-
Página 6: 3Er. Paso - Izaje Y Posicionamiento De La Unidad
3er. Paso - Izaje y Posicionamiento de la Para aplicaciones horizontales, las pestañas Unidad - Examine la unidad por posibles daños suministradas en fábrica deben ser sujetadas a durante el transporte. Presente cualquier reclamo las aberturas de descarga horizontal y a todos a la empresa de transporte. - Página 7 1. Abra todos los interruptores eléctricos antes de NOTA: El diseño y la instalación del sistema de comenzar con cualquier trabajo de service. conducto debe cumplir con los estándar del NFPA para la aislación de sistemas de ventilación y aire 2.
-
Página 8: 5To. Paso - Instalación Del Sifón Exterior
5. Aísle apropiadamente contra las inclemencias Para usar la conexión del sifón trasero para una instalación con Roof Curb, reubique el tapón del tiempo a todos los conductos ubicados en instalado en fábrica desde la conexión trasera el exterior. Aísle los pasajes de conducto a a la conexión lateral. - Página 9 Izaje de la Unidad 50TCN120-140 MAX. WEIGHT / PESO MAX. 50TCN-120 1966.5 1054 1260 50TCN-140 1966.5 1054 1260 Fig. 7 - Izaje de la unidad...
- Página 10 Datos Físicos - 50TCN120-140 50TCN UNIT SIZE Tons 12,5 Nominal Cooling Capacity 35,2 380V - 3 phase - 50Hz Electric Characteristics Compressor 2 - Scroll Quantity and type Current RLA c/u 8,61 10,30 LRA c/u Consumption c/u R-410A Refrigerant type...
-
Página 11: Datos De Performance
Datos de Performance Performance del Ventilador (SI) - 50TCN120 (50Hz) Unidades de Descarga Horizontal PRESSIÓN ESTÁTICA EXTERIOR DISPONIBLE (Pa) CAUDAL (l/s) 1770 0,77 0,90 1,04 1,19 1,33 1,48 1,64 1880 0,92 1,06 1,20 1,36 1,51 1,67 2000 1,08 1,23 1,39... - Página 12 Datos de Performance (cont.) Performance del Ventilador (SI) - 50TCN140 (50Hz) Unidades de Descarga Horizontal PRESSIÓN ESTÁTICA EXTERIOR DISPONIBLE (Pa) CAUDAL (l/s) 1770 0,77 0,90 1,04 1,19 1,33 1920 0,95 1,10 1,24 1,40 1,56 2065 1,16 1,32 1,48 1,64 1,81 2215 1,41 1,57...
-
Página 13: Potencia De Sonido
Potencia de Sonido Tamanho de la Unidad Rendimiento de sonido (dBA) Datos Eléctricos Tensiones y Corrientes 50TCN120-140 (3 - 380 - 50Hz) Rango de Fusible de Suministro de Compresor Unidad Tensión Tensión Energia o BRKR 50TCN MOCP* 380-3-50 8,61 73 c/u 2,5A 2 x ⅓Hp... -
Página 14: 6To. Paso - Realizar Las Conexiones Eléctricas
Tal operación podría invalidar El gabinete de la unidad debe tener una cualquier garantía aplicable de Carrier. ininterrumpida y continua conexión eléctrica a tierra, a fi n de minimizar la posibilidad de daños personales en caso de ocurrir fallas... -
Página 15: Conexiones De Control De Tensión
Convensiones Americana y Europea de Cableado MARR BLAN Fig. 9 - Conexión de Alta Tensión y de Control CONEXIONES DE CONTROL DE TENSIÓN NOTA: No use ningún tipo de termostato que absorba potencia. Puede ocasionar problemas de control de la unidad. NOTA: Para cables de hasta 15 m, use un cable de aislación (35°C mínimo) N°... -
Página 16: Economizador
4. Reemplace el panel de abertura de aire 2. Afl oje la correa sacando las tuercas del plato exterior. del motor del ventilador. (vea la Fig. 12). 5. Ubique la campana enfrente del panel de 3. Reemplace la polea motora por otra, del Ø abertura de aire exterior. -
Página 17: Pre-Puesta En Marcha
PRE-PUESTA EN MARCHA b. Inspeccione todas las conexiones de la tubería del refrigerante y la base de la unidad. Si se detecta aceite, esto generalmente signifi ca una fuga del refrigerante. F a l l a s q u e p u e d e n o c a s i o n a r d a ñ o s Controle fugas en todas las conexiones personales: de la tubería del refrigerante usado un... -
Página 18: Para Apagar La Unidad
Refrigeración - Para poner en marcha a la unidad, Ayuda de Seguridad - Una junta de soldadura leve encienda el suministro de potencia. Coloque el en la línea de succión en el puerto de servicio de switch selector del sistema en la posición COOL baja presión, proporciona el alivio de presión bajo (Frío) y el switch del ventilador en la posición condiciones anormales de temperatura y presión. -
Página 19: Service
Cuando el termostato de comando deba instalarse alejado del Roof Top, puede presentarse un repiqueteo en los contactores de comando por la caída de tensión en los cables, en ese caso incorpore una placa de relés de acuerdo con el diagrama eléctrico a continuación (Fig. -
Página 20: Filtro De Aire
Los requerimientos mínimos de mantenimiento Filtro de Aire para este equipo son los siguientes: Inspeccione el/los fi ltro/s de aire por lo menos una 1. Inspeccione el/los fi ltro/s de aire mensualmente. vez al mes y reemplace (los descartables) o limpie Limpie o reemplace cuando sea necesario. -
Página 21: Rodamientos Del Motor Del Ventilador
Fig. 15 - Altura del cubo Ventilador Condensador RODAMIENTOS DEL MOTOR DEL VENTILADOR Caudal de Aire del Evaporador - Los rodamientos del motor del ventilador son del El caudal de aire de calefacción/refrigeración tipo permanentemente lubricados. No se requiere no necesita controles, a menos que se sospeche una lubricación adicional. -
Página 22: Serpentín Del Evaporador
SERPENTÍN DEL EVAPORADOR 2. Retire los tornillos del panel de arriba en el extremo del condensador de la unidad. Vea la 1. Apague la alimentación eléctrica de la unidad. Fig. 16. Retire el panel de acceso al serpentín del evaporador. 3. - Página 23 DEFLECTOR CENTRAL PANEL SUPERIOR ABIERTO PANEL CENTRO POSTERIOR ESQUINA POSTERIOR SERPENTÍN DEL CONDENSADOR Fig. 17 - Retirar el panel superior hacia arriba 50TCN120 Fig. 18 - Separación de la Sección del Serpentín...
-
Página 24: Circuito Esquemático Típico
Circuito esquemático típico - 50TCN120-140 (50 Hz) -
Página 25: Resolución De Problemas
Resolución de Problemas Análisis del Service de Refrigeración... -
Página 27: Safety Measures
Installation, Operation and Maintenance Instructions 50TCN120-140 ROOFTOP UNITS R-410A HIGH EFFICIENCY COOLING ONLY Nominal Capacity 35,2 at 44,0 kW (10 at 12,5 Tons) CONTENTS • SAFETY MEASURES ........27 • RECEIVING AND INSTALLING THE UNIT 1st Step – Equipment Control ......28 •... -
Página 28: Receiving And Installing The Unit
If one of the parts is missing, please notify it if allowed by the local codes. Position the unit immediately the nearest Carrier Air Conditioning at the ground level, prepared with gravel for the offi ce. - Página 29 Nomenclature 50TC N - 120 9 0 1 50TC ROOF TOP R410A Constant Volume Discharge/ Vertical Return PACKAGE Discharge/ Horizontal Return 1 - Light export PROJECT REVISION Cooling only V - F - Hz 9 - 380/400 - 3 - 50 Nominal Capacity 120 - 35.2 kW (10 Ton.) 140 - 44.0 kW (12,5 Ton.)
- Página 30 Unit Dimensions - 50TCN120-140 AIR RETURN AIR RETURN Picture 2 - Unit Dimensions...
-
Página 31: Roof Curb
Roof Curb Dimensions - 50TCN120-140 Picture 3 - Roof Curb... -
Página 32: 3Rd Step - Lifting And Positioning The Unit
3rd Step - Lifting and positioning the Unit The piping laid in a non-conditioned space should - Check the unit for possible damages during be insulated and covered with a vapor barrier. transportation. Present any claim to the transport In case a full return is used in a vertical unit, the company Do not let the unit fall. - Página 33 1. Open all the electric switches before starting any NOTE: The design and installation of the piping system must comply with all NFPA standards for servicing. the insulation of ventilation and air conditioning 2. Remove the cover of the return piping located systems for non-residential types;...
-
Página 34: 5Th Step - Installation Of The Outside Siphon For The Condensate Draining
5. Insulate properly against bad weather all the All units must have an outside siphon to drain piping installed outside. Insulate the piping the condensate. Install a 100 mm depth siphon, passages of a non-conditioned room and use a protected against ice. See Picture 6. -
Página 35: Lifting The Unit
Lifting the Unit 50TCN120-140 See Detail “A” Detail “A” MAX. WEIGHT / PESO MAX. 50TCN-120 1966.5 1054 1260 50TCN-140 1966.5 1054 1260 Picture 7 - Lifting the Unit... -
Página 36: Physical Data
Physical Data - 50TCN120-140 50TCN UNIT SIZE Tons 12,5 Nominal Cooling Capacity 35,2 380V - 3 phase - 50Hz Electric Characteristics Compressor 2 - Scroll Quantity and type Current RLA c/u 8,61 10,30 LRA c/u Consumption c/u Refrigerant type R-410A... -
Página 37: Performance Data
Performance Data Fan Performance (SI) - 50TCN120 (50Hz) Units with Horizontal Discharg PRESSIÓN ESTÁTICA EXTERIOR DISPONIBLE (Pa) AVAILABLE EXTERNAL STATIC PRESSURE (Pa) CAUDAL (l/s) 1770 0,77 0,90 1,04 1,19 1,33 1,48 1,64 1880 0,92 1,06 1,20 1,36 1,51 1,67 2000... - Página 38 Performance Data (cont.) Fan Performance (SI) - 50TCN140 (50Hz) Units with Horizontal Discharg PRESSIÓN ESTÁTICA EXTERIOR DISPONIBLE (Pa) AVAILABLE EXTERNAL STATIC PRESSURE (Pa) CAUDAL (l/s) 1770 0,77 0,90 1,04 1,19 1,33 1920 0,95 1,10 1,24 1,40 1,56 2065 1,16 1,32 1,48 1,64 1,81...
-
Página 39: Sound Power
Sound power Unit Dimensions Sound performance (dBA) Electric Data Voltages and Currents 50TCN120-140 (3 - 380 - 50Hz) Voltage Power supply fuse Compresor Unit Voltage Range or BRKR 50TCN MOCP* 380-3-50 8,61 73 c/u 2,5A 2 x ⅓Hp 3,7A 380-3-50... -
Página 40: 6Th Step -Perform The Electric Connections
The failure of the unit due to its operation in an improper line voltage or with an excessive phase imbalance is an abuse and can damage the electric components of the unit. Such operation can make any applicable Carrier warranty void. -
Página 41: Control Voltage Wiring
American and European Wiring Conventions Picture 9 – High Voltage and Control Connection CONTROL VOLTAGE WIRING – NOTE: Do not use any kind of thermostat that absorbs power. It can cause control problems to the unit. NOTE: For cables up to 15 m, use an insulating cable (35°C minimum) No. -
Página 42: 8Th Step - Setting Of The Evaporator Fan Speed
4. Replace the outside air opening panel. 4. The increase of the fan speed originates from the motor load increase. Do not exceed the maximum 5. Locate the cover in front of the outside air speed recommended in the Evaporator Fan opening panel. -
Página 43: Pre-Start-Up
PRE-START-UP c. Control the leaks in all refrigerant piping connections using an electronic leak detector, halogen lamps, or a liquid soap solution. In case a refrigerant leak is detected. d. Examine all the factory and fi eld cabling Failures that can result in personal injuries: connections. - Página 44 Heating (If the Heating Accessory is installed) Operation Sequence - To start up the unit, turn on the power supply. COOLING – When cooling is selected at the Turn the thermostat to HEAT, set it above the room thermostat, the terminals G and Y1 power up. temperature and the fan to AUTO.
-
Página 45: Service
SERVICE In order to ensure the continuous high-performance and minimize the possibility of premature failures The mistakes made while reconnecting the of the equipment, a periodic maintenance must be cables can cause an improper and dangerous performed. At least once a year, this cooling unit o p e r a t i o n . -
Página 46: Air Filter
After inspecting the electric controls and cabling, CONDENSATE DRAINING – Review and clean each replace the access panel. Start up the unit and year, at the beginning of the cooling season. In observe it for, at least, one full heating cycle winter, keep the draining dry or protected from ice. - Página 47 FAN MOTOR BEARINGS – The fan motor bearings are permanently lubricated. No additional CONDENSER COIL lubrication is required. Neither the lubrication of Check the coil on a monthly basis. Clean the the evaporator or condenser fan motors is required. condenser coil on an annual basis and whenever necessary depending on the conditions of the Evaporator and Motor Fan outside air and the place.
- Página 48 OPEN UPPER PANEL CENTER PANEL POSTERIOR CORNER CONDENSER COIL Picture 17 – Remove the panel upwards UPPER PANEL ONLY UNITS 50TCN120 50TCN120 CONDENSER COIL INSIDE SECTION OF THE COIL CENTERED GROOVE OUTSIDE SECTION OF THE COIL Picture 18 – Coil Section Separation...
-
Página 49: Typical Schematic Circuit
Typical Schematic Circuit - 50TCN120-140 (50 Hz) 220V... -
Página 50: Troubleshooting
Troubleshooting Analysis of the Cooling Service Problem Cause Solution The Compressor(s) and the Power failure. Call the electricity company. Evaporator Fan do not start Burnt fuse or tripper cutting circuit. Replace the fuse or readjust the cutting circuit. Defective thermostat, contactor, transformer or Replace the component. - Página 52 El fabricante se reserva el derecho a discontinuar o modifi car las especifi caciones o diseños sin previo aviso. The manufacturer reserves the right to discontinue or to change the specifi cations or drawings without prior notice. IOM 50TCN_120-140 EXPORT - A - 04/18...