Tabla de contenido
Publicidad
Idiomas disponibles
Idiomas disponibles
Enlaces rápidos
SPLIT TYPE ROOM AIR CONDITIONER
OPERATION MANUAL
CLIMATISEUR INDIVIDUEL EN DEUX PARTIES
MODE D'EMPLOI
ACONDICIONADOR DE AIRE TIPO SPLIT
MANUAL DE INSTRUCCIONES
INDOOR UNIT
OUTDOOR UNIT
UNITÉ INTÉRIEURE
UNITÉ EXTÉRIEURE
UNIDAD INTERIOR
UNIDAD EXTERIOR
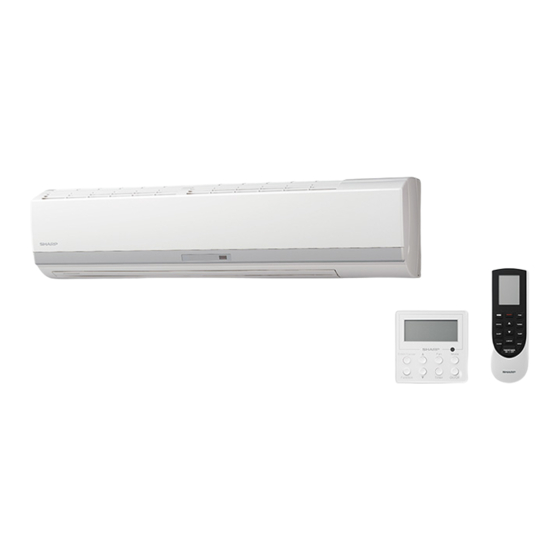
AY-X36RU
AE-X36RU
AYX36RU_OM_3_lang.indb 1
2014-09-10 19:58:12
Publicidad
Capítulos
Tabla de contenido

Manuales relacionados para Sharp AY-X36RU


Resumen de contenidos para Sharp AY-X36RU
- Página 1 SPLIT TYPE ROOM AIR CONDITIONER OPERATION MANUAL CLIMATISEUR INDIVIDUEL EN DEUX PARTIES MODE D’EMPLOI ACONDICIONADOR DE AIRE TIPO SPLIT MANUAL DE INSTRUCCIONES INDOOR UNIT OUTDOOR UNIT UNITÉ INTÉRIEURE UNITÉ EXTÉRIEURE UNIDAD INTERIOR UNIDAD EXTERIOR AY-X36RU AE-X36RU AYX36RU_OM_3_lang.indb 1 2014-09-10 19:58:12...
- Página 2 AYX36RU_OM_3_lang.indb 2 2014-09-10 19:58:12...
-
Página 3: Tabla De Contenido
Please read this manual carefully before using the product. This manual should be kept ENGLISH in a safe place for handy reference. CONTENTS • CONSUMER LIMITED WARRANTY ....EN-2 • SAFETY PRECAUTIONS ......... EN-3 • PART NAMES ........... EN-4 • USING THE REMOTE CONTROL ....EN-6 •... -
Página 4: Consumer Limited Warranty
VARY FROM STATE TO STATE. WARRANTY PERIOD FOR THIS PRODUCT: For a period of two (2) years from date of installation, SHARP will replace a defective parts with new, or at its op- tion, remanufactured replacement parts. For a period of five (5) years from date of installation, SHARP will replace a defective compressor with new, or at its option, remanufactured replacement compressor. -
Página 5: Safety Precautions
SAFETY PRECAUTIONS WARNINGS FOR USE • Do not pull or modify the power supply cord. Pulling and other misuse of the power supply cord may cause damage to the unit and cause electric shock. • Do not expose your body directly to the conditioned air for an extended period of time. This could be detrimental to your health. -
Página 6: Part Names
PART NAMES INDOOR UNIT 1 Inlet (Air) 2 Open Panel 3 Air Filter 4 AUTO(AUX) Button 5 Vertical Airflow Louver 6 Horizontal Airflow Louver 7 Outlet (Air) 8 Receiver Window 9 DRY Lamp 10 OPERATION Lamp ON: Green OFF: Red 11 TEMPERATURE Indicator 12 COOL Lamp 13 HEAT Lamp... - Página 7 REMOTE CONTROL 1 TRANSMITTER 2 MODE Button 3 SWING Button 4 SLEEP Button 5 COMFORT Button 6 CLOCK Button 7 TIMER ON Button 8 ON/OFF Button 9 FAN Button Button 11 TURBO FAN Button ON/OFF MODE Button SWING TURBO 13 TEMP Button 14 DISPLAY Button SLEEP TEMP...
-
Página 8: Using The Remote Control
USING THE REMOTE CONTROL LOADING BATTERIES HOW TO USE THE REMOTE CONTROL Remove the battery cover. Point the remote control towards the receiver window and press the desired button. The unit • Press the back side of remote control will make a beep sound when it receives the marked with "... -
Página 9: Basic Operation
BASIC OPERATION Press the ON/OFF button to start operation. • “ ” will be displayed on the remote control. • The OPERATION lamp ( ) will become green. TO TURN OFF Press the ON/OFF button again. • “ ” will disappear on the remote control. •... -
Página 10: Adjusting The Air Flow Direction
ADJUSTING THE AIR FLOW DIRECTION TURBO FAN OPERATION VERTICAL AIR FLOW DIRECTION The unit runs at extra high fan speed to reach the desired room temperature faster. Press the SWING button to select the vertical air flow direction. In the COOL or HEAT mode, press the TURBO FAN button. -
Página 11: Sleep Operation
COMFORT OPERATION SLEEP OPERATION The temperature setting is adjusted to prevent Room temperature is sensed around the the room from becoming too cold or warm, for remote control for higher comfort around the example while you sleep. user. In the COOL, HEAT mode, press the During operation, press the COMFORT SLEEP button. -
Página 12: Temp Button
TEMP BUTTON DISPLAY BUTTON The temperature indicator on the indoor unit Press the DISPLAY button to turn the LED will change each time you press the TEMP lights on the indoor unit off. button. During operation, press the DISPLAY During operation, press the TEMP but- button. -
Página 13: Timer Operation
TIMER OPERATION Before setting the timer, make sure the clock is properly set with the current time. TIMER OFF TIMER ON Press the TIMER OFF button. Press the TIMER ON button. • “ ” will blink on the remote control. •... -
Página 14: Lock Button
TIPS ON SAVING ENERGY LOCK BUTTON Below are some simple ways to save energy Press " " and " " buttons when you use your air conditioner. simultaneously. • “ “ will be displayed on the remote control. Set the proper temperature •... -
Página 15: Notes On Operation
NOTES ON OPERATION MAINTENANCE Be sure to stop the operation and turn off the OPERATING CONDITION circuit breaker before performing any mainte- nance. OUTDOOR INDOOR TEMP. TEMP. CLEANING THE FILTERS Upper limit 90˚F(32 ˚C) 109˚F(43 ˚C) COOLING 1. Remove the filters. Lower limit 61˚F(16 ˚C) 5˚F(-15 ˚C) -
Página 16: Before Calling For Service
BEFORE CALLING FOR SERVICE The following conditions do not denote equip- Check the following points before calling for ment malfunctions service. Unit does not operate The unit does not operate • The unit will not operate if it is turned on im- •... - Página 17 Veuillez lire attentivement ce manuel avant d’utiliser l’appareil. Ce mode d’emploi doit FRANÇAIS être conservé en lieu sûr et rester facile d’accès. TABLE DES MATIÈRES • GARANTIE LIMITÉE ............FR-2 • CONSIGNES DE SÉCURITÉ ..........FR-3 • NOMENCLATURE ..............FR-4 •...
-
Página 18: Garantie Limitée
SHARP garantit que le produit (le « Produit »), lorsque livré dans son emballage d'origine, sera exempt de défauts de matériaux et de fabrication. Si un vice devait se présenter, SHARP devra, à son gré, réparer ou remplace la ou les pièce(s) défectueuse(s) avec une pièce neuve ou remise à... -
Página 19: Consignes De Sécurité
CONSIGNES DE SÉCURITÉ MISES EN GARDE • Veuillez ne pas tirer ou modifier le cordon d’alimentation. Le fait de tirer sur le cordon d’alimentation ou une autre mauvaise utilisation de ce dernier peut endommager l’appareil et provoquer une électrocution. • N'exposez pas directement votre corps à de l'air climatisé pendant une durée prolongée. Ceci peut être mauvais pour la santé. -
Página 20: Nomenclature
NOMENCLATURE UNITÉ INTÉRIEURE 1 Bouche d'entrée (Air) 2 Panneau d’accès 3 Filtre à air 4 Touche AUTO(AUX) 5 Volet vertical d’aération 6 Volet horizontal d’aération 7 Bouche de sortie (Air) 8 Fenêtre de réception 9 Voyant SEC 10 Voyant de FONCTIONNEMENT Marche : Vert Arrêt : Rouge 11 Voyant de TEMPÉRATURE... - Página 21 TÉLÉCOMMANDE 1 ÉMETTEUR 2 Touche MODE 3 Touche SWING 4 Touche VEILLE (SLEEP) 5 Touche CONFORT 6 Touche HORLOGE (CLOCK) 7 Touche MINUTERIE DE DÉMARRAGE (TIMER ON) 8 Touche MARCHE/ARRÊT (ON/OFF) 9 Touche VENTILATEUR (FAN) Touche ON/OFF MODE 11 Touche VENTILATEUR TURBO (TURBO FAN) SWING TURBO...
-
Página 22: Utilisation De La Télécommande
UTILISATION DE LA TÉLÉCOMMANDE INSTALLATION DES PILES COMMENT UTILISER LA TÉLÉCOM- MANDE Retirez le couvercle de la télécommande. Pointez la télécommande vers la fenêtre de ré- • Pressez la partie arrière de la télécommande ception et appuyez sur la touche désirée. L’unité marquée du symbole «... -
Página 23: Fonctionnement De Base
FONCTIONNEMENT DE BASE Appuyez sur la touche MARCHE/ARRÊT (ON/OFF) pour commencer l’utilisation. • « » s'affiche sur la télécommande. • Le voyant de FONCTIONNEMENT ( ) devient vert. POUR ÉTEINDRE L'APPAREIL Appuyez à nouveau sur la touche MARCHE/ARRÊT (ON/OFF). • « »... -
Página 24: Réglage De La Direction Du Flux D'air
RÉGLAGE DE LA DIRECTION DU FLUX D'AIR FONCTION VENTILATEUR TURBO DIRECTION VERTICALE DU FLUX D'AIR L'unité fonctionne à une vitesse de ventilateur très élevée pour atteindre plus rapidement la Pressez la touche SWING pour sélec- température ambiante désirée. tionner la direction verticale du flux d'air. En mode FRAIS ou CHAUD, pressez la touche VENTILATEUR TURBO (TURBO FAN). -
Página 25: Fonction De Veille
FONCTION CONFORT FONCTION DE VEILLE Le réglage de température est ajusté afin La température de la pièce est mesurée au d'éviter que la pièce ne devienne trop froide niveau de la télécommande, afin d'améliorer ou trop chaude, par ex. durant votre sommeil. le confort de l'utilisateur. -
Página 26: Touche Temp
TOUCHE TEMP TOUCHE AFFICHAGE L'affichage de la température sur l'unité intérieure Pressez la touche d'AFFICHAGE (DISPLAY) pour change à chaque fois que vous pressez la touche TEMP. éteindre les voyants LED de l'unité intérieure. Durant le fonctionnement, pressez la Durant le fonctionnement, pressez la touche TEMP pour sélectionner la tem- touche AFFICHAGE (DISPLAY). -
Página 27: Fonction Minuterie
FONCTION MINUTERIE Avant de régler la minuterie, assurez-vous que l'horloge soit bien est à l'heure. MINUTERIE D'ARRÊT MINUTERIE DE DÉMARRAGE Pressez la touche MINUTERIE D'ARRÊT Appuyez sur la touche MINUTERIE DE (TIMER OFF). DÉMARRAGE (TIMER ON). • « » clignote sur la télécommande. •... -
Página 28: Touche De Verrouillage
CONSEILS SUR LES ÉCONOMIES D’ÉNERGIE TOUCHE DE VERROUILLAGE Quelques méthodes simples vous permettant Pressez les touches « » et « » d'économiser de l'énergie durant l'utilisation simultanément. de votre climatiseur sont décrites ci-dessous. • « » s'affiche sur la télécommande. Réglez une température appropriée. -
Página 29: Autres Remarques Sur Le Fonctionnement
AUTRES REMARQUES SUR LE FONCTIONNEMENT ENTRETIEN Assurez-vous de débrancher le cordon d’alimen- CONDITIONS DE FONCTIONNEMENT tation de la prise murale ou de couper le disjonc- teur avant d'effectuer des travaux d'entretien. TEMP. INT. TEMP. EXT. Limite supé- NETTOYAGE DES FILTRES 32˚C (90˚F) 43˚C (109˚F) REFROI-... -
Página 30: Avant D'appeler Le Service Après-Vente
AVANT D’APPELER LE SERVICE APRÈS-VENTE Les conditions suivantes ne signifient pas un L'unité extérieure ne s'arrête pas. mauvais fonctionnement de l’appareil. • Après l'arrêt du fonctionnement, l'unité exté- rieure fait tourner son ventilateur pendant envi- L’appareil ne fonctionne pas ron une minute pour refroidir l'unité. •... - Página 31 Antes de usar la unidad lea detenidamente el manual. Guárdelo en un lugar seguro para ESPAÑOL consultarlo con facilidad. ÍNDICE • GARANTÍA LIMITADA DE CLIENTE .......... ES-2 • PRECAUCIONES DE SEGURIDAD ........... ES-3 • DESIGNACIÓN DE LAS PIEZAS ..........ES-4 •...
-
Página 32: Garantía Limitada De Cliente
SHARP garantiza que este producto (en lo sucesivo, el "Producto"), cuando se envíe en su contenedor original, estará libre de defectos de fabricación y fallos en los materiales. Si el producto tiene un defecto, SHARP, a su discreción, reparará o sustituirá la pieza o piezas defectuosas por una nueva o refabricada equivalente sin ningún coste para el cliente por la pieza o piezas para el periodo y los términos estipulados a continuación. -
Página 33: Precauciones De Seguridad
PRECAUCIONES DE SEGURIDAD ADVERTENCIAS DE USO • No deforme ni tire del cable de alimentación. Estirar y utilizar incorrectamente el cable de alimentación puede ocasionar daños o descargas eléctricas. • No exponga su cuerpo directamente a la salida de aire durante un largo periodo de tiempo, ya que podría afectar a su salud. -
Página 34: Designación De Las Piezas
DESIGNACIÓN DE LAS PIEZAS UNIDAD INTERIOR 1 Entrada de aire 2 Panel de apertura 3 Filtro de aire 4 Botón AUTO(AUX) 5 Deflectores de corriente de aire vertical 6 Deflectores de corriente de aire horizontal 7 Salida de aire 8 Célula receptora 9 Indicador de SECO 10 Indicador de FUNCIONAMIENTO Encendido: verde... - Página 35 MANDO A DISTANCIA 1 TRANSMISOR 2 Tecla MODE 3 Tecla SWING 4 Tecla SLEEP 5 Tecla COMFORT 6 Tecla CLOCK 7 Tecla TIMER ON 8 Tecla ON/OFF 9 Tecla FAN 10 Tecla 11 Tecla TURBO ON/OFF MODE 12 Tecla SWING TURBO 13 Tecla TEMP 14 Tecla DISPLAY...
-
Página 36: Uso Del Mando A Distancia
USO DEL MANDO A DISTANCIA FORMA DE COLOCAR LAS PILAS CÓMO UTILIZAR EL MANDO A DISTANCIA Retire la tapa del compartimento de las pilas. Dirija el mando a distancia hacia la célula re- ceptora de señal de la unidad y pulse la tecla •... -
Página 37: Funcionamiento Básico
FUNCIONAMIENTO BÁSICO Pulse la tecla ON/OFF para poner el apara- to en marcha. • " " aparecerá en el mando a distancia. • El indicador de FUNCIONAMIENTO ( ) se vol- verá de color verde. PARA APAGAR Pulse nuevamente el tecla ON/OFF. •... -
Página 38: Ajuste De La Dirección De La Corriente De Aire
AJUSTE DE LA DIRECCIÓN DE FUNCIONAMIENTO DEL LA CORRIENTE DE AIRE TURBOVENTILADOR DIRECCIÓN DE LA CORRIENTE DE AIRE VERTICAL El ventilador de la unidad funciona a una velo- cidad extra alta para alcanzar la temperatura Pulse la tecla SWING para seleccionar deseada en la sala de forma más rápida. -
Página 39: Funcionamiento Del Modo Nocturno
FUNCIONAMIENTO DEL MODO NOCTURNO MODO COMODIDAD Se ajusta la temperatura para evitar que la La temperatura de la habitación se mide alre- habitación se enfríe o caliente demasiado, por dedor del mando a distancia para mayor co- ejemplo, mientras duerme. modidad del usuario. -
Página 40: Tecla Temp
TECLA TEMP TECLA DISPLAY El indicador de temperatura en la unidad in- Pulse la tecla DISPLAY para apagar los indi- terior cambiará cada vez que pulse la tecla cadores luminosos en la unidad interior. TEMP. Con la unidad en funcionamiento, pul- Con la unidad en funcionamiento, pul- se la tecla DISPLAY. -
Página 41: Funcionamiento Del Temporizador
FUNCIONAMIENTO DEL TEMPORIZADOR Antes de programar el temporizador‚ asegúrese de que el reloj esté ajustado apropiadamente con la hora actual. APAGAR EL TEMPORIZADOR TEMPORIZADOR ENCENDIDO Pulse la tecla TIMER OFF. Pulse la tecla TIMER ON. • " " parpadeará en el mando a distancia. •... -
Página 42: Tecla De Bloqueo
TECLA DE BLOQUEO ALGUNOS CONSEJOS PARA AHORRAR ENERGÍA A continuación se incluyen varios consejos Pulse la tecla " " y la tecla " " si- sencillos para ahorrar energía al usar el multáneamente. acondicionador de aire. • " " aparecerá en el mando a distancia. Ajuste la temperatura correcta •... -
Página 43: Observación Sobre El Funcionamiento
OBSERVACIÓN SOBRE EL FUNCIONAMIENTO MANTENIMIENTO Asegúrese de detener el funcionamiento y ESTADO DE FUNCIONAMIENTO apagar el interruptor de corte antes de reali- zar cualquier mantenimiento. TEMP. EXTE- TEMP. INTERIOR RIOR LIMPIEZA DE LOS FILTROS Límite superior 90˚F (32˚C) 109˚F (43˚C) ENFRIAR 1. -
Página 44: Antes De Llamar Al Servicio Técnico
ANTES DE LLAMAR AL SERVICIO TÉCNICO Las siguientes condiciones no significan mal La unidad exterior no se detiene funcionamiento del equipo. • Después de detener el funcionamiento, el venti- lador de la unidad exterior girará durante aproxi- La unidad no funciona madamente un minuto para enfriar la unidad. - Página 45 AYX36RU_OM_3_lang.indb 15 2014-09-10 19:58:26...
- Página 46 AYX36RU_OM_3_lang.indb 15 2014-09-10 19:58:26...
- Página 47 AYX36RU_OM_3_lang.indb 15 2014-09-10 19:58:26...
- Página 48 AYX36RU_OM_3_lang.indb 16 2014-09-10 19:58:26...