Publicidad
Idiomas disponibles
Idiomas disponibles
Note: Prior to Assembly
Prior to assembling your cross bar kit check that the kit
contains all the parts you will need to fit the cross bars.
Refer to parts lists for guidance. L-Wrench is stored in the
End Support.
Please read these instructions before assembly.
Step 1: Removing the vehicles anchor point covers.
A.
On the vehicles roof or ditch molding you will find fore and aft
anchor point covers. (fig 1)
B.
Carefully remove these covers by sliding them in the direction
shown on the cover. This will reveal the anchor points. It is
advisable to screw the bolts into the anchor point threads at
this time to clean the threads.
Note: Take care when removing the covers to avoid damaging or
losing clips. Covers will not be replaced while the cross bars are
on the vehicle.
Store the covers and any plugs while cross bars are in use for
later replacement.
Anchor point
cover
Vehicle's roof
Location of anchor points on vehicle
Step 2: Installing Rubber Gaskets and Adaptor
A.
Position the rubber gaskets over the anchor points as
shown in figure. (fig 2)
B.
Ensure that the gasket is properly aligned.
C.
If your gasket has a directional arrow this always points
toward the front of vehicle.
D.
Ensure that the gasket slots are centered over the anchor
point threads in the roof.
E.
Place the plastic adaptors into the gasket's recessed top
surface. (fig 3) Repeat for all four anchor points. (fig 4)
59832-3N Rev 10/11/11
Fitting Instructions
AP-GTX (Anchor Point GTX)
Cross Bar Kits
Anchor point
Fig 1
L-Wrench – Security
Key(2) (Stored in End
Support)
Bolt (4)
Vehicle's roof
Fig 2
Printed in China
PART No:
59832 / 59833
CARRYING CAPACITY:
Parts list
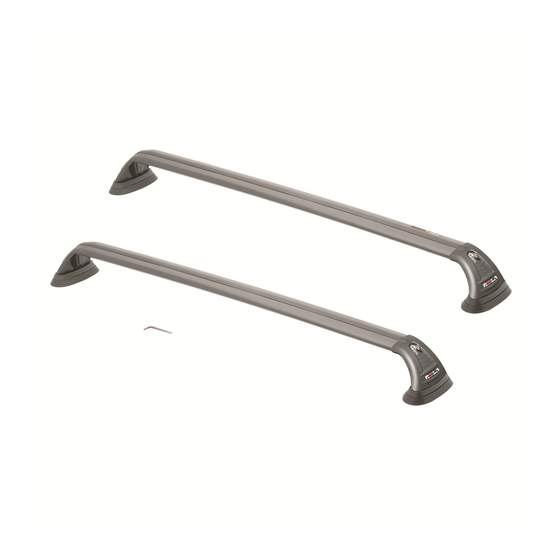
Cross Bar / End Support
Assembly (2)
Plastic adaptor (4)
Rubber Gasket (4)
Key (4)
Plastic adaptor
Rubber Gasket
Anchor point
Vehicle's
Fig 3
50Kgs/
110 Lbs
roof
Front of vehicle
Fig 4
Pg 1 of 2
Publicidad
Tabla de contenido

Resumen de contenidos para Rola AP-GTX 59832
- Página 1 PART No: 59832 / 59833 Fitting Instructions AP-GTX (Anchor Point GTX) 50Kgs/ CARRYING CAPACITY: Cross Bar Kits 110 Lbs Note: Prior to Assembly Parts list Prior to assembling your cross bar kit check that the kit contains all the parts you will need to fit the cross bars. Refer to parts lists for guidance.
-
Página 2: Fitting Instructions
59832 / 59833 PART No: Fitting Instructions AP-GTX (Anchor Point GTX) 50Kgs/ CARRYING CAPACITY: Cross Bar Kits 110 Lbs Step 3: Fitting Cross Bars to the vehicle (fig 5) Cross Bar Each Cross Bar varies in length. The Cross Bar labeled “FRONT” on the underside of the Cross Bar, belongs to the front location. -
Página 3: Instrucciones De Ajuste
Número de parte: Instrucciones de ajuste 59832 / 59833 AP-GTX (punto de anclaje GTX) 50Kgs / CAPACIDAD DE CARGA: Kit de travesaños 110 Lbs Nota: Antes de ensamblar Lista de partes Antes de ensamblar el kit de travesaños revise que el kit contenga todas las piezas que se necesitan para ajustar los travesaños. - Página 4 Instrucciones de ajuste 59832 / 59833 Número de parte: AP-GTX (punto de anclaje GTX) 50kgs / CAPACIDAD DE CARGA: Kit de travesaños 110 Lbs Paso 3: Instalación de los travesaños en el vehículo (fig 5) Cada travesaño varía en longitud. El travesaño con la etiqueta "FRENTE" en Travesaño la parte inferior corresponde a la ubicación delantera.
-
Página 5: Nomenclature Des Pièces
No PIÈCE : 59832 / 59833 Instructions de montage Ensembles de traverses de toit 50 kg / Capacité de charge : AP-GTX (point d'ancrage GTX) 110 lb Nota : Avant le montage Nomenclature des pièces Avant le montage, vérifier que l'ensemble comprend toutes les pièces nécessaires pour installer les traverses. -
Página 6: Informations Générales
59832 / 59833 No PIÈCE : Instructions de montage Ensembles de traverses de toit 50 kg / Capacité de charge : AP-GTX (point d'ancrage GTX) 110 lb Étape 3 : Pose des traverses sur le véhicule (fig 5) A. Chaque traverse varie en longueur. La traverse étiquetée ‘FRONT’ (Avant) (sur Traverse le dessous de la traverse) ira à...


