Tabla de contenido
Publicidad
Idiomas disponibles
Idiomas disponibles
Enlaces rápidos
Publicidad
Capítulos
Tabla de contenido

Manuales relacionados para Genius BRAIN 06 24V


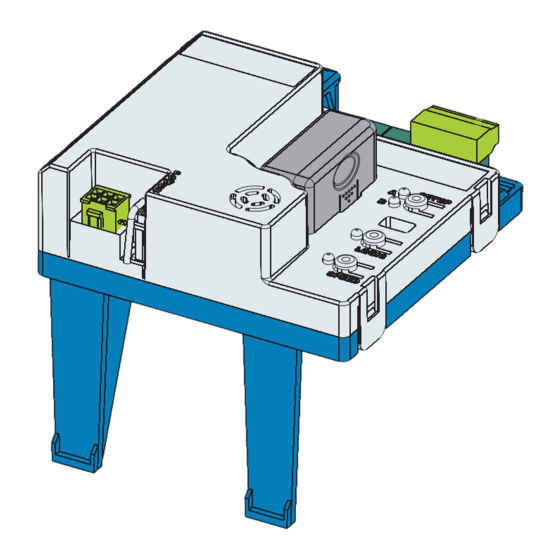
Resumen de contenidos para Genius BRAIN 06 24V
- Página 1 BRAIN 06 24V...
- Página 2 à l’Usager qui utilise l’installation les 6) GENIUS declines all liability caused by improper use or use other than that for which “Instructions pour l’Usager” fournies avec le produit.
-
Página 3: Tabla De Contenido
• è conforme ai requisiti essenziali di sicurezza delle seguenti direttive CEE: 73/23/CEE e successiva modifica 93/68/CEE. 89/336/CEE e successiva modifica 92/31/CEE e 93/68/CEE Nota aggiuntiva: Questo prodotto è stato sottoposto a test in una configurazione tipica omogenea (tutti prodotti di costruzione GENIUS S.p.A.) Grassobbio , 01-09-2006. L’AmministratoreDelegato D. Gianantoni AVVERTENZE •... -
Página 4: Avvertenze
APPARECCHIATURA ELETTRONICA BRAIN 06 AVVERTENZE Prima di effettuare qualsiasi tipo di intervento sull’apparecchiatura elettronica (collegamenti, manutenzione) togliere sempre l’alimentazione elettrica. - Prevedere a monte dell’impianto un interruttore magnetotermico differenziale con adeguata soglia di intervento. - Separare sempre i cavi di alimentazione da quelli di comando e di sicurezza (pulsante, ricevente, fotocellule, ecc.). - Per evitare qualsiasi disturbo elettrico utilizzare guaine separate o cavo schermato (con schermo collegato a massa). -
Página 5: Caratteristiche Tecniche
CARATTERISTICHE TECNICHE 3.2 DESCRIZIONE MORSETTIERE Tensione alimentazione 230Vac (+6% -10%) - 50Hz Morsetto e/o Morsettiera Descrizione Dispositivo collegato Potenza assorbita Alimentazione ac- +24V Carico max Motore 150W x 2 cessori Corrente max accessori 250 mA (+24V) Negativo Corrente max accessori 400 mA Dispositivo con Dispositivo con... -
Página 6: Messa In Funzione
6 MESSA IN FUNZIONE 6.4 APPRENDIMENTO TEMPI - SETUP 6.1 VERIFICA DEI LED Prima di eseguire qualsiasi manovra è neces- sario eseguire un ciclo di SETUP La tabella sottostante riporta lo stato dei leds in relazione allo stato degli ingressi (in neretto la condizione di automazione Durante la procedura di SETUP non interrompe- chiusa a riposo). -
Página 7: Installazione Accessori Bus
della battuta meccanica di apertura. Se è stata impostata la forza BASSA attendere circa 5 sec verificando lo spegnimento del lampeggiante. Nel caso sia selezionata la logica A la scheda inizia il con- teggio del tempo di pausa (max 10 min) e dopo il tempo desiderato dare un impulso di OPEN per continuare la procedura. -
Página 8: Memorizzazione Accessori Bus
7.2 MEMORIZZAZIONE ACCESSORI BUS In qualsiasi momento è possibile aggiungere fotocellule BUS all’impianto, semplicemente memorizzandole sulla scheda seguendo la seguente procedura: Installare e programmare gli accessori con l’indirizzo desi- derato (vedi par. 7.1). Togliere alimentazione alla scheda. Collegare i due cavi degli gli accessori alla morsettiera rossa J10 (polarità... -
Página 9: Memorizzazione Dei Radiocomandi 433
morizzazione. PROCEDURA DI CANCELLAZIONE DEI RADIO- • Premere per 2 volte, il pulsante del radiocomando me- COMANDI morizzato, in breve successione. Per cancellare TUTTI i codici dei radiocomandi inseriti è suf- ficiente premere il pulsante LOGIC (SW3) o SPEED (SW2) e mantenendolo premuto premere anche il pulsante SETUP L’automazione effettuerà... -
Página 10: Tabelle Delle Logiche
11 TABELLE DELLE LOGICHE... -
Página 11: Ce Declaration Of Conformity
• conforms to the essential safety requirements of the following EEC directives: 73/23/EEC and subsequent amendment 93/68/EEC. 89/336/EEC and subsequent amendment 92/31/EEC and 93/68/EEC Additional information: This product underwent a test in a typical, uniform configuration. (all products made by GENIUS S.p.A) Grassobbio 01-09-2006. The Managing Director D. Gianantoni WARNINGS •... -
Página 12: Warnings
CONTROL UNIT BRAIN 06 WARNINGS Before attempting any work on the control unit (connections, maintenance), always turn off power. - Install, upstream of the system, a differential thermal breaker with adequate tripping threshold, - Always separate power cables from control and safety cables (push-button, receiver, photocells, etc.). - To avoid any electrical disturbance, use separate sheaths or a screened cable (with the screen earthed). -
Página 13: Technical Specifications
TECHNICAL SPECIFICATIONS 3.2 DESCRIPTION OF TERMINAL-BOARDS 230Vac (+6% -10%) - 50Hz Power supply voltage Terminal and/or Description Device connected terminal-board Absorbed power Motor max. load 150W x 2 Power supply for +24V accessories Accessories max. current 250 mA (+24V) Negative BUS Accessories max.current 400 mA Device with NC... -
Página 14: Start-Up
6.4 TIME - SETUP LEARNING 6 START-UP 6.1 LEDS CHECK Before any manoeuvre is executed, a SETUP cycle must first be run. The following table shows that status of the LEDs in relation to the status of the inputs (the closed at rest automated system During SETUP do not interrupt the photocells condition is shown in bold). -
Página 15: Installation Of Bus Accessories
If the A Logic was selected, the board begins to count the pause time (max 10 min) and, after the required time has elapsed, give an OPENING pulse to continue the proce- dure. Otherwise, if you have selected the EP logic, give an OPEN pulse to continue the procedure. -
Página 16: Memory Storage Of Bus Accessories
7.2 MEMORY STORAGE OF BUS ACCESSORIES You can add the BUS photocells to the system at any time, simply by memory-storing them on the board, observing the following procedure: Install and program the accessories using the required address (see paragraph 7.1) Cut power to the board. -
Página 17: Memory Storage Of 433 Radio Controls
push-button of the radio control to be added, releasing 8.3 RADIO CONTROLS DELETION PROCEDURE it only after the double flash of the radio control LED, To delete ALL the input radio control codes, press push- which indicates memory storage executed. button LOGIC (SW3) or SPEED (SW2) and, while holding it •... -
Página 18: Logic Tables
11 LOGIC TABLES... -
Página 19: Déclaration Ce De Conformité
73/23/CEE et modification 93/68/CEE successive. 89/336/CEE et modifications 92/31/CEE et 93/68/CEE successives. Note complémentaire: Ce produit a été testé dans une configuration typique homogène (tous les produits sont fabriqués par GENIUS S.p.A.) Grassobbio, le 01-09-2006. L’Administrateur Délégué D. Gianantoni AVERTISSEMENTS •... -
Página 20: Layout Et Connexions
ARMOIRE ÉLECTRONIQUE BRAIN 06 AVERTISSEMENTS Avant tout type d’intervention sur l’armoire électronique (connexions, entretien), toujours couper le courant électrique. - Prévoir en amont de l’installation un disjoncteur magnétothermique différentiel au seuil d’intervention adéquat. - Toujours séparer les câbles d’alimentation des câbles de commande et de sécurité (bouton-poussoir, récepteur, photocellules, etc.). -
Página 21: Caractéristiques Techniques
3 CARACTÉRISTIQUES TECHNIQUES 3.2 DESCRIPTION DES BORNIERS Tension d’alimentation 230Vca (+6% -10%) - 50Hz Borne et/ou Bornier Description Dispositif connecté Puissance absorbée +24V Alimentation accessoires Charge maxi Moteurs 150W x 2 Négatif Courant maxi accessoires 250 mA (+24V) Dispositif avec contact Dispositif avec contact Courant maxi accessoires N.F. -
Página 22: Mise En Fonction
6.4 APPRENTISSAGE TEMPS - SETUP 6 MISE EN FONCTION 6.1 VÉRIFICATION DES LEDS Avant toute manœuvre, exécuter un cycle de SETUP Le tableau ci-après indique l’état des LEDs en fonction de l’état des entrées (en caractères gras la condition d’automatisme fermée au repos). -
Página 23: Installation Des Accessoires Bus
Si l’on a programmé la force BASSE, attendre environ 5 s en vérifiant l’extinction de la lampe clignotante. Si l’on a sélectionné la logique A, la platine commence le comptage du temps de pause (10 min. maxi) et, après le temps souhaité, donner une impulsion d’OPEN pour continuer la procédure. -
Página 24: Mémorisation Des Accessoires Bus
7.2 MÉMORISATION DES ACCESSOIRES BUS À tout moment, on peut ajouter des photocellules BUS à l’installation, simplement en les mémorisant sur la platine comme suit: Installer et programmer les accessoires avec l’adresse souhaitée (voir par. 7.1). Mettre la platine hors tension. Connecter les deux câbles des accessoires au bornier rouge J10 (polarité... -
Página 25: Mémorisation Des Radiocommandes 433
maintenant enfoncé, sur le bouton-poussoir correspondant 8.3 PROCÉDURE D’EFFACEMENT DES RADIOCOM- de la radiocommande à ajouter, ne le relâcher qu’après MANDES le double clignotement de la LED de la radiocommande qui indique que la mémorisation a été effectuée. Pour effacer TOUS les codes des radiocommandes introduits, •... - Página 26 11 TABLEAUX DES LOGIQUES...
-
Página 27: Declaración Ce De Conformidad
73/23/CEE y sucesiva modificación 93/68/CEE. 89/336/CEE y sucesiva modificación 92/31/CEE y 93/68/CEE Nota: Este producto ha sido sometido a pruebas en una configuración típica homogénea (todos los productos son de fabricación GENIUS S.p.A.) Grassobbio , 01-09-2006. El Administrador Delegado D. Gianantoni ADVERTENCIAS •... -
Página 28: Advertencias
EQUIPO ELECTRÓNICO BRAIN 06 ADVERTENCIAS Antes de efectuar cualquier tipo de intervención en el equipo electrónico (conexiones, mantenimiento) quite siempre la alimentación eléctrica. - Coloque antes de la instalación un interruptor magnetotérmico diferencial con un adecuado umbral de intervención. - Separe siempre los cables de alimentación de los cables de mando y de seguridad (pulsador, receptor, fotocélulas, etc). - Para evitar cualquier interferencia eléctrica utilice vainas separadas o un cable blindado (con blindaje conectado a masa). -
Página 29: Características Técnicas
3.2 DESCRIPCIÓN REGLETAS DE BORNES 3 CARACTERÍSTICAS TÉCNICAS Tensión de alimentación 230Vac (+6% -10%) - 50Hz Borne y/o Regleta de Descripción Dispositivo conectado bornes Potencia absorbida Carga máx. Motor 150W x 2 +24V Alimentación accesorios Corriente máx. accesorios 250 mA Negativo (+24V) Dispositivo con contacto... -
Página 30: Puesta En Funcionamiento
6.4 APRENDIZAJE TIEMPOS - SETUP 6 PUESTA EN FUNCIONAMIENTO 6.1 COMPROBACIÓN DE LOS DIODOS Antes de realizar cualquier maniobra es necesario realizar un ciclo de SETUP La tabla siguiente indica el estado de los diodos en relación al estado de las entradas (en negrita se indica la condición de automación cerrada en reposo). -
Página 31: Instalación De Los Accesorios Bus
Si se ha programado la fuerza BAJA, espere unos 5 seg. y compruebe que se apague el destellador. Si se ha seleccionado la lógica A, la tarjeta empieza a contar el tiempo de pausa (máx. 10 min.). Transcurrido el tiempo deseado, dé un impulso de OPEN para continuar el procedimiento. -
Página 32: Memorización De Los Accesorios Bus
7.2 MEMORIZACIÓN DE LOS ACCESORIOS BUS En cualquier momento se pueden añadir a la instalación fotocélulas BUS, para ello basta memorizarlas en la tarjeta del siguiente modo: Instale y programe los accesorios con la dirección deseada (véase párrafo 7.1). Quite la alimentación a la tarjeta. Conecte los dos cables de los accesorios a la regleta de bornes roja J10 (polaridad indiferente). -
Página 33: Memorización De Los Radiomandos 433
• Presione 2 veces seguidas rápidamente el pulsador del 8.3 PROCEDIMIENTO DE CANCELATIóN DE LOS RA- radiomando memorizado. DIOMANDOS La automación realizará una apertura. Asegúrese Para cancelar TODOS los códigos de los radiomandos de que la automación esté libre de todo presione el pulsador LOGIC (SW3) o SPEED (SW2) y, obstáculo creado por personas o cosas. -
Página 34: Tablas De Lógicas
11 TABLAS DE LÓGICAS... -
Página 35: Ce-Konformitätserklärung
• den wesentlichen Sicherheitsbestimmungen der folgenden EWG-Richtlinien entspricht: 73/23/EWG und nachträgliche Änderung 93/68/EWG 89/336/EWG und nachträgliche Änderung 92/31/EWG und 93/68/EWG Zusätzliche Anmerkungen: Dieses Produkt wurde in einer typischen, homogenen Konfiguration getestet (alle von GENIUS S.p.A. hergestellten Produkte). Grassobbio, 01-09- 2006 Geschäftsführer D. Gianantoni HINWEISE •... -
Página 36: Hinweise
ELEKTRONISCHES STEUERGERÄT BRAIN 06 HINWEISE Vor Arbeiten am elektronischen Steuergerät (Anschlüsse, Wartung usw.) stets die Stromzufuhr unterbrechen. - Vor der Anlage einen thermomagnetischen Fehlerstrom-Schutzschalter mit entsprechender Auslöseschwelle einbauen. - Die Versorgungskabel stets von den Steuer- und Sicherheitskabeln (Taste, Empfänger, Fotozellen usw.) trennen. - Um jegliche elektrische Störung zu vermeiden, getrennte Ummantelungen oder abgeschirmte Kabel (mit geerdeter Abschirmung) verwenden. -
Página 37: Technische Daten
3.2 BESCHREIBUNG DER KLEMMENLEISTEN TECHNISCHE DATEN Versorgungsspannung 230Vac (+6% -10%) - 50Hz Klemme und/oder Angeschlossene Beschreibung Klemmenleiste Vorrichtung Leistungsaufnahme +24V Zubehörversorgung Max. Last Motor 150W x 2 Max. Stromstärke Zubehör Minuspol 250 mA (+24v) Vorrichtung mit Vorrichtung mit Max. Stromstärke BUS- 400 mA Ruhekontakt, die die Ruhekontakt, die die... -
Página 38: Inbetriebnahme
6.4 LERNVERFAHREN DER BETRIEBSZEITEN – SETUP 6 INBETRIEBNAHME 6.1 ÜBERPRÜFUNG DER LED Vor der Ausführung von Bewegungen muss ein SETUP-Zyklus gefahren werden. Die unten aufgeführte Tabelle zeigt den Zustand der LED in Bezug auf den Zustand der Eingänge (fett gedruckt ist der Zustand der Automation geschlossen in Ruhestellung). -
Página 39: Einbau Des Bus-Zubehörs
Wenn die NIEDRIGE Schubkraft eingestellt wurde, etwa 5 Sekunden lang abwarten und sicherstellen, dass die Blinkleuchte erlischt. Wenn die Logik A ausgewählt wurde, beginnt die Karte mit der Zählung der Pausenzeit (max. 10 Minuten). Nach dem gewünschten Zeitraum einen OPEN-Impuls senden, damit der Vorgang weitergeführt wird. -
Página 40: Einspeicherung Des Bus-Zubehörs
EINSPEICHERUNG DES BUS-ZUBEHÖRS Jederzeit können der Anlage BUS-Fotozellen hinzugefügt werden, und zwar einfach durch deren Einspeicherung auf der Karte entsprechend dem nachfolgend beschriebenen Verfahren: Das Zubehör einbauen und mit der gewünschten Adresse programmieren (siehe Abschnitt 7.1). Die Stromzufuhr zur Karte unterbrechen. Die beiden Kabel der Zubehörteile an die rote Klemenleiste J10 anschließen (die Polarität ist nicht zu berücksichtigen). -
Página 41: Einspeicherung Der 433-Funksteuerungen
Die Automation führt einen Öffnungszyklus aus. LÖSCHEN DER FUNKSTEUERUNGEN Sicherstellen, dass die Automation nicht von Um ALLE Codes der eingegebenen Funksteuerungen zu Personen oder Dingen behindert wird. löschen, einfach die Taste LOGIC (SW3) oder SPEED (SW2) gleichzeitig mit der Taste SETUP (SW1) 10 Sekunden lang 8.2 EINSPEICHERUNG DER 433-FUNKSTEUERUNGEN drücken. -
Página 42: Tabelle Der Betriebslogiken
11 TABELLE DER BETRIEBSLOGIKEN... -
Página 43: Eg-Verklaring Van Overeenstemming
73/23/EEG en latere wijziging 93/68/EEG. 89/336/EEG en latere wijzigingen 92/31/EEG en 93/68/EEG Aanvullende opmerking: Dit product is getest in een specifieke homogene configuratie (alle door GENIUS S.p.A. vervaardigde producten). Grassobbio, 01-09-2006. De Gedelegeerd Bestuurder D. Gianantoni WAARSCHUWINGEN • Let op! Het is van belang voor de veiligheid van personen dat deze instructies in hun geheel zorgvuldig wordt opgevolgd. -
Página 44: Waarschuwingen
ELEKTRONISCHE APPARATUUR BRAIN 06 1 WAARSCHUWINGEN Alvorens een willekeurige ingreep op de elektronische apparatuur uit te voeren (aansluitingen, onderhoud) moet altijd de stroomvoorziening worden losgekoppeld. - Zorg dat er bovenstrooms van de installatie een magnetothermische differentieelschakelaar is gemonteerd met een geschikte inschakellimiet. -
Página 45: Technische Eigenschappen
3.2 BESCHRIJVING KLEMMENBORDEN TECHNISCHE EIGENSCHAPPEN Voedingsspanning 230Vac (+6% -10%) - 50Hz Klem en/of Beschrijving Aangesloten inrichting Klemmenbord Opgenomen vermogen +24V Voeding accessoires Max. belasting motor 150W x 2 Max. stroom accessoires Negatieve draad 250 mA (+24V) Inrichting met N.C.- Inrichting met N.C.- Max. -
Página 46: Inbedrijfstelling
6.4 ZELFLERENDE PROCEDURE TIJDEN - SETUP 6 INBEDRIJFSTELLING 6.1 CONTROLE VAN DE LEDS Alvorens enige manoeuvre uit te voeren moet een SETUP-cyclus worden uitgevoerd. In de onderstaande tabel wordt de status van de leds weergegeven in relatie tot de status van de ingangen (de conditie van het automatische systeem gesloten, in de ruststand, is dikgedrukt). -
Página 47: Installatie Accessoires Met Busaansluiting
Als een LAGE kracht is ingesteld, wacht dan ongeveer 5 sec. om te controleren of het lichtsignaal uitgaat. Indien de A-logica is geselecteerd, begint de kaart de pauzetijd af te tellen (max. 10 min.) en geeft hij na de gewenste tijd een OPEN-impuls om verder te gaan met de procedure. -
Página 48: Opslag In Geheugen Accessoires Met Busaansluiting
7.2 OPSLAG IN GEHEUGEN ACCESSOIRES MET BU- SAANSLUITING Op ieder willekeurig moment kunnen er BUS-fotocellen aan de installatie worden toegevoegd, door ze simpelweg op de kaart op de slaan door de volgende procedure te volgen: Installeer en programmeer de accessoires met het gewenste adres (zie par. -
Página 49: 433-Afstandsbedieningen In Het Geheugen Opslaan (Slechts Voor Een Aantal Markten)
• Druk de knop van de afstandbediening die in het geheugen 8.3 PROCEDURE VOOR HET WISSEN VAN AFSTAND- is opgeslagen twee keer kort achter elkaar in. SBEDIENINGEN Om ALLE codes van de geregistreerde afstandsbedieningen Het automatische systeem zal de poort te wissen is het voldoende om op de LOGIC-knop (SW3) of openen. -
Página 50: Tabellen Van De Logica's
11 TABELLEN VAN DE LOGICA’S... - Página 51 HINWEISE FÜR DEN INSTALLATIONSTECHNIKER nomen. 9) GENIUS is niet aansprakelijk als de regels der goede techniek niet in acht genomen ALLGEMEINE SICHERHEITSVORSCHRIFTEN zijn bij de bouw van het sluitwerk dat gemotoriseerd moet worden, noch voor 1) ACHTUNG! Um die Sicherheit von Personen zu gewährleisten, sollte die Anleitung...
- Página 52 Les descriptions et les illustrations du présent manuel sont fournies à titre indicatif. GENIUS se réserve le droit d’ap- porter à tout moment les modifications qu’elle jugera utiles sur ce produit tout en conservant les caractéristiques essentielles, sans devoir pour autant mettre à...