Tabla de contenido
Publicidad
Enlaces rápidos
ASME A112.18.1 / CSA B125.1
Model/Modelo/Modèle
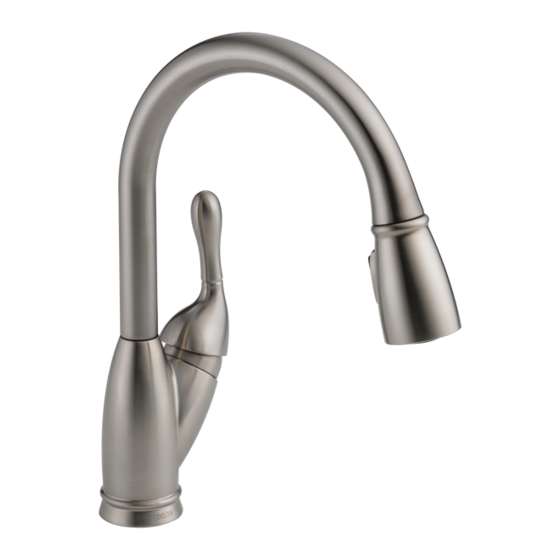
19939F-DST
Series/Series/Seria
Write purchased model number here.
Escriba aquí el número del modelo comprado.
Inscrivez le numéro de modèle ici.
WARNING: THIS FAUCET IS NOT TO BE USED WITH PORTABLE
DISHWASHERS! / ADVERTENCIA: ¡SESTA LLAVE NO SE DEBE UTILIZAR
CON MAQUINAS LAVAPLATOS PORTATILES! / AVERTISSEMENT: ON NE
DOIT PAS BRANCHER UN LAVE-VAISSELE PORTATIF SUR CE ROBINET!
MEETS OR EXCEEDS — ASME A112.18.1 / CSA B125.1
ALCANZA O EXCEDE LAS SIGIENTES NORMAS —
ASME A112.18.1 / CSA B125.1
LE ROBINET EST CONFORME OU SUPÈRIEUR AUX EXIGENCES DES
NORMES SUIVANTES: ASME A112.18.1 / CSA B125.1
For easy installation of your Delta
faucet you will need:
• To READ ALL the instructions completely before
beginning.
• To READ ALL warnings, care, and maintenance
information.
Para instalación fácil de su llave Delta
usted necesitará:
• LEER TODAS las instrucciones completamente
antes de empezar.
• LEER TODOS los avisos, cuidados, e
información de mantenimiento.
Pour installer votre robinet Delta
facilement, vous devez:
• LIRE TOUTES les instructions avant de débuter;
• LIRE TOUS les avertissements ainsi que toutes
les instructions de nettoyage et d'entretien.
76420
HIGH-RISE PULL-DOWN KITCHEN FAUCETS
76420
LLAVES DE AGUA ELEVADAS, DESLIZABLES
HACIA ABAJO, PARA COCINAS
ROBINET À COL DE CYGNE ET BEC-DOUCHETTE
POUR DE CUISINE
1
You may need/Usted puede necesitar/
Articles dont vous pouvez avoir besoin:
1/8"
6/5/14
Rev. A
Publicidad
Tabla de contenido

Manuales relacionados para Delta 19939F-DST


Resumen de contenidos para Delta 19939F-DST
- Página 1 • To READ ALL the instructions completely before beginning. • To READ ALL warnings, care, and maintenance information. Para instalación fácil de su llave Delta usted necesitará: • LEER TODAS las instrucciones completamente antes de empezar. • LEER TODOS los avisos, cuidados, e información de mantenimiento.
-
Página 2: Explanation Of Signal Word Consequences
fl ooding: Intended use: • Read and follow instructions before installation and use of ® Delta system model professional water systems are intended for use in this system; filtering drinking water in homes and has not been evaluated for other uses. -
Página 3: Información De Seguridad Para El Filtro
Uso previsto: • Lea y siga las instrucciones antes de la instalación y el uso de este El sistema de agua de modelos profesionales de los sistemas Delta® está sistema; diseñado para usarse con el sistema de fi ltración de agua potable en los hogares y no ha sido evaluado para otros usos. - Página 4 Utilisation prévue : • Respectez tous les codes de plomberie applicables. Les systèmes d’eau potable professionnels Delta® sont conçus pour fi ltrer l’eau à la maison et ils n’ont pas été évalués pour d’autres utilisations. Gé- • Montez le fi ltre sur un tuyau d’eau froide seulement.
- Página 5 Single Hole Installation / Instalación solo agujero / Un trou d’installation Place gasket (1) into groove on bottom of faucet (2). Install mounting bracket (4) and nut (5) onto the mounting shank using wrench (6). Insert faucet tubes and mounting shank (3) through mounting hole. Coloque el empaque (1) en la ranura en la parte inferior de la llave de agua (grifo) (2).
-
Página 6: Instalación Opcional De La Chapa De Cubierta
Three Hole Installation / Tres agujeros de instalación / Trois trous d’installation D.-2 D.-1 D.-3 Optional Escutcheon Installation Not included with all models - To order see replacement parts page for your model. Slide the tubes and shank of the hub (5) through the escutcheon and mount- For installations using the 10"... -
Página 7: Hose Installation
Hose Installation Slide spout assembly (4) onto hub (5). Use caution not to pinch Screw the threaded fitting of hose (1) into spray head (2) to prevent the fingers. Rotate spout assembly to ensure smooth operation. hose from being pulled into the spout until you are ready to flush the lines. -
Página 8: Instalación De La Manguera
Incorrect Installations. Hose Installation Remove hose guide and discard. Slide hose weight (1) over end of hose (2). Instalacións incorrecta. Push hose end (1) onto faucet outlet (2). Attach clip (3) over hose and outlet as shown. Pull Installations down moderately to ensure connection has been made. incorrecte. -
Página 9: Instalación Del Sistema De Fi Ltro
Filter System Installation Instalación del sistema de fi ltro Tools Required: Parts and Materials Included: Piezas y materiales incluidos: Herramientas necesarias: 1. Drill (Cordless recommended) 1. Filter Cartridge 1. Cartucho filtrante 1. Taladro (Se recomienda sin cable) 2. Adjustable Wrench 2. - Página 10 Installation du système de fi ltration Pièces et matériaux inclus : Outils requis : 1. Cartouche filtrante 1. Perceuse (perceuse sans fil 2. Tête de filtre recommandée) 3. Adaptateur 3/8 po x 24 po en PEX 2. Clé ajustable 4. Vis de montage no 2 Phillips 3.
- Página 11 Check location of head/bracket (1): After checking location, Place fi lter head assembly holes over mounting screws and pull ■ Line up head with holes marked in step B. down to lock into place. Tighten the screws for a ■ Verify cold pex line (2) coming from faucet (blue end) can reach the outlet of the head unit. secure fi...
- Página 12 Ensure the COLD water fitting (5), from the faucet, is Using the supplied 24” PEX tubing (7), connect the Verify both O-rings (10) are present and properly free of debris. The cold water fitting (5) is 3/8” COLD water supply outlet (8) to the filter inlet (9). seated in the grooves.
-
Página 13: Conexiones Especiales
Loop tubing (2) if it is too long. Note: created. Delta is not responsible for tubing that is cut ● Tubing is cut too short: buy a coupling union and a Recommended tubing minimum bend diameter is 8". -
Página 14: Correct Method Método Correcto Bonne Méthode
Incorrect Installation Correct method Instalación Incorrecta Método Correcto Installation Incorrecte Bonne méthode Do not install sleeve Ensure cut is straight. upside down. Custom Fit Connections - Plastic Sleeve Installation Instructions No instale la manga Asegúrese que el corte (For Hot Water Line Only) boca abajo. - Página 15 Wand will lock into position when brought into proximity of the spout magnet. The Turn on hot and cold water supplies (1). Pull the hose assembly (2) out of the sprayer can be removed by either pulling directly out from the spout or by twisting spout and remove the sprayer (3).
-
Página 16: Fijando La Parada De Límite De La Manija (Opcional)
Setting The Handle Limit Stop (Optional) This faucet includes an integrated handle limit stop that has two positions. Position because it limits the amount of hot water in the mix; however, this handle limit stop will not always prevent scalding because it does not compensate for incoming 1, to the left, allows full handle motion (the full range between “all cold”... -
Página 17: Resolución De Averías
Mantenimiento del filtro de agua Cambie este fi ltro por lo menos cada seis meses. Condiciones locales del agua y el volumen real de agua pueden afectar la vida del fi ltro. Reemplace si ocurre una reducción apreciable de la presión en la llave de agua/el grifo. Instrucciones para el reemplazo del filtro 1. -
Página 18: Mantenimiento
(si no la reinstala resultar en daño por agua. podria dañar las partes internas). Su llave de agua tipo deslizable Delta tiene un siste- Nota: Una cantidad pequeña de agua puede escur- ma de protección contra el contraflujo, incorporado, Si la llave de agua tiene una filtración por debajo de... - Página 19 RP47666 Set Screw RP73055▲ Tornillo de Lever Handle Presión Manijas de Palanca Vis de calage Manette ▲ Specify Finish Especifíque el Acabado RP47271▲ Précisez le fini Set Screw & Button Tornillo de Presión y Botón RP51502▲ Vis de calage RP73053▲ et Bouton Sprayer Assembly Casquete...
- Página 20 76420 Rev. A...
-
Página 21: Garantía Limitada De Las Llaves De Agua (Grifos) Delta
5 ans à compter de la date d’achat. pour toutes les demandes en vertu de la garantie, sauf si le produit a été enregistré auprès de Delta Dans le cas d’une utilisation commerciale, la garantie est d’un an à compter de la date d’achat.