
Manuales relacionados para De Dietrich DOP1160X


Resumen de contenidos para De Dietrich DOP1160X
- Página 1 FR GUIDE D'UTILISATION EN USER GUIDE ES MANUAL DE UTILIZACIÓN PT MANUAL DE UTILIZAÇÃO DE BETRIEBSANLEITUNG Four Oven Horno Forno Backofen...
- Página 2 Retrouvez toutes les informations de la marque sur w w w w w w . . d d e e - - d d i i e e t t r r i i c c h h . . c c o o m m Visitez La Galerie De Dietrich, 6 rue de la Pépinière à Paris VIIIème Ouvert du mardi au samedi de 10h à...
-
Página 3: Tabla De Contenido
SOMMAIRE 1 / DESCRIPTION DE VOTRE APPAREIL • • Présentation de votre four ___________________________________ • • Présentation du programmateur ______________________________ 2 / UTILISATION DE VOTRE APPAREIL • • Utilisation du programmateur º Comment régler l’heure _________________________________ º Cuisson immédiate _____________________________________ •... -
Página 4: Description De Votre Appareil
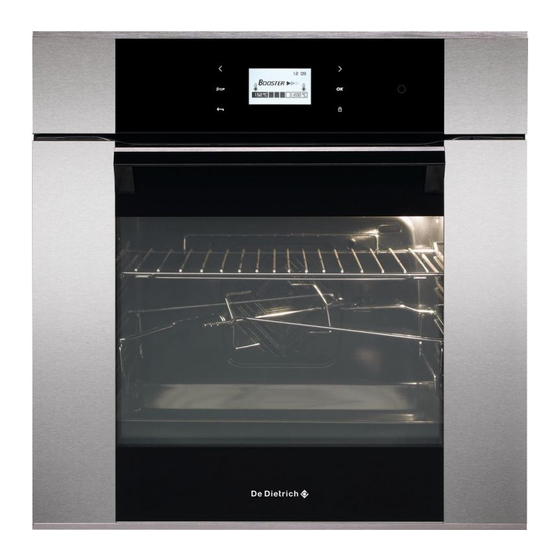
1 / DESCRIPTION DE VOTRE APPAREIL • • PRESENTATION DE VOTRE FOUR Programmateur Gradins fil Manette de commandes Trou pour tournebroche Lampe... -
Página 5: Description De Votre Appareil
1 / DESCRIPTION DE VOTRE APPAREIL • • PRESENTATION DU PROGRAMMATEUR Affichage des modes de cuisson Affichage de l’horloge Indicateur de durées de cuisson Indicateur de montée en température Affichage durée de cuisson/minuterie Indicateur de gradins Indicateur de minuterie Indicateur de verrouillage clavier (sécurité enfant) Indicateur fin de cuisson Affichage de la température du four... -
Página 6: Comment Régler L'heure
2 / UTILISATION DE VOTRE APPAREIL • • UTILISATION DU PROGRAMMATEUR • Comment régler l’heure A la mise sous tension L’afficheur clignote à 12H00. -Réglez l’heure à l’aide de la manette. Exemple : 12H30. -Appuyez sur la manette pour valider. L’affichage ne clignote plus. -
Página 7: Utilisation De Votre Appareil
2 / UTILISATION DE VOTRE APPAREIL • • UTILISATION DU PROGRAMMATEUR •Cuisson immédiate — Le programmateur ne doit afficher que l’heure. Celle-ci ne doit pas clignoter. - Sélectionnez avec la manette la cuis- son choisie. - Exemple: --> Température de pré- conisation 180°C. -
Página 8: Cuisson Programmée
2 / UTILISATION DE VOTRE APPAREIL CUISSON PROGRAMMEE • • Cuisson avec départ immédiat et - - - - durée programmée - Choisissez le mode de cuisson souhaité et ajustez la température (voir paragraphe: cuis- son immédiate). - Appuyez sur la touche - L’af fichage clignote à... - Página 9 2 / UTILISATION DE VOTRE APPAREIL CUISSON PROGRAMMEE • • Cuisson avec départ différé et heure de fin choisie P P r r o o c c é é d d e e z z c c o o m m m m e e u u n n e e c c u u i i s s s s o o n n p p r r o o g g r r a a m m m m é é e e . . - Appuyez sur la touche pour fai- re clignoter l’indicateur de fin de cuis-...
-
Página 10: Utilisation De La Fonction Minuterie
2 / UTILISATION DE VOTRE APPAREIL • • PERSONNALISATION DE LA TEMPERATURE PRECONISEE Sélectionnez la fonction de cuisson : Si vous souhaitez personnaliser la température préconisée : - Appuyez sur la touche jusqu’à faire clignoter la température. -Ajustez la température à l’aide de la manette. -Appuyez sur la manette pour valider. -
Página 11: Verrouillage Des Commandes
2 / UTILISATION DE VOTRE APPAREIL VERROUILLAGE DES COMMANDES (SÉCURITE ENFANTS) • • Vous avez la possibilité d’interdire l’accès aux commandes du four en procédant de la façon suivante : le four étant à l’arrêt, appuyez simul- tanément sur les touches S S T T O O P P et pen- dant quelques secondes. -
Página 12: Réglage Du Contraste
2 / UTILISATION DE VOTRE APPAREIL REGLAGE DU CONTRASTE • • Reglez l’heure à 00:10(voir réglage de l’heure p.6) - Appuyez sur la touche jusq u’à l’affichage de -CO-. - Ajustez le contraste à l’aide de la ma- nette. - Appuyez sur la manette pour valider. -
Página 13: Mode Démo
2 / UTILISATION DE VOTRE APPAREIL MODE DEMO • • Reglez l’heure à 00:00 (voir réglage de l’heu- re p.6) - Appuyez simultanément durant 10s sur S S T T O O P P jusqu’à l’af fi- les touches chage de DEMO. - Pour retourner en mode normal reglez l’heu- re à... -
Página 14: Modes De Cuisson Du Four
3 / MODES DE CUISSON DU FOUR C C H H A A L L E E U U R R T T O O U U R R N N A A N N T T E E (température préconisée 1 1 9 9 0 0 ° ° C C mini 35°C maxi 250°C) •La cuisson s’effectue par l’élément chauffant situé... - Página 15 3 / MODES DE CUISSON DU FOUR M M A A I I N N T T I I E E N N A A U U C C H H A A U U D D (température préconisée 6 6 0 0 ° ° C C mini 35°C maxi 100°C) •Cette position permet un maintien au chaud de vos aliments par un dosage de l’élé- ment situé...
- Página 16 4 / GUIDE DES FONCTIONS BASSE TEMPERATURE UTILISATION DE LA FONCTION “BASSE TEMPERATURE” ( ( s s e e l l o o n n l l e e s s • • m m o o d d è è l l e e s s ) ) L L a a c c u u i i s s s s o o n n “...
-
Página 17: Entretien Et Nettoyage De Votre Four
5 / ENTRETIEN ET NETTOYAGE DE VOTRE FOUR • • FAIRE UNE PYROLYSE •Pyrolyse immédiate Attention Retirez la casserolerie du four et enlevez les débordements importants qui auraient pu se produire. - - Vérifiez que le programmateur affiche l’heu- re du jour et que celle-ci ne clignote pas. Vous avez la possibilité... - Página 18 5 / ENTRETIEN ET NETTOYAGE DE VOTRE FOUR • • FAIRE UNE PYROLYSE •Pyrolyse différée - - Suivre les instructions décrites dans le para- graphe “Pyrolyse immédiate” Avant de valider le cycle de pyrolyse . - Appuyez 1 fois sur la touche pour fair clignoter l’indicateur de fin “...
-
Página 19: Service Apres-Vente
6 / SERVICE APRES-VENTE •INTERVENTIONS Les éventuelles interventions sur votre appa- reil doivent être effectuées par un profession- nel qualifié dépositaire de la marque. Lors de votre appel, mentionnez la référence complète de votre appareil (modèle, type, numéro de sé- rie). - Página 21 FR GUIDE D'UTILISATION EN USER GUIDE ES MANUAL DE UTILIZACIÓN PT MANUAL DE UTILIZAÇÃO DE BETRIEBSANLEITUNG Four Oven Horno Forno Backofen...
- Página 22 You can find a full range of information about the brand at w w w w w w . . d d e e - - d d i i e e t t r r i i c c h h . . c c o o m m Visit the De Dietrich Gallery, 6 rue de la Pépinière (Paris eighth district)
- Página 23 CONTENTS 1 / DESCRIPTION OF YOUR APPLIANCE • • Introduction to your oven ____________________________________ • • Introduction to the programmer ______________________________ 2 / USING YOUR APPLIANCE • • Using the programmer º How to set the time_____________________________________ º Immediate cooking _____________________________________ •...
-
Página 24: Description Of Your Appliance
1 / DESCRIPTION OF YOUR APPLIANCE • • INTRODUCTION TO YOUR OVEN Programmer Wire shelf supports Control knob Hole for rotisserie Lamp... -
Página 25: Introduction To The Programmer
1 / DESCRIPTION OF YOUR APPLIANCE • • INTRODUCTION TO THE PROGRAMMER Cooking modes display Clock display Cooking time indicator Temperature rise indicator Cooking time/timer display Shelf support indicator Timer indicator Control panel lock indicator (child safety device). End of cooking time indicator Oven temperature display. -
Página 26: Using Your Appliance
2 / USING YOUR APPLIANCE • • USING THE PROGRAMMER • How to set the time When connecting to a power source The displays flashes 12:00. -Set the time using the control knob. Example: 12H30. -Press the control knob to confirm. The display stops flashing. -
Página 27: º Immediate Cooking
2 / USING YOUR APPLIANCE • • USING THE PROGRAMMER •Immediate cooking — The programmer should display only the ti- me. It should not be flashing. - Use the control knob to select the cho- sen type of cooking. - Example: —>... -
Página 28: Programmed Cooking
2 / USING YOUR APPLIANCE PROGRAMMED COOKING • • Cooking with immediate start and pro- grammed duration - Select the desired cooking mode and adjust the temperature (see paragraph: immediate cooking). - Press the button - The display flashes to indi- cate that you can now adjust the setting. - Página 29 2 / USING YOUR APPLIANCE PROGRAMMED COOKING • • Cooking with delayed start and selec- ted end of cooking time P P r r o o c c e e e e d d a a s s f f o o r r p p r r o o g g r r a a m m m m e e d d c c o o o o k k i i n n g g . . - Press the button twice until the end of cooking time indicator starts...
-
Página 30: Personalising The Recommended Temperature
2 / USING YOUR APPLIANCE • • PERSONALISING THE RECOMMENDED TEMPERATURE Select the cooking function: If you wish to customise the recommended temperature: - Press the touch control until the °C flashing. -Set the temperature, using the knob. -Press the control knob to confirm. USING THE TIMER FUNCTION •... -
Página 31: Locking The Controls
2 / USING YOUR APPLIANCE LOCKING THE CONTROLS (CHILD SAFETY) • • OVEN OFF You have the option of preventing access to the oven controls by taking the following steps: when the oven is off, press and hold the S S T T O O P P and buttons for a few seconds. -
Página 32: Adjusting Contrast
2 / USING YOUR APPLIANCE ADJUSTING THE CONTRAST • • - Adjust the time to 0:10 (see section "Resetting the time") then confirm. - Press a the buttons until "-CO-" is shown in the display. - Adjust the contrast, using the control knob - Press the button to confirm. -
Página 33: Demo Mode
2 / USING YOUR APPLIANCE DEMO MODE • • - Adjust the time to 0:00 (see section "Resetting the time") then confirm. - Press and hold down the S S T T O O P P buttons simultaneously for 10 seconds until "DEMO" is shown in the display. -
Página 34: Oven Cooking Modes
3 / OVEN COOKING MODES F F A A N N O O V V E E N N (recommended temperature 1 1 9 9 0 0 ° ° C C min 35°C max 250°C) • Cooking is controlled by the heating element at the bottom of the oven and by the fan. - Página 35 3 / OVEN COOKING MODES K K E E E E P P I I N N G G T T H H I I N N G G S S W W A A R R M M (recommended temperature 6 6 0 0 ° ° C C min 35°C max 100°C) •This position allows you to keep your food warm using bursts of heat from the element at the bottom of the oven combined with the fan.
-
Página 36: Guide To Low Temperatures Fonction
4 / GUIDE TO LOW TEMPERATURE FUNCTIONS USING THE “LOW TEMPERATURE” FUNCTION • • C C o o o o k k i i n n g g m m u u s s t t a a b b s s l l o o u u t t e e l l y y b b e e g g i i n n i i n n a a “ “ L L O O W W T T E E M M P P E E R R A A T T U U R R E E ”... - Página 37 5 / CARING FOR AND CLEANING YOUR OVEN • • PYROLYSIS •Immediate pyrolysis Note Remove cookware from the oven and clean up any major spill residue. - - Check that the programmer is displaying the time of day and that it is not flashing. You can choose between 3 pyrolysis cycle times: pyrolysis time 1 hour 30 minutes.
- Página 38 5 / CARING FOR AND CLEANING YOUR OVEN • • PYROLYSIS •Delayed pyrolysis - - Follow the instructions described in the “Pro- gramming for immediate pyrolysis” section Before confirming the pyrolysis cycle - Press the button until the end “ of cooking time indicator starts to flash.
-
Página 39: After-Sales Service
6 / AFTER-SALES SERVICE • SERVICE CALLS Any repairs to your appliance must be made by a qualified professional, authorised to work on the brand. When you call, provide your ap- pliance’s complete reference information (mo- del, type, serial number). This information ap- pears on the manufacturer’s nameplate (Fig.1). - Página 41 FR GUIDE D'UTILISATION EN USER GUIDE ES MANUAL DE UTILIZACIÓN PT MANUAL DE UTILIZAÇÃO DE BETRIEBSANLEITUNG Four Oven Horno Forno Backofen...
- Página 42 Conozca todas las noticias de la marca en w w w w w w . . d d e e - - d d i i e e t t r r i i c c h h . . c c o o m m Visite La Galería De Dietrich, 6 rue de la Pépinière, en París VIII Abierto de martes a sábado de las 10:00 a las 19:00.
- Página 43 ÍNDICE 1/ DESCRIPCIÓN DEL APARATO • Presentación del horno ___________________________________ __ • Presentación del programador _______________________________ 2/ UTILIZACIÓN DEL APARATO • Utilización del programador º Cómo ajustar la hora ________________________________ _______ º Cocción inmediata _________________________________ ________ ____ 7 • Cocción programada º...
-
Página 44: Es 1 / Descripción Del Aparato
1 / DESCRIPCIÓN DEL APARATO • • PRESENTACIÓN DEL HORNO Programador Varillas de soporte Rueda de mandos Orificio para asador Lámpara... -
Página 45: Descripción Del Aparato
1 / DESCRIPCIÓN DEL APARATO • • PRESENTACIÓN DEL PROGRAMADOR Visualización de los modos de cocción Presentación del reloj Indicador de la duración de cocción Indicador de aumento de temperatura Indicador de altura Visualización de la duración de cocción/minutero Indicador de bloqueo del teclado (seguridad Indicador de minutero para niños) Indicador de final de cocción... -
Página 46: Utilización Del Programador
2 / UTILIZACIÓN DEL APARATO • • UTILIZACIÓN DEL PROGRAMADOR Cómo ajustar la hora - Al encender el horno Verá que en la pantalla parpadea 12:00 -Ajuste la hora utilizando la rueda. Ejemplo: 12:30. -Presione la rueda para validarla. La pantalla deja de parpadear. - - P P a a r r a a m m o o d d i i f f i i c c a a r r l l a a h h o o r r a a d d e e l l r r e e l l o o j j -Pulse el mando durante unos... -
Página 47: Utilización Del Aparato
2 / UTILIZACIÓN DEL APARATO • • UTILIZACIÓN DEL PROGRAMADOR •Cocción inmediata – El programador sólo debe indicar la hora y ésta no debe parpadear. - Seleccione con la rueda la cocción que desea. - Ejemplo: Temperatura recomenda- da 180°C. - Valide presionando la rueda. -
Página 48: Cocción Programada
2 / UTILIZACIÓN DEL APARATO COCCIÓN PROGRAMADA • • Cocción con inicio inmediato y dura- ción programada - Elija el modo de cocción deseado y ajuste la temperatura (ver apartado: cocción inmedia- ta). - Pulse el mando - La pantalla parpadea para indi- car que se puede comenzar la regulación. - Página 49 2 / UTILIZACIÓN DEL APARATO COCCIÓN PROGRAMADA • • Cocción con inicio diferido y hora de fi- nal programada P P r r o o c c e e d d a a c c o o m m o o p p a a r r a a u u n n a a c c o o c c c c i i ó ó n n p p r r o o g g r r a a m m a a - - d d a a .
-
Página 50: Personalización De La Temperatura Recomendada
2 / UTILIZACIÓN DEL APARATO • • PERSONALIZACIÓN DE LA TEMPERATURA RECOMENDADA Si desea personalizar la temperatura recomendada: Seleccione la función de cocción: - Pulse la tecla hasta que la temperatura °C empiece a parpadear. - Ajuste la temperatura utilizando la rueda. - Presione la rueda para validarlo. - Página 51 2 / UTILIZACIÓN DEL APARATO BLOQUEO DE LOS MANDOS (SEGURIDAD NIÑOS) • • HORNO PARADO Tiene la posibilidad de impedir el acceso a los mandos del horno procediendo de la siguien- te forma: con el horno parado, pulse simultánea- mente los mandos S S T T O O P P y durante unos segundos.
-
Página 52: Ajuste Del Brillo De La Pantalla
2 / UTILIZACIÓN DEL APARATO AJUSTE DEL BRILLO DE LA • • PANTALLA Ajuste la hora en 0:10 (ver apartado "Puesta en hora") y valídelo. - Pulse el mando hasta que aparezca “CO” en la pantalla. - Regule el brillo deseado. - Presione la rueda para validarlo. - Página 53 2 / UTILIZACIÓN DEL APARATO MODO DEMO • • - Para activar el modo DEMO: Ajuste la hora en 0:00 (ver apartado "Puesta en hora") y valídelo. - Pulse simultáneamente los mandos S S T T O O P P durante 10 segundos hasta que aparezca “DEMO”...
-
Página 54: Es 3 / Modos De Cocción Del Horno
3 / MODOS DE COCCIÓN DEL HORNO C C A A L L O O R R G G I I R R A A T T O O R R I I O O (temperatura recomendada 1 1 9 9 0 0 ° ° C C mínimo 3 3 5 5 ° ° C C máximo 2 2 5 5 0 0 ° ° C C ) La cocción se efectúa con el elemento calefactor situado al fondo del horno y con la hé- lice para mover el aire. -
Página 55: Modos De Cocción Del Horno
3 / MODOS DE COCCIÓN DEL HORNO M M A A N N T T E E N N I I M M I I E E N N T T O O C C A A L L I I E E N N T T E E (temperatura recomendada 6 6 0 0 º... -
Página 56: Manuales De Las Funciones De Baja Temperatura
4 / MANUALES DE LAS FUNCIONES DE BAJA TEMPERATURA UTILIZACIÓN DE LA FUNCIÓN • • “BAJA TEMPERATURA” L L a a c c o o c c c c i i ó ó n n “ “ B B A A J J A A T T E E M M P P E E R R A A T T U U R R A A ” ” d d e e b b e e c c o o m m e e n n z z a a r r o o b b l l i i g g a a t t o o r r i i a a m m e e n n t t e e c c o o n n e e l l h h o o r r n n o o f f r r í... -
Página 57: Mantenimiento Y Limpieza Del Horno
5 / MANTENIMIENTO Y LIMPIEZA DEL HORNO • • HACER UNA PIRÓLISIS •Pirólisis inmediata Atención Retire la batería de cocina del horno y los desbordamientos importantes que hubieran podido producirse.Cuando el horno esté frío, utilice un paño húmedo para retirar la ceniza blanca. -
Página 58: Es 5 / Mantenimiento Y Limpieza Del Horno
5 / MANTENIMIENTO Y LIMPIEZA DEL HORNO • • HACER UNA PIRÓLISIS •Pirólisis diferida - Siga las instrucciones descritas en el apar- tado “Pirólisis inmediata” Después de validar el ciclo de pirólisis. - Pulse el mando hasta que parpa- dee el indicador de fin de la cocción. - El indicador de fin de cocción parpadea indicando que se puede comenzar la regula- ción. -
Página 59: 6/ Servicio Técnico
6 /SERVICIO TÉCNICO •INTERVENCIONES Todas las intervenciones que pueda ser nece- sario efectuar en su aparato deben ser realiza- das por un profesional cualificado autorizado por la marca. Cuando realice su llamada, men- cione la referencia completa del aparato (mo- delo, tipo y número de serie). - Página 61 FR GUIDE D'UTILISATION EN USER GUIDE ES MANUAL DE UTILIZACIÓN PT MANUAL DE UTILIZAÇÃO DE BETRIEBSANLEITUNG Four Oven Horno Forno Backofen...
- Página 62 Encontre todas as informações acerca da marca em w w w w w w . . d d e e - - d d i i e e t t r r i i c c h h . . c c o o m m Visite A Galeria De Dietrich, 6 rue de la Pépinière em Paris, VIII Aberta de terça-feira a sábado, das 10h às 19h.
- Página 63 ÍNDICE 1 / DESCRIÇÃO DO SEU APARELHO • • Apresentação do seu forno __________________________________ • • Apresentação do programador _______________________________ 2 / UTILIZAÇÃO DO SEU APARELHO • • Utilização do programador º Como acertar a hora____________________________________ º Cozedura imediata _____________________________________ •...
-
Página 64: Apresentação Do Seu Forno
1 / DESCRIÇÃO DO SEU APARELHO • • APRESENTAÇÃO DO SEU FORNO Programador Encaixes do filamento Manípulo dos comandos Buraco para espeto rotativo Lâmpada... -
Página 65: Descrição Do Seu Aparelho
1 / DESCRIÇÃO DO SEU APARELHO • • APRESENTAÇÃO DO PROGRAMADOR Apresentação dos modos de cozedura Visualização do relógio Indicador das durações de cozedura Indicador de aumento da temperatura Visualização da duração da Indicador de encaixes cozedura/temporizador Indicador de bloqueio de teclado (segurança Indicador do temporizador para as crianças) Indicador de fim de cozedura... -
Página 66: Como Acertar A Hora
2 / UTILIZAÇÃO DO SEU APARELHO • • UTILIZAÇÃO DO PROGRAMADOR • Como acertar a hora Aquando da ligação eléctrica O visor pisca em 12H00. - Acerte a hora com o manípulo. Exemplo: 12H30. - Prima o manípulo para validar. O visor deixa de piscar. -
Página 67: Utilização Do Seu Aparelho
2 / UTILIZAÇÃO DO SEU APARELHO • • UTILIZAÇÃO DO PROGRAMADOR •Cozedura imediata — O programador deve apresentar apenas a hora. Esta não deve estar a piscar. - Seleccione com o manípulo a cozedura escolhida. - Exemplo: -—> Temperatura reco- mendada de 180 °C. - Página 68 2 / UTILIZAÇÃO DO SEU APARELHO COZEDURA PROGRAMADA • • Cozedura com início imediato e duração programada - Escolha o modo de cozedura pretendido e regule a temperatura (consulte o parágrafo: cozedura imediata). - Prima o botão - O visor pisca para indicar que a regulação é...
- Página 69 2 / UTILIZAÇÃO DO SEU APARELHO COZEDURA PROGRAMADA • • Cozedura com início diferido e hora final escolhida P P r r o o c c e e d d a a c c o o m m o o p p a a r r a a u u m m a a c c o o z z e e d d u u r r a a p p r r o o g g r r a a m m a a d d a a . . - Prima 2 vezes o botão até...
- Página 70 2 / UTILIZAÇÃO DO SEU APARELHO • • PERSONALIZAÇÃO DA TEMPERATURA RECOMENDADA Seleccione a função de cozedura: Se quiser personalizar a temperatura aconselhada: - Prima o botão até a temperatura ficar a piscar. -- Acerte a temperatura com o manípulo. - Valide premindo simplesmente o manípulo.
- Página 71 2 / UTILIZAÇÃO DO SEU APARELHO BLOQUEIO DOS COMANDOS (SEGURANÇA PARA AS CRIANÇAS) • • FORNO DESLIGADO Pode impedir o acesso aos comandos do for- no, procedendo da seguinte forma: Com o forno desligado, prima em simultâneo os botões S S T T O O P P e durante alguns segundos.
- Página 72 2 / UTILIZAÇÃO DO SEU APARELHO AJUSTE O CONTRASTE • • Acerte a hora em 0:10 (consulte o capítulo "Acertar a hora") e valide. Prima botão até aparecimento de “-CO-” no visor. - Ajuste o contraste usando o manípulo - Valide premindo simplesmente o maní- pulo.
- Página 73 2 / UTILIZAÇÃO DO SEU APARELHO MODO DEMO • • - Para activar o modo DEMO: Acerte a hora em 0:00 (consulte o capítulo "Acertar a hora") e valide. - Prima em simultâneo os botões S S T T O O P P durante 10 segundos até ao apa- recimento de “DEMO”...
-
Página 74: Pt 3 / Modos De Cozedura Do Forno
3 / MODOS DE COZEDURA DO FORNO C C A A L L O O R R G G I I R R A A T T Ó Ó R R I I O O (temperatura recomendada 1 1 9 9 0 0 ° ° C C mín. 35 °C máx. 250°C) •A cozedura é... -
Página 75: Modos De Cozedura Do Forno
3 / MODOS DE COZEDURA DO FORNO M M A A N N T T E E R R Q Q U U E E N N T T E E (temperatura recomendada 6 6 0 0 ° ° C C mín. 35 °C máx. 100 °C) •... -
Página 76: Utilização Da Função "Baixa Temperatura
4 / GUIA DAS FUNÇÕES DE BAIXA TEMPERATURA UTILIZAÇÃO DA FUNÇÃO • • “BAIXA TEMPERATURA” A A c c o o z z e e d d u u r r a a e e m m “ “ B B A A I I X X A A T T E E M M P P E E R R A A T T U U R R A A ” ” d d e e v v e e I I M M P P E E R R A A T T I I V V A A M M E E N N T T E E i i n n i i c c i i a a r r c c o o m m o o f f o o r r n n o o f f r r i i o o . -
Página 77: Manutenção E Limpeza Do Forno
5 / MANUTENÇÃO E LIMPEZA DO FORNO • • EFECTUAR UMA PIRÓLISE • Pirólise imediata Atenção! Retire os acessórios do forno e remova os eventuais derrames importantes. - - Certifique-se de que o programador esteja a indicar a hora actual e que não esteja a piscar. Pode escolher entre 3 durações de ciclo de pirólise: Duração de pirólise de 1 hora 30. - Página 78 5 / MANUTENÇÃO E LIMPEZA DO FORNO • • EFECTUAR UMA PIRÓLISE •Pirólise diferida - - Siga as instruções descritas no parágrafo “Pirólise imediata” Após ter validado o ciclo de pirólise. - Prima 1 vezes o botão até que o i n d i c a d o r d e d u r a ç ã o d e c o z e d u r a “...
-
Página 79: 6/ Serviço Pós-Venda
6 / SERVIÇO PÓS-VENDA • INTERVENÇÕES As eventuais intervenções no seu aparelho de- vem ser efectuadas por um profissional quali- ficado que trabalhe para a marca. Durante o seu telefonema, indique a referência completa do seu aparelho (modelo, tipo, número de sé- rie). - Página 81 FR GUIDE D'UTILISATION EN USER GUIDE ES MANUAL DE UTILIZACIÓN PT MANUAL DE UTILIZAÇÃO DE BETRIEBSANLEITUNG Four Oven Horno Forno Backofen...
- Página 82 Alle Informationen über die Marke auf w w w w w w . . d d e e - - d d i i e e t t r r i i c c h h . . c c o o m m Besuchen Sie La Galerie De Dietrich, 6 rue de la Pépinière in Paris im VIII.
- Página 83 INHALT 1 / BESCHREIBUNG DES GERÄTS • • Übersicht über den Backofen ________________________________ • • Übersicht über die Programmiervorrichtung ____________________ 2 / BENUTZUNG DES GERÄTS • • Benutzung der Programmiervorrichtung _______________________ º Einstellung der Uhrzeit __________________________________ º Sofortiges Garen_______________________________________ • • Programmiertes Garen º...
-
Página 84: Beschreibung Des Geräts
1 / BESCHREIBUNG DES GERÄTS • • ÜBERSICHT ÜBER DEN BACKOFEN Programmiervorrichtung Einschubleisten Bedienschalter Loch für Spieß Lampe... - Página 85 1 / BESCHREIBUNG DES GERÄTS • • BESCHREIBUNG DER PROGRAMMIERVORRICHTUNG Anzeige der Garmethoden Anzeige der Uhrzeit Anzeige der Gardauer Anzeige des Temperaturanstiegs Anzeige der Gardauer/Zeitschaltuhr Anzeige der Einschubleisten Anzeige der Zeitschaltuhr Anzeige der Tastenverriegelung (Kindersicherung) Anzeige der Garzeitbeendigung Anzeige der Backofentemperatur Taste zur Einstellung der Temperatur Taste zur Einstellung von Zeit, Gardauer, Garzeitbeendigung und Zeitschaltuhr STOP-Taste...
-
Página 86: Benutzung Des Geräts
2 / BENUTZUNG DES GERÄTS • • BENUTZUNG DER PROGRAMMIERVORRICHTUNG • Einstellung der Uhrzeit Bei Stromzuschaltung: Die Anzeige blinkt auf 12:00 Uhr. - Durch Drehen des Bedienschalters die Uhrzeit einstellen. Beispiel: 12:30. - Zur Bestätigung den Bedienschalter drücken. Die Anzeige blinkt nicht mehr. - Z Z u u r r Ä... -
Página 87: º Sofortiges Garen
2 / BENUTZUNG DES GERÄTS BENUTZUNG • • •Sofortiges Garen — Die Programmiervorrichtung darf nur die Uhrzeit anzeigen, und diese darf nicht blinken. - Durch Drehen des Bedienschalters die gewünschte Garmethode auswählen. - Beispiel: —> Temperaturvorgabe 180 °C. - Zur Bestätigung einfach den Bedien- schalter drücken. -
Página 88: Programmiertes Garen
2 / BENUTZUNG DES GERÄTS PROGRAMMIERTES GAREN • • Unverzüglich anlaufender Garvorgang über eine vorprogrammierte Dauer - Auswählen der gewünschten Garmethode und Anpassung der Temperatur (siehe Absatz: Sofortiges Garen): - Die Taste drücken. - Die Anzeige blinkt auf zeigt so an, dass die Einstellung nun vor- genommen werden kann. - Página 89 2 / BENUTZUNG DES GERÄTS PROGRAMMIERTES GAREN • • Zeitlich verzögert beginnender Garvor- gang mit Wahl des Garzeitendes W W i i e e b b e e i i m m p p r r o o g g r r a a m m m m i i e e r r t t e e n n G G a a r r e e n n v v o o r r g g e e h h e e n n . . - Zweimal die Taste drücken, bis die Anzeige für die Garzeitbeendigung blinkt.
-
Página 90: Benutzung Der Zeitschaltuhr-Funktion
2 / BENUTZUNG DES GERÄTS • • VERÄNDERUNG DER EMPFOHLENEN TEMPERATUR Die Garfunktion wählen: Wenn die empfohlene Temperatur verändert werden soll: - Die Taste drücken, bis die °C blinkt. - Durch Drehen des Bedienschalters die Temperatur verändern. - Zur Bestätigung den Bedienschalter drücken.. BENUTZUNG DER ZEITSCHALTUHR-FUNKTION •... -
Página 91: Verriegelung Der Bedienelemente
2 / BENUTZUNG DES GERÄTS VERRIEGELUNG DER BEDIENELEMENTE (KINDERSICHERUNG) • • IM AUSGESCHALTETEN ZUSTAND DES BACKOFENS Der Zugriff zu den Bedienelementen des Back- ofens kann folgendermaßen gesperrt werden: Bei abgeschaltetem Backofen einige Sekunden lang gleichzeitig die Tasten S S T T O O P P drücken. -
Página 92: Kontrasteinstellung
2 / BENUTZUNG DES GERÄTS KONTRASTEINSTELLUNG • • -Stellen Sie die Zeit bis 00.10 Uhr (siehe Einstellung der Zeit S.6) - Drücken Sie die Taste , bis das Display -CO-. - Stellen Sie den Kontrast mit dem Joystick. - Zur Bestätigung den Bedienschalter drücken.. -
Página 93: Aktivierung Des Demo-Modus
2 / BENUTZUNG DES GERÄTS AKTIVIERUNG DES DEMO-MODUS • • Die Uhrzeit auf 0:00 stellen (siehe Kapitel „Neueinstellung der Uhrzeit"), anschließend bestätigen. - Gleichzeitig 10 Sekunden lang die Tasten S S T T O O P P drücken, bis ”DEMO” in der Anzeige erscheint. -
Página 94: Garmethoden Im Backofen
3 / GARMETHODEN IM BACKOFEN U U M M L L U U F F T T (Temperaturvorgabe 1 1 9 9 0 0 ° ° C C , mindestens 35 °C, höchstens 250 °C) •Das Garen erfolgt durch das Heizelement in der Rückwand des Backofens und durch die Schraube für die Luftumwälzung. - Página 95 3 / GARMETHODEN IM BACKOFEN W W A A R R M M H H A A L L T T E E N N (Temperaturvorgabe 6 6 0 0 ° ° C C , mindestens 35 °C, höchstens 100 °C) •In dieser Position können Lebensmittel durch dosierte Wärmeabgabe des Heizelements an der Rückwand des Backofens in Kombination mit Umluft warmgehalten werden.
-
Página 96: Nutzung Der Funktion "Niedertemperatur
4 / NUTZUNG DER FUNKTION “NIEDERTEMPERATUR” NUTZUNG DER FUNKTION • • “NIEDERTEMPERATUR” D D e e r r “ “ N N I I E E D D E E R R T T E E M M P P E E R R A A T T U U R R ” ” - - G G a a r r v v o o r r g g a a n n g g m m u u s s s s u u n n b b e e d d i i n n g g t t b b e e i i... -
Página 97: Pflege Und Reinigung Des Backofens
5 / PFLEGE UND REINIGUNG DES BACKOFENS • • DURCHFÜHRUNG EINER PYROLYSE •Sofortige Pyrolyse Achtung Das gesamte Zubehör aus dem Backofen nehmen und eventuell vorhandene, stark übergelaufene Reste entfernen. - - Sicherstellen, dass die Programmiervorrich- tung die Tageszeit anzeigt und diese nicht blinkt. - Página 98 5 / PFLEGE UND REINIGUNG DES BACKOFENS • • DURCHFÜHRUNG EINER PYROLYSE •Verzögerte Pyrolyse - - Die Anweisungen aus dem Abschnitt „Sofor- tige Pyrolyse“ befolgen. Nach Bestätigung des Pyrolyseprogramms: - Zweimal die Taste drücken, bis die Anzeige für die Garzeitbeendigung blinkt.
-
Página 99: Kundendienst
6 / KUNDENDIENST • REPARATURARBEITEN Eventuelle Reparaturarbeiten am Gerät müssen von qualifiziertem Fachpersonal eines Händlers für die- sen Hersteller vorgenommen werden. Geben Sie bei Benachrichtigung des Kundendienstes die vollstän- digen Geräteangaben (Modell, Typ und Seriennum- mer) an. Diese Angaben sind dem Typenschild (Abb.