Publicidad
sauder.com
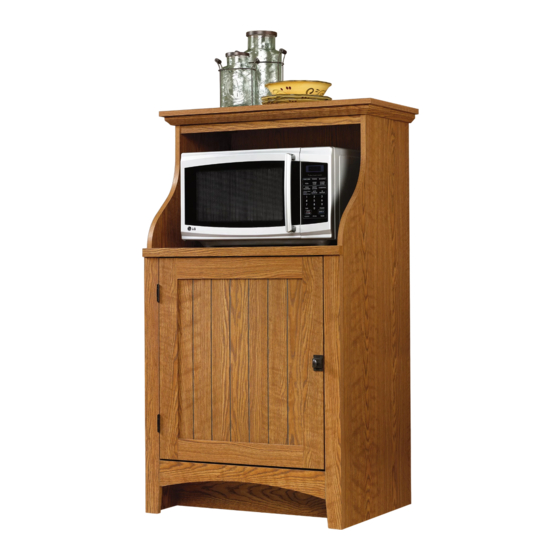
Gourmet Stand
Summer Home Collection | 401902
Need help? Visit Sauder.com to view video assembly tips or chat with a live rep.
Prefer the phone? Call 1-800-523-3987.
Share your journey!
Fancy yourself a
gourmet?
NOTE: THIS INSTRUCTION
BOOKLET CONTAINS IMPORTANT
SAFETY INFORMATION.
PLEASE READ AND KEEP FOR
FUTURE REFERENCE.
English pg 1-22
Français pg 23-25
Español pg 26-28
Lot # 362955
06/23/14
Purchased: __________________
Be sure to give us a ring before
making any returns. 1-800-523-3987
Publicidad
Tabla de contenido

Manuales relacionados para Sauder 401902


Resumen de contenidos para Sauder 401902
- Página 1 Summer Home Collection | 401902 NOTE: THIS INSTRUCTION BOOKLET CONTAINS IMPORTANT SAFETY INFORMATION. Need help? Visit Sauder.com to view video assembly tips or chat with a live rep. PLEASE READ AND KEEP FOR FUTURE REFERENCE. Prefer the phone? Call 1-800-523-3987.
- Página 2 Assembly Tools Required Part Identifi cation No. 2 Phillips Screwdriver Tip Shown Actual Size Hardware Identifi cation Assembly Steps 6-22 Hammer Not actual size Français 23-25 Español 26-28 Skip the power trip. Safety 29-30 This time. Warranty Page 2 401902 www.sauder.com/services...
-
Página 3: Part Identifi Cation
TOP (1) SHELF/BOTTOM (2) BACK (1) DOOR (1) ADJUSTABLE SHELF (1) SKIRT (1) RIGHT LEG (1) LEFT LEG (1) BRACE (1) FRONT MOLDING (1) RIGHT MOLDING (1) LEFT MOLDING (1) SHELF MOLDING (1) TOP MOLDING (1) www.sauder.com/services 401902 Page 3... - Página 4 HINGE - 2 STRIKE PLATE - 1 MOLDING ANGLE BRACKET - 18 HINGE BUSHING - 1 CONNECTOR - 2 TIE PLATE - 2 BACKPLATE - 1 KNOB - 1 RUBBER SLEEVE - 4 METAL PIN - 4 Page 4 401902 www.sauder.com/services...
- Página 5 BROWN 1-1/2" FLAT HEAD SCREW - 6 BLACK 1-5/8" PAN HEAD SCREW - 1 SILVER 1-1/4" MACHINE SCREW - 1 BLACK 1/2" FLAT HEAD SCREW - 1 BLACK 9/16" LARGE HEAD SCREW - 48 NAIL - 31 www.sauder.com/services 401902 Page 5...
- Página 6 Arrow Arrow (11 used) Arrow Insert the metal end of the CAM DOWEL into the HIDDEN CAM. Arrow Hole The arrow in the HIDDEN CAM must point toward the hole in the edge of the board. Page 6 401902 www.sauder.com/services...
- Página 7 Tap two MOLDING CONNECTORS (Y) into the notches in å the MOLDINGS (L, M, and N). Use your hammer to tap the MOLDING CONNECTORS (Y) into the notches in the MOLDINGS (L, M, and N). Flat edge Flat edge www.sauder.com/services 401902 Page 7...
- Página 8 Step 3 Turn three CAM SCREWS (8F) into the SHELF MOLDING (O). å Fasten the SHELF MOLDING (O) to the SHELF/BOTTOM (D). å Tighten three HIDDEN CAMS. These surfaces should be almost even. Page 8 401902 www.sauder.com/services...
- Página 9 Tighten Risk of damage or Arrow injury. HIDDEN CAMS must be completely Arrow Maximum tightened. HIDDEN 210 degrees CAMS that are not completely tightened may loosen, and parts may separate. To Minimum completely tighten: 190 degrees www.sauder.com/services 401902 Page 9...
- Página 10 Step 5 Fasten the RIGHT END (A) to the SHELVES/BOTTOMS (D). å Tighten four HIDDEN CAMS. Don't worry. It isn't Rome. This can be built in a day. Finished edge Maximum Arrow 210 degrees Minimum 190 degrees Page 10 401902 www.sauder.com/services...
- Página 11 BOTTOM (D). Use ten BLACK 9/16" LARGE HEAD SCREWS (II). NOTE: Be sure the edges of the ANGLE BRACKETS are å even with the edges of the ENDS and SHELF/BOTTOM. BLACK 9/16" LARGE HEAD SCREW (10 used in this step) (10 used) www.sauder.com/services 401902 Page 11...
- Página 12 Step 7 Fasten the LEGS (I and J) to the ENDS (A and B). Use å eight BLACK 9/16" LARGE HEAD SCREWS (II). BLACK 9/16" LARGE HEAD SCREW (8 used in this step) Page 12 401902 www.sauder.com/services...
- Página 13 BLACK 9/16" LARGE HEAD SCREWS (II). Fasten the SKIRT (H) to the ENDS (A and B) and å BOTTOM (D). Use four BLACK 9/16" LARGE HEAD SCREWS (II). BLACK 9/16" LARGE HEAD SCREW (6 used in this step) www.sauder.com/services 401902 Page 13...
- Página 14 Step 9 Fasten the MOLDINGS (M and N) to the ENDS (A and B). å Use four BLACK 1-7/8" PAN HEAD SCREWS (EE). BLACK 1-7/8" PAN HEAD SCREW (4 used in this step) Finished surface Page 14 401902 www.sauder.com/services...
- Página 15 Step 10 Fasten the TOP (C) to the MOLDINGS (L, M, and N). Use å six BROWN 1-1/2" FLAT HEAD SCREWS (FF). BROWN 1-1/2" FLAT HEAD SCREW (6 used in this step) Long fi nished edge www.sauder.com/services 401902 Page 15...
- Página 16 Use three BLACK 9/16" LARGE HEAD SCREWS (II). NOTE: There are no pre-drilled holes in the TOP å MOLDING (P). The SCREWS will tighten into the grooves. (3 used) BLACK 9/16" LARGE HEAD SCREW (6 used in this step) Groove Page 16 401902 www.sauder.com/services...
- Página 17 BRACE. Fasten the BRACE (K) to the ENDS (A and B) and å SHELF/BOTTOM (D). Use fi ve BLACK 9/16" LARGE HEAD SCREWS (II). (5 used) BLACK 9/16" LARGE HEAD SCREW (10 used in this step) www.sauder.com/services 401902 Page 17...
- Página 18 Fasten two HINGES (T) to one of the LEGS (I or J). Use å four BLACK 9/16" LARGE HEAD SCREWS (II). BLACK 9/16" LARGE HEAD SCREW (4 used for the HINGES) DOOR on the Left DOOR on the Right Page 18 401902 www.sauder.com/services...
- Página 19 SHELF (D). NOTE: A perforation has been provided for access å through the BACK. Carefully cut out the hole if needed. NAIL (31 used in this step) These holes must line up over the SHELF (D). www.sauder.com/services 401902 Page 19...
- Página 20 Fasten the MAGNETIC CATCH (U) and HINGE å legs. And, you know, BUSHING (W) to the SHELF (D). Use a BLACK 1-5/8" your arms. PAN HEAD SCREW (GG). BLACK 1-5/8" PAN HEAD SCREW (1 used in this step) Page 20 401902 www.sauder.com/services...
- Página 21 Use a SILVER 1-1/4" MACHINE SCREW (HH). Fasten a STRIKE PLATE (V) to the DOOR (F). Use a BLACK å 1/2" FLAT HEAD SCREW (JJ). NOTE: The surface of the STRIKE PLATE with "SAUDER" å should be facing up. BLACK 9/16" LARGE HEAD SCREW NOTE: To make adjustments to the DOORS, loosen the å...
- Página 22 This completes assembly. Clean with your favorite furniture polish or å a damp cloth. Wipe dry. And to celebrate, why not share your success story? 40 lbs. 40 lbs. 25 lbs. 50 lbs. Page 22 401902 www.sauder.com/services...
-
Página 23: Liste De Pièces
QUANTITÉ d’ a chat de cet élément et conserver le livret pour future référence. EXTRÉMITÉ DROITE ..........1 EXCENTRIQUE ESCAMOTABLE ....11 Pour contacter Sauder EXTRÉMITÉ GAUCHE ..........1 CHEVILLE D’EXCENTRIQUE.......8 en ce qui concerne cet DESSUS ................1 VIS D'EXCENTRIQUE ..........3 élément, faire référence TABLETTE/DESSOUS ..........2... - Página 24 Utiliser trois VIS NOIRES TÊTE LARGE 14 mm (II). ÉTAPE 5 REMARQUE : La MOULURE DE DESSUS (P) ne comporte pas de Fixer l’EXTRÉMITÉ DROITE (A) aux pièces TABLETTE/ trous pré-percés. Serrer les VIS dans les rainures. DESSOUS (D). Serrer quatre EXCENTRIQUES ESCAMOTABLES. Page 24 401902 www.sauder.com/services...
- Página 25 REMARQUE : La surface de la PLAQUE DE BUTÉE comportant Fixer deux CHARNIÈRES (T) à l’une des PIEDS (I ou J). Utiliser l’inscription “SAUDER“ devrait être dirigée vers le haut. quatre VIS NOIRES TÊTE LARGE 14 mm (II). REMARQUE : Pour ajuster les PORTES, desserrer les VIS des CHARNIÈRES, ajuster et serrer les VIS.
-
Página 26: Armario De Cocina
EXTREMO DERECHO ..........1 EXCÉNTRICO ESCONDIDO ......11 et conserver le livret pour future référence. EXTREMO IZQUIERDO ..........1 PASADOR DE EXCÉNTRICO ......8 Pour contacter Sauder PANEL SUPERIOR ............1 BIELA DE EXCÉNTRICO ........3 en ce qui concerne cet ESTANTE/FONDO............2 BISAGRA ................2 élément, faire référence DORSO .................1... - Página 27 FONDO (D). Apriete cuatro EXCÉNTRICOS ESCONDIDOS. DELANTERA (L). Utilice tres TORNILLOS NEGROS DE CABEZA GRANDE de 14 mm (II). NOTA: No hay agujeros perforados en la MOLDURA DE PANEL SUPERIOR (P). Los TORNILLOS apretarán dentro de las ranuras. www.sauder.com/services 401902 Page 27...
- Página 28 NOTA: La superfi cie de la PLACA DE CONTACTO con la mostrarán la fi jación de la PUERTA al lado izquierdo. inscripción ”SAUDER” debe mirar hacia arriba. Fije dos BISAGRAS (T) a una de las PATAS (I o J). Utilice cuatro NOTA: Para ajustar las PUERTAS, afl...
- Página 29 • Ne pas pousser le mobilier, surtout sur la être très lourd. moquette. Se faire aider par une autre personne pour soulever l’élément et le mettre en place • Cette unité doit être placée contre un mur.. www.sauder.com/services 401902 Page 29...
- Página 30 • No empuje la unidad, especialmente sobre ser muy pesado. un piso alfombrado. Pide la ayuda de otra persona para levantar la unidad y colocarla en lugar. • Esta unidad debe ser colocada contra una pared. Page 30 401902 www.sauder.com/services...
-
Página 31: Garantie Limitée De 5 Ans
à compter de la date d'achat la première fois et qui sont signalés à Sauder dans les limites de couverture de la contre tout défaut de matériaux ou de fabrication des composantes de mobilier Sauder. - Página 32 Dear Valued Customer: So, how did it go? Thanks so much for choosing Sauder® furniture. I hope the Set a world record for speed? purchase and assembly process was a positive experience Feeling good about yourself? and you feel good about the furniture you just built. If you Nice.