Tabla de contenido
Publicidad
Enlaces rápidos
sauder.com
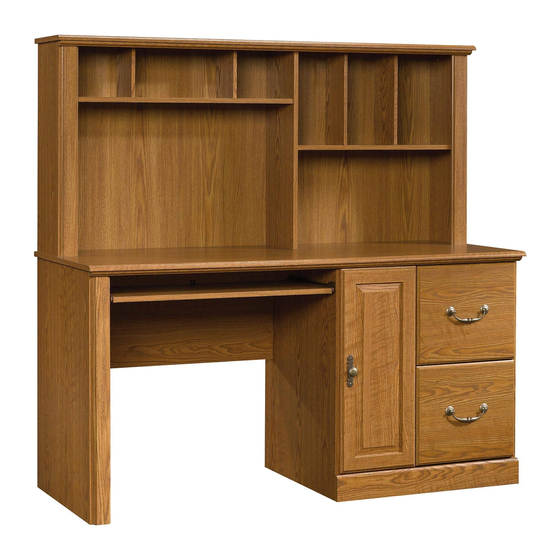
Computer Desk with Hutch
Orchard Hills Collection | 401354
Need help? Visit Sauder.com to view video assembly tips or chat with a live rep.
Prefer the phone? Call 1-800-523-3987.
Share your journey!
The original desktop.
NOTE: THIS INSTRUCTION
BOOKLET CONTAINS IMPORTANT
SAFETY INFORMATION.
PLEASE READ AND KEEP FOR
FUTURE REFERENCE.
English pg 1-32
Français pg 33-36
Español pg 37-40
Lot # 370970
03/05/15
Purchased: __________________
Be sure to give us a ring before
making any returns. 1-800-523-3987
Publicidad
Tabla de contenido

Manuales relacionados para Sauder 401354


Resumen de contenidos para Sauder 401354
- Página 1 Orchard Hills Collection | 401354 NOTE: THIS INSTRUCTION BOOKLET CONTAINS IMPORTANT SAFETY INFORMATION. Need help? Visit Sauder.com to view video assembly tips or chat with a live rep. PLEASE READ AND KEEP FOR FUTURE REFERENCE. Prefer the phone? Call 1-800-523-3987.
- Página 2 RIGHT DRAWER SIDE (2) HUTCH UPRIGHT (1) KEYBOARD SHELF (1) LEFT DRAWER SIDE (2) DESK TOP (1) DRAWER FRONT (2) D708 DRAWER BOTTOM (2) HUTCH TOP (1) LONG DIVIDER (2) MODESTY PANEL (1) SHORT DIVIDER (2) Page 2 401354 www.sauder.com/services...
-
Página 3: Part Identifi Cation
Now you know Part Identifi cation our ABCs. D708 D708 www.sauder.com/services 401354 Page 3... - Página 4 RAIL BRACKET - 2 UU SLIDE CAM - 4 CORD CLIP - 1 KNOB - 1 BACKPLATE - 1 PULL - 2 METAL PIN - 19 FELT DISC CARD - 1 PULL MOUNT - 4 CAM COVER -6 Page 4 401354 www.sauder.com/services...
-
Página 5: Tabla De Contenido
BROWN 1" FLAT HEAD SCREW - 4 GOLD 9/16" LARGE HEAD SCREW - 30 GOLD 5/16" FLAT HEAD SCREW - 20 NAIL - 72 SILVER 5/8" FLAT HEAD SCREW - 4 30S BLACK 1-9/16" FLAT HEAD SCREW - 8 www.sauder.com/services 401354 Page 5... - Página 6 Then, insert the metal end of a CAM DOWEL (NN2) into each HIDDEN CAM. Do not tighten the HIDDEN CAMS in this step. Arrow (21 used) Arrow Arrow Insert the metal end of the CAM DOWEL into the HIDDEN CAM. Page 6 401354 www.sauder.com/services...
-
Página 7: Eee Silver 1-1/8" Flat Head Screw
Righty tighty. NOTE: You should start each SCREW a few turns before å Lefty loosey. completely tightening any of them. Do not overtighten. SILVER 1-1/8" FLAT HEAD SCREW (10 used in this step) Curved edge Curved edge www.sauder.com/services 401354 Page 7... - Página 8 CABINET LEFTS (45BB) to the UPRIGHT (E). Use eight GOLD 5/16" FLAT HEAD SCREWS (LLL) through holes #1 and #4. Roller end Finished edge Roller end Finished edge GOLD 5/16" FLAT HEAD SCREW (8 used in this step) Page 8 401354 www.sauder.com/services...
-
Página 9: Gold 9/16" Large Head Screw
Step 4 Fasten the RAIL BRACKETS (RR) to the LEFT END (B). å Use four GOLD 9/16" LARGE HEAD SCREWS (III). GOLD 9/16" LARGE HEAD SCREW (4 used in this step) Finished edge www.sauder.com/services 401354 Page 9... - Página 10 END (B). Use four GOLD 5/16" FLAT HEAD SCREWS (LLL). NOTE: Use the exact holes shown in the RAIL BRACKETS. å GOLD 5/16" FLAT HEAD SCREW (4 used in this step) Roller end Finished edge Roller end Finished edge Page 10 401354 www.sauder.com/services...
- Página 11 BRACKETS and into the HUTCH MOLDINGS. NOTE: There are no pre-drilled holes in the MOLDINGS (BB). The å SCREWS will tighten into the grooves. (6 used) These edges should be even. These edges should be even. www.sauder.com/services 401354 Page 11...
- Página 12 ANGLE BRACKETS and into the DESK MOLDING. NOTE: There are no pre-drilled holes in the MOLDING (Z). å The SCREWS will tighten into the groove. GOLD 9/16" LARGE HEAD SCREW (6 used in this step) (3 used) These edges should be even. Page 12 401354 www.sauder.com/services...
- Página 13 Tighten Risk of damage or Arrow injury. HIDDEN CAMS must be completely Arrow Maximum tightened. HIDDEN 210 degrees CAMS that are not completely tightened may loosen, and parts may separate. To Minimum completely tighten: 190 degrees www.sauder.com/services 401354 Page 13...
- Página 14 HUTCH LEFT END as shown in the diagram. Fasten the LONG SHELF (K) to the SHORT DIVIDERS (W). Use å two BROWN 1-1/2" FLAT HEAD SCREWS (DDD). Finished edge 9-5/8" (4 used) BROWN 1-1/2" FLAT HEAD SCREW (2 used in this step) Page 14 401354 www.sauder.com/services...
- Página 15 å SHELF (K) insert into the holes in the HUTCH UPRIGHT (G). Finished edge i t h f a c S u r D E N H I D Maximum Arrow 210 degrees Minimum 190 degrees www.sauder.com/services 401354 Page 15...
- Página 16 HUTCH UPRIGHT as shown in the diagram. Fasten the SHORT SHELF (L) to the LONG DIVIDERS (V). Use two å BROWN 1-1/2" FLAT HEAD SCREWS (DDD). Finished edge 7-5/8" (8 used) BROWN 1-1/2" FLAT HEAD SCREW (2 used in this step) Page 16 401354 www.sauder.com/services...
- Página 17 å SHELF (L) insert into the holes in the HUTCH RIGHT END (C). i t h o f a c S u r D E N H I D Maximum Arrow 210 degrees Minimum 190 degrees www.sauder.com/services 401354 Page 17...
- Página 18 Fasten the DESK TOP (H) to the HUTCH ENDS (C and D) å and HUTCH UPRIGHT (G). Use six BLACK 1-7/8" FLAT HEAD SCREWS (CCC). fi n i s h r f a BLACK 1-7/8" FLAT HEAD SCREW (6 used in this step) Page 18 401354 www.sauder.com/services...
- Página 19 H I D D E N S u r f a c H I D D E N i t h o Maximum Arrow 210 degrees Minimum 190 degrees www.sauder.com/services 401354 Page 19...
- Página 20 H I D S u r f a c H I D D E N i t h o Finished edge Maximum Arrow BLACK 1-7/8" FLAT HEAD SCREW 210 degrees (2 used in this step) Minimum 190 degrees Page 20 401354 www.sauder.com/services...
- Página 21 å UPRIGHT (F), and BOTTOM (M). Use four GOLD 9/16" LARGE HEAD SCREWS (III) through the ANGLE GOLD 9/16" LARGE HEAD SCREW BRACKETS and into the BASE. (8 used in this step) Curved edge (4 used) www.sauder.com/services 401354 Page 21...
- Página 22 H I D D E N i t h For support, place packing foam and magazines under the HUTCH TOP. Maximum Arrow 210 degrees BLACK 1-7/8" FLAT HEAD SCREW (2 used in this step) Minimum 190 degrees Page 22 401354 www.sauder.com/services...
-
Página 23: Mmm Nail
BACK. Carefully cut out the holes needed. Carefully cut out the NAIL rectangles in the BACKS for proper ventilation of your CPU. (72 used in this step) These holes must line up over the UPRIGHTS (E and G) and SHELVES (K and L). Notch www.sauder.com/services 401354 Page 23... - Página 24 Step 19 Fasten two HINGE SPACERS (22H) and two HINGES (40H) to the å DOOR (P2). Use four SILVER 5/8" FLAT HEAD SCREWS (23S). SILVER 5/8" FLAT HEAD SCREW (4 used in this step) Page 24 401354 www.sauder.com/services...
- Página 25 Fasten the BACKPLATE (WW) and KNOB (VV) to the å DOOR (P2). Use a BLACK 1-1/8" MACHINE SCREW (FFF). See the next step for DOOR adjustments. å BLACK 1-1/8" MACHINE SCREW (1 used in this step) www.sauder.com/services 401354 Page 25...
- Página 26 To adjust the DOORS in or out (depth), loosen the mounting å screw one turn and move the DOORS in or out, as needed. Tighten the mounting screw after making adjustments. Mounting screw (depth) Adjusting screw (horizontal) (vertical adjustment) Page 26 401354 www.sauder.com/services...
- Página 27 Turn the CORD CLIP (TT) into the KEYBOARD SHELF (Q). å NOTE: The CORD CLIP is used to hold your keyboard cord å against the KEYBOARD SHELF. Roller end Roller end Finished edge BROWN 1" FLAT HEAD SCREW (4 used in this step) www.sauder.com/services 401354 Page 27...
-
Página 28: Black 1-9/16" Flat Head Screw
å and D88). Use four BLACK 1-9/16" FLAT HEAD SCREWS (30S). NOTE: Be sure the DRAWER BOTTOM (D708) inserts into the å groove of the DRAWER BACK (D78). Repeat this step for the other drawer. å Page 28 401354 www.sauder.com/services... - Página 29 Repeat this step for the other drawer. å Roller end Screw head - turn CAM to line up holes in the SLIDES with holes in DRAWER SIDES Roller end GOLD 5/16" FLAT HEAD SCREW (8 used in this step) www.sauder.com/services 401354 Page 29...
- Página 30 FILE RODS (LL), then press this FILE GLIDE over the LEFT DRAWER SIDE (D88). Repeat this step for the other drawer. å Insert the FILE RODS into the holes of your choice in the FILE GLIDES, depending on your fi le sizes. Page 30 401354 www.sauder.com/services...
-
Página 31: Silver 5/8" Machine Screw
ENDS (C and D) and HUTCH UPRIGHT (G). (6 used) 10 lbs. To cover HIDDEN CAMS total 20 lbs. 7 lbs. total 70 lbs. 20 lbs. 40 lbs. 35 lbs. each SILVER 5/8" MACHINE SCREW (4 used for the PULLS) www.sauder.com/services 401354 Page 31... - Página 32 #4. The higher the screw in the oblong hole, the higher your drawer front will be. The lower the screw, the lower the drawer front. Page 32 401354 www.sauder.com/services...
-
Página 33: Liste De Pièces
EXTRÉMITÉ DROITE ..........1 35AW ÉLÉMENT DROITE............1 pour future référence. EXTRÉMITÉ GAUCHE ..........1 35AX ÉLÉMENT GAUCHE ...........1 Pour contacter Sauder EXTRÉMITÉ DROITE DE SURMEUBLE ..1 35AY TIROIR DROIT ..............1 en ce qui concerne cet EXTRÉMITÉ GAUCHE DE SURMEUBLE ..1 35AZ TIROIR GAUCHE ............1 élément, faire référence... - Página 34 TABLETTE LONGUE (K) dans les trous dans MOULURES DE SURMEUBLE. le MONTANT DE SURMEUBLE (G). REMARQUE : Les MOULURES (BB) ne comportent pas de trous pré- percés. Serrer les VIS dans les rainures. Page 34 401354 www.sauder.com/services...
- Página 35 ÉTAPE 20 DESSOUS (M). Serrer quatre EXCENTRIQUES ESCAMOTABLES. REMARQUE : S’ a ssurer de bien insérer la GOUPILLE EN MÉTAL du Relever, avec précaution, l'élément dans sa position verticale. MONTANT GAUCHE dans le DESSUS DE BUREAU. www.sauder.com/services 401354 Page 35...
- Página 36 Ceci complète l'assemblage. Nettoyer à l’ a ide d’une encaustique pour REMARQUE : S'assurer que le FOND DE TIROIR (D708) s'encastre dans la meubles ou d’un chiff on humide. Essuyer. rainure de l'ARRIÈRE DE TIROIR (D78). Répéter cette étape pour l'autre tiroir. Page 36 401354 www.sauder.com/services...
-
Página 37: Escritorio De Computadora Con Organizador
EXTREMO IZQUIERDO ..........1 VARILLA DE ARCHIVERO ........4 pour future référence. EXTREMO DERECHO DE ORGANIZADOR ..1 MM2 EXCÉNTRICO ESCONDIDO ......21 Pour contacter Sauder EXTREMO IZQUIERDO DE ORGANIZADOR ..1 NN2 PASADOR DE EXCÉNTRICO ......21 en ce qui concerne cet PARAL DERECHO ............1 OO SOPORTE ANGULAR ........... - Página 38 ORGANIZADOR (C y D). Pase seis TORNILLOS DORADOS DE CABEZA GRANDE de 14 mm (III) a través de los SOPORTES ANGULARES y dentro de las MOLDURAS DE ORGANIZADOR. NOTA: No hay agujeros perforados en las MOLDURAS (BB). Los TORNILLOS apretarán dentro de las ranuras. Page 38 401354 www.sauder.com/services...
- Página 39 16 mm (23S). FONDO (M). Apriete cuatro EXCÉNTRICOS ESCONDIDOS. NOTA: Asegúrese de que la ESPIGA DE METAL en el PARAL IZQUIERDO se PASO 20 introduzca en el PANEL SUPERIOR DE ESCRITORIO. Cuidadosamente ponga la unidad en posición vertical. www.sauder.com/services 401354 Page 39...
- Página 40 Utilice cuatro TORNILLOS NEGROS DE CABEZA PERDIDA de 40 mm (30S). NOTA: Asegúrese de que el FONDO DE CAJÓN (D708) ajuste en la ranura del DORSO DE CAJÓN (D78). Repita este paso para el otro cajón. Page 40 401354 www.sauder.com/services...
- Página 41 à Les téléviseurs peuvent être particulièrement un téléviseur. cet eff et. lourds. De plus, le poids et l’emplacement du tube image ont tendance à rendre les téléviseurs instables et enclins à tomber vers l’ a vant. www.sauder.com/services 401354 Page 41...
- Página 42 Además, el peso y la ubicación del tubo de imagen tienden a causar la inestabilidad de televisores y propensa a volcarse hacia adelante. Page 42 401354 www.sauder.com/services...
-
Página 43: Garantie Limitée De 5 Ans
GARANTIE LIMITÉE DE 5 ANS 1. Sauder Woodworking Co. (Sauder®) off re une couverture de garantie limitée à l’ a cheteur 4. La présente garantie ne s’ a pplique qu’ a ux défauts garantis qui se produisent pour initial du présent produit pendant une période de cinq ans à... - Página 44 Dear Valued Customer: So, how did it go? Thanks so much for choosing Sauder® furniture. I hope the Set a world record for speed? purchase and assembly process was a positive experience Feeling good about yourself? and you feel good about the furniture you just built. If you Nice.