Publicidad
Enlaces rápidos
sauder.com
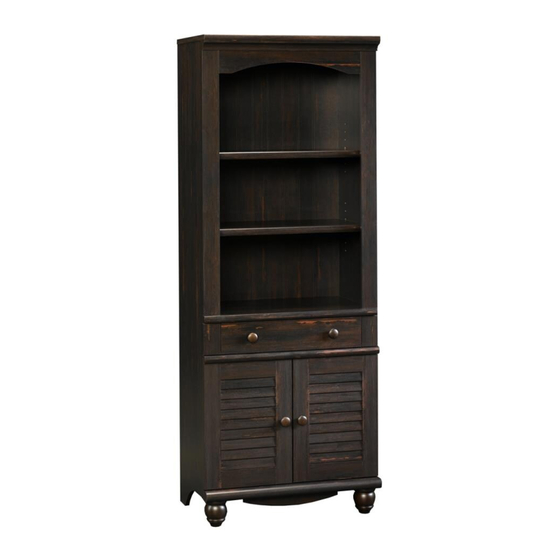
Library with Doors
Harbor View Collection | Model 401632
Need help? Visit Sauder.com to view video assembly tips or chat with a live rep.
Prefer the phone? Call 1-800-523-3987.
Share your journey!
Here's one for
the books.
NOTE: THIS INSTRUCTION
BOOKLET CONTAINS IMPORTANT
SAFETY INFORMATION.
PLEASE READ AND KEEP FOR
FUTURE REFERENCE.
English pg 1-22
Français pg 23-25
Español pg 26-28
Lot # 390995
05/05/16
Purchased: __________________
Be sure to give us a ring before
making any returns. 1-800-523-3987
Publicidad

Manuales relacionados para Sauder 401632


Resumen de contenidos para Sauder 401632
- Página 1 Harbor View Collection | Model 401632 NOTE: THIS INSTRUCTION BOOKLET CONTAINS IMPORTANT SAFETY INFORMATION. Need help? Visit Sauder.com to view video assembly tips or chat with a live rep. PLEASE READ AND KEEP FOR FUTURE REFERENCE. Prefer the phone? Call 1-800-523-3987.
- Página 2 RIGHT DRAWER SIDE (1) RIGHT DOOR (1) M59 VALANCE (1) LEFT DRAWER SIDE (1) LEFT DOOR (1) M64 DRAWER BRACE (1) D169 DRAWER BACK (1) DRAWER FRONT (1) END MOLDING (2) D977 DRAWER BOTTOM (1) FOOT (2) Page 2 401632 www.sauder.com/services...
- Página 3 Now you know Part Identifi cation our ABCs. D169 D977 www.sauder.com/services 401632 Page 3...
- Página 4 WASHER - 1 Locate this nylon SAFETY STRAP (60M) to be used later in assembly. Do not accidentally throw away. SAFETY DRYWALL NAIL - 41 METAL PIN - 12 RUBBER SLEEVE - 12 ANCHOR - 1 Page 4 401632 www.sauder.com/services...
- Página 5 BLACK 1-1/4" FLAT HEAD SCREW - 4 BLACK 1/2" FLAT HEAD SCREW - 8 BLACK 1-1/8" PAN HEAD SCREW - 3 BLACK 1-7/8" PAN HEAD SCREW - 3 30S BLACK 1-9/16" FLAT HEAD SCREW - 5 www.sauder.com/services 401632 Page 5...
- Página 6 fl oor. Scan this QR code or go to this address: http://qr.sauder.com/?ID=1668 To begin assembly, push a SAUDER TWIST-LOCK® to watch a video on how to assemble your unit. å FASTENER (7F) into the large holes in the ENDS (A and B).
- Página 7 Do not tighten the HIDDEN CAMS in this step. Arrow Arrow Arrow Hole Hole The arrow in the HIDDEN CAM must point toward the hole in the edge of the board. www.sauder.com/services 401632 Page 7...
- Página 8 5/16" FLAT HEAD SCREWS (3S) through holes #1 and #3. GOLD 5/16" FLAT HEAD SCREW (4 used for the RAILS) BLACK 9/16" LARGE HEAD SCREW (10 used) (10 used for the ANGLE BRACKETS) Roller end Finished edge Finished edge Roller end Page 8 401632 www.sauder.com/services...
- Página 9 T E N F A S Dowel end ® How to use the SAUDER TWIST-LOCK FASTENER 1. Insert the dowel end of the FASTENER into the hole of the adjoining part. NOTE: The dowel end of the FASTENER must remain fully inserted in the hole of the adjoining part while locking the FASTENER.
- Página 10 BOTTOM (E). Tighten six TWIST-LOCK® FASTENERS. Finished edge S u r f a c i t h o u t T W I S T - L K ® F A S T E N E R S Page 10 401632 www.sauder.com/services...
- Página 11 Fasten the SHELF MOLDING (M38) (with the CAM SCREWS) å to the SHELF (D). Tighten three HIDDEN CAMS. BLACK 1-7/8" PAN HEAD SCREW (3 used for the TOP MOLDING) Curved edge These surfaces should be even. www.sauder.com/services 401632 Page 11...
- Página 12 Fasten the SHELF MOLDING (M38) (with the LARGE RUBBER å SLEEVES) to the ENDS (A and B). Use two BLACK 9/16" LARGE HEAD SCREWS (1S) through the ANGLE BRACKETS and into the SHELF MOLDING. The LARGE RUBBER SLEEVES should be here. Page 12 401632 www.sauder.com/services...
- Página 13 SCREW (23F). Turn the FEET clockwise until the FOOT SCREWS are tight in the BOTTOM MOLDING and each FOOT. NOTE: Do not overtighten the FOOT SCREWS. å Unfi nished surface Rounded edge Rounded edge BLACK 1-1/8" PAN HEAD SCREW (3 used for the BOTTOM MOLDING) www.sauder.com/services 401632 Page 13...
- Página 14 NOTE: Perforations have been provided for access å through the BACK. Carefully cut out the holes needed. NAIL (41 used in this step) These holes must line up over the SHELF (D). Cut-outs (used for lifting) Page 14 401632 www.sauder.com/services...
- Página 15 Fasten the HINGES (13H) to the DOORS (I and J). Use å eight BLACK 1/2" FLAT HEAD SCREWS (11S). Now might be a good time to refresh your drink. BLACK 1/2" FLAT HEAD SCREW (8 used in this step) www.sauder.com/services 401632 Page 15...
- Página 16 BLACK 1-1/4" FLAT HEAD SCREW (7S). Mounting screw Repeat this step for the LEFT DOOR (J). å See the next step for DOOR adjustments. å Hinge BLACK 1-1/4" FLAT HEAD SCREW (2 used for the KNOBS) Page 16 401632 www.sauder.com/services...
- Página 17 To adjust the DOORS in or out (depth), loosen the mounting screw one turn å and move the DOORS in or out, as needed. Tighten the mounting screw after making adjustments. Mounting screw (depth) Adjusting screw (horizontal) (vertical adjustment) www.sauder.com/services 401632 Page 17...
- Página 18 Fasten the DRAWER BACK (D169) to the DRAWER Fasten the DRAWER BRACE (M64) to the å å SIDES (D83 and D84) and DRAWER BRACE (M64). Use DRAWER FRONT (K). Tighten one HIDDEN CAM. five BLACK 1-9/16" FLAT HEAD SCREWS (30S). Page 18 401632 www.sauder.com/services...
- Página 19 BLACK 1-1/4" FLAT HEAD SCREW (2 used for the KNOBS) Screw head - turn CAM to line up holes in the SLIDES with holes in DRAWER SIDES Roller end GOLD 5/16" FLAT HEAD SCREW (4 used for the SLIDES) www.sauder.com/services 401632 Page 19...
- Página 20 NOTE: Before moving your unit to a diff erent location, unscrew the SAFETY DRYWALL ANCHOR (61M) from your wall. å The nylon sheath will remain behind your wall. BLACK 9/16" LARGE HEAD SCREW (1 used in this step) Page 20 401632 www.sauder.com/services...
- Página 21 Lift the front of the drawer up and slide it into the unit. No load 25 lbs. 25 lbs. Place the roller on the SLIDE behind the roller on the RAIL. 35 lbs. 15 lbs. 25 lbs. 40 lbs. (12 used) www.sauder.com/services 401632 Page 21...
- Página 22 #3. The higher the screw in the oblong hole, the higher your drawer front will be. The lower the screw, the lower the drawer front. Page 22 401632 www.sauder.com/services...
- Página 23 Modèle 401632 Bibliothèque avec portes Utilisez les instructions d’ a ssemblage en français avec les NOUS SOMMES LA POUR VOUS AIDER! schémas étape par étape du manuel d’instruction en anglais. Nous faisons de notre mieux pour nous assurer que votre meuble Chaque étape en français correspond à...
- Página 24 Pour commencer l'assemblage, enfoncer une FIXATION TWIST-LOCK® D’ATTACHE et dans la MOULURE DE DESSUS. SAUDER (7F) dans les gros trous des EXTRÉMITÉS (A et B). Fixer les MOULURES D'EXTRÉMITÉ (M71) aux EXTRÉMITÉS (A et B) et au Répéter cette étape pour la TABLETTE (D) et le DESSOUS (E).
- Página 25 REMARQUE : La tête de vis dans l'EXCENTRIQUE doit être visible à travers le trou fendu dans la COULISSE. Fixer deux BOUTONS (93K) au DEVANT DE TABLETTE (K). Utiliser deux VIS NOIRES TÊTE PLATE 32 mm (7S). www.sauder.com/services 401632 Page 25...
- Página 26 Modelo 401632 Biblioteca con puertas Use estas instrucciones de ensamblaje en español junto con las ESTAMOS AQUI PARA AYUDAR! fi guras paso-a-paso provistas en el folleto inglés. Cada paso Tratamos de asegurar que su mueble llega en condición excelente. en español corresponde al mismo paso en inglés. Se destacan Nuestros representantes de Servicio al Cliente son amables y las fi...
- Página 27 Para comenzar el ensamblaje, empuje un SUJETADOR TWIST-LOCK® Fije la MOLDURA DEL ESTANTE (M38) (con los MANGUITOS DE GOMA SAUDER (7F) dentro de los agujeros grandes de los EXTREMOS (A y B). GRANDES) a los EXTREMOS (A y B). Apriete tres EXCÉNTRICOS ESCONDIDOS.
- Página 28 NOTA: La cabeza de tornillo del EXCÉNTRICO debe ser visible a través del agujero alargado de la CORREDERA. Fije dos POMOS (93K) a la CARA DE CAJÓN (K). Utilice dos TORNILLOS NEGROS DE CABEZA GRANDE de 32 mm (7S). Page 28 401632 www.sauder.com/services...
- Página 29 Les téléviseurs peuvent être un téléviseur. cet eff et. particulièrement lourds. De plus, le poids et l’emplacement du tube image ont tendance à rendre les téléviseurs instables et enclins à tomber vers l’ a vant. www.sauder.com/services 401632 Page 29...
- Página 30 Además, el peso y la ubicación del tubo de imagen tienden a causar la inestabilidad de televisores y propensa a volcarse hacia adelante. Page 30 401632 www.sauder.com/services...
- Página 31 à compter de la date d'achat la première fois et qui sont signalés à Sauder dans les limites de couverture de la contre tout défaut de matériaux ou de fabrication des composantes de mobilier Sauder.
- Página 32 Dear Valued Customer: So, how did it go? Thanks so much for choosing Sauder® furniture. I hope the Set a world record for speed? purchase and assembly process was a positive experience Feeling good about yourself? and you feel good about the furniture you just built. If you Nice.