
Manuales relacionados para Pari VORTEX Tracheo


Resumen de contenidos para Pari VORTEX Tracheo
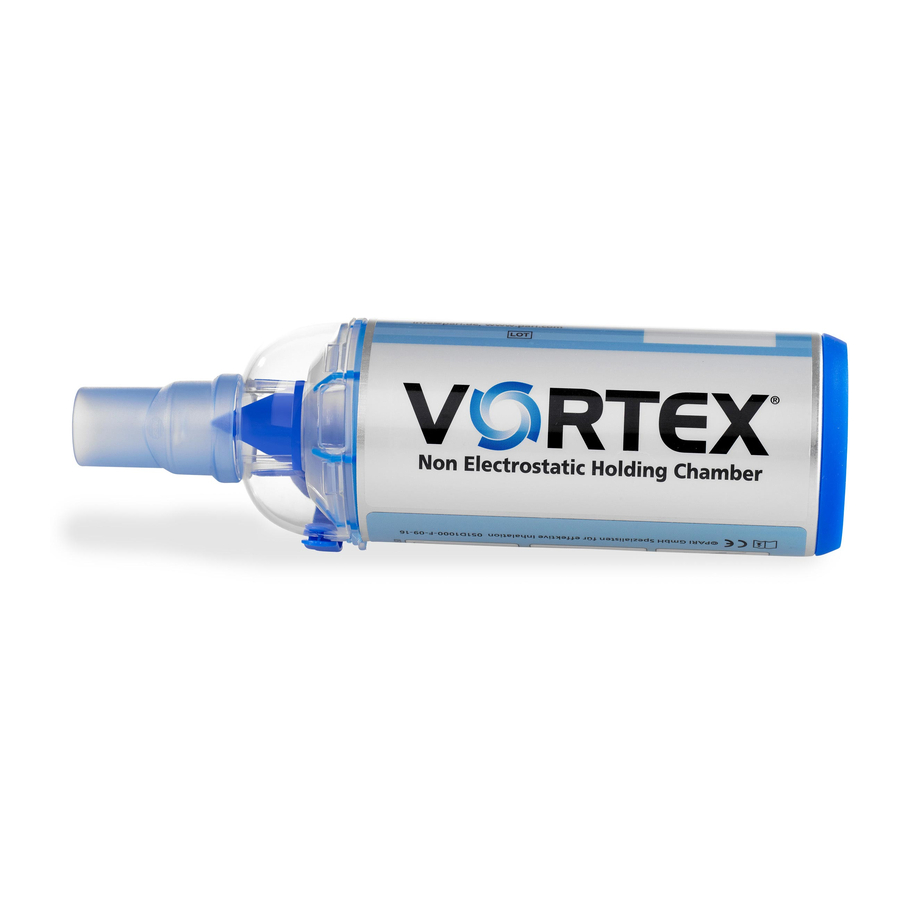
- Página 1 ® VORTEX Tracheo Non Electrostatic Holding Chamber ©2012 PARI GmbH Spezialisten für effektive Inhalation, 051D0068-A-04/12...
- Página 2 Gebrauchsanweisung......1 Instructions for use......23 Instrucciones de uso ....... 43 Notice d'utilisation ......63 Istruzioni per l'uso ......83 Manual de instruções ....103...
-
Página 3: Tabla De Contenido
- 3 - GEBRAUCHSANWEISUNG Stand der Information: Februar 2012. Technische Änderungen vorbehalten. Inhaltsverzeichnis WICHTIGE HINWEISE............4 1.1 Informationen zur Gebrauchsanweisung......4 1.2 Informationen zu Sicherheitshinweisen......4 1.3 Allgemeine Sicherheitshinweise.........5 PRODUKTBESCHREIBUNG ..........7 2.1 Lieferumfang ..............7 2.2 Materialinformation.............8 2.3 Zweckbestimmung .............8 INHALATION ..............9 3.1 Vorbereitung...............9 3.2 Inhalation durchführen............11 HYGIENISCHE AUFBEREITUNG ........14 4.1 Allgemeines..............14... -
Página 4: Wichtige Hinweise
1.1 Informationen zur Gebrauchsanweisung Alle Gebrauchsanweisungen sind im Internet unter www.pari.de/produkte (auf der jeweiligen Produktseite) abrufbar und auf Anfrage bei der PARI GmbH in gedruckter Version erhältlich. Prüfen Sie regelmäßig, ob eine neuere Version der Gebrauchsanweisung erhältlich ist. 1.2 Informationen zu Sicherheitshinweisen... -
Página 5: Allgemeine Sicherheitshinweise
- 5 - 1.3 Allgemeine Sicherheitshinweise WARNUNG Bei Therapie von Babys, Kindern und hilfsbedürftigen Personen ist Folgendes unbedingt zu beachten: – Babys, Kinder und hilfsbedürftige Personen dürfen nur unter ständiger Aufsicht inhalieren. Nur so ist eine sichere und wirksame Therapie gewährleistet. Diese Personen schätzen oftmals Gefährdungen falsch ein, wodurch eine Verlet- zungsgefahr bestehen kann. - Página 6 - 6 - Bei Anwendung im Klinikbereich mit Patientenwechsel: ® Sollte für die VORTEX eine Schutzkappe vorhanden sein, entfernen Sie diese. Die Schutzkappe ist nicht sterilisierbar und des- halb für die Anwendung mit Patientenwechsel nicht geeignet.
-
Página 7: Produktbeschreibung
- 7 - 2 PRODUKTBESCHREIBUNG 2.1 Lieferumfang Prüfen Sie, ob laut nachfolgender Beschreibung alle Komponen- ten im Lieferumfang enthalten sind. Sollte etwas fehlen, verstän- ® digen Sie umgehend den Händler, bei dem Sie die VORTEX gekauft haben: (1) Inhalierkammer (2) Mundstück mit Ein- und Ausatemventil (2a) (3) blauer Anschlussring mit Öffnung für das Mundstück des Dosieraerosols (vormontiert an der Inhalierkammer) (4) Tracheoadapter... -
Página 8: Materialinformation
Tracheostoma eingesetzt wer- den. ® Die VORTEX dient dazu, Koordinationsfehler beim Gebrauch von Dosieraerosolen zu minimieren. Der flexible Anschlussring erlaubt eine Anwendung mit allen gängigen Dosieraerosolen. Für die sachgemäße Behandlung verwenden Sie bitte aus- schließlich PARI-Zubehör. -
Página 9: Inhalation
- 9 - 3 INHALATION 3.1 Vorbereitung WARNUNG ® Da die Inhalierkammer der VORTEX nicht vollständig geschlossen ist, können Kleinteile hineingeraten, die beim Inhalieren eingeatmet werden könnten (Erstickungsgefahr). Stellen Sie deshalb vor jeder Benutzung sicher, dass sich keine ® Fremdkörper in der VORTEX befinden. - Página 10 - 10 - • Stecken Sie das Mundstück des Dosieraerosols in den Anschlussring ® der VORTEX • Stecken Sie den Tracheoadapter direkt auf das Mundstück auf.
-
Página 11: Inhalation Durchführen
- 11 - 3.2 Inhalation durchführen VORSICHT Vergewissern Sie sich vor der Inhalation, dass alle Teile fest miteinander verbunden sind. Andernfalls kann eine Unterdo- sierung die Folge sein. • Verbinden Sie den Tracheo- adapter mit der Trachealkanüle. ® • Halten Sie die VORTEX wie im Bild dargestellt. - Página 12 - 12 - • Betätigen Sie das Dosieraerosol einmal und atmen Sie tief und langsam ein. Stellen Sie sicher, dass nur ein Sprühstoß pro Anwendung aus dem Dosieraerosol in die ® VORTEX gegeben wird. • Halten Sie den Atem kurz an. •...
- Página 13 - 13 - • Trennen Sie den Tracheo- adapter zusammen mit der ® VORTEX von der Tracheal- kanüle.
-
Página 14: Hygienische Aufbereitung
- 14 - 4 HYGIENISCHE AUFBEREITUNG 4.1 Allgemeines Halten Sie die folgenden Zyklen ein: – Ohne Patientenwechsel / zu Hause: ® Reinigen Sie alle Bestandteile der VORTEX nach jeder Anwendung. ® Desinfizieren Sie alle Bestandteile der VORTEX mindes- tens einmal täglich. Bei Infektionserkrankungen und bei Zugehörigkeit zu einer Hochrisikogruppe (z.B. -
Página 15: Vorbereitung
- 15 - 4.3 Vorbereitung • Ziehen Sie den Tracheoadapter vom Mundstück ab. ® Belassen Sie das Mundstück an der VORTEX • Nehmen Sie den Anschlussring 4.4 Reinigung und Desinfektion zu Hause Reinigung • Reinigen Sie alle Einzelteile ca. 5 Minuten lang gründlich in warmem Leitungswasser und Spülmittel. - Página 16 - 16 - Desinfektion ® Desinfizieren Sie die Einzelteile Ihrer VORTEX im Anschluss an die Reinigung (nur gereinigte Teile können wirksam desinfi- ziert werden). In kochendem Wasser: ® • Legen Sie die Einzelteile Ihrer VORTEX mind. 15 Minuten in kochendes Wasser. Verwenden Sie einen sauberen Kochtopf und frisches Trink- wasser.
-
Página 17: Hygienische Aufbereitung Für Fachpersonal
Verfahren so durchgeführt werden, dass der Erfolg dieser Ver- fahren nachvollziehbar gewährleistet ist und die Sicherheit und Gesundheit von Patienten nicht gefährdet wird. Im Folgenden sind die von PARI validierten Verfahren beschrie- ® ben, mit denen die VORTEX wirksam aufbereitet werden kann. - Página 18 - 18 - ren validierten Verfahren abweichen müssen (z.B. weil die beschriebenen Geräte und Chemikalien nicht zur Verfügung ste- hen). Achten Sie bei der Auswahl der eingesetzten Chemikalien darauf, dass diese für die Reinigung bzw. Desinfektion von Medizinprodukten aus den im Abschnitt „Materialinformation“ (Seite 8) angegebenen Materialien geeignet sind.
- Página 19 - 19 - Validierung: Das Verfahren ist validiert unter Verwendung von: – Desinfektor G7736 MCU der Firma Miele, Programm Vario TD. – Standardkörbe der Firma Miele – Neodisher MediZym als Reinigungsmittel (von Dr. Weigert) Trocknen: Auch wenn das verwendete RDG über eine Trocknungsfunktion verfügt, stellen Sie sicher, dass keine Restnässe in den Einzel- teilen vorhanden ist.
- Página 20 - 20 - Validierung: Das Verfahren ist gemäß DIN EN ISO 17665-1 validiert unter Verwendung von Euro-Selectomat 666 von MMM (fraktioniertes Vorvakuumverfahren). Visuelle Kontrolle ® Überprüfen Sie die Teile Ihrer VORTEX nach jeder Reinigung/ Desinfektion. Ersetzen Sie gebrochene, verformte oder stark verfärbte Teile.
-
Página 21: Sonstiges
Ent- sorgungsregeln gibt. 5.2 Kontakt Für Produktinformationen jeder Art, im Fehlerfall oder bei Fra- gen zur Handhabung wenden Sie sich bitte an das PARI Service Center: Tel.: +49 (0)8151-279 279 (deutschsprachig) +49 (0)8151-279 220 (international) - Página 22 - 22 -...
- Página 23 - 23 - INSTRUCTIONS FOR USE Information as of: February 2012. We reserve the right to make technical changes. Table of contents IMPORTANT INFORMATION..........24 1.1 Information about the instructions for use ......24 1.2 Information about safety instructions........24 1.3 General safety instructions..........25 PRODUCT DESCRIPTION ..........27 2.1 Components ..............27 2.2 Material information............28...
-
Página 24: Important Information
All instructions for use can be retrieved on the internet at www.pari.de/en/products (on the respective product page), or they are available in hardcopy version on request from PARI GmbH. Check for updated versions of all instructions for use at regular intervals. 1.2 Information about safety instructions... -
Página 25: General Safety Instructions
- 25 - 1.3 General safety instructions WARNING When treating babies, children and anyone who requires assistance, the following must be observed without fail: – Babies, children and anyone who requires assistance must be supervised constantly during inhalation therapy. This is the only way to ensure safe and effective treatment. - Página 26 - 26 - If the device is to be used in a hospital environment with multiple patients: ® If the VORTEX is equipped with a protective cap, remove it. The protective cap is not ster- ilisable and is therefore not suitable for appli- cations involving multiple patients.
-
Página 27: Product Description
- 27 - 2 PRODUCT DESCRIPTION 2.1 Components Check whether all components are included in the package according to the following description. Should anything be miss- ing, please notify the dealer from whom you obtained the ® VORTEX at once. (1) Inhalation chamber (2) Mouthpiece with inspiratory and expiratory valve (2a) (3) Blue connecting ring with opening for the mouthpiece of the... -
Página 28: Material Information
(MDI). With its flexible connecting ring, the device can be used with all commonly used metered dose inhalers. Use only PARI accessories to ensure that the treatment is per- formed properly. -
Página 29: Inhalation
- 29 - 3 INHALATION 3.1 Preparation WARNING ® Since the inhalation chamber of the VORTEX is not completely closed, small particles can get into it, and may be breathed in during inhaling (danger of choking). Therefore, make sure ® there are no foreign bodies in the VORTEX before every use. - Página 30 - 30 - • Insert the mouthpiece of the MDI into the connecting ring of the ® VORTEX • Place the tracheal adapter directly on the mouthpiece.
-
Página 31: Performing The Inhalation
- 31 - 3.2 Performing the inhalation CAUTION Before the patient starts inhaling, ensure that all parts are firmly connected to each other. Otherwise, it is possible that insuffi- cient medication may be delivered. • Attach the tracheal adapter to the tracheal cannula. - Página 32 - 32 - • Operate the MDI once and breathe in deeply and slowly. Take care to ensure that only one dose of medication is sprayed from the metered dose inhaler into the ® VORTEX each time the device is operated. •...
- Página 33 - 33 - • Disconnect the tracheal adapter from the tracheal cannula ® together with the VORTEX...
-
Página 34: Hygienic Re-Use
- 34 - 4 HYGIENIC RE-USE 4.1 General Adhere strictly to the following cycles: – Single patient use / at home: ® Clean all components of the VORTEX after each application. ® Disinfect all components of the VORTEX at least once a day. -
Página 35: Preparation
- 35 - 4.3 Preparation • Pull the tracheal adapter off the mouthpiece. ® Leave the mouthpiece on the VORTEX • Take off the connecting ring. 4.4 Cleaning and disinfection at home Cleaning • Thoroughly clean all components in warm tap water and dish- washing liquid for about 5 minutes. - Página 36 - 36 - Disinfection ® Disinfect the components of your VORTEX immediately after cleaning (only cleaned parts can be disinfected effectively). In boiling water: ® • Place the individual parts of your VORTEX in boiling water for at least 15 minutes. Use a clean pot and fresh drinking water.
-
Página 37: Hygienic Re-Use For Medical Technical Personnel
The following section describes the procedures that have been ® validated by PARI for effective preparation of the VORTEX hygienic re-use. Ensure that the desired results are achieved consistently by the processing methods employed by your staff with the equipment and chemicals used. - Página 38 - 38 - chemicals for use, make sure that they are suitable for cleaning or disinfecting medical products made from the materials described in section "Material information" (page 28). Bear in mind the manufacturer's dosing information and instructions for safe handling of chemicals. Mechanical cleaning and disinfection Equipment: –...
- Página 39 - 39 - Validation: The method has been validated using: – G7736 MCU disinfector made by Miele, programme Vario TD. – Standard baskets manufactured by Miele – Neodisher MediZym as cleaning agent (manufactured by Dr. Weigert) Drying: Even if the cleaner-disinfector is equipped with a drying function, make sure that no residual moisture is left in the components.
- Página 40 - 40 - Validation: The procedure has been validated in accordance with DIN EN ISO 17665-1 using Euro-Selectomat 666 from MMM (fractionated pre-vacuum method). Visual inspection ® Check the parts of your VORTEX after each cleaning/disinfec- tion. Replace any broken, misshapen or seriously discoloured parts.
-
Página 41: Miscellaneous
5.2 Contact For all product information and in the event of defects or ques- tions about usage please contact the PARI Service Center: Tel.: +49 (0)8151-279 279 (German-speaking) +49 (0)8151-279 220 (international) - Página 42 - 42 -...
- Página 43 - 43 - INSTRUCCIONES DE USO Última actualización: febrero de 2012. Sujeto a modificaciones técnicas. Índice ADVERTENCIAS IMPORTANTES........44 1.1 Información sobre las instrucciones de uso .....44 1.2 Información sobre las advertencias de seguridad....44 1.3 Advertencias de seguridad generales ......45 DESCRIPCIÓN DEL PRODUCTO........47 2.1 Componentes ..............47 2.2 Información sobre el material ...........48 2.3 Finalidad de uso ...............48...
-
Página 44: Advertencias Importantes
1.1 Información sobre las instrucciones de uso Todas las instrucciones de uso están disponibles en la página web de Pari www.pari.de/en/products (en la página del producto correspondiente). También se puede solicitar la versión impresa a PARI GmbH. Compruebe con regularidad si existe una nueva versión disponible de las instrucciones de uso. -
Página 45: Advertencias De Seguridad Generales
- 45 - 1.3 Advertencias de seguridad generales ADVERTENCIA En la terapia inhalada de lactantes, niños pequeños y perso- nas que necesiten ayuda debe tenerse en cuenta lo siguiente: – Los lactantes, los niños y las personas que necesiten ayuda sólo podrán realizar la inhalación bajo supervisión constante. - Página 46 - 46 - Aplicación en hospitales con intercambio entre pacien- tes: ® En caso de que el VORTEX vaya provisto de una tapa protectora, retírela. La tapa pro- tectora no se puede esterilizar, de modo que no se puede utilizar cuando existe intercam- bio entre pacientes.
-
Página 47: Descripción Del Producto
- 47 - 2 DESCRIPCIÓN DEL PRODUCTO 2.1 Componentes Compruebe que le han sido suministrados todos los componen- tes mencionados a continuación. Si falta algún componente póngase en contacto inmediatamente con el establecimiento en ® el que haya adquirido el VORTEX (1) Cámara de inhalación (2) Boquilla con válvula inspiratoria y de espiración (2a) (3) Anillo de conexión azul con abertura para la boquilla del... -
Página 48: Información Sobre El Material
El VORTEX sirve para minimizar los errores de coordinación durante el uso de inhaladores presurizados. El anillo de conexión flexible permite la aplicación con prácticamente todos los inhaladores presurizados. Para realizar el tratamiento de forma adecuada utilice sólo acce- sorios PARI. -
Página 49: Inhalación
- 49 - 3 INHALACIÓN 3.1 Preparación ADVERTENCIA ® Puesto que la cámara de inhalación del VORTEX no está completamente cerrada, es posible que entren piezas pequeñas que se podrían inspirar durante la inhalación (peligro de asfixia). Por esta razón, compruebe antes de cada uso que no ®... - Página 50 - 50 - • Retire la tapa del inhalador presuri- zado. • Agite enérgicamente el inhalador presurizado antes de usarlo. • Inserte la boquilla del inhalador pre- surizado en el anillo de conexión del ® VORTEX • Conecte directamente el adaptador traqueal a la boquilla.
-
Página 51: Inhalación
- 51 - 3.2 Inhalación ATENCIÓN Asegúrese antes de la inhalación de que todos los componentes se encuentran unidos firmemente. En caso contrario, la dosis podría ser insuficiente. • Conecte el adaptador traqueal a la cánula traqueal. ® • Sostenga el VORTEX tal y como se indica en la imagen. - Página 52 - 52 - • Accione el inhalador presuri- zado una vez e inspire profunda y lentamente. Asegúrese de que sólo se libera una dosis por aplicación del inhalador presurizado en el ® VORTEX • Contenga brevemente la respi- ración. • A continuación, espire lenta- mente.
- Página 53 - 53 - • Separe el adaptador traqueal ® con el VORTEX de la cánula traqueal.
-
Página 54: Higienización
- 54 - 4 HIGIENIZACIÓN 4.1 Información general Mantenga los siguientes ciclos: – Sin intercambio entre pacientes / en casa: ® Limpie todos los componentes del VORTEX después de cada uso. ® Desinfecte todos los componentes del VORTEX al menos una vez al día. -
Página 55: Preparación
- 55 - 4.3 Preparación • Desconecte el adaptador traqueal de la boquilla. ® Deje la boquilla colocada en el VORTEX • Retire el anillo de conexión. 4.4 Limpieza y desinfección en casa Limpieza • Lave bien todos los componentes durante unos 5 minutos con agua corriente caliente y detergente. -
Página 56: Desinfección
- 56 - Desinfección ® Desinfecte los componentes de su VORTEX después de haberlos limpiado (la desinfección sólo es eficaz si los compo- nentes están limpios). En agua hirviendo: ® • Sumerja los componentes sueltos de su VORTEX en agua hirviendo durante al menos 15 minutos. -
Página 57: Higienización Por Parte De Personal Técnico
A continuación se describen los procedimientos validados por ® PARI con los que se puede higienizar eficazmente el VORTEX Asegúrese de que los resultados de higienización obtenidos con su equipo, su personal y los productos químicos empleados son siempre los deseados. Si por algún motivo no pudiera utilizar nuestro procedimiento validado (p. - Página 58 - 58 - de que el procedimiento de higienización elegido por usted pre- senta la misma eficacia. Asegúrese de que los productos quími- cos utilizados son adecuados para la limpieza y desinfección de productos sanitarios fabricados con los materiales indicados en el apartado "Información sobre el material"...
-
Página 59: Esterilización
- 59 - Validación: El procedimiento está validado utilizando: – Desinfectadora G7736 MCU de la marca Miele, programa Vario TD. – Cestas estándar de Miele – Detergente Neodisher MediZym (del Dr. Weigert) Secado: Asegúrese de que no quedan restos de líquido en los compo- nentes incluso si el aparato de limpieza y desinfección utilizado dispone de una función de secado. - Página 60 - 60 - Validación: El procedimiento está validado conforme a DIN EN ISO 17665- 1 utilizando Euro-Selectomat 666 de MMM (procedimiento de prevacío fraccionado). Control visual Después de cada limpieza/desinfección compruebe el estado ® de los componentes de su VORTEX .
-
Página 61: Información Adicional
5.2 Contacto Si desea obtener cualquier tipo de información sobre nuestros productos y en caso de fallos o consultas sobre el uso diríjase al Centro de Atención de PARI: Tel.: +49 (0)8151-279 279 (atención en alemán) +49 (0)8151-279 220 (internacional) 6 Recambios Descripción... - Página 62 - 62 -...
- Página 63 - 63 - NOTICE D'UTILISATION Dernière mise à jour : février 2012. Sous réserve de modifications techniques. Table des matières REMARQUES IMPORTANTES........64 1.1 Informations à propos de la notice d'utilisation....64 1.2 Informations à propos des consignes de sécurité ....64 1.3 Consignes de sécurité générales ........65 DESCRIPTION DU PRODUIT .........67 2.1 Étendue de livraison............67 2.2 Informations matériaux.............68...
-
Página 64: Remarques Importantes
Toutes les notices d'utilisation peuvent être téléchargées sur Internet sous www.pari.de/en/products (à la page correspon- dante du produit) ou être obtenues en version papier sur simple demande auprès de PARI GmbH. Vérifiez régulièrement si une version plus récente de la notice d'utilisation est dispo- nible. -
Página 65: Consignes De Sécurité Générales
- 65 - 1.3 Consignes de sécurité générales AVERTISSEMENT Pour la thérapie de bébés, d'enfants et de personnes dépen- dantes, les points suivants doivent absolument être respec- tés : – Les bébés, les enfants et les personnes dépendantes ne doi- vent effectuer les inhalations que sous une surveillance per- manente. - Página 66 - 66 - En cas d'utilisation dans les hôpitaux avec changement de patient : ® Si le VORTEX est équipé d'un capuchon, retirez-le. Ce capuchon ne peut pas être sté- rilisé et ne convient donc pas à une utilisation avec changement de patient.
-
Página 67: Description Du Produit
- 67 - 2 DESCRIPTION DU PRODUIT 2.1 Étendue de livraison Veuillez contrôler si tous les composants décrits ci-dessous sont bien compris dans l’étendue de livraison. Si un élément manque, informez immédiatement le détaillant chez qui vous avez acheté ® le VORTEX (1) Chambre d'inhalation (2) Embout buccal avec valve inspiratoire et expiratoire (2a) -
Página 68: Informations Matériaux
Le VORTEX sert à minimiser les erreurs de coordination lors de l'utilisation des aérosols-doseurs. La bague de raccordement flexible permet d'utiliser l'appareil avec tous les aérosols- doseurs courants. Pour garantir une utilisation conforme, veuillez utiliser unique- ment les accessoires PARI. -
Página 69: Inhalation
- 69 - 3 INHALATION 3.1 Préparation AVERTISSEMENT ® Puisque la chambre d'inhalation du VORTEX n'est pas complè- tement fermée, de petites pièces peuvent y pénétrer et être ensuite avalées lors de l'inspiration (risque d'asphyxie). Assu- rez-vous en conséquence avant chaque utilisation qu'aucun ®... - Página 70 - 70 - • Retirez le bouchon de l'aérosol- doseur. • Agitez bien l’aérosol-doseur avant chaque utilisation. • Placez l'embout buccal de l'aérosol- doseur dans la bague de raccorde- ® ment du VORTEX • Placez l'adaptateur trachéo directe- ment sur l'embout buccal.
-
Página 71: Exécution De L'inhalation
- 71 - 3.2 Exécution de l'inhalation ATTENTION Assurez-vous avant l'inhalation que tous les éléments sont bien reliés les uns aux autres. Dans le cas contraire, un dosage insuffisant peut en être la conséquence. • Connectez l'adaptateur trachéo à la canule trachéale. ®... - Página 72 - 72 - • Actionnez une fois l'aérosol- doseur et respirez profondé- ment et lentement. Assurez-vous qu'une seule pulvérisation soit émise par utilisation de l'aérosol- ® doseur dans le VORTEX • Retenez brièvement votre respi- ration. • Expirez ensuite lentement. ATTENTION Les enfants âgés de moins de 18 mois doivent inhaler pro- fondément 4 à...
- Página 73 - 73 - • Séparez l'adaptateur trachéo ® avec le VORTEX de la canule trachéale.
-
Página 74: Préparations En Matière D'hygiène
- 74 - 4 PRÉPARATIONS EN MATIÈRE D'HYGIÈNE 4.1 Généralités Respectez les cycles suivants : – Sans changement de patient / À domicile : ® Nettoyez tous les éléments du VORTEX après chaque utili- sation. ® Désinfectez tous les éléments du VORTEX au minimum une fois par jour. -
Página 75: Préparation
- 75 - 4.3 Préparation • Retirez l'adaptateur trachéo de l'embout buccal. ® Laissez l'embout buccal sur le VORTEX • Retirez la bague de raccorde- ment. 4.4 Nettoyage et désinfection à domicile Nettoyage • Nettoyez soigneusement toutes les pièces pendant 5 minutes environ dans de l'eau chaude du robinet avec du produit de vaisselle. - Página 76 - 76 - Désinfection ® Désinfectez toutes les pièces de votre VORTEX à l'issue du nettoyage (seules les pièces nettoyées peuvent être désinfec- tées efficacement). Dans l'eau bouillante: ® • Placez les pièces démontées de votre VORTEX dans l’eau en ébullition durant 15 minutes au minimum. Utilisez une casserole propre et de l'eau potable fraîche.
-
Página 77: Préparations En Matière D'hygiène Pour Le Personnel Spécialisé
à ne pas mettre en danger la sécu- rité et la santé des patients. Vous trouverez ci-après la description des procédés validés par ® PARI, avec lesquels le VORTEX peut être préparé efficace- ment. Assurez-vous que la préparation, que vous réalisez avec votre équipement, les produits chimiques utilisés et votre personnel,... - Página 78 - 78 - ment efficace si vous devez ne pas vous conformer à notre pro- cédé validé (parce que vous ne disposez pas des appareils et produits chimiques décrits). Lors du choix des produits chimiques utilisés, veillez à ce qu'ils conviennent pour le net- toyage et la désinfection des produits médicaux fabriqués dans les matériaux indiqués au paragraphe «...
- Página 79 - 79 - Validation : Le procédé est validé à l'aide des produits suivants : – Désinfecteur G7736 MCU de la société Miele, programme Vario TD. – Paniers standard de la société Miele – Neodisher MediZym comme nettoyant (du Dr. Weigert) Séchage : Même lorsque le laveur-désinfecteur utilisé...
- Página 80 - 80 - Validation : Le procédé est validé selon la norme DIN EN ISO 17665-1 avec utilisation de l'Euro-Selectomat 666 de MMM (procédé de pré- vide fractionné). Contrôle visuel ® Contrôlez les pièces de votre VORTEX après chaque net- toyage/désinfection.
-
Página 81: Divers
5.2 Contact Pour obtenir des informations sur les produits de tout type, en cas d'erreur ou de questions à propos du maniement, veuillez- vous adresser au S.A.V. PARI : Tél. : +49 (0)8151-279 279 (en allemand) +49 (0)8151-279 220 (international) 6 Pièces de rechange... - Página 82 - 82 -...
- Página 83 - 83 - ISTRUZIONI PER L'USO Ultimo aggiornamento: febbraio 2012. Con riserva di modifiche tecniche. Indice INDICAZIONI IMPORTANTI ..........84 1.1 Informazioni sulle istruzioni per l'uso........84 1.2 Informazioni sulle indicazioni per la sicurezza ....84 1.3 Indicazioni generali per la sicurezza ........85 DESCRIZIONE DEL PRODOTTO ........87 2.1 Confezione ...............87 2.2 Informazioni sui materiali..........88...
-
Página 84: Indicazioni Importanti
Tutte le istruzioni per l'uso sono disponibili in Internet all'indirizzo www.pari.de/en/products (nella relativa pagina del prodotto) e possono essere anche richieste in forma cartacea a PARI GmbH. Verificare regolarmente se è disponibile una nuova versione delle istruzioni per l'uso. 1.2 Informazioni sulle indicazioni per la sicurezza... -
Página 85: Indicazioni Generali Per La Sicurezza
- 85 - 1.3 Indicazioni generali per la sicurezza AVVERTENZA Durante la terapia di neonati, bambini e persone con parti- colari difficoltà è assolutamente necessario osservare quanto segue: – In caso di neonati, bambini e persone con particolari diffi- coltà, la terapia inalatoria deve essere eseguita esclusiva- mente dietro il costante controllo di un responsabile. - Página 86 - 86 - In caso di utilizzo in ambiente ospedaliero da parte di più pazienti: Se è presente un coperchio di protezione del ® VORTEX , rimuoverlo. Il coperchio di prote- zione non è sterilizzabile, pertanto non è ido- neo per l'utilizzo da parte di più pazienti.
-
Página 87: Descrizione Del Prodotto
- 87 - 2 DESCRIZIONE DEL PRODOTTO 2.1 Confezione Si prega di accertarsi che tutti i componenti illustrati di seguito siano contenuti nella confezione. Qualora mancassero dei com- ponenti, si prega di informare immediatamente il rivenditore ® presso il quale è stato acquistato il VORTEX (1) Camera di inalazione (2) Boccaglio con valvola di aspirazione ed espirazione (2a) (3) Anello di raccordo blu con apertura per il boccaglio dell'eroga-... -
Página 88: Informazioni Sui Materiali
L'anello di raccordo flessibile ne consente l'utilizzo con tutti i tipi di erogatori di aerosol comuni. Per un trattamento appropriato utilizzare esclusivamente acces- sori PARI. -
Página 89: Inalazione
- 89 - 3 INALAZIONE 3.1 Preparazione AVVERTENZA ® Poiché la camera di inalazione del VORTEX non è completamente chiusa, è possibile che vi penetrino piccole parti che potrebbero essere respirate durante l'inspirazione (rischio di soffocamento). Pertanto, prima di ogni utilizzo, accertarsi ®... - Página 90 - 90 - • Rimuovere il cappuccio dell'eroga- tore di aerosol. • Agitare energicamente l'erogatore di aerosol prima di ogni utilizzo. • Inserire il boccaglio dell'erogatore di aerosol nell'anello di raccordo del ® VORTEX • Inserire l'adattatore per tracheo- stoma direttamente sul boccaglio.
-
Página 91: Esecuzione Dell'inalazione
- 91 - 3.2 Esecuzione dell'inalazione ATTENZIONE Prima dell'inalazione, assicurarsi che tutti i componenti siano fissati saldamente tra loro. In caso contrario, potrebbe verificarsi un sottodosaggio. • Collegare l'adattatore per tra- cheostoma alla cannula trache- ale. ® • Tenere il VORTEX come illu- strato in figura. - Página 92 - 92 - • Azionare una volta l'erogatore di aerosol e inspirare lentamente e profondamente. Assicurarsi che venga ero- gato un solo spruzzo per ogni utilizzo dall'erogatore ® di aerosol nel VORTEX • Trattenere leggermente il respiro. • Quindi espirare lentamente. ATTENZIONE Per i bambini di età...
- Página 93 - 93 - • Separare l'adattatore per tra- cheostoma insieme al ® VORTEX dalla cannula trache- ale.
-
Página 94: Preparazione Igienica
- 94 - 4 PREPARAZIONE IGIENICA 4.1 Indicazioni generali Osservare i seguenti cicli: – Apparecchio utilizzato sempre dalla stessa persona / A casa: ® Pulire tutti i componenti del VORTEX dopo ogni utilizzo. ® Disinfettare tutti i componenti del VORTEX almeno una volta al giorno. -
Página 95: Preparazione
- 95 - 4.3 Preparazione • Estrarre l'adattatore per tracheostoma dal boccaglio. ® Lasciare il boccaglio sul VORTEX • Rimuovere l'anello di raccordo. 4.4 Pulizia e disinfezione a casa Pulizia • Pulire a fondo tutti i componenti per circa 5 minuti con acqua di rubinetto calda e detersivo. - Página 96 - 96 - Disinfezione ® Dopo la pulizia disinfettare i componenti del VORTEX (solo i componenti puliti possono essere disinfettati efficacemente). In acqua bollente: ® • Fare bollire in acqua i singoli componenti del VORTEX almeno 15 minuti. Utilizzare una pentola pulita e acqua potabile fresca. In caso di acqua particolarmente dura si può...
-
Página 97: Preparazione Igienica Per Personale Specializzato
Di seguito vengono descritte le procedure convalidate da PARI ® con le quali è possibile preparare in modo efficace il VORTEX... - Página 98 - 98 - perché non è possibile reperire gli apparecchi e i prodotti chimici descritti). Assicurarsi che i prodotti chimici scelti siano idonei per la pulizia o la disinfezione di prodotti medicali composti dei mate- riali indicati nella sezione "Informazioni sui materiali" (pagina 88).
- Página 99 - 99 - Convalida: La procedura è convalidata per l'utilizzo dei seguenti elementi: – Apparecchio per disinfezione G7736 MCU della ditta Miele, programma Vario TD. – Cestello standard della ditta Miele – Detergente Neodisher MediZym (di Dr. Weigert) Asciugatura: Anche se l'apparecchio per pulizia e disinfezione utilizzato dispone di una funzione di asciugatura, assicurarsi che nei com- ponenti non rimangano tracce di umidità.
-
Página 100: Controllo Visivo
- 100 - Temperatura massima e tempo di sterilizzazione: 121°C per almeno 20 min. oppure massimo 134°C per almeno 3 min. Convalida: La procedura è convalidata in base alla norma DIN EN ISO 17665-1 per l'utilizzo di Euro-Selectomat 666 di MMM (procedura con prevuoto frazionato). -
Página 101: Altro
Paese. 5.2 Contatti Per informazioni di qualunque tipo sul prodotto, in caso di guasti o per dubbi sull'utilizzo, rivolgersi al centro di assistenza di PARI: Tel.: +49 (0)8151-279 279 (in lingua tedesca) +49 (0)8151-279 220 (internazionale) - Página 102 - 102 -...
- Página 103 - 103 - MANUAL DE INSTRUÇÕES Data da informação: Fevereiro de 2012. Reservados os direitos a alterações técnicas. Índice INDICAÇÕES IMPORTANTES........104 1.1 Informações sobre o manual de instruções ....104 1.2 Informações sobre as instruções de segurança.....104 1.3 Instruções gerais de segurança ........105 DESCRIÇÃO DO PRODUTO ........107 2.1 Material fornecido............107 2.2 Informação sobre os materiais ........108...
-
Página 104: Indicações Importantes
Todos os manuais de instruções estão disponíveis para con- sulta na Internet, em www.pari.de/en/products (na respetiva página do produto), sendo que é igualmente possível solicitar a versão impressa à PARI GmbH. Verifique com regularidade se está disponível uma versão mais recente do manual de instruções. -
Página 105: Instruções Gerais De Segurança
- 105 - 1.3 Instruções gerais de segurança ATENÇÃO Na terapia em bebés, crianças e pessoas fragilizadas tem de se respeitar impreterivelmente o seguinte: – Bebés, crianças e pessoas fragilizadas só podem inalar sob vigilância constante. Só assim pode ser garantida uma tera- pia segura e eficaz. - Página 106 - 106 - No caso de utilização em ambiente hospitalar com mudança de paciente: ® Se a VORTEX dispuser de uma capa de proteção, remova-a. A capa de proteção não pode ser esterilizada, não sendo por isso adequada para a utilização com mudança de paciente.
-
Página 107: Descrição Do Produto
- 107 - 2 DESCRIÇÃO DO PRODUTO 2.1 Material fornecido Com base na descrição seguinte, verifique se todos os compo- nentes estão contidos no material fornecido. Se faltar algum, ® contate de imediato o fornecedor ao qual adquiriu a VORTEX (1) Câmara de inalação (2) Bocal com válvula de inspiração e expiração (2a) (3) Virola de ajustamento azul com abertura para o bocal do dosi-... -
Página 108: Informação Sobre Os Materiais
® A VORTEX serve para minimizar descoordenações na utiliza- ção de dosificadores de aerossol. A virola de ajustamento flexí- vel permite utilizá-la com todos os dosificadores de aerossol. Para um tratamento adequado, utilize exclusivamente acessó- rios PARI. -
Página 109: Inalação
- 109 - 3 INALAÇÃO 3.1 Preparação ATENÇÃO ® Devido à câmara de inalação da VORTEX não estar completamente fechada, podem entrar peças pequenas que podem ser inaladas (risco de asfixia). Assim, e antes de cada utilização, verifique se não existem corpos estranhos no interior ®... - Página 110 - 110 - • Retire a tampa do dosificador de aerossol. • Agite vigorosamente o dosificador de aerossol. • Encaixe o bocal do dosificador de aerossol na virola de ajustamento ® da VORTEX • Encaixe o adaptador traqueal direta- mente no bocal.
-
Página 111: Efetuar A Inalação
- 111 - 3.2 Efetuar a inalação CUIDADO Antes da inalação, certifique-se de que todos os componentes estão bem fixos uns aos outros. Caso contrário, existe o risco de uma subdosagem. • Ligue o adaptador traqueal à cânula traqueal. ® •... - Página 112 - 112 - • Acione o dosificador de aeros- sol uma vez e inspire fundo e lentamente. Assegure-se de que, por cada utilização, passa apenas uma bombada do dosificador de aerossol ® para a VORTEX • Retenha a respiração durante um momento.
- Página 113 - 113 - • Separe o adaptador traqueal ® juntamente com a VORTEX cânula traqueal.
-
Página 114: Preparação Higiénica
- 114 - 4 PREPARAÇÃO HIGIÉNICA 4.1 Generalidades Cumpra os ciclos que se seguem: – Sem mudança de paciente/em casa: ® Limpe todos os componentes da VORTEX após cada utili- zação. ® Desinfete todos os componentes da VORTEX pelo menos uma vez por dia. -
Página 115: Preparação
- 115 - 4.3 Preparação • Retire o adaptador traqueal do bocal. ® Deixe o bocal na VORTEX • Retire a virola de ajustamento. 4.4 Limpeza e desinfecção em casa Limpeza • Limpe bem todos os componentes durante aprox. 5 minutos em água quente da torneira e detergente. - Página 116 - 116 - Desinfecção ® Desinfete os componentes da sua VORTEX após a limpeza (as peças só podem ser bem desinfetadas se estiverem limpas). Em água fervente: ® • Coloque os componentes da sua VORTEX durante pelo menos 15 minutos em água a ferver. Utilize um tacho limpo e água potável fresca.
-
Página 117: Preparação Higiénica Para Pessoal Técnico
A seguir, encontram-se descritos os procedimentos validados pela PARI, com os quais é possível efetuar uma preparação efi- ® caz da VORTEX Certifique-se de que a preparação efetuada com o seu equipa- mento, os químicos utilizados e o seu pessoal é... - Página 118 - 118 - além daquelas que foram validadas por nós (p. ex., porque não estão disponíveis os aparelhos e os químicos descritos). Ao selecionar os químicos a utilizar, certifique-se de que são ade- quados para a limpeza ou desinfecção de dispositivos médicos fabricados com os materiais indicados na secção "Informação sobre os materiais"...
- Página 119 - 119 - Validação: O método é validado mediante a utilização de: – Aparelho de desinfecção G7736 MCU da empresa Miele, programa Vario TD. – Cestos standard da empresa Miele – Neodisher MediZym como produto de limpeza (Dr. Weigert) Secar: Mesmo que o aparelho de limpeza e desinfecção utilizado tenha uma função de secagem, certifique-se de que não ficam quais- quer restos de humidade nos componentes.
- Página 120 - 120 - Validação: O método está validado de acordo com a norma DIN EN ISO 17665-1 mediante a utilização de Euro-Selecto- mat 666 da MMM (processo de pré-vácuo fracionado). Controlo visual ® Inspecione os componentes da sua VORTEX após cada lim- peza/desinfecção.
-
Página 121: Diversos
5.2 Contato Para quaisquer informações sobre o produto, em caso de falhas ou de questões relacionadas com o manuseamento, contate o centro de atendimento PARI: Tel.: +49 (0)8151-279 279 (alemão) +49 (0)8151-279 220 (internacional) 6 Peças de reposição... - Página 122 - 122 -...
- Página 124 PARI GmbH Moosstrasse 3 • 82319 Starnberg • Germany Tel.: +49 (0)81 51-2 79 0 • Fax: +49 (0)81 51-2 79 101 E-Mail: info@pari.de • www.pari.de...