Tabla de contenido
Publicidad
Idiomas disponibles
Idiomas disponibles
Enlaces rápidos
Publicidad
Tabla de contenido

Manuales relacionados para EAS ELECTRIC EMRH60TX


Resumen de contenidos para EAS ELECTRIC EMRH60TX
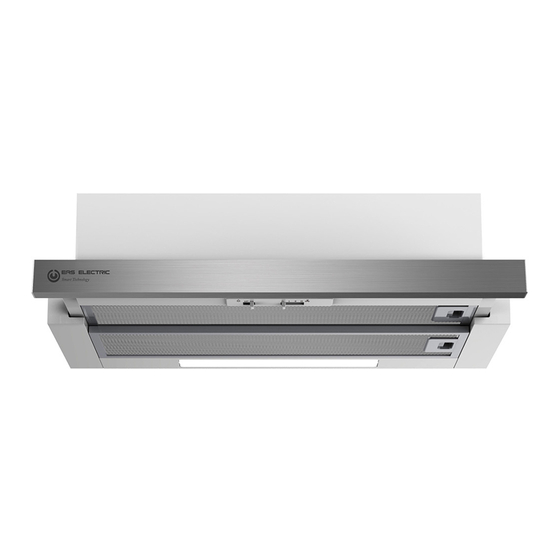
- Página 1 CAMPANA EXTRACTORA COOKER HOOD EMRH60TX MANUAL Lea este manual de Instrucciones antes de usar el aparato y consérvelo para futuras consultas. Before use the appliance please read this manual carefully and keep it for future reference. www.easelectric.es...
-
Página 2: Información Y Consejo
Información y consejo Debe haber una adecuada ventilación en la habitación cuando la campana se use a la vez que otros aparatos que quemen gas u otros combustibles. No compruebe el estado de los filtros mientras la campana esté en funcionamiento.. No toque las bombillas de la campana hasta media hora después de apagar la campana. - Página 3 L) Los niños no deben jugar con el aparato. La limpieza y mantenimiento no deben hacerla niños sin supervisión Cuando la campana se está reparando, revisando, o cambiando alguna de sus partes, desconecte el enchufe asegurando la seguridad de la gente. Para proteger el cuerpo principal de la corrosión por acumulación durante largo tiempo de suciedad la campana debe ser limpiada con un detergente no corrosivo, cada 2 meses.
-
Página 4: Información
PRECAUCIÓN: Las partes accesibles se pueden calentar durante su uso. Por favor guarde estas instrucciones para futuras consultas. Por favor léalas detenidamente; contiene información importante para un uso y un mantenimiento adecuado del aparato. Ensamblaje de la bandeja Conducto de aire. Cuerpo principal Filtros También incluye:... -
Página 5: Instalación
Instalación Asegúrese de que la corriente ha sido desconectada antes de la instalación. El enchufe debe ser conectado en una toma en la que sea fácil conectar y desconectar. Para instalar esta campana necesitarás dos ayudantes. También necesitarás las siguientes herramientas y materiales: * Taladro * Destornillador de cabeza plana * Destornillador de cabeza Phillips o taladro sin cuerda y punta de cabeza de Phillips *... - Página 6 Método 1 Asegure la posición de la campana en el hueco de aacuerdo a la figura. Los orificios en el mueble deben alinearse con los de la parte superior de la campana. Introducza los tornillos en el la campana conforme a la posición relativa de los orificios en la parte superior de la campana.
- Página 7 Método 2 Si la superficie de instalación no se adapta a la instalación de la campana, enctonces conforme a la figura, fije la posición de la campana en la pared. Instale dos de los tornillos suministrados a la pared, de acuerdo a la posición relativa de los 2 orificios de sujeción, de la parte trasera de la campana.
- Página 8 Instalación de la válvula de seguridad Sujete la válvula con sus manos, alineela con el conducto de la salida del cuerpo de la campana, gire hasta que las tres pestañas de la válvula encajen, entonces instalación estará completada. Filtros de carbono Los filtros de carbón activo pueden ser usados para atrapar los olores.
- Página 9 Método de uso de la campana Funcionamiento Compruebe previamente Compruebe si hay algún defecto visible Compruebe que todass las partes han sido instaladas de forma segura. Encendido y apagado -Extraiga la bandeja de aspiración de la campana -En el panel de mandos hay tres velocidades de aspiración y el botón de encendido y apagado de la luz.
-
Página 10: Instrucciones De Limpieza
Sustitución de las lámparas 1. Desconecte la campana extractora y aísle la campana desconectando el enchufe de la red o apagando el fusible. 2.Retire los filtros de grasa. 3.Reemplace la lámpara por una de las mismas características. 4.Reconecte la campana a la red o conecte el fusible. Información Limpie las los ventiladores frecuentemente, no se debe permitir que la grasa se acumule en los filtros o en el ventilador. -
Página 11: Eliminación
Es recomendable limpiar el filtro metálico cada tres meses siguiendo las siguientes instrucciones: - Retire el filtro metálico de la campana extractora y lávelo con una solución de agua y detergente líquido neutro. Déjelo en remojo. —Enjuague bien con agua tibia y deje secar. - El filtro metálico puede alterar su color después de varios lavados. -
Página 12: Garantía Comercial
GARANTÍA COMERCIAL CONDICIONES DE LA GARANTÍA COMERCIAL EN ELECTRODOMÉSTICOS Este aparato tiene una garantía de reparación de dos años, a partir de la fecha de venta, contra todo defecto de funcionamiento proveniente de la fabricación, incluyendo mano de obra y piezas de recambio. Para justificar la fecha de compra será... - Página 13 GARANTÍA COMERCIAL Durante el periodo de garantía es imprescindible conservar todos los manuales junto con el equipo. Si alguno de estos se perdiera, no podrá ser reclamada su reposición. Las averías que tengan su origen o sean consecuencia directa o indirecta de: reacción o radiación nuclear o contaminación radiactiva;...
- Página 14 Information and advice There shall be adequate ventilation of the room when the range hood is used at the same time as appliances burning gas or other fuels. Do not check the status of the filters while the cooker hood is operating. Do not touch the light bulb within half an hour after appliance use.
- Página 15 N) When the hood is in repair,maintenance,replacement of parts,please pull out the plug,ensure the safety of the people. To pritect the main body from corrosive of the long time accumulation of dirt,the cooker hood should be cleaned with hot water with non-corrosive detergent every two months. O) Don't put things on the drawer, so as to avoid dropping in the operation of the drawer.
- Página 16 CAUTION: Accessible parts may become hot when used with cooking appliance. Please keep this instruction booklet in a safe place for future reference. Please read this instruction manual careful: it contains important information concerning the safe operation, installation and maintenance of the appliance.
- Página 17 Installation Ensure the power has been turned off before beginning this installation. Plug must be assembled in places easy to drag and insert . To install this hood you will require two assistants. You will need the following tools and material to complete this installation: *Drill*Flat head screwdriver *Phillips head screwdriver or cordless drill and Phillips head bit*Tin snip*...
- Página 18 Method 1 1. According to the figure, make sure the position of hood in the cabinet. The wood strips should be line up with the 4 keyholes slots on the top of the range hood. On the cabinet, install 4 screws(supplied) according to the relative position of 4 key holes on the bottom of hood.
- Página 19 Method 2 In the installation surface in cabinet don’t adapt to install the cooker hood, then as per fig, fix the position of cooker hood on the wall. On the wall, install 2 screws(supplied) according to the relative position of 2 key holes on the back of hood.
- Página 20 Check valve Installation Hold on check valve with your hands, align the box gap, put in the check valve , and then spin to a certain angle until three angles of the valve are stuck. Installation is complete. Carbon Filter Activated carbon filter can be used to trap odors.Normally the activated carbon filter should be changed at three or six...
- Página 21 Operation Check beforehand Check the safe condition of the appliance: - Check whether there are visible defects. - Check that all parts of the appliance have been securely fitted. Switching on/off - Slide the front part of the cooker hood.(For some models) ·...
-
Página 22: Cleaning Instruction
Replacing Bulb: 1.Switch off the extractor hood and isolate the extrator hood by pulling out the mains plug or switching off the fuse. 2.Remove the grease filter. 3.Replace the lamp(commercially available filament lamps (max.40watts) or halogen lamp (max.28watts),E14 lampholder). 4.Reconnect the power by inserting the mains plug or by switchingonthe fuse. Clean ventilation fans frequently. - Página 23 It is recommendable to clean the metallic filter every three months by carrying out the following instruction: —Remove the metallic filter from the cooker hood and wash it in a solution of water and neutral liquid detergent, leaving to soak —Rinse thoroughly with warm water and leave to dry.
-
Página 24: Commercial Guarantee
Commercial Guarantee CONDITIONS COMMERCIAL GUARANTEE ELECTRICAL APPLIANCES This device has a two-year repair guarantee, from the date of sale, against all malfunctions arising from manufacture, including labour and spare parts. To justify the date of purchase, the invoice or receipt must be presented. - Página 25 Commercial Guarantee During the guarantee period it is essential to keep all manuals with the equipment. Should any of these be lost, no claim may be made for their replacement. The breakdowns that have their origin or are a direct or indirect consequence of: Nuclear reaction or radiation or radioactive contamination;...