Tabla de contenido
Publicidad
Idiomas disponibles
Idiomas disponibles
Enlaces rápidos
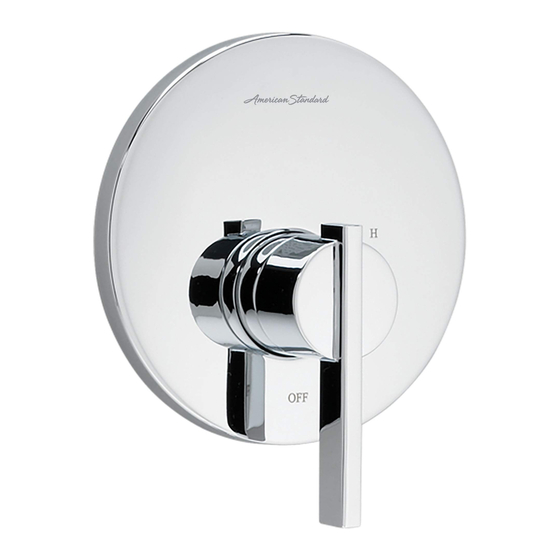
Berwick
®
Boulevard
®
Pressure Balancing
Bath and Shower Trim Kit
Thank you for selecting American Standard...
the benchmark of fine quality for over 140 years.
To ensure that your installation proceeds smoothly-please
read these instructions carefully before you begin.
For use with shower heads rated at 4.9 L/min (1.3 gpm) or higher.
RECOMMENDED TOOLS
Plumbers' Putty
or Caulking
ROUGHING-IN DIMENSIONS
• To assure proper positioning in relation to wall.
Note roughing-in dimensions.
FINISHED WALL
5" (127mm) REF.
74" (1880mm)
12" (305mm) REF.
FOR HEAD
CLEARANCE
18" (457mm)
OPTIONAL
1-1/2" REF.
(38mm)
TOP OF TUB RIM
BOTTOM OF TUB
Product names listed herein are trademarks of AS America, Inc.
© AS America, Inc. 2020
INSTALLATION
INSTRUCTIONS
Phillips Screwdriver
Teflon Tape
Flat Blade Screwdriver
1-5/8" TO 3-1/4"
(41 TO 83mm)
1/2" (12mm) NPT
2-1/4"
(57mm)
1-5/8" TO 3-1/4"
(41 TO 83mm)
6-3/4"
(173mm)
OPTIONAL TO FINISHED
FLOOR USUALLY
BETWEEN 65'' AND 80''
(1651 AND 2032mm)
7-1/4" DIA.
(184mm)
2-3/4" MAX. (69mm)
1-3/4" MIN. (45mm)
4-7/8" REF.
4"
(124mm)
(102mm)
1/2" (13mm)
COPPER
TU430500
TU430501
TU430502
TU431500
TU431501
TU431502
Adjustable Wrench
1
CARTRIDGE INSTALLATION
• Remove PLASTER GUARD (6)
(Keep it installed for thin wall Installation).
• Remove BONNET NUT (1) by unthreading it
Counter clockwise. Remove test CAP (2).
• Remove PROTECTIVE HOUSING (3) from
CARTRIDGE (4). Install with "UP" text on top.
• Reinstall BONNET NUT (1) onto VALVE BODY (5)
and tighten firmly with 12 Nm or 9 lbs/ft.
5
2
NOTE: Specified tightening torque
of BONNET NUT (1) is critical to
assure sealing function.
- 1 -
Channel Locks
1
3
4
M965941 Rev. 1.1 (3/20)
6
Publicidad
Tabla de contenido

Manuales relacionados para American Standard Berwick TU430500


Resumen de contenidos para American Standard Berwick TU430500
- Página 1 TU431500 Bath and Shower Trim Kit TU431501 TU431502 Thank you for selecting American Standard... the benchmark of fine quality for over 140 years. To ensure that your installation proceeds smoothly-please read these instructions carefully before you begin. For use with shower heads rated at 4.9 L/min (1.3 gpm) or higher.
- Página 2 INSTALL VALVE TRIM (STANDARD WALL INSTALLATION) • Figure 1. Push CAP (1) over VALVE CARTRIDGE (2) until seated against stop. PLASTER GUARD • Figure 2. Make sure O-RING (6) is secure within ESCUTCHEON HOLDER (3). Push ESCUTCHEON HOLDER (3) onto CAP (1) and attach with LONG SCREWS (4). Mount ESCUTCHEON SUPPORT (5) to ESCUTCHEON HOLDER (3) with 4 SHORT SCREWS (8).
-
Página 3: Install Handle
INSTALL, TUB SPOUT, SHOWER HEAD, SHOWER ARM WITH FLANGE O-RING Protect finish on SHOWER HEAD CAUTION and TUB SPOUT when installing. Note: Apply sealant or Teflon Tape to shower arm. • Remove PIPE PLUG and CAP (1, 2) from shower pipe and tub filler pipe. -
Página 4: Care Instructions
SERVICE Turn off hot and cold water TO GAIN ACCESS TO VALVE FOR SERVICING CAUTION supplies before beginning. • Remove HANDLE (see step 3 and reverse). • Remove ESCUTCHEON and CARTRIDGE CAP (see step 1 and reverse). VALVE LEAKS WHEN SHUT OFF •... -
Página 5: Model Numbers
Berwick / Boulevard ® ® Pressure Balancing Bath and Shower Trim Kit MODEL NUMBERS TU430500 / TU431500 TU430501 / TU431501 TU430502 / TU431502 A912655-0070A O-RING M962847-YYY0A SHOWER ARM & FLANGE M970654-0070A 1660681-YYY CARTRIDGE SHOWER HEAD (2.5 GPM) M970484-0070A MOUNTING PLATE EXTENSION M907053-YYY0A CARTRIDGE CAP... - Página 6 INSTRUCTIONS D’INSTALLATION Berwick TU430.500 Boulevard TU430.501 Équilibrage de Pression TU430.502 Douche et Baignoire TU431.500 Soupape de Garniture TU431.501 Merci d’avoir choisi American-Standard... la référence TU431.502 de qualité supérieure depuis plus de 140 ans. Pour être sûr que votre installation se déroule correctement, veuillez lire attentivement les instructions avant de commencer.
-
Página 7: Installation De Garniture De Robinet (Installation Sur Standard Mur)
INSTALLATION DE GARNITURE DE ROBINET (INSTALLATION SUR STANDARD MUR) • Figure 1. Pousser le CAPUCHON (1) sur la CARTOUCHE DE VANNE (2) jusqu’à ce qu’il repose fermement contre la butée. PROTECTION DE PLÂTRE • Figure 2. S’assurer que les JOINTS TORIQUES (6) sont bien fixés au niveau du SUPPORT DE ROSACE (3). -
Página 8: Installation De La Poignée
INSTALLER LE BEC DE BAIGNOIRE, LE POMMEAU DE DOUCHE, LE BRAS DE DOUCHE AVEC BRIDE JOINT TORIQUE MISE EN Protégez le fini de la DOUCHETTE et du BEC INVERSEUR lorsque vous GARDE : procédez à l’installation. Remarque : Appliquer un ruban de scellant ou de Téflon sur les raccordements de la douche. -
Página 9: Instructions D'entretien
MAINTENANCE Fermez l’alimentation en eau chaude MISE EN GARDE POUR ACCÉDER AU ROBINET et en eau froide avant de commencer. • Enlevez la POIGNÉE (voir l’étape 3, mais à l’inverse). • Enlevez l’ÉCUSSON et le CAPUCHON DE CARTOUCHE (voir l’étape 1, mais à l’inverse). LE ROBINET FUIT LORSQU’IL EST FERMÉ... -
Página 10: Numéros De Modèle
Berwick / Boulevard Équilibrage de Pression Douche et Baignoire Soupape de Garniture NUMÉROS DE MODÈLE TU430.500 / TU431.500 TU430.501 / TU431.501 TU430.502 / TU431.502 A912655-0070A JOINT TORIQUE M962847-YYY0A BRAS DE DOUCHE ET BRIDE M970654-0070A CARTOUCHE 1660681-YYY POMMEAU DE DOUCHE (2.5 GPM) M970484-0070A EXTENSION DE LA PLAQUE DE MONTAGE... -
Página 11: Herramientas Recomendadas
Accesorios de Baño y TU431.501 Ducha con Desviador TU431.502 Gracias por elegir American Standard, el punto de referencia de óptima calidad durante más de 140 años. Para realizar la instalación sin problemas, lea atentamente estas instrucciones antes de comenzar. -
Página 12: Instalar El Chapetón De La Válvula (Instalación En Pared Estándar)
INSTALAR EL CHAPETÓN DE LA VÁLVULA (INSTALACIÓN EN PARED ESTÁNDAR) • Figura 1. Empuje la TAPA (1) por encima del CARTUCHO DE LA VÁLVULA (2) hasta que esté apoyada contra el PROTECCIÓN DE YESO dispositivo de retención. • Figura 2. Empuje el PROTECTOR DEL CHAPETÓN (3) en la TAPA (1) y fije el cuerpo de la válvula usando los TORNILLOS LARGOS (4). -
Página 13: Instalación De La Manija
INSTALE, CANALÓN DE TINA, CABEZA DE DUCHA, BRAZO DE DUCHA CON REBORDE JUNTA TÓRICA Proteja el acabado en la CABEZA PRECAUCIÓN: DE LA DUCHA y el PICO DE LA TINA al realizar la instalación. Nota: Aplique sellador o cinta de Teflón a las conexiones de la ducha. -
Página 14: Reemplazar El Cartucho
SERVICIO Apague los suministros de agua PARA ACCEDER A LA VÁLVULA Y DARLE SERVICIO PRECAUCIÓN caliente y fría antes de comenzar. • Retire la MANIJA (vea el paso 3 e inviértalo). • Retire el CHAPETÓN y la TAPA DEL CARTUCHO (vea el paso 1 e inviértalo). FUGAS EN LA VÁLVULA CUANDO ESTÁ... -
Página 15: Comprado Por Separado
Berwick / Boulevard ® ® Equilibrio de Presión Juego de Accesorios de Baño y Ducha con Desviador NÚMEROS DE MODELO TU430.500 / TU431.500 TU430.501 / TU431.501 TU430.502 / TU431.502 A912655-0070A JUNTA TÓRICA M962847-YYY0A BRAZO DE LA REGADERA Y BRIDA 1660681-YYY REGADERA M970654-0070A (2.5 GPM)