Tabla de contenido
Publicidad
Idiomas disponibles
Idiomas disponibles
Enlaces rápidos
FR
02-05 / 6-23 / 114-120
02-05 / 24-41 / 114-120
EN
02-05 / 42-59 / 114-120
DE
02-05 / 60-77 / 114-120
ES
02-05 / 78-95 / 114-120
NL
IT
02-05 / 96-113 / 114-120
73502
V1
09/07/2021
NEOPULSE 400 CW
Générateur MIG/MAG - TIG - MMA
MIG/MAG - TIG - MMA welding machine
Schweissgerät für MIG/MAG - WIG - E-Hand
Equipo de soldadura MIG/MAG - TIG - MMA
Сварочный аппарат МИГ/МАГ - ТИГ - ММА
MIG/MAG - TIG - MMA lasapparaat
Dispositivo saldatura MIG/MAG - TIG - MMA
Find more languages of user manuals
www.gys.fr
Publicidad
Tabla de contenido

Manuales relacionados para GYS NEOPULSE 400 CW


Resumen de contenidos para GYS NEOPULSE 400 CW
- Página 1 NEOPULSE 400 CW 02-05 / 6-23 / 114-120 02-05 / 24-41 / 114-120 Générateur MIG/MAG - TIG - MMA MIG/MAG - TIG - MMA welding machine 02-05 / 42-59 / 114-120 Schweissgerät für MIG/MAG - WIG - E-Hand Equipo de soldadura MIG/MAG - TIG - MMA 02-05 / 60-77 / 114-120 Сварочный...
- Página 2 Manuel d’utilisation NEOPULSE 400 CW Notice originale M6x12 (x8) M6 (x8) Ne pas décoller l’autocollant avant l’assemblage des roues. Do not remove the sticker until the wheels are assembled. M8x12 (x8) M6x12 (x8)
- Página 3 Manuel d’utilisation NEOPULSE 400 CW Notice originale M4x10 (x6) Chaine Chain...
- Página 4 Manuel d’utilisation NEOPULSE 400 CW Notice originale Acier - Steel - Stahl - Acero - Staal - Aço Aluminium 91151 Inox - Stainless steel - Edelstahl Tube capillaire / Capillary Pipe / Kapillarrohr Gaine acier Gaine téflon Steel sheath Teflon sheath...
- Página 5 Manuel d’utilisation NEOPULSE 400 CW Notice originale 1ÈRE UTILISATION / ERSTE VERWENDUNG / FIRST USE / ПЕРВОЕ ИСПОЛЬЗОВАНИЕ / I° UTILIZZO / EERSTE GEBRUIK / PRIMERA UTILIZACIÓN / 1º USO / 首次使用 / 初めてご使用になる前に Avant la première utilisation de votre appareil, merci de vérifier la présence de nouvelles mises à jour.
-
Página 6: Avertissements - Règles De Sécurité
Manuel d’utilisation NEOPULSE 400 CW Notice originale AVERTISSEMENTS - RÈGLES DE SÉCURITÉ CONSIGNE GÉNÉRALE Ces instructions doivent être lues et bien comprises avant toute opération. Toute modification ou maintenance non indiquée dans le manuel ne doit pas être entreprise. Tout dommage corporel ou matériel dû à une utilisation non-conforme aux instructions de ce manuel ne pourra être retenu à la charge du fabricant. -
Página 7: Bouteilles De Gaz
Manuel d’utilisation NEOPULSE 400 CW Notice originale Les bouteilles doivent être entreposées dans des locaux ouverts ou bien aérés. Elles doivent être en position verticale et maintenues à un support ou sur un chariot. Le soudage doit être proscrit à proximité de graisse ou de peinture. - Página 8 Manuel d’utilisation NEOPULSE 400 CW Notice originale Tous les soudeurs devraient utiliser les procédures suivantes afin de minimiser l’exposition aux champs électromagnétiques provenant du circuit de soudage: • positionner les câbles de soudage ensemble – les fixer les avec une attache, si possible;...
-
Página 9: Installation Du Matériel
Manuel d’utilisation NEOPULSE 400 CW Notice originale TRANSPORT ET TRANSIT DE LA SOURCE DE COURANT DE SOUDAGE Ne pas utiliser les câbles ou torche pour déplacer la source de courant de soudage. Elle doit être déplacée en position verticale. Ne pas faire transiter la source de courant au-dessus de personnes ou d’objets. - Página 10 Manuel d’utilisation NEOPULSE 400 CW Notice originale INSTALLATION – FONCTIONNEMENT PRODUIT Seul le personnel expérimenté et habilité par le fabricant peut effectuer l’installation. Pendant l’installation, s’assurer que le générateur est déconnecté du réseau. Les connexions en série ou en parallèle de générateur sont interdites. Il est recommandé d’utiliser les câbles de soudage fournis avec l’appareil afin d’obtenir les réglages optimum du produit.
-
Página 11: Installation De La Bobine
Manuel d’utilisation NEOPULSE 400 CW Notice originale INSTALLATION DE LA BOBINE - Enlever la buse (a) et le tube contact (b) de votre torche MIG/MAG. - Ouvrir la trappe du générateur. - Positionner la bobine sur son support. - Tenir compte de l’ergot d’entrainement (c) du support bobine. Pour monter une bobine 200 mm, serrer le maintien bobine en plastique (a) au maximum. -
Página 12: Soudage Semi-Automatique En Acier/Inox (Mode Mag)
Manuel d’utilisation NEOPULSE 400 CW Notice originale AMORÇAGE DU GROUPE FROID Lors de la première utilisation, l’amorçage de la pompe peut s’avérer difficile et générer un défaut de débit d’eau. Pour l’amorcer correctement, il est recommandé d’utiliser le tuyau d’amorçage fourni avec le produit (I-19) et suivre les indications suivantes : - Remplir le réservoir de liquide de refroidissement jusqu’à... -
Página 13: Raccordement Gaz
Manuel d’utilisation NEOPULSE 400 CW Notice originale SOUDAGE SEMI-AUTOMATIQUE ALUMINIUM (MODE MIG) Le matériel peut souder du fil aluminium de Ø 0.8 à 1.6 mm (II-B). L’utilisation en aluminium nécessite un gaz spécifique argon pur (Ar). Pour le choix du gaz, demander conseil à un distributeur de gaz. Le débit de gaz en aluminium se situe entre 15 et 25 l/min selon l’environnement et l’expérience du soudeur. - Página 14 L’accès à certains paramètres de soudage dépend du mode d’affichage sélectionné : Paramètres/Mode d’affichage : Easy, Expert, Avançé. Se reporter à la notice IHM. PROCÉDÉS DE SOUDAGE Pour plus d’informations sur les synergies GYS et les procédés de soudage, scannez le QR code : MODE DE POINTAGE • SPOT Ce mode de soudage permet le préassemblage des pièces avant soudage.
-
Página 15: Cycles De Soudage Mig/Mag
Manuel d’utilisation NEOPULSE 400 CW Notice originale Uplsope Rampe de montée progressive du courant. Courant froid Deuxième courant de soudage dit «froid» Fréquence du Pulse Fréquence de pulsation Rapport cyclique En pulsé, règle le temps de courant chaud par rapport au temps de courant froid. - Página 16 Manuel d’utilisation NEOPULSE 400 CW Notice originale Procédé 4T Standard : T hotstart I Blackout Dstart Gas post-Flow T burn-back T crater Filler I crater Filler Soft-start En 4T standard, la durée du Pré-gaz et du Post-gaz sont gérés par des temps. Le HotStart et le Crater filler par la gâchette.
-
Página 17: Mode De Soudage Tig (Gtaw)
Manuel d’utilisation NEOPULSE 400 CW Notice originale Procédé 4T Pulsé : T hotstart T upslope T downslope I Blackout Dstart Gas post-Flow T burn-back T crater Filler I crater Filler Soft-start En 4T pulsé, la durée du Pré-gaz et du Post-gaz sont gérés par des temps. Le HotStart et le Crater filler par la gâchette... - Página 18 Manuel d’utilisation NEOPULSE 400 CW Notice originale L’accès à certains paramètres de soudage dépend du mode d’affichage sélectionné : Paramètres/Mode d’affichage : Easy, Expert, Avançé. PROCÉDÉS DE SOUDAGE • TIG DC Dédié au courant des métaux ferreux tels que l’acier, l’acier inoxydable, mais aussi le cuivre et ses alliages ainsi que le titane.
- Página 19 Manuel d’utilisation NEOPULSE 400 CW Notice originale COMPORTEMENT GÂCHETTE • 2T T1 - Le bouton principal est appuyé, le cycle de soudage démarre (PréGaz, I_Start, UpSlope et soudage). T2 - Le bouton principal est relâché, le cycle de soudage est arrêté...
-
Página 20: Conseils De Réglage
Manuel d’utilisation NEOPULSE 400 CW Notice originale Montée de courant Permet une montée progressive du courant de soudage. Courant de soudage Courant de soudage. Évanouisseur Évite le cratère en fin de soudage et les risques de fissuration particulièrement en alliage léger. - Página 21 Manuel d’utilisation NEOPULSE 400 CW Notice originale vous pouvez régler sur l’écran la fréquence de votre courant pulsé. Ce procédé offre ainsi une plus grande maitrise de l’opération de soudage vertical. CHOIX DES ÉLECTRODES ENROBÉES • Électrode Rutile : très facile d’emploi en toutes positions.
-
Página 22: Torche Push-Pull En Option
Dès que l’IHM est éteinte ou déconnectée, l’IHM du générateur est réactivée. AJOUT DE FONCTIONNALITÉS Le fabricant GYS propose un large choix de fonctionnalités compatible avec votre produit. Pour les découvrir, scannez le QR code. -
Página 23: Conditions De Garantie
Manuel d’utilisation NEOPULSE 400 CW Notice originale Gaine guide-fil écrasée. Vérifier la gaine et corps de torche. Blocage du fil dans la torche. Remplacer ou nettoyer. Le fil bouchonne après les galets Pas de tube capillaire. Vérifier la présence du tube capillaire. -
Página 24: Warnings - Safety Instructions
Operating manual Translation of the original NEOPULSE 400 CW instructions WARNINGS - SAFETY INSTRUCTIONS GENERAL INSTRUCTIONS These instructions must be read and understood before using the machine. Any modification or maintenance that is not specified in the manual must not be carried out. -
Página 25: Gas Cylinders
Operating manual Translation of the original NEOPULSE 400 CW instructions Gas cylinders should be stored in open or well-ventilated areas. They should be kept in an upright position and kept on a cart or trolley. Welding should not be undertaken near grease or paint. -
Página 26: General Information
Operating manual Translation of the original NEOPULSE 400 CW instructions • do not position yourself between the welding cables and keep both welding cables on your same side, • connect the return cable to the workpiece, as close as possible to the area to be welded, •... - Página 27 Operating manual Translation of the original NEOPULSE 400 CW instructions SETTING UP THE EQUIPMENT • Place the welding power source on a floor with a maximum inclination of 10°. • Provide sufficient space to ventilate the welding power source and access the controls.
- Página 28 Operating manual Translation of the original NEOPULSE 400 CW instructions HUMAN-MACHINE INTERFACE (HMI) Please read the Human Machine Interface (HMI) which forms part of the equipment’s user literature. POWER SWITCH • This equipment is supplied with a 32 A EN 60309-1 socket and should only be used on a three phase, 400 V (50-60 Hz), four wire, earthed electrical system.
- Página 29 Operating manual Translation of the original NEOPULSE 400 CW instructions - Check the inscription on the roller to ensure that the rollers are suitable for the wire diameter and the wire material (for a Ø 1.2 wire, use the Ø 1.2 groove).
- Página 30 Operating manual Translation of the original NEOPULSE 400 CW instructions LIQUID COOLING FILLING The cooling unit’s tank must be filled to the MAX level recommended by the gauge on the front of the cooling unit. However, the coolant level must never fall below the MIN level, this will bring up a warning message.
-
Página 31: Gas Supply
Operating manual Translation of the original NEOPULSE 400 CW instructions CHOOSING A POLARITY Polarity + Polarity - Gas-shielded MIG/MAG welding generally re- MIG/MAG welding without gas shielding (No quires positive polarity. Gas) generally requires negative polarity. In any case, refer to the wire manufacturer’s recommendations for the choice of polarity for your MIG-MAG torch. - Página 32 NEOPULSE 400 CW instructions WELDING PROCESSES For more information on GYS pre-installed user settings and welding processes, scan the QR code: SPOT WELDING MODE • SPOT WELDING This welding mode allows the pre-assembly of parts before welding. Spot welding can be done manually using the trigger or timed with a predefined spot welding period.
- Página 33 Operating manual Translation of the original NEOPULSE 400 CW instructions MIG/MAG WELDING CYCLES Standard 2T process: T hotstart I blackout Dstart Gas post-Flow T burn-back T crater Filler I crater Filler Soft-start When the trigger is pulled, the pre-gas starts. When the wire touches the workpiece, a pulse initiates the arc and the welding cycle starts. When the trigger is released, the wire feeding stops and a current pulse cleanly cuts the wire, followed by the post-gas.
- Página 34 Operating manual Translation of the original NEOPULSE 400 CW instructions Pulsed 2T process: T hotstart T downslope T upslope I blackout Dstart Gas post-Flow T burn-back T crater Filler I crater Filler Soft-start When the trigger is pulled, the pre-gas starts. When the wire touches the workpiece, a pulse initiates the arc. Then, the machine starts with HotStart or upslope and finally, the welding cycle starts.
- Página 35 Operating manual Translation of the original NEOPULSE 400 CW instructions TIG (GTAW) WELDING MODE INSTALLATION AND GUIDANCE • DC TIG welding requires a protective gas shield (Argon). • Connect the earth clamp to the positive (+) plug connector. Plug in the TIG torch (ref. 046108) iinto the power source’s EURO connector and the reverse cable into the negative (-) connector.
- Página 36 Operating manual Translation of the original NEOPULSE 400 CW instructions • TACK WELDING This welding mode also allows for the pre-assembly of parts before welding, but in two stages this time: the first stage uses a pulsed DC current which concentrates the arc for better penetration. This is then followed by the second stage where a standard DC current is used to widen the arc and therefore the weld pool to secure the weld point.
- Página 37 Operating manual Translation of the original NEOPULSE 400 CW instructions Bouton principal • 4T LOG T1 - The main button is pressed, the cycle starts from Pre-Gas and stops at the I_Start phase. <0.5s <0.5s >0.5s T2 - The main button is released, the cycle continues to upslope and welding.
- Página 38 Operating manual Translation of the original NEOPULSE 400 CW instructions MMA (SMAW) WELDING MODE INSTALLATION AND GUIDANCE • Plug the cables, electrode holder and earth clamp into the plug connections. • Respect the electrical polarities and the strength of the welding power indicated on the electrode boxes.
-
Página 39: Optional Remote Control
Operating manual Translation of the original NEOPULSE 400 CW instructions ADJUSTING THE WELDING CURRENT The following settings correspond to the applicable current range depending on the type and diameter of the electrode used. These ranges are quite large as they depend on the usage and the welding position. - Página 40 Translation of the original NEOPULSE 400 CW instructions ADDITONAL FEATURES The manufacturer GYS offers a wide range of features that are compatible with your product. To check them out, scan this QR code. DEFECTS: CAUSES & SOLUTIONS SYMPTOMS POSSIBLE CAUSES...
-
Página 41: Warranty Conditions
Operating manual Translation of the original NEOPULSE 400 CW instructions You have exceeded the maximum number of You need to delete some programs. Backup error. backups. The number of backups is limited to 500. Some of your JOBs have been deleted Automatic deletion of JOBS. -
Página 42: Sicherheitshinweise
Betriebsanleitung Übersetzung der NEOPULSE 400 CW Originalbetriebsanleitung WARNUNGEN - SICHERHEITSREGELN ALLGEMEIN Die Missachtung dieser Bedienungsanleitung kann zu schweren Personen- und Sachschäden führen. Nehmen Sie keine Wartungsarbeiten oder Veränderungen an dem Gerät vor, die nicht in der Anlei- tung genannt werden. -
Página 43: Brand- Und Explosionsgefahr
Betriebsanleitung Übersetzung der NEOPULSE 400 CW Originalbetriebsanleitung SCHWEISSRAUCH/-GAS Beim Schweißen entstehen Rauchgase bzw. toxische Dämpfe, die zu Sauerstoffmangel in der Atemluft führen können. Sorgen Sie daher immer für ausreichend Frischluft, technische Belüftung (oder ein zugelassenes Atmungsgerät). Verwenden Sie die Schweßanlagen nur in gut belüfteten Hallen, im Freien oder in geschlossenen Räumen mit einer den aktuellen Sicherheitsstandards entsprechender Absaugung. -
Página 44: Elektromagnetische Felder Und Störungen
Betriebsanleitung Übersetzung der NEOPULSE 400 CW Originalbetriebsanleitung Dieses Gerät ist nicht mit der Norm IEC 61000-3-12 konform. Es liegt in der Verantwortung des Anwenders zu überprüfen, ob die Geräte für den Stromanschluss geeignet sind, bevor Sie es an das Versorgungsnetz anschließen. - Página 45 - Legen Sie die Schweißbrenner oder die Elektrodenhalter auf eine isolierte Oberfläche, wenn sie nicht benutzt werden! Die Versorgungs-, Verlängerungs- und Schweißkabel müssen komplett abgerollt werden, um ein Überhitzen zu verhindern. Der Hersteller GYS haftet nicht für Verletzungen oder Schäden, die durch unsachgemäße Handhabung dieses Gerätes entstanden sind.
- Página 46 Betriebsanleitung Übersetzung der NEOPULSE 400 CW Originalbetriebsanleitung AUFBAU - PRODUKTFUNKTION Das Gerät darf nur von qualifizierten und befugten Personen montiert und in Betrieb genommen werden. Der Aufbau darf nur im ausgeschalteten, nicht angeschlossenen Zustand vorgenommen werden. Reihen- oder Parallelschaltungen von Generatoren sind nicht zulässig. Für optimale Schweißergebnisse sollten Sie das dem Gerät beiliegende Zubehör benutzen.
- Página 47 Betriebsanleitung Übersetzung der NEOPULSE 400 CW Originalbetriebsanleitung EINBAU DER SPULE - Entfernen Sie die Düse (a) und das Kontaktrohr (b) von Ihrem MIG/MAG-Brenner. - Öffnen Sie die Generatorklappe. - Positionieren Sie die Spule auf ihrer Halterung. - Achten Sie auf den Mitnehmerzapfen (c) der Spulenhalterung. Um eine 200-mm-Spule zu montieren, ziehen Sie den Kunststoff-Spulenhalter (a) bis zum Maximum an.
- Página 48 Betriebsanleitung Übersetzung der NEOPULSE 400 CW Originalbetriebsanleitung ANSAUGEN DES KÜHLAGGREGATS Bei der ersten Verwendung kann sich die Ansaugung der Pumpe als schwierig erweisen und einen mangelnden Wasserdurchfluss verursachen. Für eine korrekte Ansaugung, wird empfohlen, den mitgelieferten Ansaugschlauch (I-19) zu verwenden und die folgenden Anweisungen zu befolgen: - Füllen Sie den Kühlmitteltank bis zum maximalen Füllstand.
- Página 49 Betriebsanleitung Übersetzung der NEOPULSE 400 CW Originalbetriebsanleitung HALBAUTOMATISCHES SCHWEISSEN ALUMINIUM (MIG-MODUS) Das Gerät ist zum Schweißen von Ø 0,8/1,6 mm Aluminiumdraht geeignet (II-B). Der Einsatz bei Aluminium erfordert ein spezielles Gas, nämlich reines Argon (Ar). Lassen Sie sich bei der Wahl des Gases von einem Gasliefe- ranten beraten.
- Página 50 Der Zugriff auf einige Schweißparameter hängt vom gewählten Anzeigemodus ab: Einstellungen/Anzeigemodus: Einfach, Expert, Erweitert. Beachten Sie die Betriebsanleitung für die Schnittstelle (HMI). SCHWEISSVERFAHREN Für weitere Informationen zu GYS-Synergien und Schweißverfahren, scannen Sie den QR-Code : HEFTSCHWEISSEN-MODUS • HEFTEN - SPOT Dieser Schweißmodus ermöglicht das Heften der Werkstücke vor dem eigentlichen Schweißprozess.
- Página 51 Betriebsanleitung Übersetzung der NEOPULSE 400 CW Originalbetriebsanleitung Vor der Zündung kommt der Draht langsam an, um den ersten Kontakt mit dem Werkstück herzustellen. Soft Start Zur Vermeidung starker Anhaftungen oder ruckartiger Aktionen wird der Strom zwischen erstem Kontakt und Schweißvorgang in Grenzen gehalten.
- Página 52 Betriebsanleitung Übersetzung der NEOPULSE 400 CW Originalbetriebsanleitung 4T Standard: T hotstart I Blackout Dstart Gas post-Flow T burn-back T crater Filler I crater Filler Soft-start Beim 4T Standardverfahren wird die Dauer von Gasvorströmung und Gasnachströmung über Zeiten gesteuert. Der Hot Start und Kraterfüller mittels Brennertaster.
- Página 53 Betriebsanleitung Übersetzung der NEOPULSE 400 CW Originalbetriebsanleitung 4T Puls: T hotstart T upslope T downslope I Blackout Dstart Gas post-Flow T burn-back T crater Filler I crater Filler Soft-start Beim 4T Pulsverfahren wird die Dauer der Gasvorströmung und Gasnachströmung zeitgesteuert. Hot Start und Kraterfüller mittels Brennertaster...
- Página 54 Betriebsanleitung Übersetzung der NEOPULSE 400 CW Originalbetriebsanleitung SCHWEISSVERFAHREN • WIG DC WIG DC ist für das Schweißen von eisenhaltigen Metallen wie Stahl und Edelstahl, aber auch Kupfer, dessen Legierungen und Titan geeignet. • WIG Synergie Der WIG Synergic-Modus funktioniert nicht mit der Auswahl DC und Schweißzykluseinstellungen sondern integriert auf Erfahrung basierte Schweißeinstellungen und -synergien.
- Página 55 Betriebsanleitung Übersetzung der NEOPULSE 400 CW Originalbetriebsanleitung BETRIEB BRENNERTASTER • 2T T1 - Brennertaste ist gedrückt, der Schweißzyklus startet (Gasvorströmung, Startstrom, Stromanstieg und Schweißstrom). T2 - Haupttaste ist gelöst, der Schweißzyklus stoppt (Stromab- senkung, Endstrom, Gasnachströmung). Beim Brenner mit 2 Tasten, und nur im 2-T-Modus, wird die Sekun- där-Taste als Haupttaste verwendet.
- Página 56 Betriebsanleitung Übersetzung der NEOPULSE 400 CW Originalbetriebsanleitung Position Schweißposition Dauer der Schutzgasnachströmung Er schützt das Werkstück und die Elektrode vor Oxidation beim Abküh- Gasnachströmung len. Wellenform Wellenform des gepulsten Anteils. Zweitstrom Zweitstrom (Kaltstrom) Kaltanteil Zeitanteil des Impuls-Heißstroms (I) Pulsfrequenz EINSTELLTIPPS: Puls- •...
- Página 57 Betriebsanleitung Übersetzung der NEOPULSE 400 CW Originalbetriebsanleitung FESTLEGUNG DER EINSTELLUNGEN Maßein- heit Prozentsatz Der Hot Start verbessert die Zündeigenschaften durch eine kurzzeitige Erhöhung des Schweißstroms. Die Hot Start Parameter sind Strom (% des Schweißstroms) und Zeit (Sekunden). Dauer Hot Start Schweißstrom...
-
Página 58: Fernbedienung (Optional)
Sobald die Fernsteuerung ausgeschaltet wird, ist das Bedienfeld der Stromquelle wieder aktiv. FUNKTIONSERWEITERUNG Der Hersteller GYS bietet eine breite Palette von Funktionen, die mit Ihrem Produkt kompatibel sind. Entdecken Sie diese, indem Sie den QR-Code scannen. FEHLER, URSACHEN, LÖSUNGEN SYMPTOME MÖGLICHE URSACHEN... - Página 59 Betriebsanleitung Übersetzung der NEOPULSE 400 CW Originalbetriebsanleitung Einstellbereich von 15 bis 20 l/min. Gasdurchfluss zu niedrig. Reinigen Sie das Basismetall. Gasflasche leer. Das Gas ersetzen. Schlechte Gasqualität. Das Gas ersetzen. Vermeiden Sie Luftzug und schützen Sie den Belüftung oder Einfluss des Windes.
-
Página 60: Advertencias - Normas De Seguridad
Manual de uso Traducción de las instrucciones NEOPULSE 400 CW originales ADVERTENCIAS - NORMAS DE SEGURIDAD CONSIGNA GENERAL Estas instrucciones se deben leer y comprender antes de toda operación. Toda modificación o mantenimiento no indicado en el manual no se debe llevar a cabo. -
Página 61: Riesgo De Fuego Y De Explosión
Manual de uso Traducción de las instrucciones NEOPULSE 400 CW originales RIESGO DE FUEGO Y DE EXPLOSIÓN Proteja completamente la zona de soldadura, los materiales inflamables deben alejarse al menos 11 metros. Cerca de la zona de operaciones de soldadura debe haber un anti-incendios. -
Página 62: Recomendaciones Para Evaluar La Zona Y La Instalación De Soldadura
Manual de uso Traducción de las instrucciones NEOPULSE 400 CW originales No enrolle cables de soldadura alrededor de su cuerpo. • no coloque su cuerpo entre los cables de soldadura. Sujete los dos cables de soldadura en el mismo lado del cuerpo;... -
Página 63: Descripción
Manual de uso Traducción de las instrucciones NEOPULSE 400 CW originales INSTALACIÓN DEL MATERIAL • La fuente de corriente de soldadura se debe colocar sobre una superficie cuya inclinación máxima sea 10°. • Coloque la máquina en una zona lo suficientemente amplia para airearla y acceder a los comandos. -
Página 64: Conexión Sobre Grupo Electrógeno
Manual de uso Traducción de las instrucciones NEOPULSE 400 CW originales INTERFAZ HOMBRE-MÁQUINA (IHM) Lea las instrucciones de uso de la interfaz (IHM) que forman parte de la documentación completa del equipo. RED ELÉCTRICA - PUESTA EN MARCHA • Este material incluye una clavija de 32 A de tipo EN 60309-1 y se debe conectar únicamente a una instalación eléctrica trifásica de 400V (50-60 Hz) de cuatro hilos con un neutro conectado a tierra. -
Página 65: Riesgo De Heridas Debidas A Los Componentes Móviles
Manual de uso Traducción de las instrucciones NEOPULSE 400 CW originales - Compruebe la marca en el rodillo para asegurarse de que los rodillos son adecuados para el diámetro del hilo y el material del hilo (para un hilo de Ø 1,2, utilice la ranura de Ø 1,2). -
Página 66: Refrigeración Líquida
Manual de uso Traducción de las instrucciones NEOPULSE 400 CW originales REFRIGERACIÓN LÍQUIDA LLENADO La reserva del equipo de refrigeración se debe llenar obligatoriamente hasta el nivel MAX aconsejado en el nivel que se encuentra en la parte frontal del equipo de refrigeración y nunca se debe dejar por debajo del indicador MIN, de lo contrario se recibirá un mensaje de error. -
Página 67: Elección De La Polaridad
El acceso a algunos parámetros de soldadura depende del modo de visualización seleccionado: Parámetros/Modo de visualización: Easy / Experto / Avanzado Consulte el manual de la IHM PROCESOS DE SOLDADURA Para obtener más información sobre las sinergias y los procesos de soldadura de GYS, escanee el código QR :... -
Página 68: Tiempo De Reacción
Manual de uso Traducción de las instrucciones NEOPULSE 400 CW originales MODO PUNTEADO • SPOT El modo de soldadura permite el pre-ensamblado de piezas antes de la soldadura. El punteado puede ser manual por el gatillo o temporizada con un retardo de punteado predefinido. El tiempo de punteado permite una mejor reproductibilidad y la realización de puntos no oxidados (accesible en el menú... -
Página 69: Ciclos De Soldadura Mig/Mag
Manual de uso Traducción de las instrucciones NEOPULSE 400 CW originales CICLOS DE SOLDADURA MIG/MAG Proceso 2T estándar: T hotstart I blackout Dstart Gas post-Flow T burn-back T crater Filler I crater Filler Soft-start Al presionar el gatillo el pregas inicia. Cuando el hilo toca la pieza un pulso inicia el arco y el ciclo de soldadura arranca. Al soltar el gatillo el devanado se detiene y un pulso de corriente permite cortar el hilo de forma limpia, el postgas sigue. - Página 70 Manual de uso Traducción de las instrucciones NEOPULSE 400 CW originales Proceso 2T Pulsado: T hotstart T downslope T upslope I blackout Dstart Gas post-Flow T burn-back T crater Filler I crater Filler Soft-start Al presionar el gatillo el pregas inicia. Cuando el cable toca la pieza, un pulso inicia el arco. Luego, la máquina comienza por el Hot-start, el Upslope, y luego el ciclo de soldadura inicia.
-
Página 71: Modo De Soldadura Tig (Gtaw)
Manual de uso Traducción de las instrucciones NEOPULSE 400 CW originales MODO DE SOLDADURA TIG (GTAW) Conexiones y consejos • La soldadura TIG DC requiere una protección gaseosa (Argón). • Conecte la pinza de masa en el conector de conexión positivo (+). Conecte la antorcha TIG (ref. 046108) en el conector EURO de la centralita y el cable de inversión en el conector de conexión negativa (-). -
Página 72: Elección Del Diámetro Del Electrodo
Manual de uso Traducción de las instrucciones NEOPULSE 400 CW originales • TACK El modo de soldadura también permite el premontaje de piezas antes de soldar, pero esta vez en dos fases: uuna primera fase de DC pulsada que concentra el arco para una mejor penetración, seguida de una segunda fase en DC estándar que ensancha el arco y, por tanto, el baño para asegurar el spot. -
Página 73: Purgado De Gas Manual
Manual de uso Traducción de las instrucciones NEOPULSE 400 CW originales Bouton principal • 4T LOG T1 - Se pulsa el botón principal, el ciclo comienza desde PreGas y se detiene en I_Start. <0.5s <0.5s >0.5s T2 - Se suelta el botón principal, el ciclo continúa en pendiente ascendente y soldadura. -
Página 74: Modo De Soldadura Mma (Smaw)
Manual de uso Traducción de las instrucciones NEOPULSE 400 CW originales MODO DE SOLDADURA MMA (SMAW) Conexiones y consejos • Conecte los cables del portaelectrodos y de la pinza de masa en los conectores. • Respete las polaridades e intensidades de soldadura indicadas sobre el embalaje de los electrodos. - Página 75 Manual de uso Traducción de las instrucciones NEOPULSE 400 CW originales AJUSTE DE LA INTENSIDAD DE SOLDADURA Los ajustes siguientes corresponden a la zona de intensidad utilizable en función del tipo y del diámetro del electrodo. Estas zonas son bastante amplias ya que dependen de la aplicación y de la posición de soldadura.
-
Página 76: Características Añadidas
Manual de uso Traducción de las instrucciones NEOPULSE 400 CW originales CARACTERÍSTICAS AÑADIDAS El fabricante GYS ofrece una amplia gama de prestaciones compatibles con su producto. Para descubrirlos, escanee el código QR. ANOMALÍAS, CAUSAS Y SOLUCIONES Anomaías Causas posibles Soluciones Limpie el tubo de contacto o cámbielo y vuelva... -
Página 77: Condiciones De Garantía
Manual de uso Traducción de las instrucciones NEOPULSE 400 CW originales Compruebe la conexión de las entradas de gas. No sale gas de la antorcha. Mala conexión del gas. Compruebe que la electroválvula funciona. Los datos del lápiz de memoria USB son Error en la descarga. -
Página 78: Algemene Instructies
Gebruikershandleiding NEOPULSE 400 CW Vertaling van de originele handleiding WAARSCHUWINGEN - VEILIGHEIDSINSTRUCTIES ALGEMENE INSTRUCTIES Voor het in gebruik nemen van dit apparaat moeten deze instructies zorgvuldig gelezen en goed be- grepen worden. Voer geen onderhoud of wijzigingen uit die niet in de handleiding vermeld staan. -
Página 79: Brand En Explosie-Risico
Gebruikershandleiding NEOPULSE 400 CW Vertaling van de originele handleiding De gasflessen moeten worden opgeslagen in een open of goed geventileerde ruimte. Ze moeten in verticale positie gehouden worden, in een houder of op een trolley. Lassen in de buurt van vet of verf is verboden. -
Página 80: Aanbevelingen Om De Laszone En De Lasinstallatie Te Evalueren
Gebruikershandleiding NEOPULSE 400 CW Vertaling van de originele handleiding Alle lassers zouden de volgende adviezen op moeten volgen om de blootstelling aan elektro-magnetische straling van het lascircuit tot een minimum te beperken: • plaats de laskabels samen - bind ze zo mogelijk onderling aan elkaar vast;... - Página 81 Gebruikershandleiding NEOPULSE 400 CW Vertaling van de originele handleiding TRANSPORT EN VERVOER VAN DE LASSTROOMBRON Gebruik niet de kabels of de toorts om het apparaat te verplaatsen. Het apparaat moet in verticale positie verplaatst worden. Til nooit het apparaat boven personen of voorwerpen.
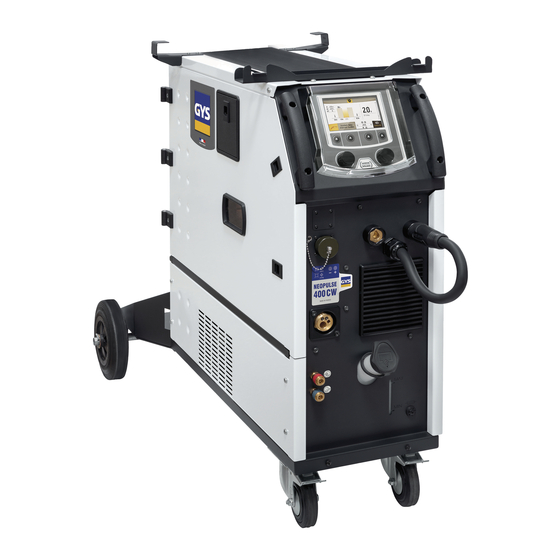
- Página 82 Gebruikershandleiding NEOPULSE 400 CW Vertaling van de originele handleiding BESCHRIJVING VAN HET MATERIAAL (I) Aansluiting gas Connector Kit NUM-1 (optioneel art. code 063938) Connector Kit NUM MIG-1 (optioneel art. code 062993) Positieve Polariteit-aansluiting AAN/UIT schakelaar Kabel ompoling Wartel (netsnoer) Analoge Aansluiting...
- Página 83 Gebruikershandleiding NEOPULSE 400 CW Vertaling van de originele handleiding INBRENGEN VAN DE LASDRAAD De rollers verwisselt u als volgt : - Draai de draaiknoppen (a) maximaal los en laat ze neerkomen. - Draai de rollen los door de borgringen (b) een kwart te draaien.
- Página 84 Gebruikershandleiding NEOPULSE 400 CW Vertaling van de originele handleiding OPSTARTEN VAN DE POMP-AS Als het apparaat langere tijd niet wordt gebruikt kan dit, samen met de aanwezigheid van onzuiverheden in de koelvloeistof, tot gevolg hebben dat de pomp van de koelgroep blokkeert. Procedure opstarten van de pomp-as : 1/ Schakel de generator uit.
-
Página 85: Semi-Automatisch Lassen Cusi En Cual (Hardsolderen)
Gebruikershandleiding NEOPULSE 400 CW Vertaling van de originele handleiding Tijdens het gebruik van de rode of blauwe mantel (lassen van aluminium) wordt aanbevolen om het accessoire 91151 (II-C) te gebruiken. Deze inox geleidingshuls zorgt voor een betere centrering van de mantel en verbetert de aanvoer van de draad. - Página 86 Gebruikershandleiding NEOPULSE 400 CW Vertaling van de originele handleiding LASPROCEDURES Voor meer informatie betreffende de GYS synergieën en de lasprocedures kunt u de QR-code scannen : PUNT MODULE • SPOT Met deze lasmodule kunnen de te lassen onderdelen voor het lassen geassembleerd worden. Het punten kan handmatig, per trekker, of getem- poriseerd gebeuren, in een van te voren gedefinieerd ritme.
- Página 87 Gebruikershandleiding NEOPULSE 400 CW Vertaling van de originele handleiding MIG/MAG LASCYCLI Procedure 2T Standaard : T hotstart I blackout Dstart Gas post-Flow T burn-back T crater Filler I crater Filler Soft-start Wanneer er op de trekker gedrukt wordt, begint Pre-gas. Wanneer de draad het werkstuk aanraakt start een puls de boog op, en vervolgens begint de lascyclus.
- Página 88 Gebruikershandleiding NEOPULSE 400 CW Vertaling van de originele handleiding Procedure 2T Puls : T hotstart T downslope T upslope I blackout Dstart Gas post-Flow T burn-back T crater Filler I crater Filler Soft-start Wanneer er op de trekker gedrukt wordt, begint Pre-gas. Wanneer het draad het werkstuk aanraakt start een puls de boog op. Vervolgens begint het apparaat met HotStart, dan de Upslope en uiteindelijk begint de lascyclus.
- Página 89 Gebruikershandleiding NEOPULSE 400 CW Vertaling van de originele handleiding TIG (GTAW) LASMODULE AANSLUITING EN ADVIEZEN • Bij TIG DC lassen moet altijd een beschermgas (Argon) worden gebruikt. • Sluit de massaklem aan op de positieve (+) aansluiting. Koppel de TIG toorts (art. code 046108) aan op de EURO connector van de generator en de omkeer-kabel op de negatieve (-) aansluiting.
- Página 90 Gebruikershandleiding NEOPULSE 400 CW Vertaling van de originele handleiding • SPOT Met deze lasmodule kunnen de te lassen onderdelen voor het lassen geassembleerd worden. Het punten kan handmatig, per trekker, of getem- poriseerd gebeuren, in een van te voren gedefinieerd ritme. Deze «punt-duur» zorgt voor een betere reproduceerbaarheid, en het realiseren van niet-geoxideerde punten.
- Página 91 Gebruikershandleiding NEOPULSE 400 CW Vertaling van de originele handleiding Bouton principal • 4T LOG T1 - De hoofd-knop is ingedrukt, de cyclus start vanuit Pre-gas en stopt in de fase l_Start. <0.5s <0.5s >0.5s T2 - De hoofd-knop wordt losgelaten, de cyclus gaat over in UpSlope en in lassen.
- Página 92 Gebruikershandleiding NEOPULSE 400 CW Vertaling van de originele handleiding MMA (SMAW) LASMODULE AANSLUITING EN ADVIEZEN • Sluit de kabels, de elektrode-houder en de massa-klem aan aan de daarvoor bestemde aansluitingen. • Respecteer de polariteiten en las-intensiteiten, zoals aangegeven op de verpakkingen van de elektroden.
- Página 93 Gebruikershandleiding NEOPULSE 400 CW Vertaling van de originele handleiding INSTELLEN VAN DE LAS-INTENSITEIT De volgende instellingen komen overeen met het intensiteitsbereik dat gebruikt kan worden, afhankelijk van het type en de diameter van de elektrode. Deze zijn betrekkelijk ruim, daar ze afhangen van de lastoepassing en de laspositie.
- Página 94 Gebruikershandleiding NEOPULSE 400 CW Vertaling van de originele handleiding TOEVOEGEN VAN FUNCTIES GYS heeft een uitgebreid assortiment aan functies, geschikt voor uw apparaat. Scan de QR-code om met deze functies kennis te maken. AFWIJKINGEN, OORZAKEN, OPLOSSINGEN SYMPTOMEN MOGELIJKE OORZAKEN OPLOSSINGEN...
-
Página 95: Garantievoorwaarden
Gebruikershandleiding NEOPULSE 400 CW Vertaling van de originele handleiding Controleer de aansluiting van het gas Geen gas aan de uitgang van de toorts. Slechte gasaansluiting. Controleer of de elektro-klep correct werkt De data op de USB-stick is onleesbaar of Fout tijdens het downloaden Controleer uw gegevens. -
Página 96: Istruzioni Generali
Manuale di utilizzo Traduzione delle istruzioni NEOUPLSE 400 CW originali AVVERTENZE - NORME DI SICUREZZA ISTRUZIONI GENERALI Queste istruzioni devono essere lette e ben comprese prima dell’uso. Ogni modifica o manutenzione non indicata nel manuale non deve essere effettuata. Ogni danno corporale o materiale dovuto ad un utilizzo non conforme alle istruzioni presenti su questo manuale non potrà essere considerato a carico del fabbricante. -
Página 97: Sicurezza Elettrica
Manuale di utilizzo Traduzione delle istruzioni NEOUPLSE 400 CW originali Le bombole devono essere posizionate in locali aperti ed aerati. Devono essere in posizione verticale su supporto o su un carrello. La saldatura è proibita se effettuata in prossimità di grasso o vernici. RISCHIO DI INCENDIO E DI ESPLOSIONE Proteggere completamente la zona di saldatura, i materiali infiammabili devono essere allontanati di almeno 11 metri. - Página 98 Manuale di utilizzo Traduzione delle istruzioni NEOUPLSE 400 CW originali • non posizionare dei corsi tra i cavi di saldatura; Tenere i due cavi di saldatura sullo stesso lato del corpo: • collegare il cavo di ritorno all’applicazione più vicina alla zona da saldare; •...
- Página 99 Manuale di utilizzo Traduzione delle istruzioni NEOUPLSE 400 CW originali INSTALLAZIONE DEL DISPOSITIVO • Mettere la fonte di corrente di saldatura su un suolo inclinato al massimo di 10°. • Prevedere una zona sufficiente per aerare il dispositivo di corrente di saldatura e accedere ai comandi. •...
-
Página 100: Interfaccia Uomo-Macchina (Ihm)
Manuale di utilizzo Traduzione delle istruzioni NEOUPLSE 400 CW originali INTERFACCIA UOMO-MACCHINA (IHM) Leggere il manuale dell’interfaccia (IHM) che fa parte della documentazione completa del dispositivo. ALIMENTAZIONE - ACCENSIONE • Questo materialeè fornito con presa 32 A di tipo EN 60309-1 e non deve essere utilizzato se non su una installazione elettrica trifase 400V (50-60 Hz) a quattro fili con un neutro collegato a terra. - Página 101 Manuale di utilizzo Traduzione delle istruzioni NEOUPLSE 400 CW originali - Controllare l’annotazione sul rullo per verificare che i rulli siano adatti al diamentrodel filo e al materiale del filo (per un filo di Ø 1.2, utilizzare la scanalatura di Ø 1.2). - Utilizzare i rulli con scanalatura a V per i fili d’acciaio e per gli altri fili duri.
- Página 102 Manuale di utilizzo Traduzione delle istruzioni NEOUPLSE 400 CW originali RAFFREDDAMENTO A LIQUIDO RIEMPIMENTO Il serbatoio dell’unità di raffreddamento deve essere imperativamente riempito fino al livello MAX consigliato dal manometro indicato sul retro del dispositivo, ma non deve mai essere sotto il livello MIN soggetto ad un avvertimento. Utilizzare imperativamente un liquido di raffreddamento specifico per le macchine saldatrici aventi una debole conduzione elettrica, essendo anticorrosivo e antigel (rif.
-
Página 103: Connessione Gas
L’accesso a certi parametri di saldatura dipende dalla modalità di visualizzazione selezionata : Parametri/ Modalità di visualizzazione : Easy, Ex- pert, Avanzato. Fare riferimento al manuale dell’IHM. PROCESSI DI SALDATURA Per avere maggiori informazioni sulle sinergie GYS e i processi di saldatura, scannerizzare il QR code:... - Página 104 Manuale di utilizzo Traduzione delle istruzioni NEOUPLSE 400 CW originali MODALITÀ DI PUNTATURA • SPOT Questa modalità di saldatura permette di pre-assemblare i pezzaprima della saldatura. La puntatura può essere manuale attraverso il pulsante o cronometrato con un tempo di puntamento predefinito. Questo tempo di puntatura permette una miglior riproducibilità e la realizzazione del punto non ossidato (accessibile dal menù...
- Página 105 Manuale di utilizzo Traduzione delle istruzioni NEOUPLSE 400 CW originali CICLI DI SALDATURA MIG/MAG Processo standard 2T T hotstart I blackout Dstart Gas post-Flow T burn-back T crater Filler I crater Filler Soft-start Premendo il pulsante il pre-gas comincia. Quando il filo tocca il pezzo una pulsazione fa avviare l’arco, poi il ciclo di saldatura comincia. Al rilascio del pulsante il dipanamento si ferma e una pulsazione di corrente permette di tagliare il filo in modo appropriato seguito dal post gas.
- Página 106 Manuale di utilizzo Traduzione delle istruzioni NEOUPLSE 400 CW originali Processo 2 Tempi pulsato : T hotstart T downslope T upslope I blackout Dstart Gas post-Flow T burn-back T crater Filler I crater Filler Soft-start Premendo il pulsante il pre-gas comincia. Quando il filo tocca il pezzo una pulsazione fa avviare l’arco, poi il ciclo di saldatura comincia. Poi, il dis- positivo comincia con l’Hot-start, l’Upslope e infine inizia il ciclo di saldatura.
- Página 107 Manuale di utilizzo Traduzione delle istruzioni NEOUPLSE 400 CW originali MODALITÀ DI SALDATURA TIG (GTAW) COLLEGAMENTO E CONSIGLI • La saldatura TIG DC richiede una protezione gas (Argon). • Collegare il morsetto di massa al connettore di raccordo positivo(+). Collegare la torcia TIG (ref. 046108) nel connettore EURO del generatore e il cavo di inversione nel connettore del raccordo negativo (-).
-
Página 108: Comportamento Pulsante
Manuale di utilizzo Traduzione delle istruzioni NEOUPLSE 400 CW originali • TACK La modalità di saldatura permette anche di preassemblare dei pezzi prima della saldatura, ma questa volta in due fasi: una prima fase DC pulsata che concentra l’arco per una miglior penetrazione, seguita da una seconda in DC standard ampliando l’arco e dunque il bagno per assicurare il punto. I tempi regolabili delle due fasi permettono una migliore riproducibiltà... - Página 109 Manuale di utilizzo Traduzione delle istruzioni NEOUPLSE 400 CW originali Bouton principal • 4T LOG T1 - Il pulsante principale è premuto, il ciclo si avvia a partire dal PreGas e si arresta nella fase di I_Start. <0.5s <0.5s >0.5s T2 - Il pulsante principale è...
- Página 110 Manuale di utilizzo Traduzione delle istruzioni NEOUPLSE 400 CW originali PARAMETRI DEL PROCESSO Processi di saldatura Parametri Regolazioni Standard Pulsato Rutilo Il tipo di elettrodo determina parametri specifici in base al tipo di elettro- Tipo di elettrodo Basico do utilizzato per ottimizzare la sua saldabilità. Cellulosico Si consiglia di rimuovere l’elettrodo in modo sicuro durante l’incollaggio Anti-Sticking...
- Página 111 Dopo che l’interfaccia viene spento o disattivato, l’interfaccia del genera- tore viene riattivato. PIU’ FUNZIONALITA’ Il produttore GYS propone un’ampia gamma di funzionalità compatibili con il vostro prodotto. Per scoprirle, scannerizzare il QR code.
-
Página 112: Anomalie, Cause, Rimedi
Manuale di utilizzo Traduzione delle istruzioni NEOUPLSE 400 CW originali ANOMALIE, CAUSE, RIMEDI SINTOMI POSSIBILI CAUSE RIMEDI Pulire il tubo contatto oppure cambiarlo e Dei residui ostruiscono il foro. rimettere del prodotto anti-adesione. Il filo scivola nei rulli. Rimettere del prodotto anti-adesione. Il flusso del filo di saldatura non è... -
Página 113: Condizioni Di Garanzia
Manuale di utilizzo Traduzione delle istruzioni NEOUPLSE 400 CW originali CONDIZIONI DI GARANZIA La garanzia copre ogni difetto di fabbricazione per 2 anni, a partire dalla data d’acquisto (pezzi e mano d’opera). La garanzia non copre: • Ogni danno dovuto al trasporto. •... -
Página 114: Pièces De Rechange
Pièces de rechange NEOPULSE 400 CW SPARE PARTS / ERSATZTEILE / PIEZAS DE REPUESTO / ЗАПАСНЫЕ ЧАСТИ / RESERVE ONDERDELEN / PEZZI DI RICAMBIO Roue pivotante / Rueda giratoria / Поворотное колесо / Zwenkwieltje / Ruota girevole 71360 Roue arrière / Rueda trasera / Заднее колесо / Achterwiel / Ruote posteriori 71735 Circuit groupe froid / Circuito equipo de refrigeración / Цепь... - Página 115 Pièces de rechange NEOPULSE 400 CW Fusible / Fusible / Плавкий предохранитель / Zekering / Fusibile 51401 Grille de protection avant / Rejilla de protección frontal / Передняя защитная решетка / Beschermrooster voor / Griglia di 51010 protezione anteriore Câble d’inversion de polarité + presse étoupe / Cable de polaridad inversa + prensaestopas / Кабель инверсии полярности + A0117 сальник...
-
Página 116: Schéma Électrique
Schéma électrique NEOPULSE 400 CW CIRCUIT DIAGRAM / SCHALTPLAN / DIAGRAMA ELECTRICO / ЭЛЕКТРИЧЕСКАЯ СХЕМА / ELEKTRISCHE SCHEMA / SCEMA ELETTRICO... -
Página 117: Spécifications Techniques
Spécifications Techniques NEOPULSE 400 CW TECHNICAL SPECIFICATIONS / TECHNISCHE DATEN / ESPECIFICACIONES TÉCNICAS / ТЕХНИЧЕСКИЕ СПЕЦИФИКАЦИИ / TECHNISCHE GEGEVENS / SPECIFICHE TECNICHE NEOPULSE 400 CW Primaire / Primary / Primär / Primario / Первичка / Primaire / Primario Tension d’alimentation / Power supply voltage / Versorgungsspannung / Tensión de red eléctrica / Напряжение... - Página 118 Pictogrammes NEOPULSE 400 CW SYMBOLS / ZEICHENERKLÄRUNG / ICONOS / СИМВОЛЫ / PICTOGRAMMEN / ICONE Attention ! Lire le manuel d’instruction avant utilisation. Warning ! Read the user manual before use. ACHTUNG ! Lesen Sie diese Anleitung sorgfältig durch vor Inbetriebnahme des Geräts.
- Página 119 Pictogrammes NEOPULSE 400 CW Matériel conforme aux normes Marocaines. La déclaration C( مCMIM) de conformité est disponible sur notre site (voir à la page de couverture). Equipment in conformity with Moroccan standards. The declaration C( مCMIM) of conformity is available on our website (see cover page).
- Página 120 GYS France GYS Italia Siège social / Headquarter Filiale / Filiale 1, rue de la Croix des Landes - CS 54159 Vega – Parco Scientifico Tecnologico di 53941 Saint-berthevin Cedex Venezia France Via delle Industrie, 25/4 30175 Marghera - VE www.gys.fr...
-
Página 121: Version Du Logiciel
NEOPULSE 220 C NEOPULSE 220 C XL NEOPULSE 320 C NEOFEED 4W NEOPULSE 400 CW Version du logiciel Cette notice décrit les versions de logiciel suivantes : 1.86 La version logicielle de l’interface est affichée dans le menu général : Information / MMI... - Página 122 Utilisation de l’interface machine Commande du générateur L’écran principal contient toutes les informations nécessaires pour le procédé de soudage avant, pendant et après le soudage (l’interface peut légèrement évoluer en fonction du procédé sélectionné). (1) Nom d’utilisateur / traçabilité Bouton poussoir n°1 : Menu général ou Retour au menu précédent Bouton poussoir n°2 :...
-
Página 123: Paramètres (Utilisateur)
Procédés L’accès à certains procédés de soudage dépend du produit : MIG-MAG (GMAW/FCAW) Soudage semi-automatique, sous atmosphère protectrice (GTAW) Soudage à l’arc avec électrode non fusible, sous atmosphère protectrice (SMAW) Soudage à l’arc avec électrode enrobée Gougeage Gougeage à l’arc-air permettant de creuser un sillon dans le métal Paramètres (utilisateur) Mode d’affichage... - Página 124 Utilisation de l’interface machine Système Nom de l’appareil Information relative au nom de l’appareil et possibilité de le personnaliser en appuyant sur de l’interface. Horloge Réglage de l’heure, la date et format (AM / PM). Groupe froid - OFF : le groupe de refroidissement est désactivé. - ON : le groupe de refroidissement est actif en permanence.
-
Página 125: Affichage De L'utilisateur
Utilisateurs Le mode utilisateur permet de partager le produit avec plusieurs utilisateurs. Au premier démarrage, la machine est en mode Admin. L’administrateur peut créer des utilisateurs. Chaque utilisateur à sa propre configuration (mode , réglage , procédé, JOBs … ) et celle-ci n’est pas modifiable par un autre utilisateur. Chaque utilisateur a besoin d’un code per- sonnel à... - Página 126 Utilisation de l’interface machine Traçabilité Cette interface de gestion de soudage permet de tracer/enregistrer toutes les étapes de l’opération de soudage, cordon par cordon, lors d’une fabrication industrielle. Cette démarche qualitative assure une qualité de soudage post-production per- mettant l’analyse, l’évaluation, le reporting et la documentation des paramètres de soudage enregistrés. Cette fonctionnalité permet la collecte précise et rapide ainsi que la sauvegarde des données demandées dans le cadre de la norme EN ISO 3834.
- Página 127 Portabilité Import Config. Chargement de la configuration machine depuis la clé USB (répertoire : Disque amovible\PORTABILITY\CONFIG) vers la machine. Un appui long sur permet de supprimer les configarations de la clé USB. Export Config. Exportation de la configuration machine vers la clé USB (répertoire : Disque amovible\PORTABILITY\CONFIG). Import Job Importation des Jobs selon les procédés présents sous le répertoire Disque amovible\PORTABILITY de la clé...
-
Página 128: Codes Erreur
Le tableau suivant présente une liste non exhaustive de messages et codes d’erreur qui peuvent apparaitre. Effectuer ces vérifications et contrôles avant de faire appel à un technicien spécialisé GYS agréé. Si l’utilisateur doit ouvrir son produit, il est obligatoire de couper l’alimentation en débranchant la prise électrique et d’attendre 2 minutes par sécurité. - Página 129 Le code personnel est erroné, saisir le bon code. Code utilisateur erroné Par défaut, ce code est 0000. Si un code erreur non répertorié apparait ou que vos problèmes persistent, contactez le SAV GYS. Icones d’alertes (Warning) Les icônes d’alertes en haut à droite de l’écran vous donnent des renseignements sur votre produit.
-
Página 130: Software-Version
Produkten NEOPULSE 220 C NEOPULSE 220 C XL NEOPULSE 320 C NEOFEED 4W NEOPULSE 400 CW Software-Version In dieser Anleitung werden die folgenden Software-Versionen beschrieben: 1.86 Die Software-Version des Bedienfelds wird im Menü „Allgemein“ angezeigt: Informationen / MMI (Mensch-Maschine-Sch-... - Página 131 Bedienung des Bedienfeldes Steuerung der Stromquelle Der Hauptbildschirm enthält alle notwendigen Informationen für das Schweißverfahren vor, während und nach dem Schweißen (das Bedienfeld kann sich je nach gewähltem Prozess leicht ändern). (1) Name des Bedieners / Rückverfolgbarkeit Drucktaste Nr. 1: Menü...
- Página 132 Verfahren Der Zugriff zu bestimmten Verfahren hängt vom Gerät ab: MIG-MAG (GMAW/FCAW) Halbautomatisches Schweißen, mit Schutzgas (GTAW) Schweißen mit nicht abschmelzender Elektrode, mit Schutzgas. (SMAW) Schweißen mit umhüllter Elektrode Fugenhobeln Druckluft-Lichtbogenart, um Metall oder Schweißgut abzutragen. Parameter (Bediener) Anzeigemodus - Einfach: Einfache Anzeige mit eingeschränkten Funktionen (kein Zugang zum Schweißzyklus). - Expert: Vollständige Anzeige, ermöglicht die Einstellung der Dauer und Zeiten der verschiedenen Phasen desSchweißzyklus.
- Página 133 Bedienung des Bedienfeldes System Name des Geräts Information zum Namen des Geräts, und zur Möglichkeit der Personalisierung durch Drücken auf auf dem Bedienfeld. Uhrzeit Einstellung der Uhrzeit und des Datums im Format (AM / PM). Kühlaggregat - OFF (AUS): Das Kühlaggregat ist deaktiviert. - ON (EIN): Das Kühlaggregat ist dauernd in Betrieb.
- Página 134 Bediener Über den Bediener-Modus kann das Gerät mit anderen Bedienern geteilt werden. Beim ersten Start befindet sich das Gerät im Admin-Modus. Der Administrator kann Bediener anlegen. Jeder Bediener hat seine persönlicheKonfiguration (Modus, Einstellung, Schweißverfahren, JOBs …). Sie kann von anderen Bedienern nicht geändert werden. Jeder Be- diener benötigt seinen vierstelligen Bediener-Code, um sich an der Stromquelle anmelden zu können.
- Página 135 Bedienung des Bedienfeldes Rückverfolgbarkeit Diese Schweißmanagement-Funktion ermöglicht es, alle Phasen des Schweißvorgangs während der industriellen Fertigung Naht für Naht aufzuzeichnen. Dieser qualitativ orientierte Ansatz gewährleistet die Schweißqualität der Produktion und er- möglicht die Analyse, Bewertung, Protokollierung und Dokumentation der aufgezeichneten Schweißparameter. Mit dieser Funktion können die von der Norm EN ISO 3834 geforderten Daten genau und schnell erfasst und gespeichert werden.
- Página 136 Portability (Portabilität) Import Config. (Import von Konfigurationen) Laden der Konfiguration des Schweißgeräts von einem USB-Stick (Verzeichnis: Wechseldatenträger\PORTABILITY\ CONFIG) in das Schweißgerät. Ein langes Drücken auf erlaubt, alle Konfigurationen von dem USB-Stick zu löschen. Export Config. (Export von Konfigurationen) Export der Konfiguration des Schweißgeräts auf einen USB-Stick (Verzeichnis: Wechseldatenträger\PORTABILITY\ CONFIG).
- Página 137 Die folgende Tabelle enthält eine nicht vollständige Liste von Meldungen und Fehlercodes, die möglicherweise erscheinen können. Führen Sie diese Prüfungen und Kontrollen durch, bevor Sie einen autorisierten Servicetechniker von GYS heran- ziehen. Wenn der Bediener sein Gerät öffnen muss, ist es zwingend vorgeschrieben, die Stromzufuhr durch Ziehen des Netzsteckers zu unterbrechen und zur Sicherheit 2 Minuten zu warten.
- Página 138 Drücken Sie auf den Brennertaster und lassen Bleibt das Problem bestehen, führen Sie eine Aktualisierung durch Sie ihn los, um zu löschen (über Planet GYS). Probleme beim Starten des Schweißvorgangs Überprüfen Sie die Einstellungen der Stromquelle und der Installation Überprüfen Sie Ihre Schweißparameter (Schweißdraht, Rollen, Gas, Brenner usw.)
- Página 139 Bedienung des Bedienfeldes Warnsymbole (Warnung) Die Warnsymbole oben rechts auf dem Bildschirm geben Ihnen Auskunft über Ihr Gerät. Alarmsymbol Bedeutung Demo-Modus Schweißen ist inaktiv. Überprüfen Sie Ihre Elektroinstallation (Abschnitt Spannung) Kühlkreislauf verstopft. Prüfen Sie die Kontinuität der Zirkulation der Kühlflüssigkeit des Brenners. Batterie des Bedienfelds leer.
- Página 140 со следующими продуктами NEOPULSE 220 C NEOPULSE 220 C XL NEOPULSE 320 C NEOFEED 4W NEOPULSE 400 CW Версия ПО В данном руководстве описаны следующие версии программного обеспечения: 1.86 Версия программного обеспечения интерфейса отображается в общем меню: Информация / MMI...
- Página 141 Использование интерфейса машины Управление источником Главный экран содержит всю информацию, необходимую для процесса сварки до, во время и после сварки (интерфейс может немного измениться в зависимости от выбранного процесса). (1) Имя пользователя / отслеживаемость Кнопка n°1 : Главное меню или Возврат в предыдущее...
- Página 142 Метод сварки Доступ к определенным методам сварки зависит от конкретного продукта MIG-MAG (GMAW/FCAW) Полуавтоматическая сварка в защитной атмосфере (GTAW) Дуговая сварка негорючим электродом в защитной атмосфере (SMAW) Дуговая арка с электродом с покрытием Строжка Воздушно-дуговая строжка для вырезания канавки в металле Настройки...
-
Página 143: Система Охлаждения
Использование интерфейса машины Система Название аппарата Информация о названии устройства и возможность его персонализации путем использования интерфейса Часы Установка времени, даты и формата (AM / PM). Система охлаждения - ВЫКЛ:: блок охлаждения отключен. - ВКЛ : блок охлаждения активен беспрерывно. - AUTO : автоматическое... - Página 144 Пользователи Режим пользователя позволяет делить аппарат между несколькими пользователями. При первом запуске аппарат в режиме «Админ» Администратор может создавать пользователей Каждый пользователь имеет свои собственные настройки (режим, конфигурации jobs, метод сварки) и пользователи не могут изменять настройки других пользователей Каждый пользователь должен иметь четырехзначный код чтобы подключиться к...
- Página 145 Использование интерфейса машины Отслеживаемость Этот интерфейс управления сваркой позволяет отслеживать/записывать все этапы сварки шов за швом во время изготовления промышленного изделия. Эта методика управления качеством обеспечивает качество сварки после производства, что позволяет провести анализ, оценку, отчетность и документацию сохраненных сварочных параметров. Эта...
- Página 146 Мобильность Загрузить Конфигурацию Загрузка конфигурации машины с USB-носителя (каталог : Съемный диск \ Мобильность \ Настройки) на машину. Длительное нажатие на клавишу удаляет настройки с USB карты. Экспортировать Конфигурацию Экспорт конфигурации машины на USB карту (каталог: Съемный диск\ Мобильность\ Настройки) Загрузить...
- Página 147 В следующей таблице приведен неполный список сообщений и кодов ошибок, которые могут появиться. Выполните эти проверки и контроль перед тем, как вызвать авторизованного сервисного специалиста GYS. Если пользователю необходимо вскрыть изделие, обязательно необходимо отключить аппарат от розетки, и подождать 2 минуты...
- Página 148 Проверьте настройки и установку генератора (присадочная Перегрузка, Проверьте настройки проволока, ролики, газ, резак и т.д.) Нажмите и отпустите триггер чтобы удалить. Если проблема не устраняется, обновитесь (через Planet GYS) Проблема начала сварки Проверьте настройки и установку генератора (присадочная Проверьте настройки сварки...
- Página 149 Использование интерфейса машины Иконки предупреждение (Warning) Значки предупреждений в верхней правой части экрана дают информацию о вашем продукте. Значки Значение предупреждений Режим Демонстрация. Сварка неактивна. Проверьте электроустановку (сетевое напряжение). Забита система охлаждения. Проверьте непрерывность циркуляции охлаждающей жидкости горелки. Батарейка интерфейса разряжена. Замените батарею (CR2032) и обновите дату и время изделия (Система/ Часы).
-
Página 150: Versione Del Software
NEOPULSE 220 C NEOPULSE 220 C XL NEOPULSE 320 C NEOFEED 4W NEOPULSE 400 CW Versione del software Questo manuale descrive le versioni dei seguenti software: 1.86 La versione software dell’interfaccia viene visualizzata nel menù generale: Informazione / MMI... -
Página 151: Comando Del Generatore
Utilizzo dell’interfaccia macchinaù Comando del generatore Il display principale contiene tutte le informazioni necessarie per il procedimento di saldatura prima, durante e dopo la saldatura (l’interfaccia può leggermente evolvere in funzione del procedimento selezionato). (1) Nome utilizzatore / tracciabilità Pulsante n°1 : Menù... - Página 152 Processi L’accesso a certi processi di saldatura dipende dal prodotto: MIG-MAG (GMAW/FCAW) Saldatura semi-automatica, in atmosfera protetta. (GTAW) Saldatura ad arco con elettrodo non fusibile, in atmosfera protetta (SMAW) Saldatura ad arco con elettrodo rivestito Scriccatura Scriccatura ad arco-aria permette di creare un solco nel metallo Parametri (utilizzatore) Modalità...
- Página 153 Utilizzo dell’interfaccia macchinaù Sistema Nome dell’apparecchio Informazione relativa al nome dell’apparecchio e possibilità di personalizzarlo premendo nell’interfaccia. Orologio Regolazione dell’ora, data e formato (AM / PM). Unità di raffreddamento - OFF : l’unità di raffreddamento è disattivata. - ON : l’unità di reffreddamento è attiva in modo permanente. - AUTO : gestione automatica (attivazione alla saldatura e disattivazione dell’unità...
- Página 154 Utilizzatori La modalità utizzatore permette di condividere il prodotto con più utilizzatori. Al primo avvio, la macchina è in modalità Admin. L’amministratore può creare degli utilizzatori. Ogni utilizzatore ha la sua propria configurazione (modalità, rego- lazione, procedimento, JOB… ) e questa non è modificabile da nessun altro utilizzatore. Ogni utilizzatore ha bisogno di un codice personale a 4 cifre al fine di potersi connettere sul generatore.
- Página 155 Utilizzo dell’interfaccia macchinaù Tracciabilità Qusto interfaccia di gestione della saldatura permette di tracciare/registrare tutte le tappe dell’operazione di saldatura, cordolo per cordolo, durante una fabbricazione industriale. Questo approccio qualitativo garantisce la qualità della saldatura post-pro- duzione consentendo l’analisi, la valutazione, la reportistica e la documentazione dei parametri di saldatura registrati. Questa funzionalità...
- Página 156 Trasportabilità Import Config. Caricamento della configurazione macchina dalla chiavetta USB (repertorio : Disco mobile\Portability\Config) alla macchina. Premere a lungo permette di eleminare le configurazioni dalla chiavetta USB. Export Config. Esportazione della configurazione macchina alla chiavetta USB (repertorio : Disco mobile\Portability\Config). Import Job Importazione dei Job a seconda dei procedimenti sotto il repertorio Disco mobile\Portability dalla chiavetta USB alla macchina.
-
Página 157: Codici Errore
La seguente tabella presenta una lista non esaustiva dei messaggi e codici di errore che possono apparire. Effettuare queste verifiche e controlli prima di ricorrere all’aiuto di un tecnico specializzato GYS autorizzato. Se l’utilizzatore deve aprire il suo prodotto, è obbligatorio staccare l’alimentazione scollegando la presa di corrente elettrica e aspettare 2 minuti per sicurezza. - Página 158 Codice utilizzatore sbagliato In automatico, il codece è 0000. Se un codice errore non epertoriato appare o nnel caso in cui il problema persista, contattare il SPV GYS. Icone di allerta (Warning) Le icone di allerta in alto a destra dello schermo vi danno delle indicazioni sul vostro prodotto.