Tabla de contenido
Publicidad
Idiomas disponibles
Idiomas disponibles
Enlaces rápidos
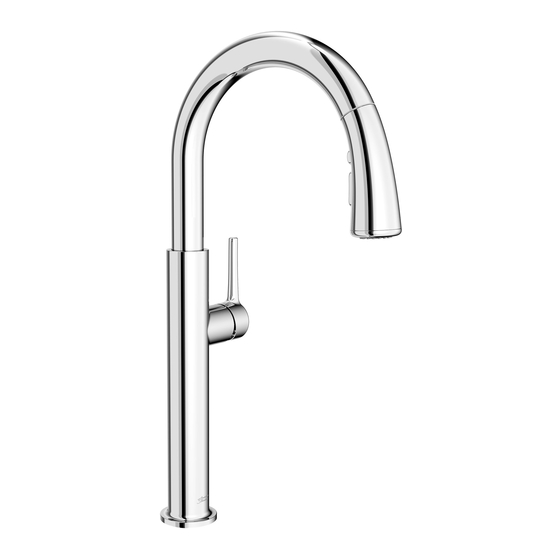
Studio-S
®
Pull-Down Kitchen Faucet
Thank you for selecting American Standard...
the benchmark of fine quality for over 140 years.
To ensure that your installation proceeds smoothly-please read
these instructions carefully before you begin.
RECOMMENDED TOOLS
Flat Blade Screwdriver
1
INSTALL FAUCET
Turn off water at
CAUTION
main supply
• Make certain the SEAL (1) is properly seated in recess of
spout base.
• Insert all HOSES (2) and SHANK (3) through MOUNTING
RING (4) and mounting surface. Do not use putty.
• Insert HOSES (2) through RUBBER WASHER (5), BRASS
WASHER (6), and threaded LOCKNUT (7).
• Assemble RUBBER WASHER (5), BRASS WASHER (6), and
threaded LOCKNUT (7) onto SHANK (3) from underside
of sink or mounting surface. Hand tighten LOCKNUT (7).
• Use a screwdriver to tighten SCREWS (8) on LOCKNUT (7).
Work your way around LOCKNUT (7), tightening the screws
slightly each time until all are snug to ensure even pressure.
Product names listed herein are trademarks of AS America, Inc.
© AS America, Inc. 2019
INSTALLATION
INSTRUCTIONS
Phillips Screwdriver
- 1 -
4803300
Certified to comply with ANSI A112.18.1M
Certified to comply with ANSI A112.18.1M
Adjustable Wrench
SPOUT BASE
2
6
7
Plumbers' Putty or Caulking
4
1
3
2
5
8
M985011 (3/19)
Publicidad
Tabla de contenido

Manuales relacionados para American Standard Studio-S 4803300.002


Resumen de contenidos para American Standard Studio-S 4803300.002
- Página 1 4803300 Studio-S ® Pull-Down Kitchen Faucet Thank you for selecting American Standard... the benchmark of fine quality for over 140 years. To ensure that your installation proceeds smoothly-please read these instructions carefully before you begin. Certified to comply with ANSI A112.18.1M Certified to comply with ANSI A112.18.1M...
- Página 2 MAKE WATER SUPPLY CONNECTIONS BLUE • Turn off hot and cold water supplies before beginning. STRIPE STRIPE • Connect FLEXIBLE SUPPLY HOSES (1, 2) directly to wall supplies. Connection on fitting supplies are 3/8" compression. Connect left supply hose (Red Stripe) to Hot wall supply.
-
Página 3: Care Instructions
CHECK CONNECTIONS FOR LEAKS • Move HANDLE into “off” position. • Turn on water supplies and check connections for leaks. • Operate HANDLE up and down, left and right to flush water lines thoroughly. • Operate HAND SPRAY and check connections for leaks. CHECK CONNECTIONS FOR LEAKS SERVICE... -
Página 4: Outils Recommandés
D’INSTALLATION 4803300 Studio-S Robinet de cuisine amovible Nous vous remercions d’avoir choisi American Standard… synonyme de qualité supérieure depuis plus de 140 ans. Pour que l’installation se déroule sans problème, veuillez lire attentivement ces instructions avant de commencer. Certifié conforme aux normes ANSI A112.18.1M OUTILS RECOMMANDÉS... - Página 5 RACCORDS DE L’ALIMENTATION EN EAU BANDE • Fermez l’alimentation en eau chaude et en eau froide avant de BANDE BLEUE commencer. ROUGE • Raccordez les TUYAUX D’ALIMENTATION FLEXIBLES (1, 2) directement à l’alimentation murale. La connexion des raccords d’alimentation est une compression de 3/8 po. Raccordez le tuyau d’alimentation gauche (bande rouge) à...
- Página 6 VÉRIFIER L’ÉTANCHÉITÉ DES RACCORDS • Abaisser la POIGNÉE en position fermée. • Ouvrir l’alimentation d’eau et vérifier l’étanchéité des raccords. • Actionner la POIGNÉE de haut en bas et de gauche à droite pour faire circuler l’eau complètement. VÉRIFICATION DE •...
-
Página 7: Herramientas Recomendadas
® Llave para cocina con manija para tirar hacia abajo Gracias por elegir American Standard, el punto de referencia de óptima calidad durante más de 140 años. Para realizar la instalación sin problemas, lea atentamente estas instrucciones antes de comenzar. -
Página 8: Realizar Las Conexiones De Los Suministros De Agua
REALIZAR LAS CONEXIONES DE LOS SUMINISTROS DE AGUA RAYA RAYA AZUL • Apague los suministros de agua caliente y fría antes de comenzar. ROJA • Conecte las MANGUERAS FLEXIBLES DE SUMINISTRO (1, 2) directamente a los suministros de la pared. La conexión en los suministros tiene una compresión de 3/8". -
Página 9: Comprobación De Fugas En Las Conexiones
COMPROBACIÓN DE FUGAS EN LAS CONEXIONES • Desplace la MANIJA a la posición de cierre. • Abra los suministros del agua y revise si hay fugas en las conexiones. • Mueva la MANIJA hacia arriba y abajo, a izquierda y derecha, para hacer correr el agua por las tuberías.