Publicidad
Enlaces rápidos
BEFORE USING THE DEVICE, PLEASE READ THE FOLLOWING INSTRUCTIONS
COMPLETELY AND CAREFULLY. CORRECT APPLICATION IS VITAL TO THE
PROPER FUNCTIONING OF THE DEVICE.
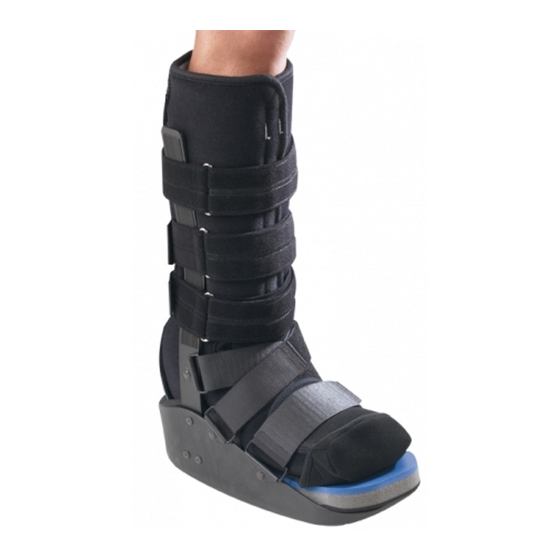
INTENDED USE/INDICATIONS: Support and management of edema for acute ankle sprains,
soft tissue injuries of the lower leg, stress fractures of the lower leg, stable fractures of the foot
and ankle, stable delayed union or non-union fractures of the distal tibia and fibula, Achilles
tendon repairs, Bunionectomies, Metatarsal Fracture, Forefoot, midfoot and hindfoot injury.
CONTRAINDICATIONS: Not for use on patients with compromised sensation in the foot and
ankle region. Application of this device is recommended only when the fracture is demonstra-
bly stable and there are acceptable limits of angular and rotational deformity. The determina-
tion of when to apply the brace rests strictly at the discretion of the treating physician.
PRESCRIBING INFORMATION: Inflate and deflate bladder once before use to ensure integrity
of the air chamber. This product was designed to complement the variety of medical treat-
ments common to the above afflictions. Your prescribing Healthcare professional should deter-
mine the frequency and duration of use. Note: Due to the molded outer sole, the orthopedic
walker may be slightly higher than a normal street shoe, therefore an athletic shoe or a street
shoe with a 1⁄2" heel, may be worn if necessary for patient comfort. A heel lift also may be used
in the shoe worn on the non-affected foot.
1
2
WARNINGS AND PRECAUTIONS: Always consult with your physician or therapist before
making changes to the brace. This product is to be used under the supervision of a medical
professional. This device is not intended for unsupervised public use. If you experience any
pain, swelling, sensation changes, any unusual reaction while using this product, consult your
medical professional.
APPLICATION INFORMATION: For first time application, loosen all straps and remove liner
from boot.
1) Place foot in liner and secure with contact closure. Make sure the heel fits snugly into the
posterior portion of the liner. Secure the forefoot flap on the liner first followed by the lower
3
leg portion. Make sure liner fits snug top to bottom.
2) Both uprights may be shortened by 2" to accommodate various patient heights. Note:
Remove soft Velcro
To Breakdown Uprights: Secure uprights on edge of table or hard surface. Firmly push down
2
on breakdown portion of bar. Soft Velcro strips are included at top of each liner. Following
1
breakdown of bars, the strips should be applied to top of uprights.
3) Spread the uprights using both hands and step into boot, aligning uprights with midline of
the ankle. Remove plastic sheaths on uprights and secure liner. The uprights may be bent
to accommodate any leg contour.
4) The two straps at the ankle joint may be adapted to accommodate individual patient needs.
Prior to securing bootstraps, determine desired ankle strapping method.
3
4a
Ankle Cross Strap Conversion: 4a) Strap 3 is removable and may be secured by feeding
through d-ring on opposing upright. 4b) If Cross Strapping is desired, feed Strap 3 through
opposing forefoot d-ring. Cross Strap 2 over Strap 3, feed through d-ring on opposing
upright and secure. Secure all other bootstraps, starting at the toes and working up the
leg. Note: The ankle version has only one strap around the lower leg.
5) To inflate air liner press and release the air bulb serveral times until liner is providing
comfortable cushion and support. DO NOT OVER INFLATE.
6) To release air from the walker liner, turn the inflation/deflation knob several times coun-
ter-clockwise. When re-inflating, turn knob clockwise until snug. Release air if liner
feels too tight. Caution: If liner feels too tight while wearing product, deflate the liner
by turning inflation/deflation knob counter clockwise. Consult your medical professional
immediately.
3
Instructions for Range-of-Motion hinge adjustment: Slide open cap cover. Turn hinge cap
cover to expose pins. Release pins, select correct settings and reinsert pins. Close cap cover.
2
To lock uprights in fixed 90° angle, set both pin settings at 0°. To lock in 7.5°, 15°, 22.5° or
1
30° of plantar or dorsiflexion, set one pin at desired setting in location marked "lock" and
second pin in corresponding (same number) setting in the open opposing position.
!
side of Walker to match the new settings.
CLEANING INSTRUCTIONS: To clean liner, hand wash in cold water using mild soap. Air dry.
4b
5
Note: If not rinsed thoroughly, residual soap may cause irritation and deteriorate material.
WARRANTY: dj Orthopedics, LLC will repair or replace all or part of the unit and its accessories
for material or workmanship defects for a period of six months from the date of sale.
!
Patent pending.
For single patient use only.
!
NOTICE: WHILE EVERY EFFORT HAS BEEN MADE IN STATE-OF-THE-ART TECHNIQUES TO OBTAIN THE MAXI-
MUM COMPATIBILITY OF FUNCTION, STRENGTH, DURABILITY AND COMFORT, THIS DEVICE IS ONLY ONE
ELEMENT IN THE OVERALL TREATMENT PROGRAM ADMINISTERED BY A MEDICAL PROFESSIONAL. THERE
IS NO GUARANTEE THAT INJURY WILL BE PREVENTED THROUGH THE USE OF THIS PRODUCT.
6
CAUTION: FEDERAL LAW (U.S.A.) RESTRICTS THIS DEVICE TO SALE BY OR ON THE ORDER OF A LICENSED
HEALTH CARE PROFESSIONAL.
strips at top of liner if bars are not broken down.
®
Only tighten cinch screw (with allen wrench), when locked in fixed position of 0°, 7.5°, 15°,
22.5° or 30° of plantar or dorsiflexion. Repeat the procedure for the hinge on opposite
ANTES DE UTILIZAR ESTE DISPOSITIVO, LEA POR FAVOR ESTAS INSTRUC-
CIONES COMPLETA Y DETENIDAMENTE. EL USO CORRECTO ES FUNDAMEN-
TAL PARA EL FUNCIONAMIENTO APROPIADO DE ESTE DISPOSITIVO.
USO PREVISTO / INDICACIONES: Apoyo y manejo de edema para torceduras de tobillo
agudas, lesiones de tejido blando de la pantorrilla, fracturas de estrés de la pantorrilla,
fracturas estables del pie y el tobillo, fracturas estables de unión retrasada o sin unión de
la tibia y peroné distales, reparaciones del tendón de Aquiles, Bunionectomías, Fractura
Metatarsiana, Lesiones de la parte frontal, media y trasera del pie.
CONTRAINDICACIONES: No debe ser utilizado en pacientes con sensación comprometida en
la región del pie y el tobillo. La colocación de este dispositivo es recomendable sólo cuando
la fractura es demostradamente estable y hay unos límites aceptables de deformidad angular
y rotacional. La determinación del momento de utilización de apoyos para tobilleras es estric-
tamente a discreción del facultativo que lleva el tratamiento.
INFORMACIÓN DE PRESCRIPCIONES: Infle y desinfle la bolsa de aire una vez antes de usarla
para asegurar la integridad de las cámaras de aire. Este producto está diseñado como comple-
mento de la variedad de tratamientos médicos comunes a las afecciones mencionadas arriba
en las indicaciones. El profesional médico que le prescribió deberá determinar la frecuencia y
la duración del uso. Nota: Debido a la suela externa amoldada, el andador ortopédico puede
tener una altura más alta de lo normal, entonces el paciente puede usar un zapato atlético o
un zapato normal con un tacón de media pulgada, si es necesario para su comodidad. También
puede utilizar un elevador para el talón en el zapato utilizado en el pie no afectado.
ADVERTENCIAS Y PRECAUCIONES: Consulte siempre con su médico o terapeuta antes de
realizar cambios en la rodillera. Este producto debe utilizarse bajo la vigilancia de un profesion-
al médico. Este aparato no está diseñado para su uso general sin supervisión. Si experimenta
dolores, hinchazón, cambios de sensibilidad o cualquier reacción fuera de lo común mientras
utiliza este producto, consulte con un profesional médico.
INFORMACIÓN DE COLOCACIÓN: Para su colocación por vez primera, afloje las correas y
saque el forro de la bota.
1) Meta el pie en el forro y fíjelo con el cierre de contacto. Asegúrese de que el talón quede
bien pegado a la parte posterior del forro. Fije la lengüeta delantera al forro primero segui-
do de la parte inferior de la pierna. Asegúrese que el forro esté completamente cómodo.
2) Se puede reducir la altura de ambas barras verticales en 2 pulgadas para ajustarlas a
la talla del paciente. Nota: Si las barras no han sido ajustadas, deberá retirar las cintas
suaves de Velcro® de la parte superior del forro. Para ajustar las barras verticales: Asegure
las barras verticales en el borde de una mesa o una superficie dura. La parte superior
del forro incorpora cintas suaves de Velcro®. Después de ajustar las barras, se deberían
colocar las cintas en las barras verticales superiores, o bien doblar el forro por encima de
las barras verticales.
3) Separe las barras verticales utilizando ambas manos y coloque la bota en el pie, alineando
las barras verticales con la parte media del tobillo. Quite las fundas de plástico de las
barras verticales y fije el forro. Las barras verticales pueden doblarse para acomodarlas
al contorno de la pierna.
4) Las dos correas de la unión del tobillo pueden ser adaptadas para acomodar las necesi-
dades individuales del paciente. Antes de fijar las correas, determine el método de amarre
del tobillo deseado. Conversión de Amarres Cruzados del Tobillo: 6a) La correa "3" es
extraible y puede ser fijada pasándola por un anillo en D en la barra vertical opuesta. 6b)
Si se desea el método de Amarres Cruzados, pase la correa "3" a través de el anillo en D
frontal del lado opuesto. Atraviese la correa "2" sobre la correa "3", pásela a través del
anillo en D de la barra vertical del lado opuesto y fíjela. Fije el resto de las correas de la
bota, comenzando por la puntera y subiendo por la pierna. Nota: la versión para el tobillo
tiene solo una correa alrededor de la pantorrilla.
5) Para inflar el revestimiento oprime y suelte la bombilla de aire varias veces hasta que el
revestimiento esté ofreciendo acojinamiento y apoyo cómodo. NO INFLE DE MÁS.
6) Para liberar el aire del revestimiento del andador, gire la perilla de inflado / desinflado
varias veces en el sentido contrario de las manecillas del reloj. Cuando vuelva a inflarlo,
gire la perilla en el sentido de las manecillas del reloj hasta que esté ajustado. Libere
aire si el revestimiento se siente demasiado apretado. Precaución: Si el revestimiento se
siente demasiado apretado mientras usa el producto, desinfle el revestimiento girando la
perilla de inflado / desinflado en el sentido contrario de las manecillas del reloj. Consulte
su profesional médico inmediatamente.
Instrucciones para el ajuste de la Gama de Movimientos de la articulación mecánica: Abra
deslizando la tapa. Gire la tapa de la articulación mecánica para dejar a la vista los retenes.
Saque los retenes, seleccione los ajustes correctos y vuelva a ponerlos. Cierre la tapa. Para
bloquear las partes verticales en un ángulo de 90°, ajuste los dos retenes a 0°. Para fijar en
7.5°, 15°, 22.5° o 30° de flexión plantar o dorsal, coloque un pasador en el lugar deseado
marcado "lock" y un segundo pasador en la configuración correspondiente (mismo número)
en la posición abierta del lado opuesto.
Apriete el tornillo (con una llave allen) sólo cuando esté fijado en la posición de 0°, 7.5°,
!
22.5° o 30° de flexión plantar o dorsal. Repita el procedimiento para la articulación
mecánica en el lado opuesto del andador para que coincida con los nuevos ajustes. Nota: El
tornillo de fijación ha de aflojarse con una llave allen pero no extraerse cuando se selecciona
un ajuste de control del movimiento.
INSTRUCCIONES DE LIMPIEZA: Lave el forro a mano con agua fría utilizando un jabón suave.
Secado al aire. Nota: Si no se enjuaga exhaustivamente, los restos de jabón pueden provocar
irritación y deteriorar el material.
GARANTÍA: dj Orthopedics, LLC reparará o reemplazará en su totalidad o en parte la unidad
y sus accesorios por defectos de materiales o mano de obra por un periodo de seis meses
desde la fecha de venta.
Patente en trámite.
Para ser usado por un solo paciente.
AVISO: SI BIEN SE HAN HECHO TODOS LOS ESFUERZOS POSIBLES CON LAS TÉCNICAS MÁS MODERNAS
PARA OBTENER LA COMPATIBILIDAD MÁXIMA DE LA FUNCIÓN, RESISTENCIA, DURABILIDAD Y
COMODIDAD, ESTE APARATO ES SÓLO UN ELEMENTO DEL TRATAMIENTO GENERAL ADMINISTRADO
POR UN PROFESIONAL MÉDICO. NO DAMOS GARANTÍA ALGUNA DE QUE PUEDAN EVITARSE LESIONES
MEDIANTE EL EMPLEO DE ESTE PRODUCTO.
PRECAUCIÓN: DE ACUERDO CON LA LEGISLACIÓN FEDERAL DE ESTADOS UNIDOS, ESTE DISPOSITIVO
SÓLO PUEDE SER VENDIDO POR PROFESIONALES DE LA MEDICINA O CON RECETA MÉDICA.
dj Ortho is a registered trademark of dj Orthopedics, LLC. dj Ortho es una marcas comercial de dj Orthopedics,
LLC. dj Ortho ist eine eingetragenes Marke der dj Orthopedics, LLC. dj Ortho sono marchi registrato di dj
Orthopedics, LLC. dj Ortho est une marque de commerce déposée de dj Orthopedics, LLC.
Velcro is a registered trademark of Velcro USA Inc. Velcro es una marca comercial de Velcro USA Inc. Velcro ist
eine eingetragenes Marke der Velcro USA Inc. Velcro é un marchio registrato di Velcro USA Inc. Velcro est une
marque de commerce déposée de Velcro USA Inc. .
13-5830-0-00000
© dj Orthopedics, LLC
REV C
Publicidad

Manuales relacionados para DJO MaxTrax


Resumen de contenidos para DJO MaxTrax
- Página 1 BEFORE USING THE DEVICE, PLEASE READ THE FOLLOWING INSTRUCTIONS ANTES DE UTILIZAR ESTE DISPOSITIVO, LEA POR FAVOR ESTAS INSTRUC- COMPLETELY AND CAREFULLY. CORRECT APPLICATION IS VITAL TO THE CIONES COMPLETA Y DETENIDAMENTE. EL USO CORRECTO ES FUNDAMEN- PROPER FUNCTIONING OF THE DEVICE. TAL PARA EL FUNCIONAMIENTO APROPIADO DE ESTE DISPOSITIVO.
- Página 2 PRIMA DELL’USO, LEGGERE INTERAMENTE E ATTENTAMENTE QUESTE AVANT D’UTILISER L’ORTHÈSE, LIRE LES INSTRUCTIONS SUIVANTES COM- VOR DEM EINSATZ DER STÜTZE SOLLTE DIE GEBRAUCHSANWEISUNG VOLLSTÄN- ISTRUZIONI. LA CORRETTA APPLICAZIONE È DI FONDAMENTALE IMPOR- PLÈTEMENT ET ATTENTIVEMENT. UNE APPLICATION CORRECTE EST INDIS- DIG UND SORGFÄLTIG DURCHGELESEN WERDEN.